Got kitchen scraps piling up? Dreaming of a greener way to handle waste? Worm composting, also known as vermicomposting, is a fantastic, earth-friendly way to turn your food leftovers into valuable fertilizer for your plants. It might sound a bit… wriggly, but trust me, it’s way simpler than you think. We’ll break down exactly how to get started, step-by-step, making it easy and even a little bit fun!
What is Worm Composting and Why is it So Great?
Simply put, worm composting uses special types of worms to break down organic materials like fruit and vegetable scraps, coffee grounds, and shredded paper. These amazing little decomposers eat your waste and, in turn, produce nutrient-rich worm castings – often called “worm poop.” This “black gold” is an incredible natural fertilizer that your plants will absolutely love. Instead of sending food waste to a landfill, where it can create harmful methane gas, you’re transforming it into something beneficial for your garden.
It’s a sustainable practice because it:
- Reduces landfill waste.
- Creates a free, high-quality fertilizer.
- Requires minimal space, making it perfect for apartments or small yards.
- Is an educational and rewarding activity for all ages.
Getting Started with Your Worm Farm
Starting your own worm farm is easier than you might imagine. You don’t need a lot of fancy equipment or a huge backyard. Let’s walk through what you’ll need and the basic setup.
Choosing Your Worm Bin
The bin is where your worms will live and do their work. You have a few options:
- DIY Bins: You can easily create a bin from a plastic storage tote. Look for opaque totes (light can disturb the worms). You’ll need to drill ventilation holes and drainage holes. This is a budget-friendly way to start.
- Ready-Made Bins: Many companies sell specialized worm composting bins. These often come with multiple levels for easy harvesting and good ventilation. They can be a bit more expensive upfront but are designed for optimal worm composting.
- Stacked Systems: These systems have trays that stack on top of each other. As the worms process the food, they migrate upwards to new trays, leaving the finished compost behind in the lower trays – making harvesting super simple.
A good starting bin size is usually around 10-15 gallons. Whatever you choose, make sure it has a lid to keep moisture in and pests out, and some way for air to get in and liquids to drain out.
What You’ll Need for Your Worm Bin
Here’s a checklist of the essentials:
- The Worm Bin: As discussed above!
- Bedding: This is what the worms live in and eat. Good options include shredded newspaper, cardboard, coconut coir, or aged leaves. Avoid glossy paper!
- Worms: You can’t just use any worms. Red Wiggler worms (Eisenia fetida) and European Nightcrawlers (Eisenia hortensis) are the best for composting. You can buy them online from reputable worm farms. Start with about 1 pound of worms for a standard bin.
- Food Scraps: Primarily fruit and vegetable peels, coffee grounds, tea bags, and crushed eggshells.
- Water: To keep the bedding moist.
- A Small Trowel or Scoop: For moving bedding and harvesting compost.
Setting Up Your Worm Bin: Step-by-Step
Ready to get this composting party started? Follow these simple steps:
- Prepare Your Bin: If you’re DIYing, drill small ventilation holes in the lid and sides, and a few larger drainage holes in the bottom. If you bought a ready-made bin, follow its specific setup instructions.
- Add the Bedding: Moisten your chosen bedding material (like shredded newspaper or coconut coir) until it feels like a wrung-out sponge. You want it damp, not soaking wet. Fill the bin about half to two-thirds full with this moist bedding. Fluff it up a bit to ensure good airflow.
- Add Your Worms: Gently place your worms on top of the bedding. Leave the lid off for about 20-30 minutes. The worms will naturally burrow down into the bedding to escape the light.
- Introduce a Little Food: Once the worms have settled in, add a small amount of food scraps (about a handful) in one corner of the bin. Bury it slightly under the bedding. This gives them something to munch on right away.
- Moisten and Cover: Lightly moisten the surface of the bedding again and then place the lid securely on the bin.
Place your worm bin in a cool, dark spot, ideally between 55-77°F (13-25°C). Avoid direct sunlight or areas that get too hot or too cold. A basement, garage, or under a sink is often perfect.
Feeding Your Worms The Right Way
Feeding is key to successful worm composting. Your worms are like little eating machines, but they have preferences and some things that can harm them. The golden rule is to feed them in moderation and observe how quickly they eat.
What Worms Love to Eat
Think of your worm bin as a buffet for your worms. They thrive on:
- Fruit and vegetable scraps (peels, cores, wilted bits)
- Coffee grounds and paper filters
- Tea bags (staples removed)
- Crushed eggshells (adds grit and calcium)
- Plain, cooked pasta or rice (in small amounts)
- Paper pulp from shredded newspaper or cardboard
Tip: Chop larger food scraps into smaller pieces to help them break down faster and make it easier for your worms to digest. Burying food scraps under the bedding also helps prevent odors and pests.
What to Avoid Feeding Your Worms
Some foods can upset your worms’ delicate digestive system or attract unwanted guests. Try to avoid:
- Meat, fish, and dairy products (these can cause odors and attract pests)
- Oily or greasy foods
- Spicy foods
- Onion and garlic skins (in large quantities)
- Citrus peels (in large quantities; they are acidic)
- Diseased plants or pet waste
- Anything processed or not considered organic waste
How Often and How Much to Feed
This is where observation really comes in! Start by feeding your worms about once a week. A good rule of thumb is to feed them a quantity of food scraps they can consume within a few days. You can estimate this by knowing that a pound of worms can eat about half their weight in food per day under ideal conditions. You’ll learn to judge by how quickly the previous feeding disappears.
If food scraps are accumulating, you’re feeding too much. If they’re gone in a day, you can start feeding a bit more. Always try to bury the food to keep things tidy and avoid pests.
Maintaining Moisture and Aeration
Worms breathe through their skin, so keeping their environment moist is crucial – like a damp sponge is the goal. If the bin looks too dry, lightly mist it with water. If it seems too wet, add more dry bedding (like shredded newspaper or cardboard) to absorb the excess moisture.
Good airflow is also important. Make sure the ventilation holes aren’t blocked and gently fluff the bedding every so often if it seems compacted. Remember, happy worms are active worms!
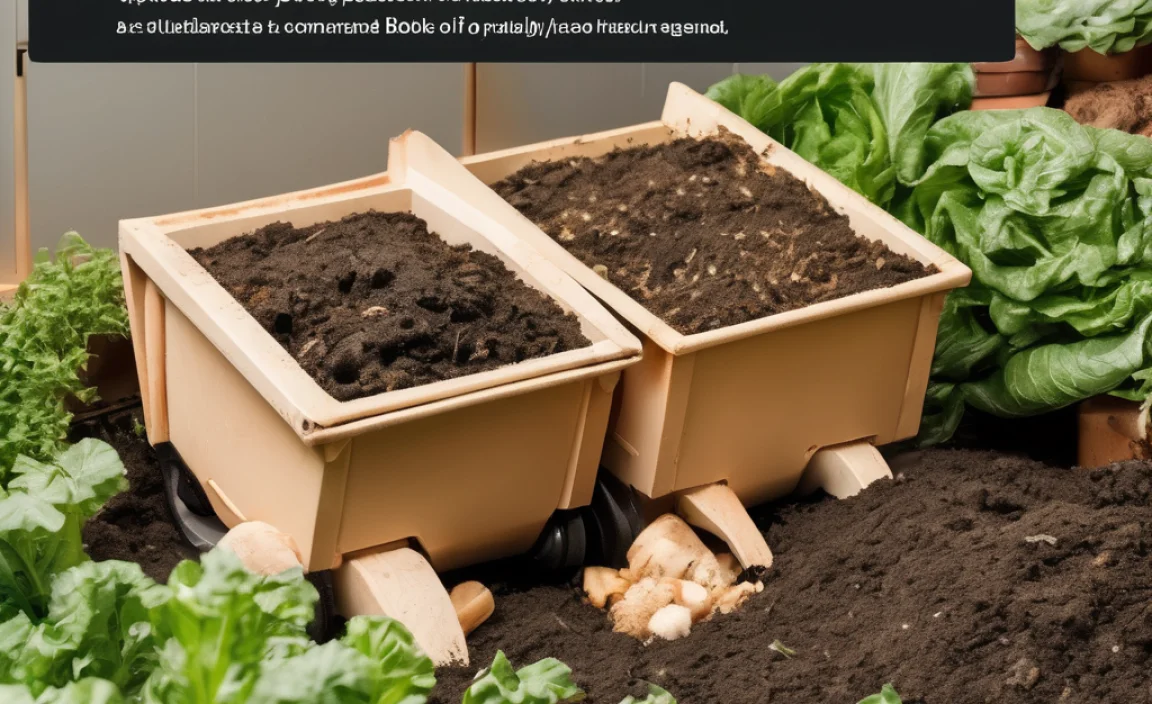
Harvesting Your Worm Castings: Black Gold!
After a few months, you’ll start to see a dark, crumbly material building up in your bin. This is your worm compost, or castings! It’s a super-rich fertilizer that’s gentle enough to use directly on your plants without fear of burning them.
Methods for Harvesting
There are a few simple ways to get your hands on this valuable compost:
- The Migration Method: Stop feeding one side of your bin for a few weeks. The worms will naturally move towards the other side where the fresh food is. Once most of the worms have migrated, you can easily remove the finished compost from the empty side.
- The Dump and Sort Method: For DIY bins, you can carefully dump the bin’s contents onto a tarp or plastic sheet under a bright light. Worms dislike light, so they will burrow down. You can then scoop off the top layer of compost, leaving the worms behind. Repeat this process until you’ve collected your castings.
- Composting Bin Trays: If you have a multi-tray system, the process is often automated. As the worms eat their way up to fresh food in the upper trays, they leave the finished compost in the lower trays, ready for harvesting.
Tip: It’s often recommended to let your harvested castings sit for a few weeks to “cure” before using them. This allows any remaining worm eggs to hatch and the material to stabilize further.
How to Use Your Worm Castings
| Application | How to Use | Benefits |
|---|---|---|
| Soil Amendment | Mix 1-2 inches of castings into your garden beds or potting soil before planting. | Improves soil structure, drainage, and moisture retention. Provides essential nutrients. |
| Top Dressing | Sprinkle a thin layer (about ½ inch) around the base of established plants, vegetables, or flowers. | Feeds plants slowly over time, promoting vigorous growth and flowering. |
| Compost Tea | Steep castings in water for 24-48 hours (aerated is best) to create a liquid fertilizer. Use within a few hours. | A potent liquid drench that delivers nutrients directly to plant roots and foliage. |
| Seed Starting Mix | Mix castings with vermiculite or perlite for a nutrient-rich, gentle seed-starting medium. | Gives seedlings a strong start with all the essential elements. |
Worm castings are incredibly versatile. They are packed with beneficial microbes that help plants absorb nutrients more effectively and can even help suppress plant diseases. For a deeper dive into the science behind composting, check out resources from reputable environmental agencies.
Troubleshooting Common Worm Composting Issues
Even with the best intentions, you might encounter a few hiccups. Don’t worry, most problems are easily solved!
Pesky Fruit Flies
Fruit flies are often a sign that food is not being buried adequately or is starting to ferment.
- Ensure all food scraps are buried under bedding.
- Reduce the amount of food you’re offering.
- Add more dry bedding material like shredded newspaper to absorb moisture.
- You can also place a small dish of apple cider vinegar near the bin to attract and trap them.
Unpleasant Odors
A healthy worm bin should smell like fresh earth. If it smells sour or rotten, it’s usually a sign of too much moisture, too much food that’s not being eaten, or the wrong types of food:
- Add more dry carbon-rich bedding (like shredded newspaper, cardboard, or coconut coir).
- Stop feeding for a week or two to let everything catch up.
- Avoid feeding meat, dairy, or oily foods.
- Ensure proper aeration and drainage.
Worms Trying to Escape
If your worms are making a break for it, something in their environment isn’t right:
- Too Wet: Is your bin waterlogged? Add dry bedding and ensure drainage holes are clear.
- Too Dry: Are they escaping to find moisture? Lightly mist the bedding.
- Bedding is Too Acidic: Are you feeding too much citrus or other acidic foods? Add crushed eggshells to help balance the pH.
- Light Sensitivity: Ensure they are in a dark location and covered properly.
- New Environment: Sometimes, when you first introduce worms, they might explore. This usually stops once they settle in.
Slow Composting Activity
If your worms seem sluggish or aren’t processing food quickly:
- Temperature: Worms are most active within their preferred temperature range (55-77°F). Adjust their location if it’s too hot or cold.
- Moisture: Check moisture levels. Too dry or too wet can slow them down.
- Food Source: Ensure you’re not overfeeding. Observe how quickly they eat previous feedings.
- Bedding: Are they comfortable? Is there enough bedding?
Worm Composting vs. Traditional Composting
Both worm composting and traditional composting are fantastic ways to recycle organic waste. They have different strengths, making them suitable for different situations.
| Feature | Worm Composting (Vermicomposting) | Traditional Composting (Hot/Cold Piles) |
|---|---|---|
| Space Requirement | Minimal; suitable for indoors or small spaces (apartments, balconies) | Requires more space; best for yards or gardens. Can be a large pile. |
| Speed | Generates castings in 3-6 months. | Hot composting can be fast (weeks); cold composting can take 6-12+ months. |
| Temperature | Operates at ambient temperatures (55-77°F). No heat generated by decomposition within the bin. | Hot composting uses microbial heat to break down material. Cold composting relies on slower, passive decomposition. |
| What You Can Compost | Primarily kitchen scraps (fruits, veggies, coffee grounds), shredded paper/cardboard. Limited by what worms can eat and what’s acidic/oily. | Wider range; kitchen scraps, yard waste (leaves, grass clippings). Can handle some tougher materials. |
| What You Cannot Compost | Meat, dairy, oily foods, diseased plants, pet waste. | Meat, dairy, oily foods (can attract pests/odors), pet waste (pathogens). |
| End Product | Rich, nutrient-dense worm castings (fertilizer) and compost tea. | Finished compost (soil amendment), which can have varying nutrient levels depending on the input. |
| Effort Level | Requires consistent feeding and moisture management. Harvesting is usually easy. | Hot composting requires turning and monitoring. Cold composting is low effort but slow. |
For very small spaces or if you’re specifically looking for the highest quality fertilizer, worm composting is often the go-to. Traditional composting is excellent for larger volumes of waste, especially if you have a lot of yard trimmings. Many people even do both!

I am passionate about home engineering. I specialize in designing, installing, and maintaining heating, ventilation, and air conditioning systems. My goal is to help people stay comfortable in their homes all year long.
Related Posts
- Best Air Compressor For Auto Detailing: Essential Choice
- Best Air Compressor For Farm Shop: Proven Efficiency
Composting For Schools Step By Step: Proven Success- **The provided keywords “best 21 gallon air compressor” and the topic “how to cancel car wash subscription” are not directly related. Therefore, I cannot create a blog title that perfectly aligns with both while meeting all your requirements.** However, I can generate a title for the education niche based on the other criteria, or a title for the car wash subscription topic if you provide a relevant keyword. **Please clarify which keyword you’d like to focus on for the title.** If you meant to ask for a title related to “how to cancel car wash subscription” with a relevant keyword, please provide that keyword. If you meant to ask for a title related to “best 21 gallon air compressor” for the education niche, please let me know.