Got a pile of leaves and grass clippings growing in the corner of your yard? Don’t let that organic stuff go to waste! Composting your yard waste is a fantastic way to reduce trash and create nutrient-rich soil for your garden. It might sound a bit technical, but it’s simpler than you think. We’ll walk through it step-by-step, making it easy for anyone to get started.
Yard Waste Composting Guide: Proven Essential
Hey there, neighbor! Troy D Harn here from TopChooser. If you’ve been staring at that growing mound of leaves, grass clippings, and plant trimmings, wondering if there’s a better way than bagging it all up for trash day, you’re in the right spot. Composting your yard waste is one of those simple, smart moves that makes a big difference. It’s good for your wallet, great for your garden, and even better for the planet. Think of it as nature’s way of recycling, and we’re just going to lend it a helping hand.
Why Bother Composting Yard Waste?
Let’s break down why giving your yard waste a second life through composting is such a smart idea. It’s not just about looking good; it’s about making your yard healthier and reducing your impact.
- Reduces Landfill Waste: Did you know that yard waste makes up a significant portion of household trash? Sending it to a compost pile means less goes to the landfill, which helps conserve space and reduce methane gas production (a potent greenhouse gas). According to the Environmental Protection Agency (EPA), composting can divert a large amount of organic material from landfills.
- Creates Rich Soil Amendment: Compost is often called “black gold” by gardeners, and for good reason! It’s packed with nutrients that plants love. Adding compost to your soil improves its structure, helps it retain moisture, and provides essential food for your plants. This means healthier, more vibrant flowers, vegetables, and a lusher lawn.
- Saves Money: You won’t need to buy as much fertilizer or soil amendments for your garden if you’re making your own compost. Plus, if your local municipality charges for yard waste pick-up, you can save on those fees too.
- Improves Soil Health: Compost helps to break up heavy clay soils, making them drain better. For sandy soils, it helps them hold onto water and nutrients more effectively. It also introduces beneficial microorganisms that are great for plant growth.
- Environmentally Friendly: By composting, you’re participating in a natural process that returns valuable organic matter to the earth. It’s a small action with a big environmental payoff.
Getting Started: What You’ll Need
The beauty of composting is that you don’t need much to get started. You can go simple or a bit more involved, depending on your space and how quickly you want compost. Here’s a look at the essentials:
Compost Bin Options
Your compost bin is where all the magic happens. There are a few popular choices:
- Open Piles: This is the most basic method. You just designate an area in your yard (usually a corner) and start piling your materials. It’s free and easy, but it can look a bit messy and might attract pests if not managed well. A good size to aim for is at least 3 feet by 3 feet by 3 feet for the pile to generate heat effectively.
- Wire Bins (DIY or Purchased): These are straightforward enclosures made from wire mesh or fencing. They offer good aeration, which is key for composting. You can buy pre-made ones or easily construct one yourself with some hardware cloth and zip ties.
- Wooden Pallet Bins: If you can get your hands on some free wooden pallets (check with local businesses or construction sites – just make sure they haven’t been treated with harmful chemicals), you can assemble a sturdy, effective bin. Simply stand four pallets on end to form a square and secure them together at the corners.
- Plastic Compost Bins (Tumblers & Stationary): These are readily available at garden centers and home improvement stores.
- Stationary Bins: These often have a lid and a door at the bottom for easy removal of finished compost. They tend to keep things tidy and can deter pests.
- Tumblers: These are enclosed drums that you can rotate. Tumbling speeds up the composting process by making turning much easier and helps with aeration. They are great for smaller yards or if you want compost quickly.
Tools for the Job
You don’t need a fancy toolbox, but a few basic tools will make managing your compost pile much easier:
- Pitchfork or Garden Fork: Essential for turning and aerating your compost. This helps mix the materials and allows air to circulate, which is vital for decomposition.
- Shovel: Useful for moving materials into and out of the bin, and for harvesting finished compost.
- Watering Can or Hose with a Sprayer: Your compost needs to stay moist, like a wrung-out sponge.
- Gloves: Keep your hands clean and protected.
- Optional: Compost Thermometer: This can help you monitor the temperature of your compost pile, ensuring it’s hot enough to break down materials efficiently and kill weed seeds or pathogens.
The Art of Composting: Balance is Key
Composting is all about creating the right environment for beneficial microorganisms to do their work. These tiny helpers break down your yard waste into that wonderful, dark compost. The secret to a good compost pile is a balance of “greens” and “browns.”
Understanding “Greens” and “Browns”
Think of “greens” as nitrogen-rich materials that provide moisture and protein for the microorganisms. “Browns” are carbon-rich materials that provide energy and structure. A good rule of thumb is a ratio of about 2 to 3 parts Browns to 1 part Greens by volume. Here’s a breakdown:
| Greens (Nitrogen-Rich) | Browns (Carbon-Rich) |
|---|---|
| Grass clippings (in thin layers) | Dry leaves |
| Vegetable scraps from the kitchen (no meat or dairy) | Straw or hay |
| Fruit peels | Twigs and small branches (chopped) |
| Coffee grounds and tea bags | Shredded newspaper or cardboard (uncoated) |
| Plant trimmings (non-diseased) | Sawdust (from untreated wood, in moderation) |
It’s important to avoid adding certain things to your compost bin, especially if you’re just starting out:
- Meat, fish, and dairy products: These can attract pests and cause odors.
- Oily or greasy foods: Similar to meat and dairy, these cause issues.
- Diseased plants: You don’t want to spread plant diseases through your compost.
- Weeds that have gone to seed: Unless your pile gets very hot, these seeds might survive and sprout in your garden.
- Pet waste (dog or cat feces): This can contain harmful pathogens.
- Coal or charcoal ash: Can contain harmful substances for plants.
- Treated wood products: These often contain chemicals like arsenic or chromium.
The Composting Process: Step-by-Step
Ready to get your hands dirty (in a good way)? Follow these steps to build and maintain your compost pile:
- Choose Your Location: Pick a spot that’s convenient for you to access and that gets some sun (to help heat the pile) but isn’t constantly baked by intense heat. A partially shaded spot is often ideal. Make sure it’s on bare soil so earthworms and other beneficial organisms can get into your pile.
- Start Layering: Begin by putting a layer of bulky brown materials (like twigs or straw) at the bottom. This helps with drainage and air flow. Then, start alternating layers of greens and browns. Aim for those 2-3 parts brown to 1 part green ratio. Chop or shred larger items to speed up decomposition.
- Add Moisture: As you build your layers, lightly moisten each one. The goal is for the compost to be as damp as a wrung-out sponge. If it’s too dry, decomposition slows down. If it’s too wet, it can become a smelly, slimy mess.
- Turn Your Pile: This is crucial! Aim to turn your compost pile about once a week, or at least every two weeks. Use your pitchfork to mix the outer materials into the center and the inner materials to the outside. This aerates the pile, provides oxygen for the microbes, and helps everything break down evenly. You’ll notice the pile gets quite warm in the center after turning – that’s a good sign! A compost thermometer can confirm if your pile is reaching ideal temperatures (between 130-160°F or 55-70°C), which helps kill weed seeds and pathogens.
- Be Patient: Depending on the materials you use, the size of your bin, and how actively you manage it (turning and moisture), compost can take anywhere from a couple of months to a year to be ready.
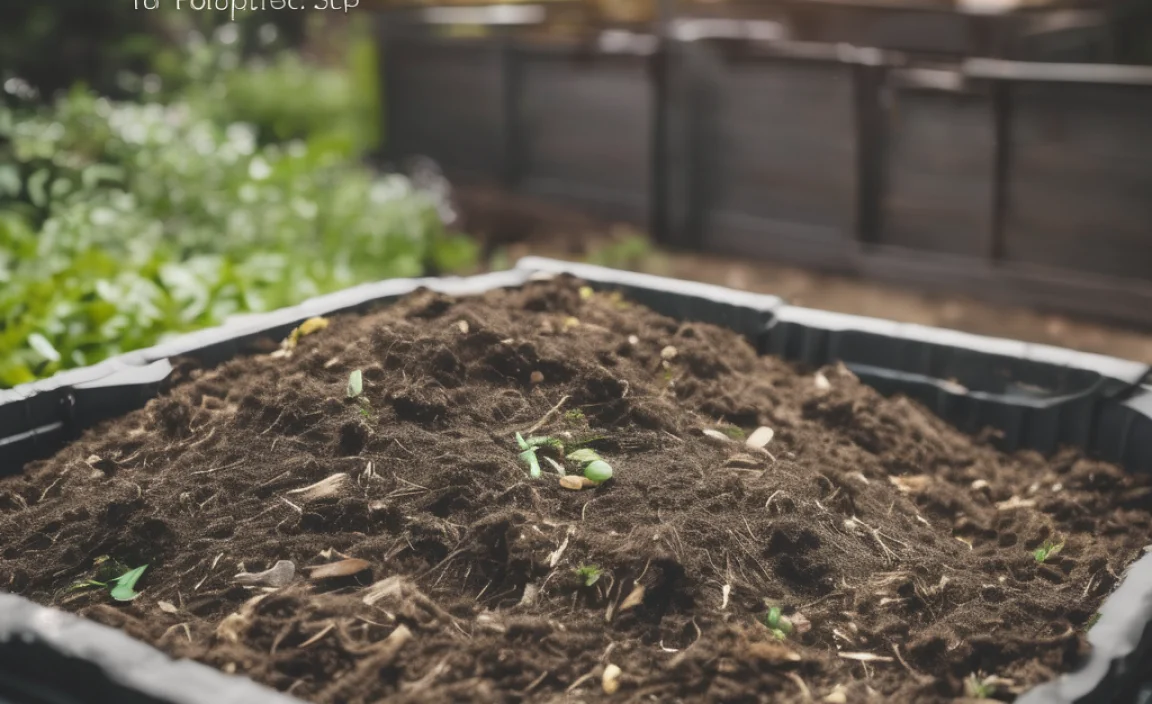
- Harvest Your Compost: Finished compost will be dark, crumbly, and smell earthy, like a forest floor. You shouldn’t be able to recognize the original materials anymore. To harvest, you can simply shovel it out from the bottom if you have a bin with an access DOOR, or fork the finished material off the top of an open pile or bin. You can sift it through a screen (a piece of hardware cloth tacked to a simple wooden frame works well) to remove any larger, unfinished pieces, which can go back into the new compost pile.
Tips for Faster Composting
Want to speed things up a bit? Here are a few tricks:
- Chop It Up: Smaller pieces mean more surface area for microbes to work on. Shred your leaves, grass clippings, and small twigs.
- Maintain the Right Moisture: Not too dry, not too wet. Think “damp sponge.”
- Aerate Regularly: Frequent turning is key to providing the oxygen that decomposition microbes need.
- “Hot” Composting: If you’re diligent with turning, moisture, and the greens/browns ratio, you can achieve “hot composting.” This method generates high temperatures that significantly speed up decomposition, sometimes producing compost in as little as 4-6 weeks. It requires more attention and effort but comes with the benefit of killing most weed seeds and pathogens.
- Add Compost Starters (Optional): Some gardeners add a shovel-full of finished compost or garden soil to a new pile. This introduces a host of beneficial microorganisms to get things going. There are also commercially available compost activators, though they aren’t usually necessary if you have a good mix of greens and browns.
What Can You Compost from Your Yard?
Your yard is a treasure trove of composting materials! Here’s a more detailed look at what’s generally safe and beneficial to compost:
- Grass Clippings: A great source of nitrogen (greens). However, add them in thin layers to avoid matting and creating a slimy, anaerobic (oxygen-deprived) layer that can smell bad. If you have a lot, mix them with a generous amount of dry brown material.
- Leaves: The quintessential “browns”! They provide carbon and add bulk. Shredding them makes them break down faster. A big pile of whole leaves can take a long time to decompose.
- Plant Trimmings: Pruned branches (small and chopped), spent flowers, and vegetable plants (as long as they aren’t diseased) are excellent additions. Remove any woody stems that are very thick, as they take longer to break down.
- Weeds: Most common garden weeds are fine to compost, but exercise caution with weeds that have already gone to seed (unless you’re hot composting) or those considered invasive in your region.
- Woody Debris: Small twigs, bark, and wood chips break down slowly but are valuable sources of carbon. Chop them into smaller pieces to speed up the process. Larger branches can be chipped if you have a chipper/shredder.
- Pine Needles/Cones: While they are acidic and break down slowly, they can be composted. Mix them in moderation with other materials.
Troubleshooting Common Composting Problems
Even with the best intentions, you might run into a snag or two. Don’t worry, it’s all part of the learning process! Here are some common issues and how to fix them:
Problem: My compost pile smells bad (like rotten eggs or ammonia).
Likely Cause: Too many “greens” (nitrogen-rich materials) or the pile is too wet and lacks air. This leads to anaerobic decomposition.
Solution:
- Add more “brown” materials (dry leaves, straw, shredded paper) to absorb moisture and balance the nitrogen.
- Turn the pile thoroughly to introduce air.
- If it’s very wet, try to lift the entire pile slightly by adding bulky brown material to the bottom for better drainage.
Problem: My compost pile isn’t heating up or breaking down.
Likely Cause: Not enough “greens” (nitrogen), too dry, or the pile is too small.
Solution:
- Add more “green” materials like fresh grass clippings or kitchen scraps.
- Add water to moisten the dry materials.
- Turn the pile to mix ingredients and introduce oxygen.
- Ensure your pile is at least 3x3x3 feet. Smaller piles don’t retain heat well.
Problem: My compost pile is full of pests (flies, rodents, etc.).
Likely Cause: Exposed food scraps, meat/dairy included, or the pile is not hot enough.
Solution:
- Avoid adding meat, dairy, and oily foods.
- Bury kitchen scraps deep within the pile.
- Cover the pile with a layer of brown materials.
- Turn the pile regularly to keep it active and potentially hot enough to deter pests.
- Consider using a fully enclosed bin or tumbler.
Problem: There are still large, recognizable pieces of yard waste in my finished compost.
Likely Cause: The composting process wasn’t long enough, materials were too large, or lack of turning/moisture.
Solution:
- Be more diligent with turning and maintaining moisture levels.
- Chop or shred larger materials before adding them.
- Simply put the unfinished material back into your new compost pile to break down further. Patience is key!
When is Compost Ready?
You’ll know your compost is ready when it:
- Looks dark brown and crumbly.
- Has an earthy, pleasant smell (like soil after rain).
- You can no longer recognize the original ingredients.
- The temperature has cooled down to ambient air temperature.
The texture should be consistent. If you sift it, you might get a few small twigs or bits, but the majority should be uniform. Using finished compost is rewarding, as it signifies the completion of a natural cycle and a valuable resource ready for your garden. The United States Department of Agriculture (USDA) provides extensive research on soil health and nutrient management, highlighting the benefits of organic amendments like compost.
Frequently Asked Questions About Yard Waste Composting
Here are some common questions beginners have:
Q1: How long does it take to make compost?
A1: It varies! Depending on your method, materials, and how often you turn it, compost can be ready in as little as 4 weeks (hot composting) to a year or more (passive composting). For a typical homeowner just starting out, think 3-6 months for a decent batch.
Q2: Can I compost diseased plants or weeds with seeds?
A2: It’s best to avoid composting diseased plants or weeds that have gone to seed unless your compost pile reliably reaches high temperatures (130-160°F or 55-70°C). These high temperatures are needed to kill off pathogens and weed seeds. If you’re unsure, it’s safer to compost these materials separately or dispose of them differently.
Q3: Do I need a special bin?
A3: No! You can simply create an open pile. However, using a bin (wire, wood pallets, or a purchased plastic one) helps keep things tidy, can deter pests, and often

I am passionate about home engineering. I specialize in designing, installing, and maintaining heating, ventilation, and air conditioning systems. My goal is to help people stay comfortable in their homes all year long.