Ever stare at your kitchen scraps and wonder what to do with them? Tossing them in the bin feels like such a waste, right? Plus, that smelly garbage can is never fun. If you’re in India and want to turn those leftovers into garden gold without the funk, you’ve come to the right place! Aerobic composting is the answer, and it’s simpler than you think. We’ll walk you through it, step-by-step, so you can start making your own fantastic compost right at home.
What is Aerobic Composting?
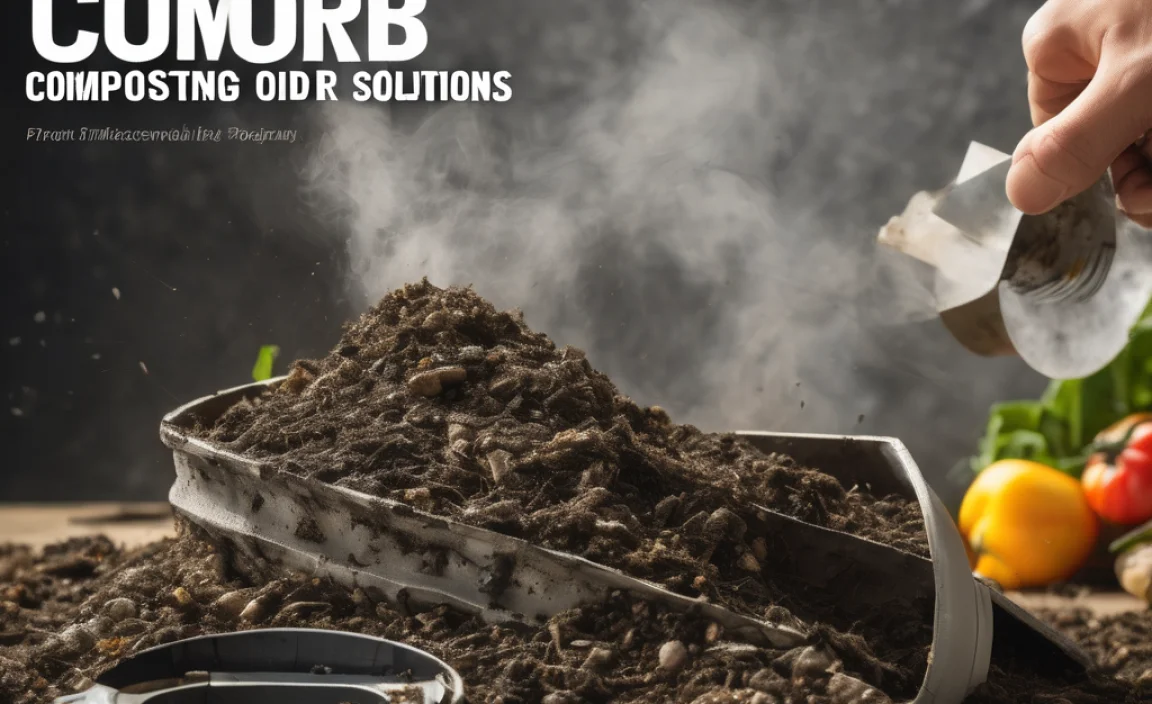
Let’s break down aerobic composting in simple terms. Think of it as giving tiny, helpful microbes (like little power workers) the perfect party to break down your organic waste. The key word here is “aerobic,” which means “with air.” These little guys need air to do their job efficiently. When they have plenty of oxygen, food scraps, yard waste, and other organic materials break down quickly into a nutrient-rich soil amendment we call compost. It’s a natural recycling process!
Unlike some other composting methods that can get a bit stinky if not managed well, aerobic composting, when done correctly, is designed to be odorless. This is because the good microbes that thrive in the presence of oxygen consume the waste before “bad” smelly microbes can take over. It’s nature’s way of cleansing and enriching our planet.
Why Aerobic Composting is Great for India
India generates a massive amount of organic waste daily, from household kitchens to agricultural byproducts. Traditionally, much of this waste ends up in landfills, contributing to pollution and the release of harmful greenhouse gases like methane. Aerobic composting offers a sustainable and eco-friendly solution right at the household or community level.
Here are some compelling reasons why aerobic composting is particularly relevant and beneficial in India:
- Waste Reduction: Significantly cuts down the amount of waste sent to overflowing landfills, which are a growing concern in many Indian cities.
- Rich Soil: Creates a natural, nutrient-rich fertilizer that can dramatically improve soil health in gardens, farms, and potted plants, reducing the need for chemical fertilizers.
- Environmental Benefits: Reduces methane emissions from landfills and conserves natural resources by recycling organic matter.
- Cost-Effective: Reduces spending on fertilizers and waste disposal.
- Resourceful: Turns waste into a valuable resource, promoting a circular economy within your home or community.
- Community Impact: Can be scaled up for apartment complexes, housing societies, and villages, fostering collective environmental responsibility.
Essential Components of Aerobic Composting
To get your aerobic compost pile humming, you need a few key things working together. Think of it like baking a cake – you need the right ingredients and the right conditions to make it perfect.
1. The Right Bin or Pile
You need a place for your compost to live. This can be a simple pile in your backyard or a structured bin. For aerobic composting, the container is crucial because it needs to allow air circulation.
- Open Piles: The simplest method. Just create a heap in a designated spot. Best if you have ample space.
- Wooden Pallet Bins: Easy to build by fastening wooden pallets together. They provide good aeration.
- Wire Mesh Bins: Cylinder-shaped bins made from chicken wire or hardware cloth. Excellent airflow.
- Plastic Bins (with aeration): Many commercially available compost bins have holes or slots for air. Look for one designed for aerobic composting.
- Tumblers: These are rotating drums that make turning the compost very easy, speeding up the process.
For urban dwellers or those with limited space, smaller, enclosed bins are popular. Whatever you choose, ensure air can get in and out. A good rule of thumb is to have about a cubic meter (3 feet x 3 feet x 3 feet) for an efficient compost pile, but smaller setups work too.
2. Greens and Browns (The Food for Microbes)
This is the “food” for your compost microbes. You need a good balance of nitrogen-rich “green” materials and carbon-rich “brown” materials. It’s like a balanced diet for your compost!
Greens (Nitrogen-Rich): These are usually moist and help heat up the pile.
- Fruit and vegetable scraps
- Coffee grounds and tea bags
- Grass clippings (in thin layers to avoid matting)
- Fresh plant trimmings
- Eggshells (crushed)
Browns (Carbon-Rich): These are usually dry and provide structure and air pockets.
- Dry leaves
- Straw or hay
- Shredded newspaper, cardboard, or paper bags (avoid glossy or colored inks)
- Twigs and small branches (chopped)
- Sawdust (from untreated wood)
A common recommendation is a ratio of about 2 parts browns to 1 part greens by volume. Don’t worry about getting this exact – it’s more of a guideline. If your compost seems too wet and smells, you likely need more browns. If it’s dry and not heating up, you might need more greens.
3. Moisture
Your compost pile needs to be damp, like a wrung-out sponge. Too dry, and the microbes slow down. Too wet, and it can become anaerobic and start to smell. You’ll need to check the moisture level regularly and add water if it feels dry, or add more browns if it’s soggy.
4. Airflow (Oxygen!)
This is the defining factor in aerobic composting. The microorganisms need oxygen to thrive and break down waste efficiently. You can provide airflow by:
- Turning the Pile: Regularly mixing the compost with a pitchfork or shovel. This is crucial!
- Using Aerated Bins: Bins designed with vents or holes.
- Including Bulky Browns: Twigs and cardboard create natural air pockets.
Turning the pile is the most effective way to ensure good aeration and speed up decomposition. Aim to turn your compost at least once a week, or every couple of weeks if you’re short on time.
What NOT to Compost
While composting is versatile, some things just don’t belong in your aerobic compost bin. These can attract pests, introduce pathogens, or simply not break down well.
- Meat, fish, and dairy products (can attract pests and create odors)
- Oily or greasy foods
- Diseased plants or weeds that have gone to seed
- Pet waste (from cats and dogs – can contain harmful pathogens)
- Chemically treated wood or yard waste
- Coal or charcoal ash
- Glossy or coated papers
Sticking to kitchen scraps, yard waste, and paper products will keep your compost healthy and effective.
Step-by-Step Guide: How to Start Aerobic Composting
Ready to get started? Follow these simple steps, and you’ll be a composting pro in no time. Remember, it’s a natural process, so don’t stress about perfection!
Step 1: Choose Your Location and Bin
Find a spot for your compost bin or pile. It should be:
- Conveniently located, a short walk from your kitchen or garden.
- Well-drained, so it doesn’t get waterlogged.
- Partially shaded, if possible, to prevent drying out too quickly in the hot Indian sun, but some sun is okay.
- Accessible for turning and harvesting compost.
Assemble or prepare your chosen bin. If building your own, look up simple DIY plans online – they’re usually very straightforward. For a wire mesh bin, simply form a cylinder and secure the ends. For a pallet bin, connect four pallets in a square.
Step 2: Gather Your Materials
Start collecting your kitchen scraps (in a small container with a lid) and your dry brown materials. Keep a small pile of dry leaves or shredded cardboard near your compost bin so you can easily add them.
Step 3: Layer Your Compost Bin
Begin by adding a base layer of coarse brown material, like small twigs or straw. This helps with airflow from the bottom. Aim for a layer about 4-6 inches thick.
Next, start adding your materials in alternating layers. A good starting point is:
- A few inches of “green” materials (kitchen scraps, grass clippings).
- Several inches of “brown” materials (dry leaves, shredded paper).
You can lightly water each layer as you add it, aiming for that “damp sponge” consistency. Try to bury fresh kitchen scraps under a layer of browns to deter pests and reduce odors.
Step 4: Maintain Moisture Levels
Check your compost pile’s moisture every few days. Squeeze a handful – if a few drops of water come out, it’s just right. If it’s dry, add some water. If it’s soggy, add more brown materials and mix them in.
Step 5: Turn Your Compost Regularly
This is key for aerobic composting! Use a pitchfork or garden fork to mix the materials. Bring the material from the outside to the center, and the material from the bottom to the top. Aim to do this at least once a week. If you can’t turn it weekly, do it every two weeks. This aerates the pile, mixes the ingredients, and speeds up decomposition.
Turning also helps the temperature rise, which is beneficial for quick composting. A hot compost pile (around 55-65°C or 130-150°F) breaks down materials much faster and kills weed seeds and pathogens. You can gauge this by how warm the pile feels in the center.
Step 6: Be Patient and Observe
Composting is a waiting game, but with aerobic methods and regular turning, it can be quite fast. Depending on the materials you use, the weather, and how often you turn it, compost can be ready in as little as 1-3 months, or it might take 6 months or longer.
You’ll know your compost is ready when it:
- Is dark brown and crumbly.
- Smells earthy and pleasant, like forest soil.
- The original materials are no longer recognizable.
Step 7: Harvest Your Compost
Once it’s ready, you can harvest your compost. You can either:
- Empty the entire bin and sift out the finished compost, returning any unfinished material to the bin to continue composting.
- Scoop out finished compost from the bottom of the bin if it has a door or access point.
Sifting is optional but recommended. It helps you remove any larger, undecomposed pieces and creates a finer texture for enthusiastic gardeners.
Troubleshooting Common Composting Problems
Even with the best intentions, you might run into a few hiccups. Here’s how to fix them:
| Problem | Possible Cause | Solution |
|---|---|---|
| Bad Odor (Ammonia/Rotten Egg Smell) | Too many “greens” (nitrogen) or too wet. Lack of air. | Add more “browns” (carbon materials like dry leaves, cardboard). Turn the pile thoroughly to aerate. Ensure good drainage. |
| Pile Not Heating Up | Too dry, not enough “greens,” or pile is too small. Lack of nitrogen. | Moisten the pile with water. Add more green materials (kitchen scraps, grass). Ensure the pile is at least 1 cubic meter if possible. Turn to aerate. |
| Pile is Too Dry | Not enough moisture added, or too much sun/wind. | Add water and mix it in. Cover the pile partially to retain moisture. |
| Pests (Flies, Rodents) | Compost contains meat, dairy, or oily foods. Exposed food scraps. | Avoid adding prohibited items. Bury fresh food scraps deep within the pile and cover with browns. Ensure your bin has a secure lid if pests are a major issue. Turning the pile regularly also deters pests. |
| Slow Decomposition | Lack of moisture, air, or greens. Materials are too large. | Ensure adequate moisture and turn regularly. Add more greens if needed. Chop or shred larger items before adding. A balanced mix is key. Ensure the pile is active with microbes. |
Using Your Finished Compost
Congratulations! You’ve successfully created nutrient-rich compost. Now, what can you do with this “black gold”?
- Soil Amendment: Mix compost into your garden beds, vegetable patches, or flower borders before planting. It improves soil structure, drainage, and aeration.
- Top Dressing: Spread a layer of compost around existing plants, trees, and shrubs. The nutrients will slowly release as it rains or you water.
- Potting Mix: Mix compost with soil and other ingredients (like coir or sand) to create a wonderful, life-filled potting mix for houseplants and container gardens.
- Seed Starting: A well-sifted compost can be used as part of a seed-starting mix, providing nutrients for young seedlings.
- Lawn Care: Rake a thin layer of compost over your lawn in spring or fall to revitalize it.
Using compost is a fantastic way to boost plant health naturally, leading to more vibrant flowers and bountiful harvests, all while practicing sustainable waste management. You’re helping your garden thrive!
Aerobic Composting in Different Indian Climates
India’s diverse climate presents unique considerations for composting:
- Hot and Arid Regions: Moisture retention is critical. Consider using a bin with a lid to reduce evaporation, and water the pile more frequently, especially after turning. Partially shading the bin can also help.
- Humid Regions: Ensure excellent drainage and adequate airflow to prevent the pile from becoming waterlogged. Turning frequently is even more important here. Consider using more coarse brown materials for structure.
- Monsoon Seasons: Protect your compost pile from excessive rain. A cover or a well-structured bin can prevent it from becoming too saturated. Continue turning as usual if moisture levels are manageable.
The principles of aerobic composting remain the same, but adapting your management slightly based on local weather will lead to better results.
Conclusion
You’ve got this! Aerobic composting in India is an achievable, rewarding way to manage your waste and enrich your garden. By understanding the basics of greens and browns, moisture, and airflow, and by following the step-by-step process we’ve outlined, you can transform everyday kitchen scraps and yard trimmings into valuable compost.
It’s a natural, sustainable practice that benefits both your home and the environment. Don’t be afraid to get your hands dirty – the earthy reward is well worth the effort. Start small, observe your pile, and adjust as needed. Happy composting!
Frequently Asked Questions (FAQs)
Q1: How long does aerobic composting take?
It can take anywhere from 1 to 6 months, depending on the size of your pile, the materials used, temperature, and how often you turn it. Regular turning and keeping the right moisture balance speed up the process significantly.
Q2: My compost smells bad. What did I do wrong?
A bad smell, often like rotten eggs or ammonia, usually means there’s not enough air or too much “green” material. Try adding more “brown” materials (like dry leaves or shredded paper) and turn the pile thoroughly to introduce oxygen. Ensure it’s not too wet; if it is, add browns and mix.
Q3: Can I compost food scraps from my kitchen?
Yes, absolutely! Fruit and vegetable peels, coffee grounds, tea bags, and crushed eggshells are excellent “green” materials for your compost. Just remember to bury them under a layer of “browns” to avoid attracting pests.
Q4: How often should I turn my compost pile?
Ideally, you should turn your compost pile at least once a week. If you can’t manage that, aim for every two weeks. Regular turning is crucial for providing oxygen, which is the hallmark of aerobic composting.
Q5: What is the ideal moisture level for compost?
Your compost should feel like a well-wrung-out sponge – damp but not dripping wet. If you squeeze a handful, only a few drops of water should come out. Check it regularly and add water if dry, or browns if too wet.
Q6: Can I compost leaves in Indian cities?
Definitely! Fallen leaves are a fantastic source of “brown” carbon material. Collect them in the autumn or whenever trees shed leaves and store them to add to your compost bin throughout the year. They are essential for creating good compost structure and aeration.

I am passionate about home engineering. I specialize in designing, installing, and maintaining heating, ventilation, and air conditioning systems. My goal is to help people stay comfortable in their homes all year long.