Ever feel like your food scraps are a lost cause, destined only for the landfill? It’s a common problem! Many of us want to compost, but the sheer amount of information online can feel overwhelming. You might be wondering if there’s an easier way. Well, you’re in the right place. I’m Troy D Harn, and I’m here to break down anaerobic composting step-by-step, making it simple and totally doable for anyone. We’ll cover everything you need to know to get started right away, turning that kitchen waste into something valuable.
Anaerobic Composting Online: Your Essential Beginner’s Guide
Hey there, neighbor! Troy D Harn here, from TopChooser. Composting is like magic for your garden, but when you’re just starting out, “composting” can sound like a big, complicated word. Especially when you start digging into the science behind it. Today, we’re going to tackle a specific type: anaerobic composting. Don’t let the fancy name scare you! Think of it as a shortcut in the composting world, using a different set of conditions to break down your organic waste. It’s super handy, especially if you have limited space or are looking for a quicker turnaround. We’ll walk through what it is, why you might choose it, and how to get your own anaerobic compost bin going. Ready to turn that kitchen waste into garden gold? Let’s dive in!
What Exactly is Anaerobic Composting?
Alright, let’s get down to what “anaerobic” really means in composting. In simple terms, “anaerobic” means “without air.” So, anaerobic composting is a process where organic materials break down in an environment that has very little or no oxygen. This is different from “aerobic composting,” which is the more common method where you actively turn your compost pile to introduce air. Because there’s no air, different types of microorganisms take over the decomposition process. These microbes, often called obligate anaerobes, do their work in a wet, oxygen-starved environment. It’s a bit like being underwater, but for decomposing matter!
This might sound a little strange, but it’s a natural process that happens in places like swamps, bogs, and even in the digestive systems of some animals. In composting, we essentially create a controlled version of this environment to speed things up.
Anaerobic vs. Aerobic Composting: What’s the Difference?
This is a key point to understand when you’re just getting started. Both methods aim to break down organic waste, but how they do it and what the results are can vary.
Aerobic Composting: The Familiar Friend
This is what most people picture when they think of composting. It’s an active, oxygen-rich process. You’ve got your compost pile or bin, and you regularly turn it (like flipping a pancake) to let air in. This encourages aerobic bacteria and fungi, which are the quick workers. They need oxygen to live and multiply, and they break down your waste efficiently.
- Pros: Faster decomposition (often weeks to months), produces less odor if managed well, compost is typically of higher quality and ready sooner.
- Cons: Requires regular turning/aeration, can dry out if not managed, needs a good balance of “greens” and “browns.”
Anaerobic Composting: The Speedy Specialist
As we discussed, this method happens without oxygen. Instead of turning, you seal your compost away. This creates an environment where anaerobic bacteria and archaea do the heavy lifting. These microbes are different from the ones in aerobic composting. They don’t need oxygen and can work in wet, enclosed conditions. While it doesn’t produce the same “fluffy” compost as aerobic methods, it can break down materials relatively quickly.
- Pros: Less labor-intensive (no turning needed), can be faster for specific applications (like certain fermented compost teas), works well in small spaces or contained systems.
- Cons: Can produce strong, unpleasant odors, takes longer to break down some materials, compost quality might be different and may require further “finishing.”
Think of it this way: Aerobic composting is like a well-ventilated kitchen where chefs can work quickly and efficiently. Anaerobic composting is more like a sealed fermentation tank, where different microbes work their magic slowly but steadily in a different way.
Why Choose Anaerobic Composting?
So, why would you opt for this oxygen-free method when aerobic composting is so common? There are a few good reasons, especially for beginners or those with specific needs:
- Space Saving: Many anaerobic composting systems are compact. This makes them ideal for apartment dwellers, people with small yards, or those who simply don’t want a large compost bin taking up space.
- Less Maintenance: The biggest draw for many is that you don’t need to turn an anaerobic compost pile. This saves you time and physical effort. Once you set it up, it largely takes care of itself (with some monitoring, of course).
- Speed (in some contexts): While it might not produce finished compost as quickly as a well-managed aerobic pile, certain anaerobic processes, like bokashi fermentation, are very fast for pre-composting. This phase makes your waste ready for burial or to be added to an aerobic pile, speeding up the overall process.
- Reduced Pests: Because many anaerobic systems are sealed, they can be more effective at keeping pests like rodents and flies out of your compost.
- Capturing Nutrients: Some forms of anaerobic composting, like bokashi, can help retain more nutrients in the material compared to traditional composting, which can be beneficial if you plan to use the fermented material directly in your garden (after proper burial).
Getting Started with Anaerobic Composting: What You Need
The beauty of starting is that you don’t need a lot of fancy equipment. For basic aerobic composting, you might think of bins, tumblers, or piles. For anaerobic, especially if we’re thinking about a more contained system like a DIY version or a pre-composting method, the tools are quite simple. Let’s look at what works well.
Container Options:
The most important piece is a container that can be sealed well to keep oxygen out. This also helps contain any odors. Here are some ideas:
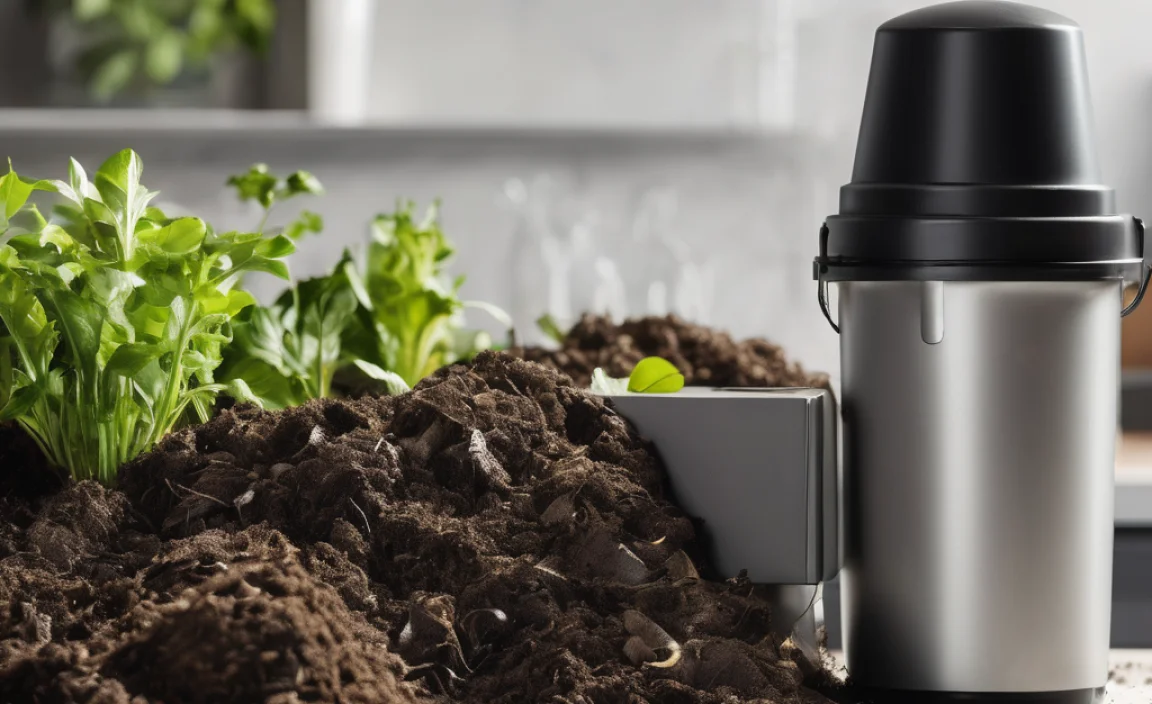
- Sealed Bins with Lids: Many plastic storage bins can work if they have a lid that fits snugly. You might need to add a rubber seal to the lid for a truly airtight fit. Look for heavy-duty ones that can withstand being outside if needed.
- Food-Grade Buckets: Similar to storage bins, 5-gallon food-grade buckets with well-fitting lids are excellent for smaller-scale anaerobic composting, especially for kitchen scraps that you’ll ferment. Many come with airtight gaskets. You can often find these from bakeries or restaurants.
- Specialized Systems: There are commercial anaerobic composters or digesters available that are designed for this purpose. While often more expensive, they can be convenient and efficient.
What Goes In: Your “Greens” and “Browns” (with a Twist)
Just like aerobic composting, you’ll be adding organic materials. However, the balance can be a little different, and certain items are better suited for anaerobic digestion. When thinking about what to add, consider the “greens” (nitrogen-rich) and “browns” (carbon-rich) concept, but with an eye toward moisture content and what breaks down well without air.
- Kitchen Scraps (fruit and vegetable peels, coffee grounds, tea bags – without staples).
- Yard Waste (grass clippings, leaves, small twigs). Be mindful that larger, woody materials break down very slowly anaerobically and might not fully decompose.
- Paper and Cardboard (shredded newspaper, non-glossy paper, paper towel rolls). Avoid heavily printed or glossy paper.
- Some Protein/Dairy: Unlike aerobic composting where these can cause massive stink and attract pests, some anaerobic methods (like bokashi) can handle small amounts. However, for a general anaerobic bin, it’s often best to avoid meat, dairy, and oily foods to minimize odors.
Key Point: Moisture is important. Anaerobic processes need a damp environment. If your compost seems too dry, you’ll need to add a little water. If it’s too wet, you can add more “browns” like shredded cardboard or dry leaves.
Optional Addatives:
- Compost Starter or Inoculant: For some anaerobic methods, like bokashi, you’ll use a specific bran inoculated with effective microorganisms (EM). This helps kickstart the fermentation process. For general anaerobic composting, you can often rely on the naturally present microbes, though adding a scoop of finished compost or soil can sometimes help.
- Epsom Salts: Some gardeners find that adding a small amount (e.g., a tablespoon per gallon of compost) of Epsom salts can help balance the pH and nutrients in anaerobic compost, especially if it’s going to be used more directly in the garden.
Setting Up Your Anaerobic Compost Bin: A Step-by-Step Guide
Let’s get your bin ready! We’ll focus on a simple, DIY sealed bin approach. This is perfect for starting out and seeing if you like the process.
Step 1: Choose and Prepare Your Container
Select a sturdy bin with a tight-fitting lid. A 10-20 gallon plastic storage bin with a latching lid works well. Ensure it’s clean. If the lid isn’t perfectly airtight, you can use weather-stripping tape or a thick rubber gasket to seal the gap. For food-grade buckets, make sure the lid has a good rubber seal.
Step 2: Add Your First Layer of “Browns”
Start with a layer of carbon-rich material at the bottom. This could be shredded newspaper, dry leaves, or small pieces of cardboard. About 2-3 inches is good. This helps absorb excess moisture and provides a base for other materials.
Step 3: Start Adding “Greens” and More “Browns”
Now, begin adding your kitchen scraps and other organic waste. It’s a good practice to layer your “greens” with “browns.” For every layer of kitchen scraps, add a layer of shredded paper, dry leaves, or sawdust. This helps balance the moisture and prevents the “greens” from becoming a slimy, smelly mass. Aim for roughly a 2:1 or 3:1 ratio of browns to greens by volume, although this isn’t as critical as in aerobic composting. What’s more important is to bury your kitchen scraps within the browns.
Step 4: Layer and Chop
Chop up larger items into smaller pieces. This increases the surface area, allowing the microbes to work more efficiently. Continue layering your greens and browns, making sure that the kitchen scraps are generally covered by browns. You want to fill the bin, but don’t compact it too tightly—you still need some room for the decomposition process.
Step 5: Moisten (If Needed)
The compost should be damp, like a wrung-out sponge. If you add a lot of dry leaves or paper, it might be a bit arid. If it feels dry, spray it lightly with water. If it feels muddy or soggy, add more dry “browns.”
Step 6: Seal the Bin Tightly
Once your bin is reasonably full (leave a little space at the top), close the lid and ensure it’s sealed as tightly as possible. The goal is to prevent oxygen from getting in.
Step 7: Let it Work (and Monitor Hints of Odor)
Now, just let it sit. Unlike aerobic composting, you don’t need to turn it. Place the bin in a convenient location, perhaps under a sink, in a shed, or in a corner of your yard. The decomposition will happen over weeks to months. You might notice a slightly tangy or fermented smell, which is normal for anaerobic decomposition. If you get a strong, foul, ammonia-like, or rotten egg smell, it might be too wet, too much “greens,” or not enough “browns” to buffer it. In such cases, you might need to add more dry browns and ensure the lid is sealed well.
Step 8: Harvesting Your Compost
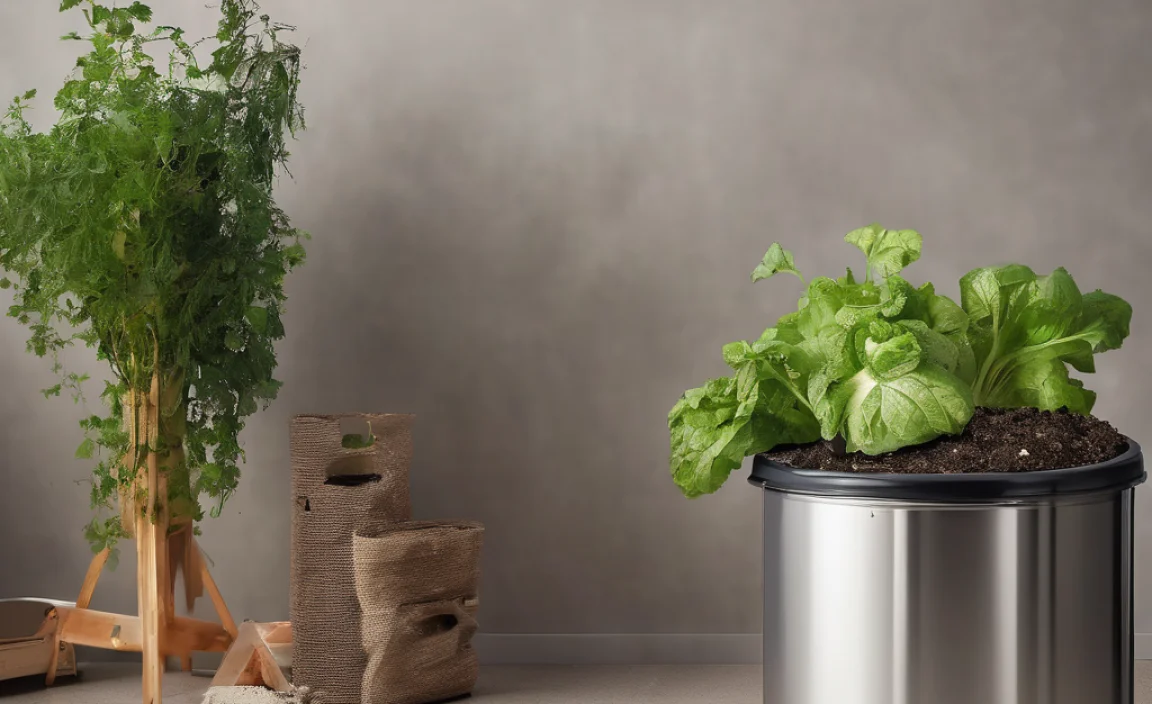
Anaerobic decomposition can take anywhere from 4 weeks to several months, depending on the materials and conditions inside the bin. The compost will look darker, more homogenous, and will have an earthy, slightly yeasty smell once it’s ready. If you’re using bokashi, you’ll end up with a fermented product that needs to be buried. For other anaerobic methods, you might get a compost that’s partially broken down. This material can often be added to an aerobic compost pile to finish breaking down, or buried directly into garden beds where it will continue to decompose.
Important Note on “Finishing”: Anaerobic compost often doesn’t fully “finish” in the same way aerobic compost does. It’s frequently a pre-compost or fermented material that benefits from being buried in the soil. This allows aerobic microbes in the soil to break down the remaining material and release nutrients for your plants.
What Can You Compost Anaerobically? (And What to Avoid)
Not all organic matter is created equal when it comes to anaerobic digestion. Some things break down well and are suitable for this environment, while others can cause problems.
Good Candidates for Anaerobic Composting:
- Fruit and Vegetable Scraps: The classic kitchen scraps. They break down relatively quickly without oxygen.
- Coffee Grounds and Tea Bags: These are nitrogen-rich and compost nicely. Just remove any staples from tea bags.
- Grass Clippings: Use them in moderation as they can mat down and become too wet if added in large quantities.
- Leaves and Garden Trimmings: Smaller leaves and soft trimmings work best. Larger, woody stems will take a very long time to break down.
- Paper and Cardboard: Uncoated paper, shredded newspaper, and plain cardboard are excellent “browns” and can be added.
- Sawdust: Untreated sawdust from softwoods is a good carbon source.
What to Be Cautious About or Avoid:
- Meat, Bones, and Dairy Products: While some advanced methods like bokashi can handle small amounts, for a simple sealed bin, these are best avoided. They are more prone to developing truly foul odors and attracting pests in less controlled anaerobic environments.
- Oily Foods and Fats: These can slow down decomposition and contribute to unpleasant smells.
- Diseased Plants: The cooler, slower process of anaerobic composting may not kill off pathogens effectively, so it’s safer to avoid adding diseased plant material.
- Pet Waste (Dog/Cat): Due to potential pathogens, it’s generally recommended to avoid adding dog or cat feces to home compost systems, whether aerobic or anaerobic.
- Weeds with Seeds: Seeds can survive the cooler, anaerobic process and may sprout when you use the compost.
- Treated Wood or Coal Ash: These are contaminants and will not break down, and can introduce harmful chemicals.
Common Issues and How to Fix Them
Even with the “set it and forget it” allure, you might encounter a few hiccups. Here’s how to troubleshoot:
| Problem | Likely Cause | Solution |
|---|---|---|
| Foul, Rotten Egg Smell | Too much of one material (e.g., too many food scraps), too wet, lack of airflow at the start (if the lid wasn’t sealed immediately). | Add more dry “browns” (shredded cardboard, dry leaves) to absorb moisture and improve the carbon-to-nitrogen ratio. Ensure the lid is sealed tightly. If really bad, you might need to try and redistribute material slightly or start over with better ratios. |
| No Decomposition Happening | Too dry, too cold, not enough active microbes, or materials are too large. | Add a little water to moisten. Move the bin to a warmer location if possible. Chop materials smaller. If you have finished compost or good garden soil, add a shovel-full to introduce microbes. |
| Slimy or Mushy Material | Too wet, too many “greens” compacted together. | Add a generous amount of dry “browns” like shredded cardboard or dry leaves to soak up excess moisture and add structure. Ensure materials are layered rather than just dumped. |
| Pests (Flies, etc.) | Lid not sealing properly, exposed food scraps. | Ensure your lid has a good seal. Always bury your fresh food scraps under a |


I am passionate about home engineering. I specialize in designing, installing, and maintaining heating, ventilation, and air conditioning systems. My goal is to help people stay comfortable in their homes all year long.