Hey there, neighbor! Are you looking to make your own garden gold but feel like traditional backyard composting is just too much work? Maybe you don’t have a lot of space, or perhaps the idea of turning a big pile feels daunting. You’re not alone! Many of us want to be more eco-friendly and boost our garden’s health, but we need simpler ways to do it. What if I told you there are some super easy alternatives that get you fantastic compost with way less fuss? Stick around, and I’ll show you how to get that rich, crumbly compost without breaking a sweat or needing acres of land.
Backyard Composting Alternative: Effortless Solutions
So, you want to compost, but the thought of managing a big, messy pile in your backyard makes you want to run the other way? I totally get it. Traditional composting can seem like a big commitment—balancing greens and browns, turning the pile, and waiting for ages. But guess what? You don’t need a huge yard or hours of your weekend to turn kitchen scraps and yard waste into amazing fertilizer for your plants. There are some fantastic, low-effort alternatives out there that are perfect for us busy folks or anyone with limited space.
Let’s dive into some of the easiest and most effective ways to create nutrient-rich compost without the traditional composting hassle. We’ll explore options that can fit on a patio, a small balcony, or just require a lot less physical labor. Ready to make your garden—and the planet—happier?
Why Go for a Composting Alternative?
Traditional backyard composting is great, but it’s not always the best fit for everyone. Here are a few reasons why people look for alternatives:
- Space Constraints: Not everyone has a sprawling backyard. Apartment dwellers, townhouse residents, or those with small yards might not have room for a large compost bin or pile.
- Time and Effort: Turning a compost pile, managing moisture, and ensuring the right carbon-to-nitrogen ratio can be time-consuming and physically demanding.
- Pest Concerns: For some, the idea of attracting rodents or insects to a compost pile is a major deterrent.
- Odor Issues: Improperly managed traditional compost piles can sometimes create unpleasant smells, which isn’t ideal for close living quarters.
- Simplicity: Many of us just want a straightforward way to recycle our organic waste without needing to become composting experts overnight.
Top Effortless Composting Alternatives
Let’s look at some of the best options you can consider. These methods are designed to be easier, quicker, and more contained than traditional pile composting.
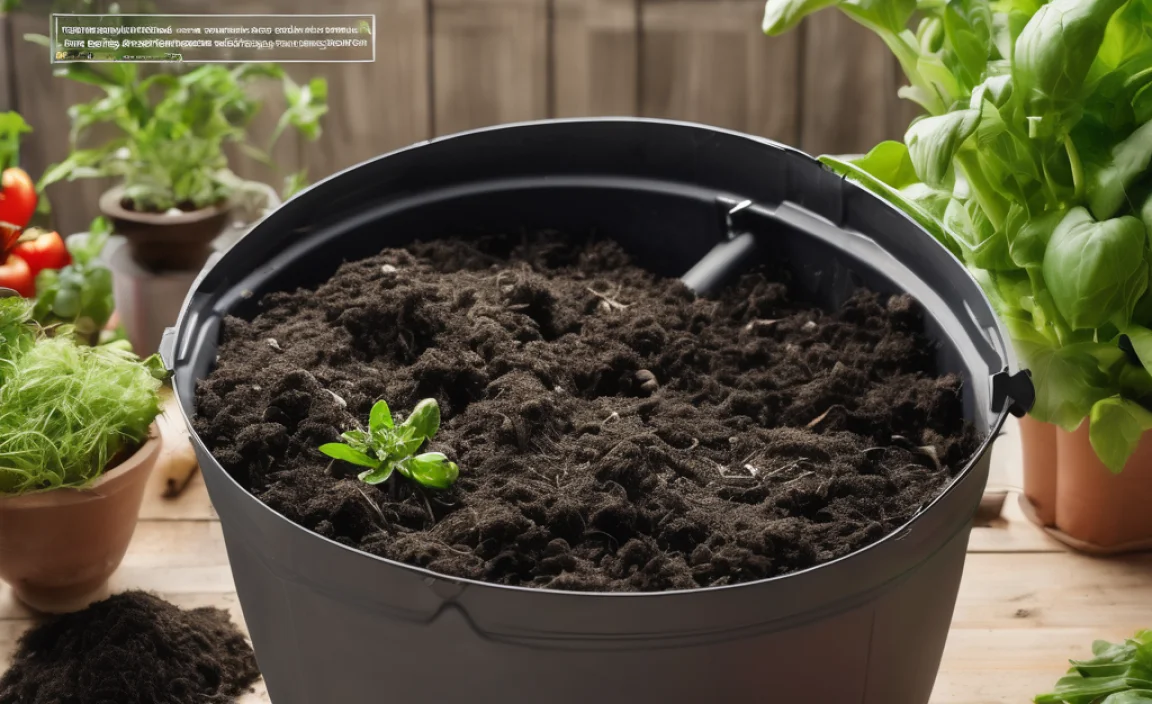
1. Tumbler Composting
Compost tumblers are essentially enclosed barrels that you can rotate. They’re a fantastic alternative because they speed up the composting process and keep things neat and tidy. Since they’re sealed, they also help deter pests and minimize odors.
How it works: You toss your kitchen scraps and yard waste into the tumbler. When you add new materials, or periodically (e.g., every few days), you give the tumbler a good spin. This mixes everything thoroughly, aerates the materials, and helps the decomposition happen much faster. Many tumblers have multiple chambers, allowing you to have one batch composting while you start another.
Pros:
- Faster Composting: The constant mixing and aeration speed up decomposition, often yielding compost in a matter of weeks rather than months.
- Pest-Proof: The enclosed design keeps rodents and other unwanted visitors out.
- Odor Control: Properly managed, tumblers are less likely to produce strong odors.
- Neat and Contained: Ideal for smaller yards or patios.
- Easy to Turn: Spinning the tumbler is much easier than turning a large compost pile.
Cons:
- Initial Cost: Tumblers can be more expensive upfront than a simple compost bin.
- Capacity Limitations: Some models might have smaller capacities, requiring more frequent emptying and starting new batches.
- May Require Some Effort: While easier than turning a pile, you still need to physically spin the tumbler.
What to put in: Fruit and vegetable scraps, coffee grounds, tea bags, eggshells, grass clippings, small garden trimmings, shredded paper and cardboard.
What to avoid: Meat, dairy products, oily foods, diseased plants, pet waste, and weeds that have gone to seed.
2. Bokashi Composting
Bokashi is a Japanese word meaning “fermented organic matter.” This method uses an anaerobic (without oxygen) fermentation process with a special culture of beneficial microbes. It’s incredibly effective for breaking down a wider range of food scraps, including meat and dairy, which are typically avoided in other composting methods.
How it works: You add your food scraps to a special airtight Bokashi bin. After each layer of food scraps, you sprinkle a bit of Bokashi bran, which contains the active microbes. Once the bin is full, you seal it tightly and let it ferment for about two weeks. After fermentation, the material isn’t quite “compost” yet; it’s more of a pre-compost that needs to be buried in soil or added to a traditional compost pile to finish breaking down. The liquid that drains off can be diluted and used as a potent plant fertilizer.
Pros:
- Accepts All Food Scraps: Handle meat, dairy, and oily foods easily.
- Fast Fermentation: The initial fermentation is quick, taking only about two weeks.
- Completely Odorless: Due to the anaerobic nature and the microbial process, it produces no foul smells.
- Small & Indoor Friendly: The system is compact and can be kept in a kitchen or pantry.
- Produces Valuable “Tea”: The liquid byproduct is excellent for fertilizing plants.
Cons:
- Requires Special Bran: You need to purchase Bokashi bran to initiate the process.
- Pre-compost Stage: The fermented material needs a second stage (burying or adding to a compost pile) to become usable soil amendment.
- Airtight Containers are Crucial: You need specialized bins that seal tightly.
What to put in: All food scraps including meat, fish, dairy, bones, oily foods, fruits, vegetables, coffee grounds, tea bags, eggshells.
What to avoid: Only things that are truly inorganic, like plastic, metal, or glass.
3. Vermicomposting (Worm Composting)
Vermicomposting uses red wiggler worms to break down your food scraps into a rich, nutrient-dense fertilizer called worm castings. It’s a fantastic method for small spaces, perfect for apartment balconies or even indoors.
How it works: You set up a worm bin with bedding (like shredded newspaper or coconut coir), water, and a colony of red wiggler worms. You then feed them your kitchen scraps. The worms eat the scraps and their waste, which is your compost. The bin needs to be kept in a suitable temperature range and shouldn’t get too wet or dry. It’s a living system, so you’re working with nature to do the composting for you.
Pros:
- Highly Nutrient-Rich Compost: Worm castings are packed with beneficial microbes and nutrients that plants love.
- Fast Processing: Worms are efficient eaters and can break down food scraps relatively quickly.
- Compact & Indoor Friendly: Worm bins are small and can be kept indoors or on a shaded patio.
- Minimal Odor: When managed correctly, worm bins have little to no odor.
- Educational and Fun: It can be a fascinating way to see nature at work!
Cons:
- Requires Specific Worms: You need red wigglers (Eisenia fetida), not common garden earthworms.
- Temperature Sensitive: Worms need a consistent temperature, typically between 55-77°F (13-25°C).
- Can Dry Out or Get Soggy: Proper moisture management is key.
- Don’t Overfeed: Too much food can lead to odors or attract pests.
- Initial Setup: Getting the bin and worms established can take a little patience.
What to put in: Fruit and vegetable scraps, coffee grounds, tea bags, eggshells, shredded newspaper and cardboard (as bedding and occasional food). Avoid citrus peels in large quantities, onions, garlic, meat, dairy, oily foods, and processed foods.
What to avoid: Meat, dairy, oily foods, spicy foods, citrus in large amounts, onions, garlic, cat or dog feces, diseased plants.
4. Trench Composting
If you have a garden bed, trench composting is an incredibly simple, “set it and forget it” method. You bury your kitchen and yard waste directly into the ground in designated trenches.
How it works: Dig a trench about 12-18 inches deep in a garden bed or an out-of-the-way spot. Add your organic materials, like kitchen scraps and yard waste, into the trench. You can mix in some soil or finished compost to kickstart decomposition. Then, simply cover the trench with at least 6 inches of soil. Over time, the materials will break down underground, enriching the soil where you buried them.
Pros:
- Extremely Low Effort: No turning, no managing bins, just digging and burying.
- No Odor or Pests: Burying the material completely eliminates odor and pest issues.
- Improves Soil In Place: Your soil gets directly amended where you need it most.
- Great for Busy People: You can do it anytime and leave it to decompose.
- Free: Requires no special equipment, just a shovel.
Cons:
- Slower Decomposition: Without active aeration, it can take longer for materials to break down.
- Not Ideal for Small Spaces: Requires some garden space to dig trenches.
- Can’t Use All Materials: Still best to avoid meat, dairy, and oily foods to prevent attracting less desirable critters or creating slow-to-decompose masses.
- Requires Some Digging: While not as strenuous as turning a large pile, it does involve shovel work.
What to put in: Vegetable and fruit scraps, coffee grounds, tea bags, eggshells, grass clippings, leaves, small garden trimmings, shredded paper and cardboard.
What to avoid: Meat, dairy, oily foods, diseased plants, weeds gone to seed.
5. Electric Composters (Food Cyclers)
These are countertop appliances that use heat, aeration, and sometimes grinding to break down food scraps in a matter of hours. They’re the ultimate in convenience and speed, though they don’t produce traditional compost.
How it works: You load food scraps into the machine, close the lid, and turn it on. The appliance heats, dries, and grinds the food waste, reducing its volume significantly. The end product is a dry, sterile matter that is nutrient-dense and can be mixed into soil. It’s more like dehydrating and grinding than traditional decomposition.
Pros:
- Incredibly Fast: Turns food waste into a usable amendment in hours, not weeks or months.
- Odorless: Most models have excellent filters to prevent any smells.
- Very Easy to Use: Simple push-button operation.
- Reduces Waste Volume Dramatically: Can reduce food waste by up to 90%.
- Compact for Kitchens: Designed to sit on a countertop.
Cons:
- High Initial Cost: These appliances are the most expensive option upfront.
- Uses Electricity: Contributes to your energy bill.
- Not True Compost: The output isn’t decomposed organic matter in the traditional sense; it’s more of a dried, ground food matter that needs soil microbes to fully break down.
- Limited Capacity: You can only process a certain amount of food waste per cycle.
- Maintenance: Filters may need replacing, and the unit needs cleaning.
What to put in: Almost all food scraps, including meat, dairy, bones, and cooked foods. Check your model’s manual for specifics.
What to avoid: Large bones (in some models), excessive amounts of liquid, non-food materials, excessive packaging.
Comparing Composting Alternatives
To help you decide, here’s a quick comparison of the methods we discussed. You can see at a glance which one might be the best fit for your lifestyle and space.
| Feature | Tumbler Composting | Bokashi Composting | Vermicomposting | Trench Composting | Electric Composter |
|---|---|---|---|---|---|
| Effort Level | Low to Medium (spinning) | Low (layering, sprinkling) | Low (feeding, monitoring) | Very Low (digging, burying) | Very Low (loading, pressing button) |
| Speed | Fast (weeks) | Fast (fermentation: 2 weeks + burying) | Medium (months) | Slow (months to a year) | Very Fast (hours) |
| Space Required | Small yard, patio | Small indoor space (kitchen, pantry) | Small indoor space, balcony | Garden bed, yard space | Countertop |
| Odor Potential | Low (if managed well) | None | Low (if managed well) | None | None (with filters) |
| Pest Potential | Very Low (enclosed) | Very Low (sealed) | Low (if managed well) | None (buried) | None (sealed unit) |
| Accepts Meat/Dairy | No | Yes | No | No | Yes (most models) |
| Typical Cost | Medium ($100-$300) | Low (bin starter kits ~$50, ongoing bran cost) | Low to Medium (bin kits ~$50-$150, worms ~$30-$50) | Very Low (shovel, free to implement) | High ($300-$800+) |
Getting Started with Your Chosen Method
No matter which alternative you choose, getting started is pretty straightforward. Here’s a general idea of what you’ll need:
Steps to Start:
- Choose Your Method: Based on your space, budget, and time, pick the composting alternative that best suits you.
- Acquire Equipment: Purchase or build the necessary bin, tumbler, or appliance. For Bokashi, you’ll need the special bran. For vermicomposting, you’ll need worms and bedding.
- Gather Materials: Start collecting your kitchen scraps (fruit and veggie peels, coffee grounds, eggshells) and appropriate yard waste.
- Set Up Your System: Follow the instructions that come with your chosen method—whether it’s setting up bedding for worms, assembling a tumbler, or preparing trench locations.
- Begin Composting: Start adding your organic materials according to the guide for your method. Remember the “what to put in” and “what to avoid” lists for your chosen technique.
- Maintain and Harvest: Regularly “tend” to your system (spin the tumbler, sprinkle Bokashi bran, feed worms, bury kitchen waste) and harvest your finished compost or compost starter when it’s ready.
Essential Tools & Supplies (Depending on Method):
- Compost Tumbler or Bin: The core of tumbler composting.
- Bokashi Bin & Bran: Airtight bin and the microbial inoculant.
- Worm Bin: A container for vermicomposting.
- Red Wiggler Worms: The key “ingredient” for vermicomposting.
- Bedding Material: Shredded newspaper, coconut coir, or peat moss for worm bins and sometimes traditional compost.
- Shovel or Trowel: For trench composting or burying Bokashi pre-compost.
- Electric Composter: An all-in-one countertop appliance.
- Kitchen Caddy: A small, lidded container to collect scraps between trips to your main composting system.
Tips for Success from an Experienced Neighbor
Here are a few friendly tips from my own experiences to help you out:
- Start Small: Don’t feel like you need to compost everything at once. Begin with a manageable amount and scale up as you get comfortable.
- Chop It Up: Smaller pieces of organic matter break down faster, no matter the method. Give those fruit rinds and veggie scraps a quick chop.
- Balance is Key (Even in Alternatives): While these methods are easier, understanding the basics helps. For tumblers and vermicomposting, avoid too much “wet” material without enough “dry” (like shredded paper).
- Observe and Learn: Pay attention to what’s happening. Does your worm bin smell? Maybe it’s too wet. Does your tumbler seem slow? It might need more “greens.” Your system will tell you what it needs.
- Don’t Be Afraid to Experiment: Every home and garden is different. What works perfectly for one person might need a slight tweak for another.
- Patience is a Virtue: Even the faster methods take a little time. Enjoy the process of creating something valuable from waste!
For more detailed guidance on composting science, you can always check out resources from reputable institutions like the U.S. Environmental Protection Agency (EPA) or your local university extension office. They often have great guides, though we’re focusing on the easy stuff here!
Conclusion: Easy Composting is Within Reach!
See? You don’t need a huge yard or a composting masterclass to create valuable, garden-enriching compost. Whether you choose the fast-paced spin of a tumbler, the odorless fermentation of Bokashi, the living magic of worm composting, the discreet burial of trench composting, or the lightning speed of an electric composter, there’s an effortless solution out there for you.
Each method offers a straightforward way to reduce waste, nurture your soil, and give your plants the boost they deserve. So, pick the method that whispers your name, gather your scraps, and get ready to transform your kitchen and yard waste into black gold. Happy composting, neighbor!
Frequently Asked Questions (FAQs)
Q1: Can I really compost indoors with these alternatives?
A: Yes! Bokashi composting and vermicomposting are specifically designed for indoor or small-space use. Electric composters are also typically countertop appliances. Tumblers can often be placed on a balcony or patio.
Q2: How much kitchen waste can I expect to handle?
A: This depends on the size of your system. Smaller worm bins or Bokashi bins might handle waste from 1-2 people. Tumblers and electric composters come in various sizes. Even trench composting can be scaled; you just need space to dig.
Q3: How do I know when my compost is ready?
A: For tumblers, the compost will look dark, crumbly, and smell earthy. For Bokashi, the fermented material needs to be buried and will break down into soil. For vermicomposting, the worm castings will look like dark, granular soil, and the original food scraps will be gone. Electric composters produce their finished product after a cycle.
Q4: What if my composting system starts to smell?
A: Odor usually means an imbalance. For tumblers, it might be too much wet material or not enough air; try adding more browns (like shredded paper) and turning it more. For worm bins, it could be too much food, too wet, or the wrong types of food. For Bokashi, a truly airtight system shouldn’t smell bad. Electric composters are designed to be odor-free with their filters.
Q5: Can I use the compost from these methods directly on my plants?
A: For tumblers and vermicomposting, yes, the finished compost (compost and worm castings, respectively) is excellent for amending garden soil or potting mixes. For Bokashi, the fermented material is a pre-compost and needs to be buried or added to a traditional compost pile for a few weeks to finish breaking down before use. The liquid from Bokashi is a potent fertilizer when diluted.
Q6: Are there any specific types of food scraps that are problematic for these methods?
A: Bokashi and electric composters can handle most food scraps, including meat and dairy. Traditional composters (including tumblers) and vermicomposting generally advise against meat, dairy, and oily foods to avoid odors and pests. Always check the specific guidelines for your chosen method and model.

I am passionate about home engineering. I specialize in designing, installing, and maintaining heating, ventilation, and air conditioning systems. My goal is to help people stay comfortable in their homes all year long.