Ever look at your kitchen scraps and garden trimmings and think, “There’s gotta be a better way than the trash bin?” You’re not alone! Many of us want to be a little kinder to the planet and get more from our yards. Composting is a fantastic way to do just that. It might sound complicated, but honestly, it’s simpler than you think. My goal today is to break down backyard composting into easy steps so you can turn that “waste” into garden gold. Get ready to transform your yard and your approach to waste!
Let’s dive into the secrets of successful backyard composting. This isn’t about complicated science; it’s about working with nature to create something amazing for your garden. Think of it as a free, DIY fertilizer that’ll make your plants sing!
Backyard Composting Course: Genius Essential Tips for Beginners

Hey everyone, Troy D Harn here from TopChooser. Today, we’re tackling something that can seem a bit daunting at first, but I promise you, it’s incredibly rewarding and surprisingly simple: backyard composting. If you’ve ever felt overwhelmed by starting a compost pile, or if you’re just curious about turning your kitchen and yard waste into nutrient-rich soil for your garden, you’ve come to the right place. We’re going to walk through this step-by-step, making it easy and stress-free. By the end of this, you’ll be a composting pro!
Why Compost? It’s a Win-Win!
Composting is more than just a gardening trend; it’s a smart, eco-friendly practice. It helps reduce the amount of waste you send to landfills, which is a huge win for the environment. Landfills produce methane, a potent greenhouse gas, so diverting organic materials is a big deal. Plus, the end product – compost – is like black gold for your garden. It improves soil structure, helps retain moisture, and provides essential nutrients for your plants, meaning healthier, happier, and more vibrant greenery.
Think about it: instead of throwing away coffee grounds, eggshells, and grass clippings, you’re creating a rich, dark, earthy material that will nourish your flower beds, vegetable patches, and lawn. It’s recycling at its finest, right in your own backyard.
Understanding the Basics: Greens and Browns
The secret to a good compost pile lies in balancing two main types of materials: “Greens” and “Browns.” Getting this balance right is the most crucial step to avoid smelly, slimy piles or piles that just sit there doing nothing.
What are “Greens”?
“Greens” are materials that are rich in nitrogen. They tend to be moist and break down quickly. Think of them as the activators of your compost pile. They provide the food for the microorganisms that do the hard work of decomposition.
- Kitchen scraps: Fruit and vegetable peelings, coffee grounds, tea bags (remove staples and paper tags), eggshells (crushed).
- Yard waste: Fresh grass clippings, green leaves, plant trimmings.
- Other: Manure from herbivores (like rabbits, chickens, cows, horses – let yours weigh in on their favorites too!), seaweed.
What are “Browns”?
“Browns” are materials that are rich in carbon. They tend to be dry and provide the structure and air pockets for your compost pile. They help the pile breathe and act as a bulking agent.
- Dried leaves: A treasure trove of carbon!
- Straw and hay: Excellent for aeration.
- Shredded newspaper and cardboard: Avoid glossy or heavily inked paper. Tear or shred them first.
- Wood chips and sawdust: Use in moderation, as they break down slowly.
- Twigs and small branches: Break them down into smaller pieces.
The Ideal Ratio: The Magic Mix
The golden rule for a happy compost pile is to aim for a ratio of roughly 2 to 3 parts Browns to 1 part Greens by volume. If you add too many Greens, your pile can become dense, wet, and develop a foul odor because decomposition happens too quickly and anaerobically (without air). If you add too many Browns, your pile will break down very slowly.
Don’t worry about being perfectly exact! Gardening and composting are often about observation and adjustment. As you compost more, you’ll get a feel for what your pile needs. If it smells (too wet), add more Browns. If it’s not heating up or breaking down (too dry/not enough nitrogen), add more Greens. It’s like cooking; you learn to adjust the ingredients.
Choosing Your Composting Method
There are several ways to compost in your backyard, each with its own pros and cons. The best method for you depends on your space, how much waste you generate, and how quickly you want compost.
Option 1: The Simple Compost Pile
This is the most basic method. You simply create a heap of your compostable materials directly on the ground. It’s easy to start and requires no special equipment, but it can look a bit messy and might take longer to break down.
Pros: No cost, easy to start, can compost large volumes.
Cons: Can look untidy, decomposition can be slower, harder to manage temperature and moisture, might attract pests if not managed well.
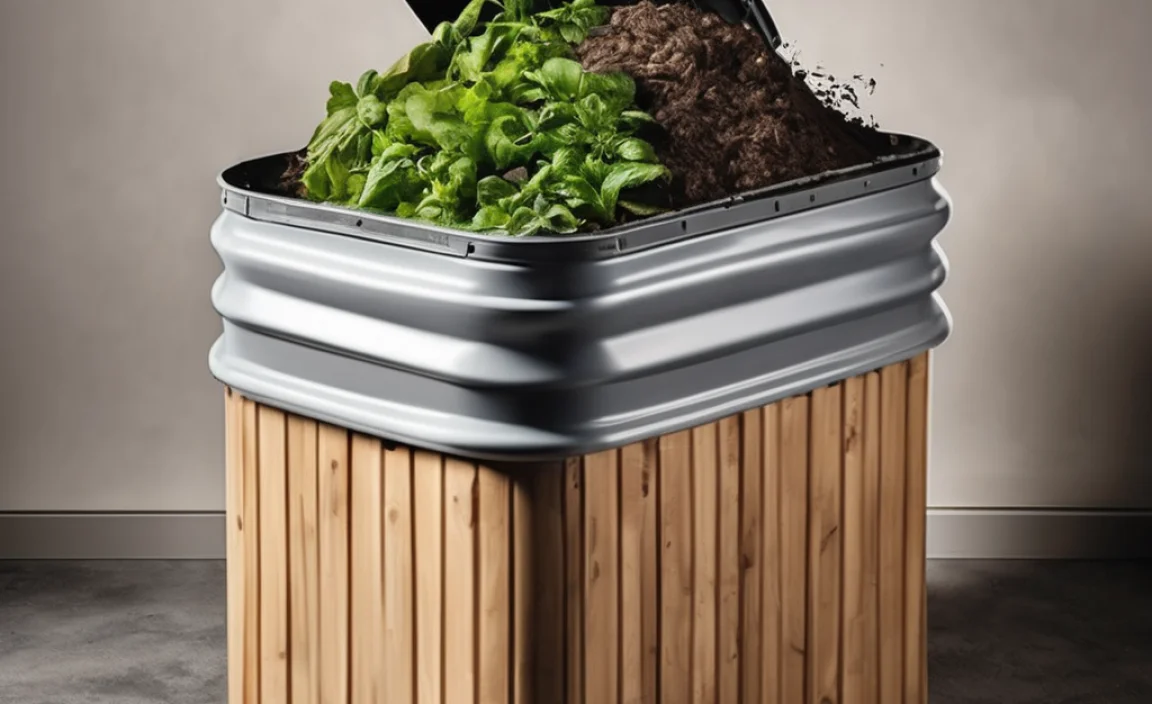
Option 2: The Compost Bin or Tumbler
These are enclosed containers designed to hold your compost. They can be made from wood, plastic, or wire mesh. Tumblers are rotating bins that make turning the compost easy.
Pros: Tidier appearance, can help retain heat and moisture, tumblers speed up decomposition and make turning easy, can deter pests.
Cons: Cost involved, may have a limited capacity, tumblers require regular spinning.
Choosing the Right Size: For a typical household, a bin that’s at least 3 feet by 3 feet by 3 feet (1 cubic yard) is ideal. This size allows the compost pile to generate and retain heat effectively, which speeds up decomposition. For tumblers, look for one that suits the amount of kitchen and yard waste you typically produce.
Option 3: The Worm Composter (Vermicomposting)
This method uses specific types of worms (like red wigglers) to break down kitchen scraps. It’s ideal for small spaces or for people who don’t have much yard waste. You can even do this indoors or on a balcony.
Pros: Produces high-quality compost (worm castings), great for small spaces, relatively fast breakdown of kitchen scraps.
Cons: Requires special worms, cannot process large amounts of yard waste, needs specific conditions (temperature, moisture), less appealing to some for kitchen scraps.
For most beginners with a backyard, a simple bin or pile is a great starting point. We’ll focus on the general principles that apply to all methods, with an emphasis on piles and bins.
Setting Up Your Compost System
Once you’ve chosen your method, it’s time to set up your composting station. Location is key!
- Choose the Right Spot: Pick a level, well-drained area in your yard. Partial shade is often best, as direct sun can dry out the pile too quickly, and full shade might keep it too wet. Make sure it’s convenient for you to access with kitchen scraps and yard waste, and near a water source if possible.
- Prepare the Base (for piles/bins): If you’re making a pile, you can start directly on the soil. This allows beneficial microorganisms and earthworms from the soil to enter your compost. If you’re concerned about pests, you can lay down a layer of hardware cloth or chicken wire first. If using a bin, place it directly on the ground or on a layer of coarse material like twigs for aeration.
- Start Layering: Begin with a layer of coarse “Browns,” like twigs or straw, at the bottom. This helps with drainage and aeration.
What Can and Cannot Be Composted?
This is super important for successful composting. Putting the wrong things in can attract pests, create unpleasant odors, or introduce pathogens. Stick to the “do’s” and avoid the “don’ts” for a healthy compost system.
Compostable Materials (“Do’s”):
- Fruit and vegetable scraps
- Coffee grounds and filters
- Tea bags (remove staples)
- Eggshells (crushed)
- Grass clippings (in thin layers to avoid matting)
- Leaves (especially dried ones)
- Yard trimmings (small twigs, dead plants from your garden)
- Shredded newspaper and non-glossy cardboard
- Hay and straw
- Sawdust and wood chips (from untreated wood, in moderation)
- Manure from herbivores (cow, horse, rabbit, chicken)
Materials to Avoid (“Don’ts”):
- Meat, fish, bones, and dairy products: These attract pests and can create foul odors.
- Oily or greasy foods: These can slow down decomposition and attract pests.
- Diseased plants or weeds that have gone to seed: You don’t want to spread diseases or weeds to your garden.
- Pet waste (from cats and dogs): Can contain harmful pathogens.
- Treated wood: Chemicals can leach into your finished compost.
- Coal ash: Can contain harmful substances.
- Synthetic materials: Plastics, synthetic fibers, etc.
- Weeds with persistent roots or invasive weeds: Some may not break down fully and could sprout later.
When in doubt, it’s often best to leave it out, especially when you’re just starting.
Building Your First Compost Pile: A Step-by-Step Guide
Let’s get practical! Here’s how to build your compost pile, layer by layer.
- Start with Browns: Lay down a layer of coarse, carbon-rich materials (like twigs, straw, or shredded cardboard) about 4-6 inches deep. This helps with airflow at the base.
- Add Greens: Follow with a layer of nitrogen-rich “Greens” (like kitchen scraps and fresh grass clippings). Aim for about half the depth of your Brown layer.
- Add More Browns: Cover the Greens with another layer of Browns. This helps absorb moisture and prevents odors. This layer should be slightly thicker than your Green layer.
- Moisten as You Go: Lightly water each layer as you add it. The compost pile should feel like a damp sponge – moist but not soaking wet.
- Layer Alternately: Continue alternating layers of Greens and Browns. A good rule of thumb is to try and maintain that 2-3 parts Browns to 1 part Greens ratio overall.
- “Activator” (Optional but Recommended): To kickstart the process and introduce beneficial microorganisms, you can add a shovel-full of finished compost, garden soil, or a commercial compost activator to one of the middle layers. This helps get the microbial party started!
- Keep Adding: As you generate more kitchen scraps and yard waste, continue adding them to your pile. Try to bury fresh kitchen scraps under a layer of Browns to deter pests and reduce odor.
The Key to Composting: Air, Moisture, and Turning
These three elements (often called the “Trinity of Composting”) are what make the magic happen. Microorganisms need air, water, and food (your organic materials) to thrive and break everything down.
Airflow
Composting is an aerobic process, meaning it needs oxygen. Without enough air, your pile can become anaerobic, leading to slow decomposition and unpleasant smells. This is why layering Browns is important – they create air pockets.
Turning: Regularly turning your compost pile is the best way to introduce oxygen. Aim to turn it every 1-4 weeks. You can use a pitchfork or a compost aerator tool.
- How to Turn: Shovel the outer materials into the center of the pile, and bring the center materials to the outside. This ensures everything gets a chance to break down evenly and speeds up the process significantly.
- Signs of Good Aeration: A healthy compost pile will often feel warm in the center, especially after turning, thanks to the activity of microbes.
Moisture
Your compost pile needs to be consistently moist, like a wrung-out sponge. Too dry, and the microbes will become dormant, slowing everything down. Too wet, and the pile can become slimy and anaerobic.
- If it’s too dry: Add water while turning the pile.
- If it’s too wet: Add dry Browns (like shredded cardboard or dry leaves) and turn the pile to help it dry out and aerate.
A compost bin or tumbler can help retain moisture, but you still need to check it regularly.
Temperature
As the microorganisms work, they generate heat. A hot compost pile (130-160°F / 55-70°C) breaks down materials much faster and kills weed seeds and pathogens. While a hot pile is great, don’t worry if yours never gets super hot. It will still compost, just at a slower rate. Regular turning and a good mix of Greens and Browns are your best bet for encouraging heat.
For more detailed information on the science behind decomposition and optimal composting conditions, the U.S. Environmental Protection Agency (EPA) offers excellent resources.
Signs Your Compost is Ready
This is the exciting part! How do you know when your compost is ready to use? It takes patience, but the signs are clear:
- Appearance: It will be dark brown or black and crumbly. You shouldn’t be able to recognize the original materials you put in (e.g., no recognizable banana peels or egg cartons).
- Smell: It should smell earthy and pleasant, like fresh forest soil. Any foul odors mean it’s not quite ready or needs more air.
- Texture: It will be uniform in texture, not clumpy or slimy.
- Temperature: It will have cooled down to ambient temperature.
The time it takes can vary wildly, from a few months to a year or more, depending on the method, materials, and how often you turn it. Don’t rush the process; good compost is worth waiting for!
Troubleshooting Common Composting Problems
Even with the best intentions, you might run into a few snags. Here’s how to fix them:
| Problem | Cause | Solution |
|---|---|---|
| Bad Odor (Ammonia/Rotten Egg smell) | Too many Greens, too wet, not enough air. | Add more Browns (dry leaves, shredded cardboard). Turn the pile to aerate. Ensure good drainage. |
| Pile is Not Heating Up / Decomposing Slowly | Not enough Greens, too dry, pile too small, not enough air. | Add more Greens. Moisten the pile if dry (like a damp sponge). Turn the pile to aerate (if not already doing so). Make the pile larger (at least 3x3x3 feet). |
| Attracting Pests (Rodents, Flies) | Exposed food scraps, meat/dairy/oily foods included. | Bury kitchen scraps deeper in the pile and cover with Browns. Ensure you’re not adding prohibited items (see “Don’ts” list). Use a compost bin with a lid. Consider a rodent-resistant bin. |
| Pile is Too Wet | Too many Greens, excessive rain, poor drainage. | Add dry Browns. Turn the pile frequently to aerate and dry it out. Cover the pile during heavy rain if possible. Ensure your location has good drainage. |
| Materials Not Breaking Down | Materials too large, too dry, not enough nitrogen, not enough air. | Chop or shred larger items. Moisten if dry. Add Greens. Turn the pile regularly. |
How to Use Your Finished Compost
Once your compost is ready, it’s ready to work wonders in your garden!
- Soil Amendment: Mix compost into your garden beds and vegetable patches before planting. It improves soil structure, drainage, and nutrient content. A good starting point is to add a layer 1-3 inches thick and gently work it into the top 6-8 inches of soil.
- Top Dressing: Spread a layer of compost around existing plants (trees, shrubs, flowers, vegetables) as a mulch. This feeds the

I am passionate about home engineering. I specialize in designing, installing, and maintaining heating, ventilation, and air conditioning systems. My goal is to help people stay comfortable in their homes all year long.