Composting in your backyard might sound like a big chore, right? Maybe you think it’s messy, smelly, or just too complicated to get started. Lots of folks feel that way! But what if I told you it can be super simple and actually save you money? You can turn kitchen scraps and yard waste into nutrient-rich “black gold” for your garden. It’s easier than you think, and I’m going to walk you through it, step-by-step. Get ready to make composting a breeze!
Backyard Composting Tips: Your Genius Effortless Guide
Hey there, gardening pals and eco-conscious homeowners! Troy D Harn here from TopChooser, ready to tackle one of the most rewarding, yet sometimes intimidating, home projects: backyard composting. We all want a thriving garden, and we all have kitchen scraps and yard trimmings cluttering up our bins. Why not combine the two? Composting is nature’s way of recycling, and it’s a fantastic way to cut down on waste while boosting your soil health. Forget those complicated diagrams and endless lists of what-ifs. This guide is all about making backyard composting effortless and effective for everyone, whether you’re a seasoned gardener or just starting to dig in.
Why Bother with Backyard Composting? The Big Perks
Before we get our hands dirty (metaphorically, for now!), let’s talk about why backyard composting is such a smart move. It’s more than just being kind to the planet, though that’s a huge part of it! Think of it as a win-win-win situation:
- For Your Garden: Compost is like a superfood smoothie for your soil. It improves soil structure, helps it retain moisture (meaning less watering for you!), and provides essential nutrients for healthier, happier plants.
- For Your Wallet: You’ll buy fewer fertilizers and soil amendments. Plus, you’ll likely reduce your trash output, which can sometimes mean lower waste disposal fees.
- For the Earth: Composting diverts organic waste from landfills, where it produces harmful greenhouse gases. You’re actively reducing your environmental footprint!
Getting Started: Your Composting Toolkit
The beauty of composting is its flexibility. You don’t need a whole lot of fancy gear to start. Here’s a breakdown of what you might need, keeping it simple and accessible:
Choosing Your Compost Bin
This is probably your biggest decision. There are a few common types, each with its own vibe:
- Open Piles: The simplest approach. Just designate an area in your yard to stack your materials. It’s free, but can look a bit untidy and might attract unwanted visitors if not managed well.
- Wire Bins: Think of a cylinder made of hardware cloth or chicken wire. Easy to assemble and offers good aeration. You can buy these or make your own for cheap!
- Plastic Compost Bins: These are widely available at garden centers and online. They often have lids, can be single or multi-compartment, and help keep things contained and looking neat. Some have handy doors for harvesting finished compost.
- Tumblers: These are rotating bins on a stand. They make turning your compost super easy, which speeds up the process. They are often sealed, which can deter pests and keep moisture in.
For beginners, a simple plastic bin or a wire bin is a great starting point. They balance ease of use with good composting conditions.
Essential (and Optional) Tools
Once you have a bin, you won’t need much else. However, a few items can make the process smoother:
- Pitchfork or Garden Fork: For turning and aerating your compost pile.
- Shovel: To move materials and harvest finished compost.
- Watering Can or Hose: To keep your compost pile moist.
- Kitchen Scrap Caddy: A small, lidded container to collect food scraps in your kitchen before taking them out to the main compost bin.
The Magic Ingredients: What Goes In Your Compost?
This is where many beginners get a little confused. The key to successful composting is a good balance of “greens” and “browns.” Think of it like a recipe for healthy soil!
Greens (Nitrogen-Rich Materials)
These materials are typically moist and add nitrogen to your compost pile. Nitrogen is like the fuel that helps the microbes break down everything quickly. Good examples include:
- Fruit and vegetable scraps (peels, cores, rinds, etc.)
- Coffee grounds and tea bags (remove staples/plastic tags)
- Grass clippings (in thin layers to avoid matting)
- Fresh plant trimmings
- Eggshells (crushed)
Browns (Carbon-Rich Materials)
These materials are usually dry and add carbon. They provide the energy source for the microbes and help keep the pile from getting too wet or smelly. Think:
- Dry leaves
- Shredded newspaper and cardboard (avoid glossy or colored inks)
- Straw or hay
- Small twigs and branches (chopped or shredded)
- Sawdust (from untreated wood only)
- Paper towel rolls and egg cartons (torn up)
What NOT to Compost (Generally Speaking)
To keep your compost healthy and pest-free, there are some things you should steer clear of:
- Meat, fish, and dairy products: These can attract pests and create unpleasant odors.
- Oily or greasy foods: Similar to meat, these can cause smell issues and slow down decomposition.
- Diseased plants: You don’t want to spread plant diseases back into your garden soil.
- Weeds that have gone to seed: These seeds might survive the composting process and sprout in your garden.
- Pet waste (from dogs and cats): It can contain harmful pathogens.
- Chemically treated wood or yard waste: Avoid anything that might have pesticides or herbicides.
It’s important to note that hot composting systems, managed under very specific conditions, can break down some of these items. But for a beginner’s backyard pile, it’s best to stick to the simpler, safer list.
The Golden Ratio: Balancing Greens and Browns
The secret sauce to fast, efficient composting without the stink is getting the mix of greens and browns right. A good general guideline is aiming for roughly a 2:1 or 3:1 ratio of browns to greens by volume. So, for every one bucket of kitchen scraps (greens), add two or three buckets of dry leaves or shredded paper (browns).
Why this ratio? The browns provide the carbon that microorganisms need to thrive, while the greens supply the nitrogen. Too many greens can lead to a slimy, smelly pile. Too many browns, and your compost will break down very slowly.
If your pile smells like ammonia, it’s probably too wet or has too many greens. Add more browns and turn it. If it’s dry and not breaking down, it might need more greens or moisture. Add some greens and water it lightly.
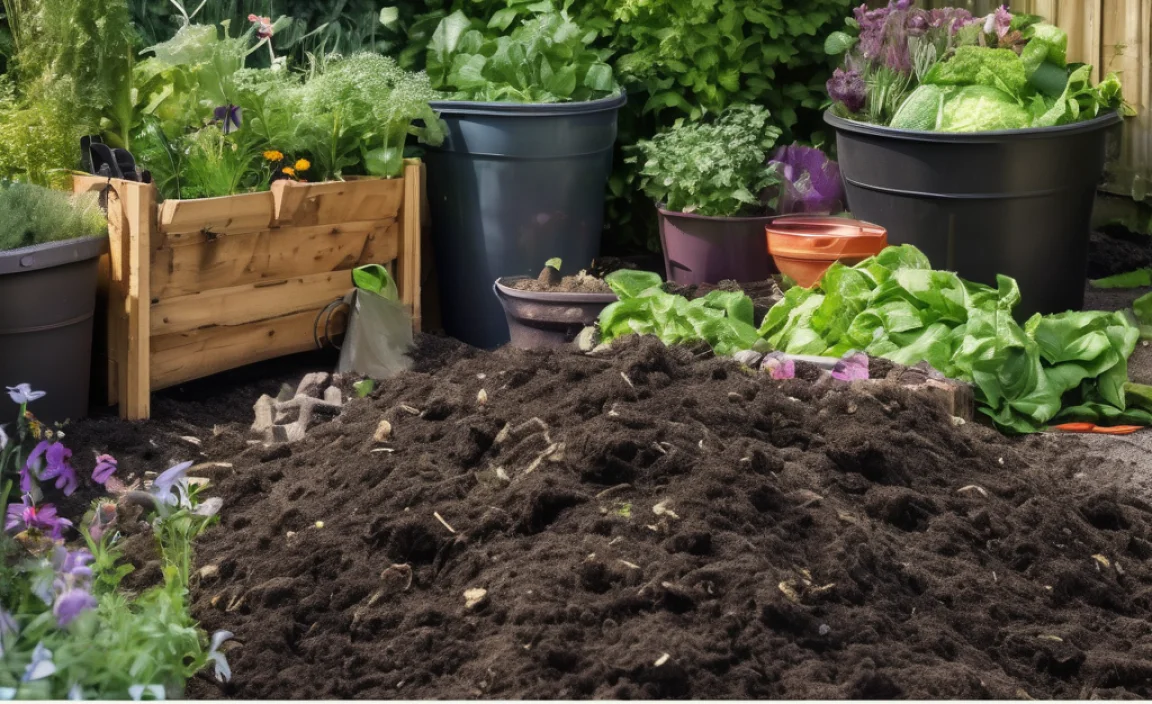
Building Your Backyard Compost Pile: Step-by-Step
Ready to get started? It’s simpler than you might think. Let’s break it down:
Step 1: Choose Your Spot
Find a convenient location for your compost bin. It should be:
- Level: To ensure your bin is stable.
- Well-drained: You don’t want your compost sitting in a puddle.
- Accessible: Easy for you to get to with kitchen scraps and garden waste.
- Partial Shade: Some sun is good for warmth, but too much direct sun can dry it out too quickly.
Step 2: Start with a Brown Layer
Begin by putting a layer of coarse brown materials (like twigs or straw) at the bottom of your bin. This helps with drainage and aeration from the start.
Step 3: Add Your Materials
Now, start layering your greens and browns. As you add kitchen scraps (greens), try to cover them with a layer of brown materials. This is a key trick to prevent odors and deter pests. Chop or shred larger items to help them break down faster.
Step 4: Maintain Moisture
Your compost pile should feel like a damp, wrung-out sponge. Too dry, and the decomposition process slows to a crawl. Too wet, and it can become anaerobic (lacking oxygen) and start to smell. Give it a good watering if it feels dry, especially when you add dry brown materials. If it seems too soggy, add more brown materials and turn it.
Step 5: Aerate Regularly (Turn Your Pile!)
This is crucial for speedy composting. Turning your pile mixes the materials, redistributes moisture, and, most importantly, introduces oxygen. Microbes need oxygen to do their work efficiently. Aim to turn your pile every 1-4 weeks. If you have a compost tumbler, just give it a few spins every week or so.
A good turning involves moving the outer, cooler material to the center and bringing the inner, hotter material to the outside. Don’t worry about perfection; any turning is better than no turning!
Step 6: Patience is a Virtue
Composting is a natural process, and it takes time. Depending on the materials you use, the temperature, how often you turn it, and the type of bin, compost can be ready in anywhere from a few months to a year.
What to Expect: The Stages of Composting
As your compost pile works its magic, you might notice a few things:
The Active Phase: When you first build your pile with a good mix and it’s moist and aerated, it will start to heat up. This is the work of thermophilic (heat-loving) bacteria. The center of the pile can reach temperatures of 130-160°F (54-71°C). This high heat is great because it kills weed seeds and pathogens. This phase can last for a few weeks.
The Curing Phase: Once the active phase cools down, the pile becomes a habitat for other organisms like fungi, actinomycetes (a type of bacteria), worms, and insects. They continue to break down the more resistant materials. The temperature will drop, and the material will start to look and smell more like soil.
Mature Compost: You’ll know your compost is ready when it’s dark brown, crumbly, and smells earthy and pleasant – like a forest floor after rain. You shouldn’t be able to recognize the original materials you put in (except maybe a few stubborn twigs). This mature compost is ready to be used in your garden!
Troubleshooting Your Compost Pile
Even with the best intentions, sometimes things go awry. Here are a few common issues and how to fix them:
Issue: Slimy and Smelly Pile
- Cause: Too much green material, not enough browns, or too much moisture.
- Solution: Add a generous amount of dry brown materials (leaves, shredded paper, sawdust). Turn the pile thoroughly to introduce air and mix in the browns.
Issue: Dry and Sluggish Pile
- Cause: Not enough moisture, too many brown materials, or not enough greens.
- Solution: Add water! Water turns are important. You can also add more green materials (like kitchen scraps) to introduce moisture and nitrogen. Turn the pile to distribute moisture and heat.
Issue: Attracting Pests (Rodents, Flies)
- Cause: Exposed food scraps, meat/dairy/oily foods in the pile.
- Solution: Always bury fresh food scraps in the center of the pile and cover them with browns. Ensure you aren’t adding meat, dairy, or oily foods. If using an open pile, consider fencing it or switching to a contained bin with a lid. Tumblers are excellent for pest deterrence.
Issue: Doesn’t Seem to Be Heating Up
- Cause: Pile is too small, not enough greens, not enough moisture, or needs turning.
- Solution: Make sure your pile is at least 3x3x3 feet (1 cubic meter) – this size helps it retain heat. Add more greens and water. Turn the pile to aerate it.
Making Compost Tea: A Liquid Gold Bonus
Once you have finished compost, you can use it in a couple of ways. The most common is to simply mix it into your garden soil. But for an extra boost, you can make “compost tea”! This is a liquid fertilizer brimming with beneficial microbes and nutrients.
How to Make Basic Compost Tea:
- Fill a bucket or old pillowcase with finished compost.
- Place the compost-filled bag into a bucket of water (non-chlorinated water is best, so let tap water sit out for 24 hours to allow chlorine to dissipate).
- Let it steep for 24-48 hours, stirring occasionally.
- Dilute the resulting “tea” with more water until it’s the color of weak tea.
- Use it to water your plants or as a foliar spray.
Compost tea is a fantastic natural way to give your plants a nutrient kick without chemicals. For more in-depth methods, you can explore actively aerated compost tea (AACT), which requires an aquarium pump, but the basic steeping method is very effective and easy for beginners.
Table: “Greens” vs. “Browns” Cheat Sheet
Here’s a quick reference to help you keep your compost balanced:
| Greens (Nitrogen-Rich) | Browns (Carbon-Rich) |
|---|---|
| Fruit scraps | Dry leaves |
| Vegetable scraps | Shredded newspaper |
| Coffee grounds | Shredded cardboard |
| Tea bags | Straw or hay |
| Grass clippings (thin layers) | Twigs and small branches |
| Fresh garden trimmings | Sawdust (untreated wood) |
| Eggshells (crushed) | Paper towel rolls and egg cartons (torn) |
Expert Tip: The Power of Tiny Decomposers
You might not see them, but your compost pile is teeming with life! Billions of bacteria, fungi, and other microorganisms are the real workers. Turning your pile helps them breathe and multiply. For an interesting read on the microbiology of composting, check out the North Carolina State University Extension’s guide to compost microbiology. Understanding this invisible world can make you appreciate the composting process even more!
FAQ: Your Backyard Composting Questions Answered
Here are some common questions from new composters:
Q1: How big does my compost pile need to be?
A: For best results, aim for a pile that is at least 3 feet wide, 3 feet deep, and 3 feet tall (approximately 1 cubic meter). This size allows the pile to generate and retain enough heat to break down materials efficiently.
Q2: How often should I turn my compost?
A: Turning your compost every 1 to 4 weeks is ideal. More frequent turning (e.g., weekly) will speed up the composting process significantly. If you have a tumbler, a few spins every few days can work wonders.
Q3: My compost smells bad. What’s wrong?
A: A foul smell (like rotten eggs or ammonia) usually means your compost is too wet and/or has too much nitrogen (too many greens). Add more brown, carbon-rich materials like dry leaves or shredded cardboard, and mix it in well. Ensure good aeration.
Q4: Can I compost diseased plants from my garden?
A: It’s generally best to avoid composting diseased plants, especially if you’re using a simple backyard system. The high temperatures needed to kill pathogens might not be reached, potentially spreading disease back into your garden. This is a good reason to stick to the “do not compost” list.
Q5: How long does it take to get finished compost?
A: This varies greatly! A well-managed, active compost pile (hot composting) can produce finished compost in 2-6 months. Slower, passive composting (just piling and letting nature do its thing) can take 6-12 months or even longer.
Q6: Do I need to chop up everything really small?
A: Chopping or shredding materials, especially browns like large leaves or cardboard

I am passionate about home engineering. I specialize in designing, installing, and maintaining heating, ventilation, and air conditioning systems. My goal is to help people stay comfortable in their homes all year long.