Hey there, neighbor! Ever look at your kitchen scraps and garden waste and think, “Man, this feels like a waste”? Well, I get it. Lots of us in Canada want a greener yard and less trash, but the thought of composting can seem… well, a bit much. Maybe you’ve heard it’s complicated, stinky, or just plain hard work. Good news! Today, we’re going to dive into cold composting – the super simple, low-effort way to turn that waste into garden gold. No turning, minimal fuss, just great compost. Stick with me, and by the end of this, you’ll be ready to start your own effortless composting journey.
Cold Composting in Canada: Your Effortless Guide
Composting might sound like it needs a science degree and a lot of elbow grease, but it doesn’t. Especially not cold composting. For us Canadians, dealing with varying weather means we want a system that’s reliable and won’t demand constant attention. Cold composting is exactly that. It’s a patient process, letting nature do most of the heavy lifting. Think of it as a slow cook for your organic materials rather than a rapid boil. It’s perfect for busy folks, beginners, or anyone who’d rather spend their weekends enjoying their garden than stressing over a compost pile.
Why Cold Composting is Perfect for Canada
Canada’s climate presents unique challenges and opportunities for composting. Long winters mean many of us have seasonal yards and garden clean-up that can produce a lot of material at once. Cold composting shines here because it’s forgiving. You can add materials throughout the seasons and let them break down naturally. You don’t need to worry about keeping a hot, active pile going through a freeze or a less vibrant summer. It’s a set-it-and-forget-it approach, almost. Plus, it’s a fantastic way to reduce your household waste, turning food scraps and yard trimmings into nutrient-rich soil improver for your garden beds, saving you money on store-bought fertilizers.
What Exactly is Cold Composting?
So, what’s the big idea behind cold composting? Simply put, it’s decomposition without the heat. Unlike hot composting, which relies on a specific balance of “greens” (nitrogen-rich) and “browns” (carbon-rich) materials, along with moisture and aeration, to heat up to temperatures between 130-160°F (54-71°C), cold composting just lets things break down slowly. Microbes, fungi, and other tiny organisms do their work over a much longer period, sometimes six months to a couple of years, depending on conditions.
Because it doesn’t generate high heat, it doesn’t kill weed seeds or pathogens as effectively as hot composting. This is something to keep in mind, but for most home gardeners, it’s not a major concern if you’re primarily composting yard waste and kitchen scraps that aren’t from diseased plants.
The Benefits of Going Cold with Your Compost
Let’s talk perks. Why should you choose this laid-back method? Here are some of the main reasons why cold composting is a winner, especially for us in Canada:
- Low Effort: This is the big one. No need to constantly turn your pile, measure carbon-to-nitrogen ratios precisely, or monitor temperatures. Just add materials as you get them.
- Simplicity: It’s incredibly beginner-friendly. You don’t need fancy equipment or a deep understanding of composting science.
- Less Demanding: The slow decomposition means fewer demands on your time and energy. Ideal if you’re busy or have mobility issues.
- Suitable for All Seasons: It works through Canadian winters. While decomposition slows down significantly in freezing temperatures, your materials are safely stored, ready to break down when things warm up again.
- Reduces Waste: It’s a fantastic way to divert a significant amount of organic waste from landfills.
- Creates Great Soil Amendment: The finished product, while taking longer, is rich in organic matter and beneficial for your garden.
What You Can (and Can’t) Compost the Cold Way
The beauty of cold composting is its flexibility. However, knowing what to include and what to avoid will help you get the best results without any potential issues.
Go Ahead and Compost These:
- Kitchen Scraps: Fruit and vegetable peels, coffee grounds and filters, tea bags, eggshells (crushed).
- Yard Waste: Grass clippings (in thin layers to avoid matting), leaves, small twigs, garden prunings (chopped up if possible), straw, hay.
- Paper and Cardboard: Plain newspaper (shredded), non-glossy junk mail, paper towels, cardboard (torn into small pieces).
- Other: Untreated sawdust (from untreated wood), natural fibres like cotton or wool scraps.
Best to Leave These Out:
- Meat, Fish, and Dairy: These can attract pests (rodents, flies) and create unpleasant odours.
- Oily or Greasy Foods: Similar to meat and dairy, they attract pests and can slow down decomposition.
- Diseased Plants: To avoid spreading plant diseases in your garden.
- Weeds with Seed Heads: Cold composting doesn’t get hot enough to kill weed seeds.
- Pet Waste: From cats and dogs, as it can contain pathogens.
- Treated Wood or Sawdust: Chemicals can leach into your compost.
- Glossy Paper or Cardboard: Inks and coatings can be problematic.
- Coal or Charcoal Ash: Can contain harmful substances.
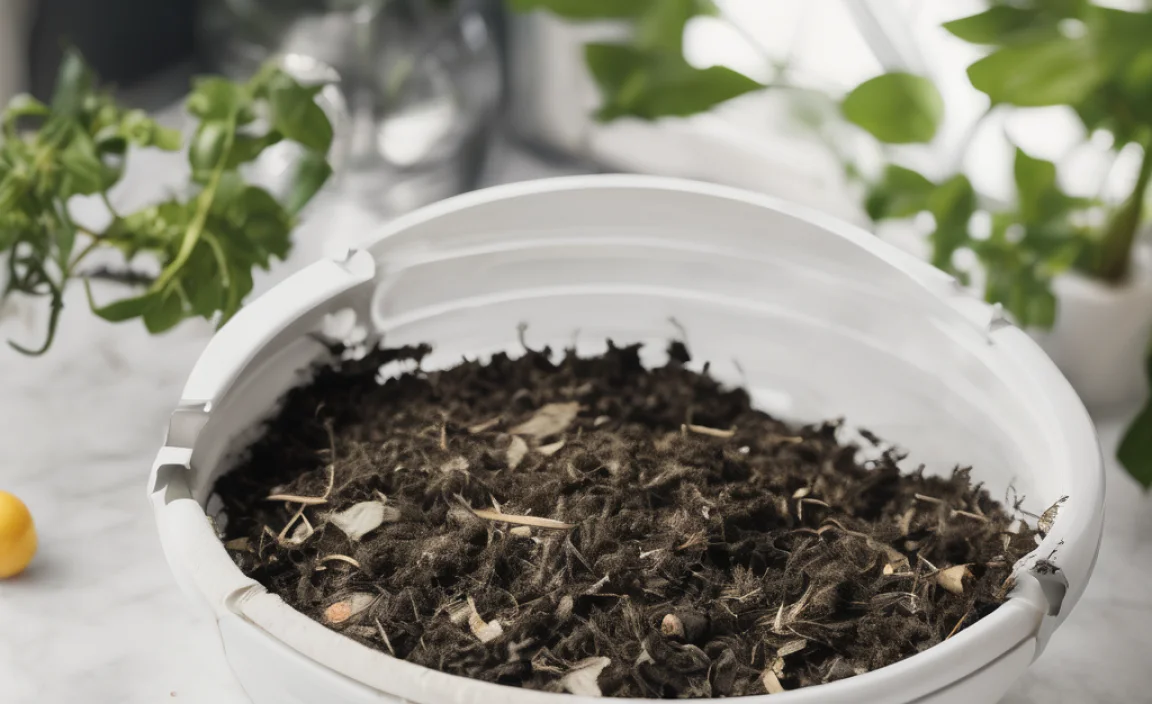
Setting Up Your Cold Compost Bin in Canada
You don’t need much to get started. The most important thing is a space to put your compostable materials. Here are a few options for Canadian gardeners:
Choosing Your Composting System
There are several ways to go about it, from a simple pile to a dedicated bin. For cold composting, simplicity is key.
- The Simple Pile: The easiest method. Just find a spot in your yard, preferably with good drainage and partial shade, and start layering your materials. It’s the most straightforward and requires no upfront cost for a bin.
- Wire Mesh Bin: Easy to build yourself. You can create a cylinder or a square using chicken wire or hardware cloth. This allows for good airflow. A common size is about 3x3x3 feet (1 meter x 1 meter x 1 meter), which is large enough to hold a decent volume without being overwhelming.
- Wooden Pallet Bin: A popular DIY option in Canada, often using free salvaged pallets. You can create a three- or four-sided bin. Angle and screw four pallets together to form a box. Ensure there are gaps for air circulation.
- Purchased Compost Bin: Many garden centres sell plastic compost bins. Some are designed for cold composting, while others are meant for hot composting, but any static bin works for cold methods. Look for one with a lid to help manage moisture and deter pests.
Where to Put Your Cold Compost Bin
Location matters, even for cold composting:
- Accessibility: Make sure it’s easy to get to with your kitchen scraps and yard waste.
- Drainage: Choose a spot that doesn’t get waterlogged. If your yard is always damp, consider a pallet bin or a raised bin.
- Sunlight: Partial shade is ideal. Too much direct sun can dry out the pile, while deep shade might keep it too damp.
- Proximity: Not too close to your house or neighbours, just in case of any minor odour issues, though cold composting is usually odour-free if balanced.
The Cold Composting Recipe: Layers are Key!
While cold composting is “low-effort,” a little attention to layering will speed things up and ensure better quality compost. Think of it as giving your decomposition crew the best building materials.
Understanding Greens and Browns
The magic of composting, hot or cold, lies in balancing nitrogen (greens) and carbon (browns). This isn’t an exact science for cold composting, but aim for a good mix.
- Greens (Nitrogen-Rich): These are usually moist and will provide the nitrogen that microbes need to reproduce and break down material. Examples: fruit and vegetable scraps, coffee grounds, grass clippings.
- Browns (Carbon-Rich): These are usually dry and provide the carbon source for energy and bulk. They also help with aeration. Examples: dried leaves, straw, shredded newspaper, small twigs.
Layering Your Compost Pile
The easiest way to build your cold compost pile is by layering. Start with a base layer, then alternate greens and browns.
- Base Layer: Start with a 4-6 inch (10-15 cm) layer of coarse brown material like small twigs or straw at the bottom. This helps with drainage and airflow from the start.
- Alternating Layers: Add your kitchen scraps (greens) and yard waste (browns) in alternating layers. A good rule of thumb is to aim for roughly two parts browns to one part greens by volume. Don’t worry about perfection; just try to get a mix.
- Smaller Pieces Break Down Faster: Chop up larger materials like branches or tough vegetable peels if you can. This increases the surface area for microbes to work on.
- Moisture is Important: Your compost pile should be as damp as a wrung-out sponge. If it’s too dry, decomposition slows way down. If it’s too wet, it can get slimy and anaerobic (lacking oxygen), leading to bad smells. You can sprinkle water on dry layers as you add them, especially if you’re adding a lot of dry browns.
- Bury Food Scraps: To deter pests and reduce the chance of odours, bury fresh kitchen scraps in the middle of the pile, under a good layer of browns.
What About Turning?
The beauty of cold composting is that you don’t need to turn it. This is the “cold” part of cold composting – it’s a passive process. However, if you want to speed things up slightly, you can give it a turn every few months with a pitchfork. This helps introduce some oxygen and mix the materials, but it’s entirely optional. For the truly effortless approach, just keep adding materials and let nature do its thing.
Troubleshooting Common Cold Composting Issues
Even with the effortless approach, you might run into a few hiccups. Here’s how to fix them:
Odour Problems
If your compost pile smells bad (like rotten eggs or ammonia), it’s usually a sign that it’s too wet and lacking oxygen, or there’s too much green material.
Solution: Add more brown materials like shredded cardboard, dry leaves, or straw. If it’s overly wet, turn it to help it dry out and aerate. Ensure you’re burying food scraps well.
Pests Attracted to the Pile
Rats, raccoons, or flies can sometimes find your compost pile appealing, especially if you’re adding meat, dairy, or greasy foods (which you shouldn’t be doing!).
Solution: Ensure you are only composting approved materials. Burying food scraps deep within the pile and covering them with browns is crucial. A bin with a secure lid can also help. If pests are persistent, consider a compost tumbler or a digester system.
The Pile Isn’t Breaking Down
If your compost pile seems like it’s just sitting there, it might be too dry, lack nitrogen, or the pieces are too large.
Solution: Check for moisture and add water if it’s dry. If you’ve only been adding browns, mix in some greener materials like grass clippings or kitchen scraps. Chop larger items into smaller pieces.
Too Much Green, Not Enough Brown
If your pile feels dense, slimy, and smells like ammonia, you’ve probably added too much nitrogen (greens).
Solution: Add a generous amount of brown materials – plenty of dry leaves, shredded paper, or straw. Mix them in as best you can.
When is Cold Compost Ready?
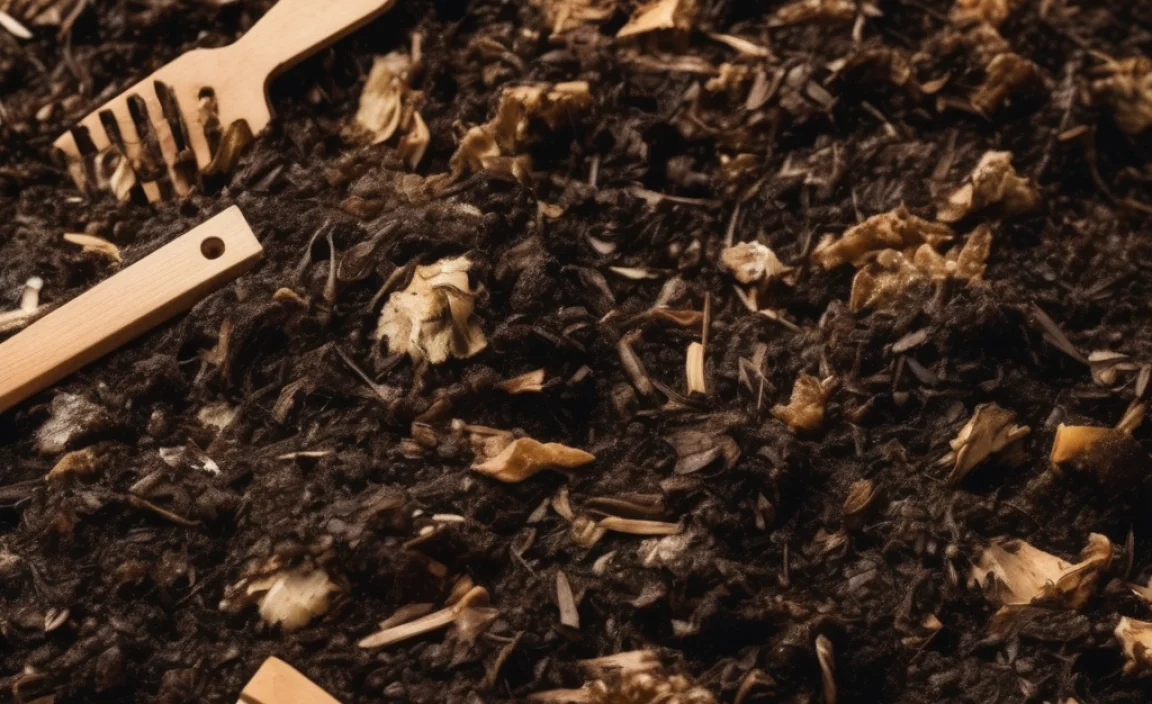
This is where patience comes in. The best indicator for cold compost readiness is its appearance and texture. It should be:
- Dark brown and crumbly.
- Look and smell earthy, like forest soil.
- You shouldn’t be able to recognize the original materials you put in (except maybe a few larger woody bits).
Because it’s a slow process, it can take anywhere from 6 months to 2 years to be ready. You can harvest compost from the bottom of your pile if you’re using a bin with an open bottom, while newer materials continue to break down on top.
How to Use Your Finished Compost
Once your cold compost is ready, it’s a gardener’s best friend! It’s essentially black gold for your plants.
- Soil Amendment: Mix it into your garden beds before planting. It improves soil structure, helping sandy soils retain moisture and clay soils drain better.
- Top Dressing: Spread a layer around existing plants, trees, and shrubs. This feeds them slowly and helps retain soil moisture.
- Potting Mix: Combine it with other ingredients like perlite or vermiculite to create a rich potting mix for containers and hanging baskets.
- Lawn Dressing: Lightly rake a thin layer over your lawn in the spring or fall to improve soil health and grass vitality.
Cold Composting vs. Hot Composting in Canada
It’s helpful to see how cold composting stacks up against its more energetic sibling, hot composting, especially for Canadian conditions.
| Feature | Cold Composting | Hot Composting |
|---|---|---|
| Effort Level | Low (minimal turning) | High (requires regular turning, moisture, and green/brown balance) |
| Speed | Slow (6 months to 2+ years) | Fast (1-3 months) |
| Temperature | Ambient (cool) | High (130-160°F / 54-71°C) |
| Weed Seeds & Pathogens | Generally not killed | Killed by high heat |
| Ideal for Canada | Excellent due to low maintenance and seasonal flexibility | Can be challenging with very cold winters; requires more active management |
| Skill Level | Beginner | Intermediate to advanced |
For most Canadian homeowners looking for a simple, sustainable way to manage organic waste, cold composting is typically the more achievable and less demanding choice. If you need compost fast* or are battling persistent weeds and diseases, hot composting might be worth the extra effort, but cold composting is the ultimate “set it and forget it” garden solution.
Resources to Help You Compost
Need a bit more info or want to explore some specific tools? Here are some helpful resources that can guide your composting journey in Canada:
- Government of Canada’s Waste Reduction Tips: For broader insights into reducing household waste, check out Environment and Climate Change Canada’s waste reduction guides. They don’t focus solely on composting but offer a great overview of sustainable living practices.
- Your Local Municipality’s Website: Many Canadian cities and towns offer specific composting guides, workshops, or even subsidized compost bins for residents. Search for “[Your City/Town Name] composting” to find local resources.
- Gardening Forums and Communities: Websites like the Growing Green forum or similar Canadian gardening groups often have discussions and tips from fellow gardeners facing similar climate challenges.
Your Effortless Cold Compost Journey Awaits!
See? Cold composting in Canada doesn’t have to be intimidating. It’s a patient, reliable way to transform your kitchen scraps and yard debris into nutrient-rich compost for your garden. You don’t need fancy gadgets or heaps of free time. Just a willingness to start and a little bit of space.
By following these simple steps – choosing a spot, layering your greens and browns, and letting nature work its magic – you’ll be enjoying the benefits of your own homemade compost before you know it. So, gather those coffee grounds, those wilting lettuce leaves, and those fallen leaves. Your garden, and the planet, will thank you for it. Happy composting!

I am passionate about home engineering. I specialize in designing, installing, and maintaining heating, ventilation, and air conditioning systems. My goal is to help people stay comfortable in their homes all year long.