Feeling a bit overwhelmed by kitchen scraps and garden waste? You’re not alone! Many of us want to do our bit for the planet and create amazing compost for our gardens, but it can seem complicated. Don’t worry, there’s a super simple way to turn that waste into garden gold. It’s called cold composting, and we’ll guide you through it, step-by-step, making it easy for anyone in South Africa to get started.
Cold Composting in South Africa: Your Essential Beginner’s Guide
Hey everyone, Troy D Harn here from TopChooser! If you’ve ever looked at your food scraps and thought, “There has to be a better way than just chucking this in the bin,” then you’re in the right place. Composting might sound like a job for expert gardeners, but it’s actually one of the easiest and most rewarding DIY projects you can undertake. And guess what? South African conditions are pretty forgiving, making it a great place to start composting. We’re going to break down cold composting – the no-fuss, slow-and-steady approach – so you can transform your waste into nutrient-rich food for your soil without breaking a sweat.
Cold composting is perfect for beginners because it requires minimal effort and attention. You just pile things up, and nature does the rest. It’s a fantastic way to reduce landfill waste, improve your soil fertility, and save money on garden amendments. We’ll cover everything you need to know, from what materials to use to how to set up your very own compost pile, right here in South Africa.
What Exactly is Cold Composting?
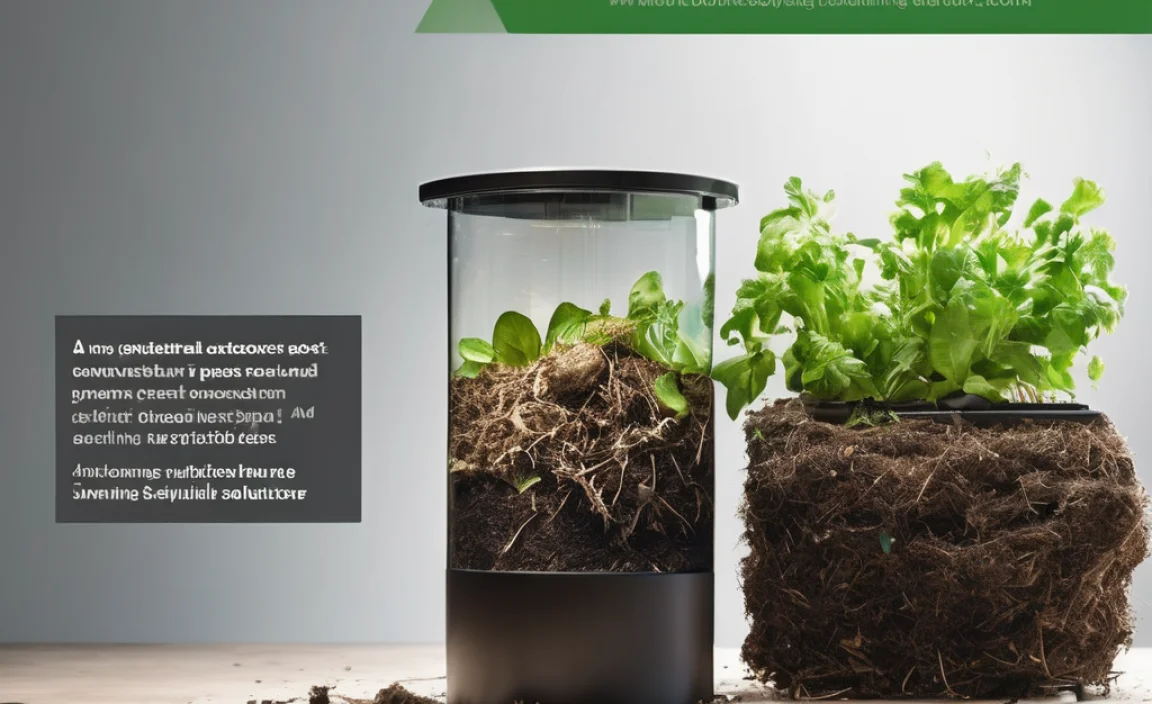
Think of cold composting, also known as lazy or passive composting, as the “set it and forget it” method of making compost. Unlike hot composting, which speeds up the process by carefully balancing materials and maintaining high temperatures, cold composting is all about patience. You simply layer your ‘greens’ (nitrogen-rich materials like kitchen scraps) and ‘browns’ (carbon-rich materials like dry leaves and cardboard) in a pile or bin. The microorganisms, fungi, and bacteria will eventually break down the organic matter over a much longer period – think months, not weeks.
The beauty of this method lies in its simplicity. It doesn’t require turning the pile regularly or precise temperature checks. It’s perfect for those who are new to composting, have busy schedules, or simply want a low-effort way to recycle organic waste. While it takes longer to produce finished compost, the end result is still valuable humus that will make your garden sing.
Why Choose Cold Composting for Your South African Garden?
South Africa’s diverse climate, from the humid subtropical east coast to the arid interior, can be managed with the right approach to composting. Cold composting is forgiving of slight variations in moisture and temperature, making it adaptable to many regions. Here’s why it’s a smart choice:
- Low Effort: No turning, no fuss. Just add materials as you get them.
- Cost-Effective: Utilises free materials from your kitchen and garden.
- Waste Reduction: Diverts significant amounts of organic waste from landfills.
- Soil Improvement: Creates a rich soil amendment that improves drainage, aeration, and water retention.
- Adaptable: Works well in most South African climates, requiring less precise management.
- Natural Fertiliser: Provides essential nutrients for your plants, reducing the need for chemical fertilisers.
What You Can (and Can’t!) Compost
The key to successful composting, even the cold kind, is understanding what goes into the pile. A good mix of “greens” and “browns” is essential. Greens provide nitrogen and moisture, while browns offer carbon and structure.
“Greens” – Nitrogen-Rich Materials:
- Fruit and vegetable scraps
- Coffee grounds and tea bags
- Grass clippings (in thin layers to avoid matting)
- Plant trimmings (soft, green growth)
- Eggshells (crushed)
“Browns” – Carbon-Rich Materials:
- Dry leaves
- Straw or hay
- Shredded newspaper or cardboard (avoid glossy paper and coloured inks)
- Wood chips or sawdust (from untreated wood, in moderation)
- Small twigs and dead plant stalks
- Paper towel and toilet paper rolls (torn into small pieces)
What to Avoid:
- Cooked food (especially meats, dairy, and oily foods) – can attract pests and create odours.
- Diseased plants – can spread pathogens.
- Weeds that have gone to seed – you might spread them to your garden.
- Pet waste (from carnivorous animals like dogs and cats) – can contain harmful pathogens.
- Treated wood or sawdust.
- Plastic, metal, glass, and synthetic materials.
- Citrus peels and onion skins in very large quantities – they can slow down decomposition if not balanced.
A good rule of thumb is to aim for roughly equal parts greens and browns by volume, though with cold composting, nature is more forgiving. You can also chop larger items into smaller pieces to help them break down a bit faster.
Setting Up Your Cold Compost Pile in South Africa
You don’t need fancy equipment to start cold composting. You can choose between a simple pile or a compost bin. Both have their advantages, and the best choice depends on your space and preferences.
Option 1: The Simple Compost Pile
This is the easiest method. All you need is a designated spot in your garden.
- Choose a Location: Find a spot that’s easily accessible, has good drainage, and receives some sunlight. A partially shaded spot is often ideal in hotter regions to prevent it from drying out too quickly. Ensure it’s not too close to your house or neighbours’ property to avoid any potential (though unlikely with cold composting) odours or aesthetic concerns. Aim for a spot on bare earth if possible, as this allows beneficial soil organisms to enter the pile.
- Start with a Base Layer: Begin with a layer of bulky, coarse brown materials like twigs, straw, or wood chips. This helps with aeration and drainage, preventing the bottom of the pile from becoming a soggy mess. A layer about 10-15 cm (4-6 inches) thick is good. This is also where you can add a spadeful of garden soil to introduce microorganisms that kickstart the decomposition process.
- Layer Your Greens and Browns: Alternate layers of “greens” and “browns.” A common ratio is about one part greens to two or three parts browns, but don’t get too caught up in exact measurements for cold composting. It’s more about creating a mix. For example, add a thick layer of kitchen scraps (greens), then cover it with a layer of dry leaves or shredded cardboard (browns).
- Continue Layering: Keep adding materials as you generate them. Try to bury kitchen scraps within the pile to deter pests and reduce odours. Always try to finish with a layer of browns on top.
- Moisture is Key: Your compost pile should be as damp as a wrung-out sponge. If it’s too dry, decomposition will slow down significantly. If it’s too wet, it can become anaerobic and smelly. You can add water gently with a hose if it’s dry, or add more dry brown materials if it’s too wet. South African weather can be unpredictable, so keep an eye on it, especially during dry spells or heavy rains.
Option 2: Using a Compost Bin
Compost bins can help keep things tidy, retain moisture better, and may look neater in your garden. You can buy them or even build one yourself.
Types of Bins:
- Stationary Bins: These are often made of plastic, wood, or wire mesh. They are typically open at the top and sometimes have a door at the bottom for harvesting finished compost.
- Tumbler Bins: These have a drum that rotates, making turning easier. While this is more suited to hot composting, you can still use them for cold composting, though the turning aids decomposition.
Setting up a Bin:
- Placement: Choose a convenient, well-drained spot, ideally on bare earth to allow worms and micro-organisms to enter.
- Start Layering: Begin with a layer of coarse brown material at the bottom for aeration, just like with a pile.
- Add Materials: Continue layering your kitchen scraps (greens) and garden waste (browns) as you accumulate them.
- Maintain Moisture: Check the moisture level regularly – the contents should feel like a damp sponge. Adjust with water or brown materials as needed.
Tools You Might Find Handy
While cold composting is simple, a few basic tools can make the process a bit easier:
- Garden Fork or Pitchfork: Useful for turning or aerating the pile occasionally (though not strictly necessary for cold composting).
- Shovel: For moving materials around and for harvesting finished compost.
- Garden Gloves: To keep your hands clean.
- Watering Can or Hose: To keep the pile moist.
- Pruning Shears or Garden Scissors: To chop up larger materials into smaller pieces, speeding up decomposition.
- Kitchen Caddy: A small bin kept in your kitchen to collect food scraps before taking them to the main compost pile.
Don’t feel like you need to buy everything at once! Start with what you have, and see what works best for you. Many South Africans create effective compost solutions with minimal investment.
Cold Composting vs. Hot Composting: A Quick Comparison
It’s helpful to understand the difference, even if you’re sticking to cold composting. This table highlights the main distinctions:
| Feature | Cold Composting (Passive) | Hot Composting (Active) |
|---|---|---|
| Speed of Decomposition | Slow (6 months to 2 years) | Fast (1-3 months) |
| Effort Required | Minimal (no turning, minimal monitoring) | High (regular turning, precise moisture and C:N ratio monitoring) |
| Temperature | Ambient or slightly warmer | High (55-70°C or 130-160°F) |
| Microbial Activity | Slower-acting microbes, fungi, and invertebrates | Thermophilic (heat-loving) bacteria dominate |
| Materials | Less strict on ratios, but avoid problematic items | Requires careful balancing of greens & browns (approx. 25-30:1 Carbon to Nitrogen ratio) |
| Best For | Beginners, busy people, those with lots of space, less effort | Experienced composters, those needing compost quickly, large volumes of waste |
As you can see, cold composting is the hands-off approach that suits most beginners and busy lifestyles. The “hot” composting method is a different beast altogether, requiring more knowledge and daily intervention.
Troubleshooting Common Cold Composting Issues in South Africa
Even with the simple cold composting method, you might run into a few hitches. Here are some common problems and how to fix them:
Issue 1: The Pile is Smelly
Possible Cause: Too many “greens” (high nitrogen) or the pile is too wet, leading to anaerobic conditions. Food scraps buried incorrectly can also contribute.
Solution: Add more “browns” like dry leaves, shredded cardboard, or straw to absorb excess moisture and balance the carbon-to-nitrogen ratio. Gently turn or fluff the pile with a fork to improve air circulation. Ensure kitchen scraps are adequately covered with brown material.
Issue 2: The Pile Isn’t Breaking Down / Seems Dry
Possible Cause: Too many “browns” (high carbon), or the pile is too dry. In hotter, drier South African climates, this is common.
Solution: Add more “greens” like fruit and vegetable scraps or grass clippings. Water the pile thoroughly. A good indication of proper moisture is that the materials should feel like a damp, wrung-out sponge. You might need to water it more frequently during hot, dry spells.
Issue 3: Attracting Unwanted Pests (e.g., Flies, Rodents)
Possible Cause: Exposed food scraps, or including forbidden items like meat, dairy, or oily foods.
Solution: Always bury fresh kitchen scraps deep within the pile and cover them with a layer of brown material. Avoid adding meat, dairy, bones, and oily foods as these are highly attractive to pests. Using a compost bin with a lid can also help deter pests.
Issue 4: The Pile is Too Compacted
Possible Cause: Adding too much of one material, like grass clippings, which can mat down and prevent airflow.
Solution: Gently turn or loosen the pile with a garden fork to introduce air. Chop up or shred larger materials before adding them to create a better mix.
When is Your Cold Compost Ready?
With cold composting, readiness is determined by appearance rather than a specific timeframe. Your compost is ready when:
- It’s dark brown and crumbly.
- It smells earthy and pleasant, like a forest floor.
- You can’t recognise the original items you put in (except maybe large woody bits, which can be sieved out or returned to the pile).
- It feels cool to the touch.
Remember, this can take anywhere from 6 months to 2 years, depending on the materials used, the climate, and whether you give it any occasional attention. Don’t rush it – the slow process allows beneficial fungi and earthworms to work their magic.
Using Your Finished Cold Compost
Once your “black gold” is ready, it’s time to reap the rewards! Finished compost is a fantastic soil improver and can be used in many ways:
- As a Soil Amendment: Dig it into your garden beds before planting or transplanting to improve soil structure, fertility, and water retention. A layer of 5-10 cm (2-4 inches) is usually sufficient for most garden beds.
- As a Top Dressing: Spread a thin layer around existing plants, shrubs, and trees to provide a slow release of nutrients and help retain soil moisture.
- In Potting Mixes: Mix compost with other ingredients like perlite, vermiculite, or coco peat to create a nutrient-rich potting mix for containers and seedlings. A common ratio is 1/3 compost, 1/3 soil, and 1/3 other amendments.
- For Lawns: Rake a thin layer (about 1 cm or 1/2 inch) over your lawn in spring or autumn to improve soil health and encourage stronger grass growth.
Using your own compost is incredibly satisfying and beneficial for your plants. It’s a true testament to turning waste into something valuable. For more on soil health and amendments in South Africa, resources like the Department of Agriculture, Land Reform and Rural Development’s soil fertility sections can offer valuable local insights.
Quick Tips for South African Composters
Here are a few extra pointers tailored for our unique South African environment:
- Manage Moisture Diligently: South Africa’s climate can swing from intense heat and drought to heavy summer rains. Always check your pile’s moisture. Shade your pile during the hottest months if possible, and ensure good drainage to prevent waterlogging.
- Embrace the Worms: Earthworms are your best friends in composting. If your pile is on bare earth, they will find it naturally. They help break down materials and aerate the pile.
- Chop it Up: While not essential for cold composting, chopping larger items (like tough stalks or thick cardboard) into smaller pieces will speed up the decomposition process.
- Be Patient: This is the golden rule of cold composting. Don’t expect quick results. Trust the process.
- Start Small: If space is limited or you’re unsure, start with a smaller bin or a modest pile. You can always scale up later.
Frequently Asked Questions About Cold Composting in South Africa
Q1: Does cold composting attract pests in South Africa?
A1: While cold composting is less prone to pests than hot composting, it can still attract them if not managed correctly. Always

I am passionate about home engineering. I specialize in designing, installing, and maintaining heating, ventilation, and air conditioning systems. My goal is to help people stay comfortable in their homes all year long.