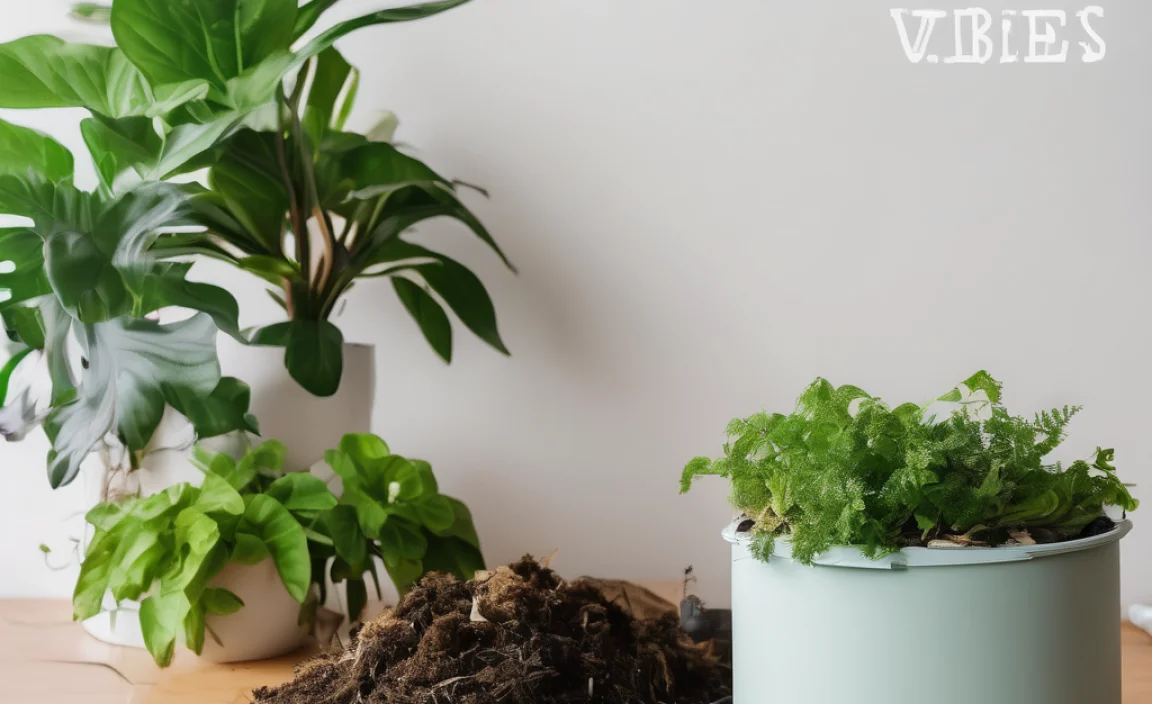
Tired of waiting ages for your compost to break down, especially when you’re trying to keep things tidy in your urban space? It can feel like a slow, frustrating process. You’ve got kitchen scraps and yard trimmings, and you want rich, healthy soil for your garden or potted plants, but nature seems to be on its own schedule. Well, good news! There are smart, simple ways to speed things up, even in the city. We’re going to break down exactly how to make your compost happen faster, effortlessly.
Compost Accelerator Urban: Genius Effortless Results
Hey there, neighbor! Troy D Harn here from TopChooser. So, you’re looking to speed up your composting game, especially if you’re dealing with limited space in an urban setting? You’re in the right spot. Composting is fantastic for reducing waste and creating amazing food for your plants. But let’s be honest, sometimes it feels like it takes forever. Good news! Using a compost accelerator can be your secret weapon for faster, more efficient composting. We’ll cover everything you need to know, from what they are to how to use them for genius, effortless results.
What Exactly is a Compost Accelerator?
Think of a compost accelerator as a turbo-boost for your compost bin. In simple terms, it’s a product or material that helps speed up the natural decomposition process of organic matter. This means your kitchen scraps, yard waste, and other compostable materials break down much faster into nutrient-rich compost.
These accelerators work by introducing or encouraging the right kind of microorganisms (like bacteria and fungi) and enzymes that are crucial for composting. Essentially, they give the “compost party” a jump-start and keep it lively.
Why Use a Compost Accelerator in an Urban Setting?
Living in a city or a smaller urban home often means you have a smaller compost bin, or perhaps you’re more conscious of smells and pests. Accelerators can be a game-changer for several reasons:
- Speed: This is the main draw! They can significantly cut down the time it takes to get usable compost, sometimes by weeks or even months.
- Efficiency: Faster decomposition means your bin fills up and becomes ready for use more quickly.
- Odor Control: Many accelerators help balance the “greens” and “browns” in your compost pile, which is key to preventing unpleasant smells associated with decomposition. This is a huge plus for urban dwellers concerned about their neighbors.
- Pest Reduction: A well-balanced and fast-composting pile is less attractive to pests.
- Space Saving: Since your compost breaks down faster, you might not need as large a bin as you would for traditional, slower composting methods.
Types of Compost Accelerators for Urban Gardeners
When you’re looking for that compost accelerator urban solution, you’ll find a few main types. Each has its own benefits and how it works:
1. Commercial Compost Accelerators (Powders, Liquids, Pellets)
These are the most common pre-made options you’ll find. They are usually blends of beneficial microorganisms, enzymes, and sometimes nutrients that kickstart the composting process.
- What they contain: Typically, these products contain dormant bacteria and fungi, or strains specifically bred to break down organic matter quickly. Some might also include nitrogen boosters to feed the microbes.
- How to use them: You usually sprinkle the powder, pour the liquid, or spread the pellets onto your compost pile’s layers, especially when you add new materials. The instructions on the packaging are usually very straightforward.
- Pros: Easy to use, reliable, specifically formulated for composting.
- Cons: Can be an ongoing expense.
2. Natural Accelerators
You don’t always need to buy something. Nature provides materials that can naturally speed up your compost pile.
- High-Nitrogen Materials (“Greens”): Things like fresh grass clippings, coffee grounds, tea bags, and fresh vegetable scraps are packed with nitrogen. Microbes love nitrogen because it helps them grow and multiply rapidly. This is crucial for breaking down the carbon-rich “browns.”
- Manure (well-aged): Composted manure from herbivores (like chickens, rabbits, cows, horses) is loaded with beneficial microbes and nitrogen. Make sure it’s well-rotted; fresh manure can be too “hot” and may contain pathogens or weed seeds.
- Comfrey or Stinging Nettle: These plants are rich in nitrogen and other nutrients. Chopping them up and adding them to your pile can give it a good boost.
- How to use them: Simply add these materials as part of your regular compost layering. Aim for a good balance!
- Pros: Often free or very low cost, readily available, completely natural.
- Cons: Requires a bit more knowledge to balance your compost ingredients.
3. Aeration Tools
While not a direct “accelerator” in terms of adding microbes, proper aeration is absolutely critical for fast composting. It ensures oxygen reaches the microbes, allowing them to work efficiently. Oxygen-fed (aerobic) composting is much faster and less smelly than anaerobic composting.
- What they are: These can range from simple compost aerator tools (which look like corkscrews) to more involved methods like turning your compost pile with a pitchfork. Some bins even have built-in ventilation systems.
- How to use them: Regularly poke or turn your compost pile. This is especially important if you have a tightly packed urban bin where air circulation might be limited.
- Pros: Essential for healthy composting, helps prevent odors, relatively low cost for simple tools.
- Cons: Requires physical effort.
The Science Behind Speeding Up Compost
Composting is fundamentally a biological process. Microorganisms, primarily bacteria and fungi, do the heavy lifting. They consume the organic material, breaking it down into simpler compounds. This process releases heat, carbon dioxide, and water, eventually forming humus – the rich, dark material we call compost.
To make this process happen faster, you need to create the ideal environment for these microbes:
- Food: A good mix of “greens” (nitrogen-rich) and “browns” (carbon-rich).
- Oxygen: Aerobic decomposition is much faster and cleaner than anaerobic.
- Moisture: The pile should be damp, like a wrung-out sponge, but not waterlogged.
- Temperature: If designed for it, the pile will heat up, which speeds up microbial activity.
Compost accelerators (commercial or natural) primarily help by:
- Introducing more active microbes: Giving the existing population a massive boost.
- Providing readily available nutrients: Especially nitrogen, which is often the limiting factor in a compost pile.
- Enhancing enzyme activity: Enzymes are biological catalysts that speed up chemical reactions, such as the breakdown of complex organic molecules.
For a more in-depth look at the science of decomposition, the EPA provides excellent resources on composting basics, explaining the role of micro-organisms and the environmental factors involved.
Step-by-Step: Using a Compost Accelerator for Effortless Results
Let’s get practical. Here’s how to use a compost accelerator to get those genius, effortless results, whether you’re using a small tumbler, a bin, or even just a pile in a corner.
Step 1: Choose Your Accelerator (and Compost Bin)
Decide if you want to go with a commercial product or rely on natural materials. For a beginner, a commercial accelerator is often the easiest way to get started and see quick results. Pair this with a bin suitable for your urban space. Tumblers are great for small spaces because they can be rotated easily and tend to heat up well.
Step 2: Gather Your Compostable Materials
You need a good mix of “greens” and “browns”:
- Greens (Nitrogen-rich):
- Fruit and vegetable scraps
- Coffee grounds and tea bags
- Grass clippings (in moderation)
- Plant trimmings (non-woody)
- Browns (Carbon-rich):
- Dry leaves
- Shredded newspaper and cardboard (avoid glossy or colored ink)
- Straw or hay
- Small twigs and wood chips
Pro Tip for Urban Gardeners: Chop larger items into smaller pieces. This increases surface area, making it easier for microbes to break them down.
Step 3: Build Your Compost Layers
Start with a layer of coarse brown material at the bottom for drainage and aeration. Then, alternate layers of greens and browns. A good general ratio is about 2 parts browns to 1 part greens.
Step 4: Add the Accelerator!
- For Commercial Accelerators: Follow the product’s instructions precisely. Usually, you’ll sprinkle it over a new layer of added compostables, or mix it in. For example, a powder might be sprinkled on top of a fresh batch of kitchen scraps.
- For Natural Accelerators: If using fresh grass clippings or manure, simply incorporate them as one of your “green” layers. If using chopped comfrey or nettles, mix them in.
Step 5: Ensure Proper Moisture
Your compost pile should be as moist as a wrung-out sponge. If it feels dry, add some water. If it’s too wet, add more brown materials. This balance is crucial for microbial activity.
Step 6: Aerate Regularly
This is non-negotiable for fast composting. Depending on your bin:
- Tumbler: Rotate the tumbler a few times every few days.
- Stationary Bin: Use a compost aerator tool to poke holes throughout the pile, or turn the pile with a pitchfork every week or two.
Regular aeration brings oxygen to the microbes working at the center of the pile and helps release heat and moisture.
Step 7: Patience (but less of it!)
Even with an accelerator, composting takes time. However, you should notice your pile heating up, reducing in volume more quickly, and developing a rich, earthy smell much faster than without an accelerator. Depending on the method, materials, and accelerator used, you could have usable compost in as little as 4-6 weeks, though 2-3 months is more typical for great results.
What Not to Compost
To ensure your compost is safe and effective, and to avoid attracting pests or creating odors, there are certain things you should keep out of your compost bin:
- Meat, fish, and bones
- Dairy products (cheese, yogurt, milk)
- Oily or greasy foods
- Diseased plants
- Weeds that have gone to seed
- Pet waste (dog or cat feces)
- Chemically treated yard waste
- Coal or charcoal ash
Keeping these items out is especially important in urban environments where pest and odor concerns can be more sensitive.
Comparing Compost Accelerators: A Quick Guide
To help you choose, here’s a quick look at what to expect when comparing some common approaches. Remember, the “best” one often depends on your setup and preferences.
| Accelerator Type | Ease of Use | Speed of Results | Cost | Best For |
|---|---|---|---|---|
| Commercial Powders/Liquids | Very Easy | Fast (4-8 weeks for mature compost) | Moderate (ongoing purchase) | Beginners, busy people, those wanting guaranteed quick results. |
| Aged Manure | Easy (if sourced) | Fast (enhances natural breakdown) | Low to Moderate (if purchased) | Gardeners with access to suitable manure, looking for organic boosts. |
| Grass Clippings/Kitchen Scraps (as “greens”) | Easy (part of regular adds) | Moderate (depends on balance) | Free | Anyone with consistent green waste, needs good brown material balance. |
| Comfrey/Nettles | Moderate (requires foraging/growing) | Moderate (good nutrient boost) | Free | DIY enthusiasts, those in rural-adjacent urban areas. |
Troubleshooting Common Composting Issues
Even with an accelerator, sometimes issues pop up. Here’s how to fix them:
- Smelly Pile: Usually means too much nitrogen (“greens”) or not enough air. Add more “browns” (like shredded paper, dry leaves) and turn the pile thoroughly to aerate it.
- Pile Not Heating Up: Could be too dry, too small, or not enough nitrogen. Check moisture, add more “greens,” or combine smaller piles.
- Pests (Flies, etc.): Often due to exposed food scraps or the presence of forbidden items (meat, dairy). Bury food scraps deeper in the pile, maintain a good green-to-brown ratio, and ensure the lid is secure if you have one.
- Slow Decomposition (Even with Accelerator): Double-check moisture levels and aeration. Ensure materials are chopped small enough. Sometimes it just needs a bit more patience or a stronger dose of greens.
Remember, composting is a forgiving process. Don’t get discouraged if you hit a snag. A bit of adjustment usually gets things back on track.
The Environmental Benefits of Faster Composting
Composting itself is fantastic for the environment. It diverts waste from landfills, where it produces methane (a potent greenhouse gas). It also creates a nutrient-rich soil amendment that improves soil health, reduces the need for synthetic fertilizers, and helps soil retain moisture, which is beneficial during dry spells.
By using a compost accelerator urban solution like one of these, you’re amplifying those benefits. Faster composting means:
- Less material sitting in bins for long periods.
- More efficient use of your bin space.
- Quicker return of valuable organic matter to your garden or houseplants.
- A more streamlined way to participate in a sustainable practice.
Initiatives like the EPA’s composting at home program highlight how individual actions contribute to broader environmental goals. Accelerators just make it more accessible and rewarding, faster.
FAQ: Your Compost Accelerator Questions Answered
Q1: How often should I add compost accelerator?
For commercial accelerators, follow the product’s instructions. Often, you add a dose when you introduce a significant amount of new material (like kitchen scraps) or at regular intervals (e.g., every 1-2 weeks) until the pile is established. For natural accelerators like grass clippings, they are added as part of your regular compost layering.
Q2: Can I use too much compost accelerator?
While not usually harmful, using excessive amounts of commercial accelerators isn’t typically necessary and can be wasteful. Natural accelerators, like adding too much fresh grass clipping (greens), can lead to an overly wet, smelly pile. It’s about balance and following recommended ratios.
Q3: Do I still need to turn my compost if I use an accelerator?
Absolutely! Accelerators speed up the microbial activity, but those microbes need oxygen. Regular turning or aeration ensures oxygen reaches all parts of the pile, preventing anaerobic conditions (which cause smells) and speeding up the process even further.
Q4: What’s the difference between a compost starter and a compost accelerator?
The terms are often used interchangeably. A “starter” typically aims to kickstart the decomposition by introducing microbes. An “accelerator” does the same but also often includes nutrients or enzymes designed to speed up the process even more aggressively than a basic starter. For all practical purposes in a home setting, they achieve a similar goal: faster composting.
Q5: My compost accelerator isn’t working. What should I do?
First, check the basics: Is your compost pile moist enough (like a wrung-out sponge)? Is it getting enough air? Make sure you have a good balance of greens and browns. Occasionally, an accelerator product might be old or compromised. If you’ve tried adjusting these factors, consider giving a different type of accelerator a try or focusing on perfect moisture and aeration.
Q6: Can I use compost accelerator in a worm bin (vermicomposting)?
Generally, commercial compost accelerators are not recommended for worm bins. Worm composting relies on a specific balance of microbes and the worms themselves. Adding commercial accelerators could potentially harm the worms or disrupt

I am passionate about home engineering. I specialize in designing, installing, and maintaining heating, ventilation, and air conditioning systems. My goal is to help people stay comfortable in their homes all year long.