Hey there! Ever look at your kitchen scraps and garden waste and wish they could turn into something useful instead of just ending up in the trash? You’re not alone! So many of us want to be a bit kinder to the planet and give our gardens a boost. Creating a healthy compost heap might seem tricky, but it’s totally doable, even right here inasia.
This guide is here to help you, no matter if you’re starting your first pile or trying to improve an existing one. We’ll walk through everything you need to know, step-by-step. Get ready to turn that waste into black gold for your plants!
Your Quick Summary: Building a Compost Heap in Asia
This guide offers a beginner-friendly approach to creating a compost heap in Asia. We’ll cover site selection, what materials to compost (greens and browns), how to layer them, maintaining moisture and aeration, and troubleshooting common issues. The goal is to create nutrient-rich compost for your garden, reducing waste and improving soil health. We emphasize practical, accessible methods suitable for various Asian climates and resources.
Why Compost? The Magic of Turning Waste into Gold
Composting is like a superpower for your home and garden. It’s an amazing way to reduce the amount of waste you send to the landfill. Think about all those fruit peels, vegetable scraps, coffee grounds, and yard trimmings – they can all be transformed! Instead of piling up and creating greenhouse gases in landfills, these organic materials break down naturally to create nutrient-rich compost. This “black gold” is a fantastic natural fertilizer for your plants. It improves soil structure, helps retain moisture, and provides essential nutrients, making your fruits, vegetables, and flowers grow healthier and stronger. Plus, it saves you money on store-bought fertilizers!
Choosing the Right Spot for Your Compost Heap
Picking the perfect spot for your compost heap is key to success. You want a place that’s convenient for you to access but also good for the composting process itself. Here’s what to consider:
- Accessibility: Make sure it’s easy to get to with your kitchen scraps and garden waste. You don’t want to trek across the whole yard every time you add something.
- Drainage: Your compost pile needs to be moist, but not waterlogged. Choose a spot that doesn’t collect puddles after it rains. A slightly raised area is ideal.
- Sunlight: A location that gets some sun can help warm the pile, which speeds up decomposition. However, too much direct, harsh sun, especially in hotter Asian climates, can dry out the pile too quickly. A spot with partial shade is often best.
- Airflow: Good air circulation is essential for the microbes that break down the waste. Avoid corners that are too enclosed or sheltered.
- Distance from Home: While a well-managed compost pile shouldn’t smell bad, it’s wise to keep it a reasonable distance from your main living areas, especially if you’re new to composting.
- Proximity to Water: You’ll need to water your compost pile occasionally, so being near a water source can be very handy.
In many parts of Asia, you might have limited space. Don’t worry! Even a small corner of your yard, a balcony, or a dedicated composting bin can work. If you’re in an apartment, consider worm composting (vermicomposting), which is perfect for smaller spaces and also uses kitchen scraps. You can find great resources on how composting works from the U.S. Environmental Protection Agency which provides general principles applicable anywhere.
What You Can (and Cannot) Compost: The Green and Brown Balance
The secret to a happy compost pile is getting the right mix of “green” and “brown” materials. Think of it like feeding a balanced diet to the tiny organisms doing the hard work!
Greens (Nitrogen-Rich Materials): Activators of the Pile
These are typically moist materials that provide nitrogen, which helps heat up the pile and feeds the microbes. They tend to break down quickly.
- Fruit andvegetable scraps
- Coffee grounds and tea bags
- Grass clippings (in moderation)
- Plant trimmings (non-woody)
- Manure from herbivores (like rabbits, chickens, cows, but avoid dog/cat waste)
- Seaweed (rinsed if very salty)
Browns (Carbon-Rich Materials): The Fuel for the Fire
These are usually dry, woody materials that provide carbon, which is the energy source for the microbes. They also help with airflow and prevent the pile from becoming too wet and slimy.
- Dry leaves
- Straw or hay
- Shredded newspaper and cardboard (avoid glossy or colored inks)
- Small twigs and wood chips
- Sawdust (from untreated wood)
- Eggshells (crushed)
- Paper towels and toilet paper rolls(unsoiled)
What to Keep Out of Your Compost Pile
Some things can cause problems, like attracting pests, spreading diseases, or containing harmful substances. It’s best to avoid:
- Meat, fish, and dairy products (attract pests and can smell bad)
- Oily or greasy foods
- Diseased plants
- Weeds that have gone to seed (they might sprout in your garden)
- Pet waste (from dogs and cats – can contain pathogens)
- Treated wood products
- Synthetic materials
- Large woody branches (unless chipped very small)
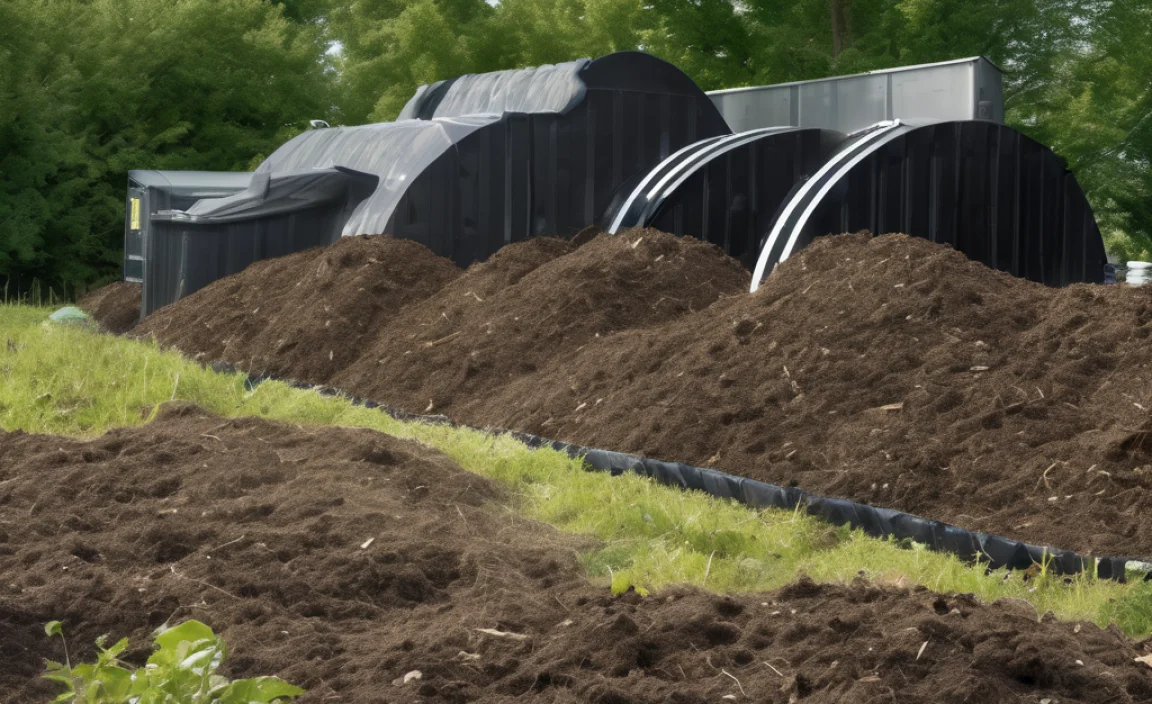
Building Your Compost Heap: Step-by-Step
Ready to start? Building your first compost heap is more straightforward than you might think. Here’s a simple way to begin:
-
Choose Your Method: Pile or Bin?
Open Pile: This is the simplest method. Just start piling your materials in your chosen spot. It’s easy to add to, but it might look a bit untidy and can dry out faster or get too wet from rain. It’s best contained within a simple enclosure of chicken wire or wooden pallets.
Compost Bin: You can buy ready-made compost bins (plastic or wooden) or build your own. Bins help contain the materials, retain moisture and heat, and look tidier. Many bins have lids to keep out excess rain and pests, and some have doors at the bottom for easy compost removal.
For beginners in Asia, a bin can be a great starting point. Many can be purchased affordably, or you can repurpose things like old plastic drums or wooden crates.
-
Start with a Base Layer
Begin by laying down a layer of coarse brown materials at the bottom, about 4-6 inches deep. This could be twigs, wood chips, or straw. This layer helps with drainage and allows air to circulate into the bottom of the pile.
-
Add Your Greens and Browns
Now, start adding your kitchen scraps (greens) and yard waste (browns). Aim for a good mix. A common recommendation is to have roughly two to three parts browns for every one part greens. You don’t need to measure perfectly; just try to layer them or mix them as you add them. You can alternate layers, like a layer of greens, then a layer of browns, and so on. Or, chop up your materials and mix them together.
Pro Tip: When you add kitchen scraps (greens), always cover them with a layer of brown material. This helps prevent odors and deter pests.
-
Chop It Up!
The smaller you chop or shred your materials, the faster they will break down. This is especially true for tougher brown materials like cardboard or twigs. You can use garden shears, a shredder, or even just tear them up by hand.
-
Keep it Moist
Your compost pile should be as damp as a wrung-out sponge. Not dripping wet, but not dry either. If the weather is dry or hot, you’ll need to water it regularly. If it’s very wet, add more brown materials to absorb the excess moisture.
A good way to check is to grab a handful of compost. If a few drops of water come out when you squeeze it, it’s just right. If it’s dry, water it thoroughly. If it’s muddy and slimy, add dry leaves or shredded cardboard.
-
Aerate Your Pile (Turn it!)
The microorganisms need oxygen to do their work. Turning the pile helps introduce air. You can use a garden fork or a compost aerator tool. Aim to turn your pile every few weeks, or at least once a month. Mix the outer layers into the center and the center layers to the outside.
If you have a tumbling composter, just give it a few turns every few days. If you have a simple pile or bin, turning is essential for faster results.
Maintaining Your Compost Heap: The Ongoing Care
Once your heap is built, a little regular attention will keep it working efficiently. Think of it as a living system that needs care.
Moisture Management
This is crucial. Too dry, and the microbes slow down or go dormant. Too wet, and you’ll get anaerobic conditions, leading to foul odors and slow decomposition. Check the moisture level weekly. If it feels dry, water it. If it’s soggy, add more brown materials and turn the pile to help it dry out.
Aeration (Turning)
As mentioned, turning your pile introduces oxygen. How often you turn depends on how quickly you want compost. For faster compost (a few months), turn it every 1-2 weeks. For a slower, more hands-off approach (6-12 months), turning once a month or even less might be sufficient.
Adding New Materials
You can continuously add new kitchen scraps and yard waste to your compost. Bury fresh kitchen scraps in the middle of the pile or under a layer of browns to help them break down faster and reduce odors or pest attraction. If you have a multi-bin system, you can have one bin for active composting and another for adding new materials.
Troubleshooting Common Compost Problems
Even with the best intentions, your compost pile might throw you a curveball. Here are some common issues and how to fix them, using practical solutions suitable for Asian conditions:
1. The Pile Smells Bad (Rotten or Ammonia-like)
Cause: Too wet, not enough air, or too many greens. Anaerobic conditions (lack of oxygen) cause a sour smell. Ammonia smell usually means too much nitrogen (greens).
Solution:
- Add more brown materials (dry leaves, shredded cardboard, sawdust).
- Turn the pile thoroughly to introduce air.
- Ensure the pile isn’t compacted.
- If it’s too wet, uncover it if it’s in a bin to let it dry, or add more browns and turn.
2. The Pile Isn’t Heating Up or Decomposing
Cause: Too dry, not enough greens (nitrogen), or the pile is too small. The microorganisms need moisture and a good balance of nitrogen and carbon to work effectively.
Solution:
- Check moisture and water if dry.
- Add more green materials (kitchen scraps, fresh grass clippings).
- Break down larger materials into smaller pieces.
- Ensure the pile is at least 3×3 feet (about 1 cubic meter) – smaller piles don’t retain heat well.
- Turn the pile to mix materials and introduce air.
3. Pests (Flies, Ants, Rodents)
Cause: Exposed food scraps, too much moisture, or the wrong type of materials are being added.
Solution:
- Always bury kitchen scraps deep within the pile and cover them with brown materials.
- Avoid adding meat, dairy, and oily foods.
- Ensure the pile is not too wet.
- If using an open pile, consider enclosing it with wire mesh to deter rodents.
- A lid on your compost bin can help.
4. The Pile is Too Wet and Slimy
Cause: Too many greens, too much rain, poor drainage, or not enough brown materials.
Solution:
- Add plenty of dry brown materials (shredded newspaper, cardboard, dry leaves).
- Turn the pile thoroughly to mix in the browns and improve aeration.
- If using an open bin or pile, try to shield it from heavy rain.
For more specific advice on composting in different climates, you can check resources from local agricultural universities or extension offices, which often have region-specific guidance. For example, many universities in Southeast Asia offer excellent publications on sustainable agriculture and organic farming practices that include composting.
Signs Your Compost is Ready
You’ll know your compost is ready when it turns dark brown or black, has an earthy smell (like a forest floor after rain), and the original materials are no longer recognizable. It should feel crumbly and moist, not soggy or dry. This usually takes anywhere from 2-3 months for a hot, actively managed pile to 6-12 months for a cooler, slower pile.
Using Your Finished Compost
Once it’s ready, your compost is a treasure. You can:
- Mix it into garden beds: Spread a layer of compost over your soil and lightly incorporate it. This is great for vegetable gardens and flower beds.
- Use it as a top dressing: Sprinkle a thin layer around established plants, trees, and shrubs.
- Add it to potting mix: Mix compost with soil and other ingredients to create a nutrient-rich mix for containers and potted plants.
- Make compost tea: Steep finished compost in water to create a liquid fertilizer for your plants.
Different Composting Methods for Asia
Asia is incredibly diverse, and so are its composting methods. While the basic principles remain the same, the techniques can vary based on climate, available materials, and space.
The Pile Method (Simple & Versatile)
This is what we’ve largely discussed – simply creating a mound of organic materials. It’s practical in areas with more space. In tropical Asian climates, it might decompose very quickly due to heat and humidity, so management of moisture is key to avoid getting too soggy.
Compost Bins (Tidy & Controlled)
Purchased or DIY bins are excellent for smaller spaces or where aesthetics matter. Many readily available bins are designed for ease of use. Look for ones with good ventilation.
Trench Composting (Hidden & Efficient)
Dig a trench or hole in your garden (about 1 foot deep) and fill it with kitchen scraps and garden waste. Cover it with soil. It decomposes directly in the soil, enriching it in place. This is great for gardeners who don’t want a visible compost heap and can be done in various garden sizes.
Worm Composting (Vermicomposting – Space-Saving & Fast)
This is perfect for apartment dwellers or those wanting faster results with kitchen scraps. Red wiggler worms, housed in a special bin, consume waste and produce nutrient-rich worm castings. It’s a clean and efficient method that can even be done indoors or on a balcony. You can easily find or build worm bins.
Bokashi Composting (Fermentation Method)
This is an anaerobic fermentation process that uses a special Bokashi bran inoculated with effective microorganisms (EM). It can handle meat, dairy, and oily foods. Bokashi pre-composts materials which then need to be buried in the soil or added to a traditional compost pile to finish decomposing. It’s good for those who produce a lot of varied kitchen waste and have a place to bury the fermented material.