Hey there, neighbors! Troy D Harn here, your go-to guy for making home projects and garden chores feel like a breeze. Ever look at a pile of kitchen scraps and yard waste and think, “This is too much work to turn into something useful”? You’re not alone! Many folks find composting a bit daunting, but what if I told you it can be surprisingly simple and incredibly rewarding?
We’re talking about transforming what you’d toss into nutrient-rich “black gold” for your garden, without breaking a sweat. Get ready, because we’re about to unlock the secrets to an effortless compost pile that works wonders for your plants and your wallet. Let’s dive in!
Compost Pile Best: Effortless Success for Your Garden
Dreaming of a lush garden but worried about the cost of fertilizers? Or maybe you’re just looking for a way to reduce waste and feel good about it? Composting is your answer, and it’s far simpler than you might think. Turning kitchen scraps and yard trimmings into valuable garden soil amendment is a win-win. It’s good for the environment, great for your plants, and surprisingly easy to get right.
We’ll break down everything you need to know, from picking the perfect spot to knowing what goes in (and what stays out). By the end of this guide, you’ll be a composting pro, ready to create your own amazing compost with minimal fuss. Let’s get started on your journey to effortless compost success!
Why Compost? The Big Benefits
Before we get our hands (figuratively, for now!) dirty, let’s chat about why building a compost pile is such a fantastic idea. It’s more than just a pile of decaying stuff; it’s a powerhouse for your garden and the planet.
- Boosts Soil Health: Compost acts like a superfood for your soil. It improves soil structure, allowing for better water drainage and aeration. This means healthier roots for your plants!
- Reduces Waste: Think about all those banana peels, coffee grounds, and grass clippings you throw away. Composting diverts a significant amount of waste from landfills, which is a huge win for the environment. Less garbage means a happier planet!
- Saves Money: High-quality soil and fertilizers can be pricey. By making your own compost, you’re essentially growing your own fertilizer for free. Your wallet will thank you!
- Reduces the Need for Chemical Fertilizers: Chemical fertilizers can sometimes harm soil ecosystems and even leach into waterways. Compost provides nutrients naturally, nurturing your soil and plants without harsh chemicals.
- Encourages Beneficial Microorganisms: A healthy compost pile is teeming with beneficial bacteria and fungi. These tiny helpers work in your soil to break down organic matter and make nutrients available to your plants.
Getting Started: The Absolute Essentials
You don’t need fancy equipment or a degree in soil science to compost. The core idea is simple: create the right environment for nature’s recyclers (microorganisms and critters) to do their job. Here’s what you’ll need:
Choosing Your Compost Bin or Location
This is your compost’s home. You have a few options, ranging from very simple to a bit more structured. For the “effortless” approach, we’re aiming for simplicity!
- Open Pile: This is the most basic method. Simply designate a spot in your yard and start piling materials. It’s easy to add to and turn. Just make sure it’s in a convenient location, away from sitting areas, and has good airflow. Aim for a size of at least 3x3x3 feet (about 1 cubic meter) for best results.
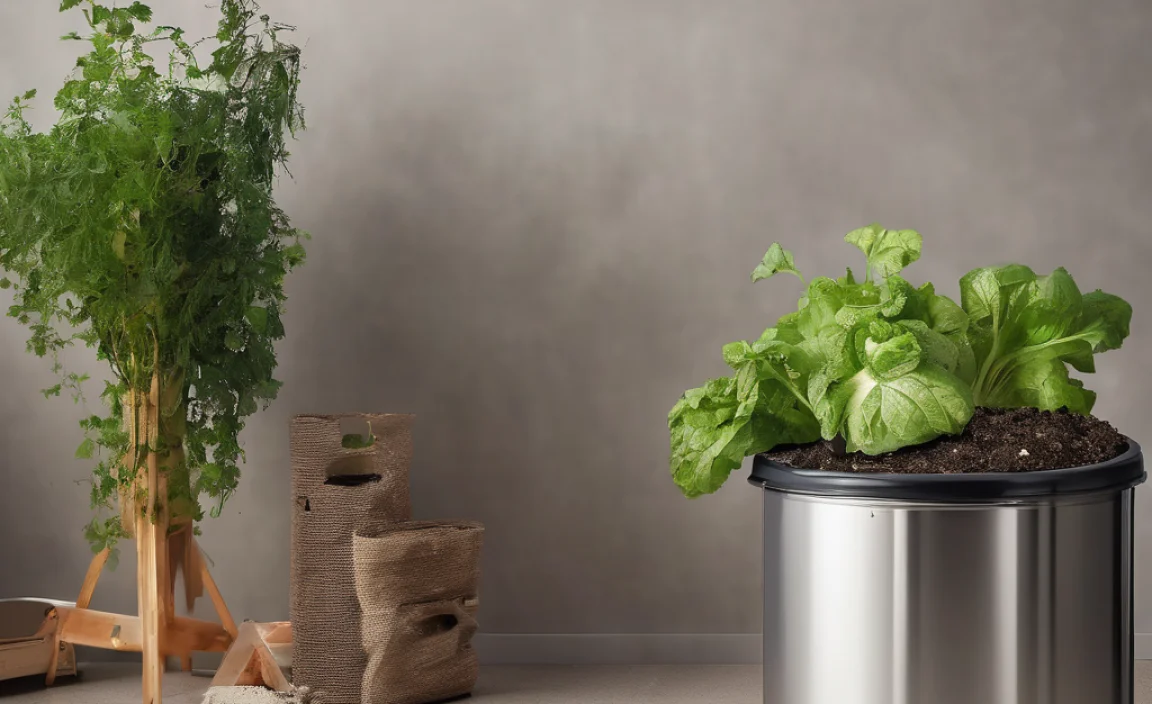
- Compost Bin (DIY or Purchased): These contain the materials, can look neater, and some are designed for easier turning. You can buy plastic bins with lids, or easily build one yourself from wood pallets or wire mesh. For beginners, a simple enclosed bin or a well-managed open pile are great starting points.
- Tumbler Composter: These are sealed barrels that you can rotate. They often speed up the composting process and keep pests out, but they can be more expensive and have a smaller capacity.
Pro Tip: For an effortless start, an open pile or a simple bin that allows easy access is usually best. You want to be able to add materials easily and turn it with a pitchfork or shovel without too much hassle.
Essential Tools (Keep it Simple!)
You really don’t need much. Here are the basics that make managing your pile so much easier:
- Pitchfork or Garden Fork: This is your best friend for turning the compost. It helps aerate the pile, which is crucial for decomposition.
- Shovel: Useful for moving materials, adding layers, and eventually harvesting your finished compost.
- Water Source: A hose with a spray nozzle or a watering can. Compost needs moisture to work.
- Optional: Kitchen Compost Caddy: A small container with a lid that you keep in your kitchen to collect food scraps before taking them out to the main pile.
The “Greens” and “Browns”: Your Compost Recipe
This is the heart of successful composting: balancing your “greens” and “browns.” Think of it like cooking – you need the right ingredients in the right proportions. Too much of one, and your compost might get smelly or slow down.
Greens (Nitrogen-Rich Materials): These are generally moist materials that provide nitrogen, which helps the microorganisms multiply. They tend to be fresh and green (hence the name!).
- Fruit and vegetable scraps
- Coffee grounds and tea bags
- Grass clippings (in thin layers to avoid matting)
- Plant trimmings (non-diseased)
- Manure from herbivores (like chickens, rabbits, cows, horses – avoid pet waste!)
Browns (Carbon-Rich Materials): These are typically dry, brown materials that provide carbon. They add bulk and allow air to circulate through the pile.
- Dry leaves
- Shredded newspaper or cardboard (avoid glossy paper)
- Straw or hay
- Wood chips or sawdust (small amounts, from untreated wood)
- Torn-up paper bags
- Eggshells (crushed)
The Ideal Ratio: A good starting point is roughly 2 parts Browns to 1 part Greens by volume. Don’t stress too much about exact measurements! If your pile seems too wet and slimy, add more Browns. If it’s dry and not breaking down, add more Greens and a bit of water.
What NOT to Compost
To keep your compost healthy and avoid attracting pests or creating unpleasant odors, steer clear of these:
- Meat, fish, and bones (attract pests, can create odors)
- Dairy products (attract pests, can create odors)
- Oily or greasy foods (slow decomposition, attract pests)
- Diseased plants (can spread disease to your garden)
- Weeds that have gone to seed (unless your pile gets very hot, these seeds might survive)
- Pet waste (from dogs or cats – can contain pathogens)
- Treated wood or sawdust (may contain harmful chemicals)
- Glossy or heavily printed paper/cardboard
Building Your Compost Pile: Step-by-Step for Effortless Success
Ready to build? It’s less about construction and more about layering and balance. Follow these simple steps:
Step 1: Choose Your Location Wisely
Select a spot that’s convenient for you to access with kitchen scraps and yard waste. Ideally, it should have good drainage, be partially shaded (to prevent drying out too quickly), and have decent airflow. A corner of your yard is often perfect.
Step 2: Start with a Base Layer (Browns!)
Begin by laying down a 4-6 inch layer of coarse brown materials at the bottom of your bin or designated spot. This could be straw, wood chips, or crumpled cardboard. This layer helps with drainage and air circulation from the start.
Step 3: Add Your First Layers (Greens & Browns)
Now start adding your materials. Alternate layers of greens and browns, aiming for that 2:1 brown-to-green ratio. Think of it as building a lasagna. Scatter a layer of greens (like kitchen scraps) over the brown base, then cover it with a layer of browns (like dry leaves or shredded paper). This helps prevent odors and keeps pests at bay.
Example Layering Sequence:
- Bottom Layer: Coarse Browns (straw, wood chips)
- Next: Greens (kitchen scraps)
- Cover with: Browns (leaves, shredded cardboard)
- Next: More Greens (grass clippings – thin layer!)
- Cover with: Browns (dryer lint, straw)
- Continue layering until your bin is full or you run out of materials. Try to finish with a layer of Browns on top.
Step 4: Add Water – The “Damp Sponge” Test
As you build your layers, lightly water them. The goal is for the compost pile to be as moist as a wrung-out sponge – damp, but not dripping wet. If it’s too dry, decomposition slows down significantly. If it’s too wet, it can become anaerobic and start to smell bad.
Quick Water Check: Grab a handful of compost material. Squeeze it. If only a drop or two of water comes out, it’s just right. If water streams out, it’s too wet. If it feels dry and crumbly, it needs more water.
Step 5: Turn Your Compost (For Faster Results)
This is where the pitchfork comes in! Turning your compost pile regularly introduces oxygen, which is vital for the aerobic bacteria that break down the material quickly and without odor. The more you turn it, the faster you’ll get finished compost.
How Often to Turn:
- Enthusiast/Fast Compost: Turn every 7-14 days.
- Moderate Gardener: Turn every 3-4 weeks.
- “Pile it and Forget It” (Slow Compost): Turn once or twice a year, or not at all. This method works, but it takes much longer.
To turn, use your pitchfork to move the outer material into the center and the inner material to the outside. Break up any clumps. This mixing helps ensure everything decomposes evenly.
Step 6: Be Patient and Observe
Composting is a natural process, so give it time! Depending on the materials you add, the temperature of your pile, and how often you turn it, compost can be ready in anywhere from a few months to a year. You’ll know it’s ready when it’s dark, crumbly, smells earthy (like a forest floor), and you can no longer recognize the original materials.
Troubleshooting Common Compost Pile Problems
Even with the best intentions, you might encounter a few hiccups. Don’t worry, most compost problems are easy to fix!
My Compost Pile Smells Bad!
This usually means your pile is too wet and not getting enough air (anaerobic decomposition).
- Solution: Add more brown materials to absorb excess moisture and turn the pile thoroughly to introduce air. Chop up large brown materials to help them break down better.
My Compost Pile Isn’t Heating Up or Breaking Down
This is often because there isn’t enough nitrogen (greens) or the pile is too dry.
- Solution: Add more green materials. If the pile is dry, add water while turning. Ensure your pile is of a decent size (at least 3x3x3 feet) as smaller piles struggle to generate heat.
I See Pests (Rats, Flies, etc.)
This can happen if you’re adding things you shouldn’t, or if the pile is too exposed.
- Solution: Stop adding meat, dairy, and oily foods. Always cover fresh kitchen scraps buried in the center of the pile with a layer of brown material. Ensure your bin has a lid or consider using a compost tumbler.
My Pile is Too Dry
Lack of moisture severely slows down decomposition.
- Solution: Water the pile thoroughly while turning it. Make sure to add sufficient greens going forward, as wet materials provide moisture.
Compost Pile Temperature: The Hot vs. Cold Debate
You might hear about “hot” composting versus “cold” composting. What’s the deal?
Hot Composting: This method involves actively managing your pile to reach temperatures of 130-160°F (55-70°C). This high heat kills weed seeds and pathogens, and it breaks down materials much faster (often in 1-3 months). Achieving hot composting requires a good balance of greens and browns, sufficient moisture, and regular turning to aerate. It’s more work but yields faster results.
Cold Composting: This is the “set it and forget it” approach. You simply add materials to a pile or bin and let nature take its course with minimal intervention. It takes much longer, often 6 months to over a year, and may not kill all weed seeds or pathogens. It’s the most effortless method.
For the beginner looking for “effortless success,” starting with a moderately managed pile (turning every few weeks) or even a slow-and-steady cold compost pile is perfectly fine and still incredibly rewarding!
When is My Compost Ready to Use?
The waiting game is the hardest part, but recognizing finished compost is easy. Your compost is ready when it:
- Looks dark brown and crumbly.
- Smells earthy and pleasant, like a forest floor after rain.
- You can no longer identify the original materials (no more recognizable banana peels or newspaper shreds!).
- The temperature of the pile has cooled down.
This whole process typically takes anywhere from 2 months to a year, depending on your methods and the season.
How to Use Your Finished Compost
Congratulations, you’ve made “black gold”! Now, how do you use this amazing stuff?
- As a Soil Amendment: Mix compost into your garden beds before planting. A few inches worked into the top 6-10 inches of soil will work wonders.
- As a Top Dressing: Spread a 1-2 inch layer of compost around established plants, trees, and shrubs. It acts as a natural mulch, retaining moisture and suppressing weeds.
- In Potting Mixes: Combine compost with other ingredients like peat moss or coir to create a nutrient-rich mix for your containers and hanging baskets. A common recipe is 1/3 compost, 1/3 peat moss/coir, and 1/3 perlite/vermiculite for drainage.
- To Improve Lawns: Rake a thin layer of compost over your lawn, especially in the spring or fall. It helps to thicken turf and improve soil health.
By using your own compost, you’re giving your plants the best natural start, leading to healthier growth and more bountiful harvests.
Quick Reference: What to Compost (and What to Skip)
To make it super easy, here’s a quick cheat sheet.
| Generally Safe to Compost (Greens) | Generally Safe to Compost (Browns) | Avoid Composting |
|---|---|---|
| Fruit & Vegetable Scraps | Dry Leaves | Meat, Fish, Bones |
| Coffee Grounds & Tea Bags | Shredded Newspaper/Cardboard | Dairy Products |
| Grass Clippings (Thin Layers) | Straw or Hay | Oily Foods |
| Plant Trimmings (Non-Diseased) | Wood Chips/Sawdust (Untreated, Small Amounts) | Diseased Plants |
| Herbivore Manure (Chicken, Rabbit, Cow) | Torn Paper Bags | Pet Waste (Dog/Cat) |
| Eggshells (Crushed) | Dryer Lint (Natural Fibers) | Treated Wood |
For more in-depth information on composting, check out resources like the U.S. Environmental Protection Agency (EPA) composting guidance. They offer fantastic, science-backed advice.
Conclusion: Your Effortless Compost Journey Begins Now!
There you have it! Composting doesn’t have to be complicated or labor-intensive. By understanding the simple balance of greens and browns, keeping your pile moist and airy, and being patient, you’re well on your way to creating your own fantastic compost. Think of the satisfaction of turning what was once “waste” into rich, life-giving soil for your garden. You’re not just gardening; you’re actively participating in a natural cycle that benefits your plants, your home, and the planet.
So, grab a pitchfork, start saving those kitchen scraps, and get that pile going. Remember, every little bit you add is a step towards a healthier garden and a greener lifestyle. You’ve got the knowledge, and you’ve got this. Happy composting!
Frequently Asked Questions About Composting
Q1: How big does my compost pile need to be?
For the best and fastest results, a compost pile should be at least 3 feet by 3 feet by 3 feet (about 1 cubic meter). This size helps it retain heat efficiently, which speeds up decomposition. Smaller piles can still compost, but they’ll take longer and likely won’t get hot.
Q2: Do I need to buy a special compost bin?
Not at all! You can create a simple open pile, or build your own bin using materials like wood pallets or wire mesh. Many commercially available bins are designed for convenience, but they aren’t essential for success. An accessible location is more important than a fancy bin for beginners.
Q3: How often should I water my compost pile?
You should aim to keep your compost pile as moist as a wrung-out sponge. Check it every few days or whenever you turn it. If it feels dry, water it. If it feels soggy, add more brown materials and turn it to aerate. The “damp sponge” test is your best guide.
Q4: What if I only have kitchen scraps and not a lot of yard waste?
It’s still possible! You’ll just need to be a bit more mindful of your “brown” materials. You can use shredded newspaper, cardboard, paper bags, and even things like natural fiber dryer lint. If you don’t have much yard waste, you might need to purchase some straw or wood chips to maintain the proper balance of browns. This is where a small compost bin or even a worm composting system (vermicomposting) might be a good alternative if yard waste is truly scarce.
Q5: Can I compost pet waste?
It’s generally recommended to avoid composting pet waste from dogs and cats. These animals can carry pathogens that might not be killed in a typical home compost pile, especially if it doesn’t reach high temperatures. Waste from herbivores like rabbits or chickens is usually safe.
Q6: My compost is taking forever! What am I doing wrong?
Composting times vary greatly. If yours is slow, consider these factors: Is the pile large enough? Is it too dry? Does it have a good mix of greens and browns? Is it getting enough air (turn it more)? Are you adding materials that decompose very slowly (like woody branches without chipping them)? Patience is key, but addressing these points will speed things up.
Q7: Can I compost grass clippings directly from my lawnmower?
Yes, but in moderation! Grass clippings are a great “green” material, but they tend to mat together when added in large clumps. This blocks airflow and can lead to a slimy, smelly pile. Always add grass clippings in thin layers and mix them with brown materials whenever possible.

I am passionate about home engineering. I specialize in designing, installing, and maintaining heating, ventilation, and air conditioning systems. My goal is to help people stay comfortable in their homes all year long.