Putting together a compost bin can feel like a puzzle, especially when you’re just starting out. You’ve probably heard that you need good “starter” material, but what exactly does that mean? And where do you even begin to find it? It’s easy to get a bit overwhelmed by all the choices and advice out there. But don’t you worry! I’m Troy D Harn from TopChooser, and I’m here to walk you through exactly what you need to know. We’ll break down what a compost starter is, why it’s helpful, and how to pick the best one for your backyard garden. Ready to turn kitchen scraps into garden gold? Let’s get this compost party started!
What Exactly is a Compost Starter and Why Do You Need It?
Great question! Think of a compost starter as a jump-start for your compost pile. It’s a blend of materials designed to introduce beneficial microorganisms (like bacteria and fungi) and sometimes actively sped-up composting activators. These tiny helpers are the rockstars of decomposition. Without them, your compost pile might just sit there, slowly breaking down, or worse, start to smell funky.
A good compost starter helps:
- Speed things up: It helps your compost break down much faster, which means you get rich, usable compost sooner.
- Reduce odors: The right microbes eat up the “bad” stuff that can cause stinky smells, leading to a more pleasant composting experience.
- Ensure a good mix: Starters often contain a balanced ratio of “greens” (nitrogen-rich) and “browns” (carbon-rich) to get the decomposition process rolling efficiently.
- Kill weed seeds and pathogens: As the compost heats up during the decomposition process, it can help kill off unwanted weed seeds and potentially harmful pathogens, making your finished compost safer for your garden.
While you can create compost without a specific starter product (more on that later!), using one is like giving your compost pile a powerful boost. It’s especially helpful for beginners who want to see results without a lot of guesswork.
Different Types of Compost Starters
When you start looking for a compost starter, you’ll notice they come in a few main forms. Each has its own way of getting the job done.
Commercial Compost Starter Products
These are the most common and easiest to find. You’ll see them in garden centers and online. They usually come in bags or bottles.
- Powders and Granules: These are often dried, dormant microorganisms mixed with other organic matter. You just sprinkle them on your pile. They’re convenient and have a long shelf life.
- Liquids: These contain active liquid cultures of beneficial microbes. You usually mix them with water and then spread them over your compost materials. They can sometimes provide a quicker initial kickstart.
- Pre-mixed Bales: Some products offer a bale of already partially composted material, acting as a ready-made starter. This is less common but very effective if you can find it.
Pros:
- Convenient and easy to use.
- Often formulated for quick results.
- Good for beginners who want a foolproof start.
Cons:
- Can be more expensive than DIY options.
- You might not know the exact ingredients.
DIY Compost Starters
Want to go the natural route and save some cash? You can create your own compost starter using materials you might already have or can easily get!
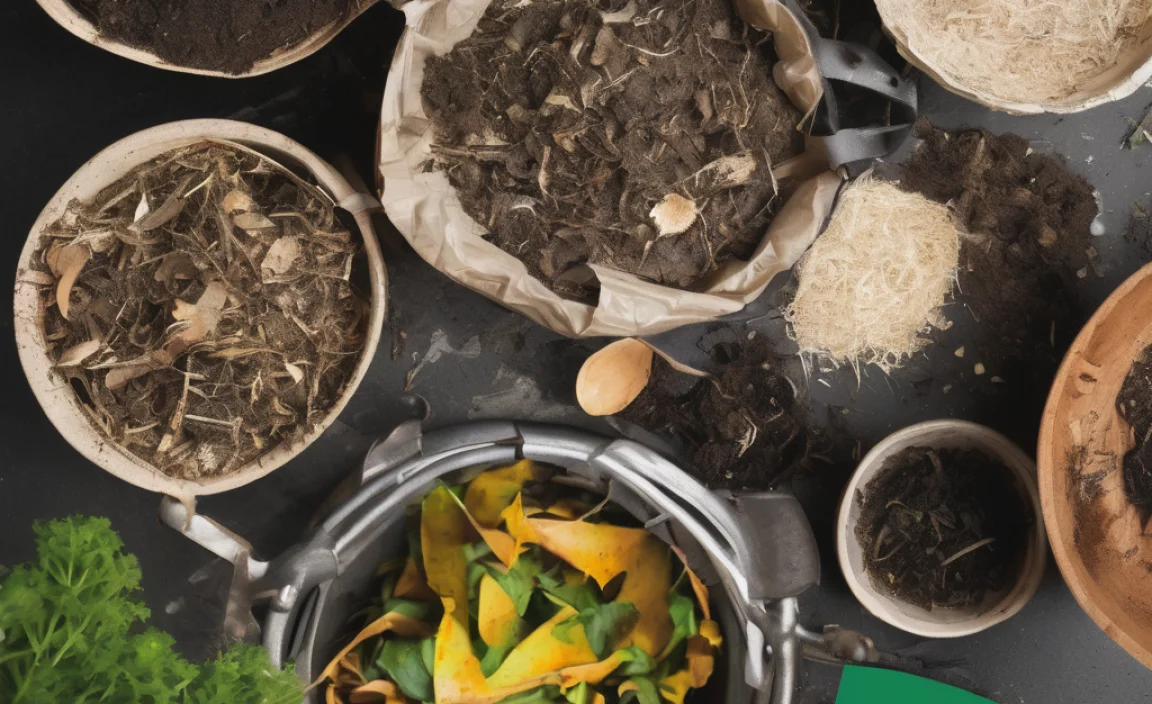
- A Shovel Full of Finished Compost: If you have a friend who composts or you can find some local finished compost (ask at a community garden!), a scoop of this is packed with the essential microbes.
- Manure (Aged): Well-rotted manure from herbivores like cows, horses, or chickens is a goldmine of beneficial bacteria and adds valuable nutrients. Make sure it’s aged; fresh manure can burn plants and is too “hot” for a fresh compost pile.
- Soil from a Healthy Garden Bed: A few shovelfuls of soil from a healthy, living garden bed can introduce a diverse range of microorganisms to your compost.
- Certain Kitchen Scraps (in moderation): While they’ll break down anyway, adding a small amount of nitrogen-rich kitchen scraps like coffee grounds or grass clippings can help kickstart microbial activity.
Pros:
- Very cost-effective, often free!
- Uses natural, readily available materials.
- Connects you more directly with the composting process.
Cons:
- May take slightly longer to “activate” compared to commercial products.
- Requires some knowledge of what materials to use.
- Can potentially introduce weed seeds or pathogens if source materials aren’t clean (especially if using fresh manure or soil with known issues).
What to Look for When Buying a Compost Starter
So, you’ve decided to buy a commercial starter. What should you be checking for on the label or in the product description?
- Ingredients: Look for products that list beneficial microorganisms, enzymes, or natural organic matter. Some might simply say “compost activators.” Avoid anything with artificial chemicals or fillers.
- Microbial Content (if specified): Some premium starters might detail the types and quantities of bacteria and fungi included. While this is more advanced, it can indicate a quality product.
- “Green” and “Brown” Components: A starter that already includes a good mix of nitrogen-rich (greens) and carbon-rich (browns) materials can give your pile a balanced start.
- Ease of Use: Are you getting granules, a liquid, or something else? Consider what will be easiest for you to measure and apply to your compost.
- Reputation and Reviews: Check what other gardeners are saying! Online reviews can be a great indicator of a product’s effectiveness.
Table: Compost Starter Features to Consider
| Feature | What to Look For | Why It Matters |
|---|---|---|
| Microbial Activity | Lists bacteria, fungi, enzymes, or “active cultures.” | These are the workers that break down your waste. |
| Organic Ingredients | Natural plant matter, composted materials, alfalfa meal, molasses. | Provides food for microbes and balances the pile’s C:N ratio. |
| Formulation | Powder, granule, or liquid – choose what fits your preference. | Impacts ease of application and storage. |
| pH Balance | Some starters help balance the pH of your compost. | Optimal pH promotes microbial growth and prevents smells. |
| Ease of Application | Clear instructions, no complex mixing required. | Saves time and effort, especially for busy gardeners. |
How to Use a Compost Starter Effectively
Buying the starter is only half the battle; using it correctly is key to seeing great results. Here’s a simple breakdown:
- Start with a Layer of Browns: Begin your compost pile (or the next layer) with a good base of carbon-rich materials like dried leaves, shredded cardboard, or straw. This provides air pockets and a carbon source for the microbes.
- Add Your “Greens”: Next, add your nitrogen-rich materials like kitchen scraps (fruit and veggie peels, coffee grounds, tea bags) and fresh grass clippings.
- Sprinkle or Pour the Starter: Follow the package instructions.
For powders and granules, sprinkle them evenly over the layer of greens and browns you’ve just added.
For liquids, mix them with water in a watering can and then evenly moisten the pile.
- Mix it In: Gently stir or turn the materials to distribute the starter throughout the new additions. You don’t need to dig deep; just ensure it’s mixed in with the top few inches.
- Add More Layers: Continue adding your compostable materials in alternating layers of greens and browns, adding a bit more starter every time you add a significant batch of new material, especially if you’re building a large pile from scratch.
- Maintain Moisture: Your compost pile needs to be as damp as a wrung-out sponge. If it’s too dry, the microbes can’t work. If it’s too wet, it can become anaerobic and smelly.
- Aerate (Turn) Regularly: Turning your compost pile every week or two (or whenever you add new material) helps introduce oxygen, which is crucial for the aerobic microbes to thrive. This speeds up decomposition and prevents foul odors. You can learn more about good composting practices from resources like the EPA’s composting guide.
When DIY is the Way to Go
Sometimes, the best compost starter isn’t something you buy at a store. It’s something you can gather yourself!
Leveraging Finished Compost
If you or a neighbor already has a healthy compost pile that’s producing finished compost, a shovel full of that is arguably the best starter. It’s already teeming with the right kind of microbial life that knows how to break down organic matter effectively. Just scoop some of that mature compost and mix it into your new pile.
The Magic of Aged Manure
Aged manure is another fantastic natural starter. It’s rich in nitrogen and beneficial bacteria. The key word here is “aged.” Fresh manure is too potent; it contains ammonia that can harm your compost microbes and plant growth. Properly aged manure (where it no longer smells strongly of ammonia and looks like dark, crumbly soil) is perfect. If you have access to a farm or a local stable, this can be an almost free and highly effective starter.
Garden Soil Method
A few shovels full of healthy garden soil can also introduce the necessary microorganisms into your compost. This works best if your garden soil is rich and active, meaning it’s full of earthworms, beneficial fungi, and bacteria. Think of it as borrowing a bit of your garden’s magic for your compost bin.
Common Mistakes to Avoid
Even with a starter, it’s easy to make a few missteps when you’re learning. Here are some common composting pitfalls to steer clear of:
- Using Too Much “Green”: Overloading your pile with nitrogen-rich materials (like grass clippings or food scraps) without enough carbon-rich materials (like dried leaves or cardboard) can lead to a slimy, stinky mess.
- Not Enough Moisture: A dry compost pile is a dormant compost pile. Without the right moisture, decomposition grinds to a halt.
- Too Much Moisture: Conversely, a waterlogged pile suffocates the beneficial aerobic microbes, leading to anaerobic decomposition, which produces foul odors.
- Lack of Aeration: Compost needs oxygen! If your pile is compacted or never turned, the microbes can’t breathe, slowing down the process and potentially creating foul smells.
- Adding the Wrong Materials: Avoid meat, dairy products, oily foods, diseased plants, and pet waste (from cats and dogs). These can attract pests, create odors, or spread pathogens. Check out resources like this guide on what to compost from UNH Extension.
- Not Using a Starter (or a good DIY alternative): While not strictly an “avoidable mistake” because you can compost without one, relying solely on slow decomposition means waiting much longer for results. Using a starter or a natural alternative significantly speeds things up.
Compost Starter vs. Activator: What’s the Difference?
You might see the terms “compost starter” and “compost activator” used interchangeably, and often, they are very similar. However, there can be subtle differences.
Compost Starter
Generally, a compost starter is focused on introducing the microorganisms needed for decomposition. It’s about bringing in the living workforce to get things going. It might also include a bit of food (like molasses) for these microbes.
Compost Activator
An activator might include microorganisms, but it often emphasizes providing a balanced mix of “greens” and “browns” and sometimes nutrients that help the existing microbes in your pile work more efficiently. Think of it as giving the existing workers a better working environment and more fuel.
For beginners, the distinction is less important. Most products labeled as either are designed to speed up your composting. The key is to choose something that introduces beneficial biological activity and balanced organic matter.
Budget-Friendly Options & DIY Deep Dive
Composting is inherently a budget-friendly practice, and using a compost starter doesn’t have to break the bank.
Cost-Effective Commercial Starters
If you opt for a commercial product, look for brands that offer good value. Larger sizes often mean a lower cost per use. Sometimes, simple granulated starters are less expensive than complex liquid formulations. Keep an eye out for sales at your local garden center or during seasonal planting events.
The Ultimate DIY Starter: It’s Free!
Let’s reiterate: the absolute cheapest and often most effective compost starter is free! Here’s how:
- Ask a Neighbor: If you know someone with a well-established mulch bed or compost pile, ask for a few shovels full of their aged compost.
- Community Gardens: Many community gardens maintain compost systems. They might be willing to share a scoop for a small donation or even for free.
- Local Farms/Stables: As mentioned, aged manure is fantastic. Many farms are happy to let you take some aged manure for free or a very small fee.
- Your Own Past Efforts: If you’ve composted before and have any finished material, even just a little, it’s a great starter for new endeavors.
Table: Cost Comparison – Starter Options
| Option | Estimated Cost | Pros | Cons |
|---|---|---|---|
| Premium Commercial Powder/Liquid | $15 – $30 for a typical-sized container | Fast-acting, convenient, designed for results | Can be costly, proprietary formulas |
| Basic Commercial Granules | $10 – $20 for a typical-sized container | Affordable, easy to store and use | May be less potent than premium options |
| Shovel of Finished Compost (from friend/neighbor) | Free! (Maybe a thank-you coffee) | Proven microbes, perfectly balanced, totally natural | Requires access to someone who composts |
| Aged Manure | Free to $5 (depending on source/delivery) | Rich in nutrients and microbes, excellent starter | Requires sourcing and ensuring it’s properly aged |
| Garden Soil | Free! | Introduces local microbial diversity | May introduce weed seeds if soil isn’t perfectly managed |
Troubleshooting Common Compost Pests and Smells
Even with a starter, your compost might occasionally attract unwanted guests or develop less-than-ideal smells. Most of these issues are signs that something in the balance is off, and they’re usually easy to fix. Learning to troubleshoot will make you a composting pro!
Smelly Compost
- The Smell: Ammonia (like strong urine), rotten eggs, or sour garbage.
- What it Means: Usually, this is a sign of too much “green” material and not enough “brown” material, or the pile is too wet and lacks oxygen (anaerobic conditions).
- The Fix:
- Add more “browns” (dried leaves, shredded cardboard, straw) to absorb excess moisture and balance the nitrogen.
- Turn the pile thoroughly to introduce oxygen. If it’s very wet, try to get some dry browns mixed in as you turn.
- If using a commercial starter, ensure you’re not overloading with kitchen scraps.
Unwanted Guests (Pests)
- The Pests: Flies, fruit flies, ants, rodents.
- What it Means: Often, this means you’ve added materials that shouldn’t be in the compost (like meat or dairy), or your compost is too wet and exposed.
- The

I am passionate about home engineering. I specialize in designing, installing, and maintaining heating, ventilation, and air conditioning systems. My goal is to help people stay comfortable in their homes all year long.