Hey there! Got a pile of leaves, grass clippings, or garden trimmings taking up space? Don’t let that valuable organic stuff go to waste. Composting yard waste is super simple, and I’m going to show you exactly how to turn it into black gold for your garden. It’s easier than you think, and by the end of this guide, you’ll be a composting pro. Let’s get started!
How To Compost Yard Waste: Your Genius, Effortless Guide
As Troy D Harn from TopChooser, I’m here to tell you that turning your yard’s green and brown bits into amazing garden fertilizer is one of the most rewarding – and surprisingly easy – DIY projects you can tackle. Forget complicated systems; we’re going for simple, effective, and totally achievable.
Why bother with composting? It’s a fantastic way to reduce what you send to the landfill, save money on store-bought fertilizers, and create the absolute best food for your plants, making them healthier and your garden more vibrant. Plus, it feels pretty darn good knowing you’re closing the loop on your yard’s natural cycle.
This guide is designed for everyone, whether you’re a seasoned gardener or just starting to get your hands dirty. We’ll break it down into simple, bite-sized steps. You’ll learn what to toss in, what to keep out, and how to set up a system that works without a ton of fuss.
Why Compost Your Yard Waste? The Big Benefits
Let’s quickly chat about why this is such a smart move. Composting isn’t just about getting rid of stuff; it’s about creating something valuable.
- Frees Up Landfill Space: A huge portion of household waste is organic material that could be composted instead of ending up in a dump.
- Enriches Your Soil: Compost is like a superfood for your garden. It improves soil structure, helps it retain moisture, and provides essential nutrients. Your plants will thank you!
- Saves You Money: Why buy expensive soil amendments and fertilizers when you can make your own for free?
- Reduces Need for Chemical Fertilizers: Natural compost is a much healthier option for your plants and the environment than synthetic chemicals.
- It’s Good for the Planet: By composting, you help reduce methane gas emissions, a potent greenhouse gas, that comes from organic matter decomposing in landfills.
What Yard Waste CAN You Compost? The “Greens” and “Browns”
The magic of composting lies in creating a good balance of materials. Think of it like a recipe. You need two main types of ingredients:
“Greens” (Nitrogen-Rich Materials)
These are typically moist and break down quickly, providing the nitrogen that microbes need to do their work. They’re like the fuel for your compost pile.
- Grass clippings (in thin layers to avoid matting)
- Fruit and vegetable scraps (from the kitchen, and also garden waste!)
- Coffee grounds and tea bags
- Plant trimmings (non-diseased)
- Weeds that haven’t gone to seed
- Manure from herbivores (chickens, rabbits, cows, horses – avoid pet waste from carnivores)
“Browns” (Carbon-Rich Materials)
These are dry and provide the carbon that the microbes need. “Browns” also help with aeration, preventing your pile from becoming a smelly, soggy mess.
- Dry leaves
- Straw or hay
- Shredded newspaper or cardboard (avoid glossy paper and colored inks)
- Small twigs and branches (chopped or shredded)
- Sawdust or wood chips (from untreated wood)
- Pine needles
- Dryer lint (from natural fibers like cotton)
What Yard Waste Should You AVOID Composting? The No-Nos
Not everything belongs in the compost bin. Some things can introduce diseases, pests, or simply won’t break down well.
- Meat, bones, and dairy products (attract pests and can smell)
- Oily or greasy foods
- Diseased plants or weeds that have gone to seed (you don’t want to spread the problem)
- Black walnut leaves and twigs (they contain a substance toxic to many plants)
- Pet waste (dog and cat feces can contain harmful pathogens)
- Treated lumber or sawdust from treated wood
- Coal or charcoal ash (can contain harmful substances)
- Invasive weeds that spread by root or seed
Choosing Your Composting Method: Bins, Piles, or Tumblers?
There are a few popular ways to compost yard waste, and the best one for you depends on your space, how much yard waste you produce, and how quickly you want compost. Let’s look at the main ones:
1. The Open Compost Pile
What it is: Simply a heap of organic materials in a designated spot in your yard. It’s the easiest and cheapest option to start.
Pros:
- No cost to set up (beyond maybe some fencing if you want to contain it).
- Can handle very large volumes of yard waste.
- Simple to add materials.
Cons:
- Can look a bit messy if not managed.
- May take longer to break down than contained methods.
- Can attract pests if not balanced properly.
- Requires more turning to aerate.
Table 1: Best Location for Your Compost Pile
| Factor | Ideal Conditions | Why It Matters |
|---|---|---|
| Sunlight | Partial shade | Too much sun can dry it out; too much shade can make it too wet. |
| Drainage | Well-drained area | Prevents the pile from becoming waterlogged and anaerobic (smelly). |
| Accessibility | Easy to reach with wheelbarrow and hose | Makes adding materials and turning much easier. |
| Ventilation | Open area | Ensures good airflow, crucial for decomposition. |
| Water Source | Close to a tap or water barrel | Compost needs to be kept moist, like a wrung-out sponge. |
2. The Compost Bin
What it is: A container designed to hold your compost materials. They come in many shapes, sizes, and materials, from simple wooden or wire structures to store-bought plastic bins with lids.
Pros:
- Neater appearance, more contained.
- Helps retain moisture and heat, speeding up decomposition.
- Can deter pests more effectively.
Cons:
- Can be more expensive to buy or build.
- May have limits on how much you can add at once.
- Some designs can be harder to turn or aerate.
3. The Compost Tumbler
What it is: A sealed barrel or drum that rotates on an axle or base. This makes turning the compost incredibly easy.
Pros:
- Very easy to turn and aerate.
- Composts relatively quickly.
- Sealed design is excellent at deterring pests.
- Neat and compact for smaller yards.
Cons:
- Can be the most expensive option.
- Limited capacity.
- Can sometimes get too hot or too wet if not managed properly.
- Not ideal for very large amounts of yard waste.
Setting Up Your Effortless Compost System: Step-by-Step
Alright, let’s get down to business! We’ll focus on a simple pile or bin setup, as these are generally the most beginner-friendly and cost-effective for yard waste.
Step 1: Choose Your Location
As mentioned in Table 1 above, pick a spot that’s:
- On level ground.
- Well-drained.
- Partially shaded.
- Easily accessible with tools and a water source.
- Ideally, not right next to your neighbor’s patio!
Step 2: Gather Your Materials
Start collecting your “greens” and “browns.” You can even designate a corner of your yard for temporary storage of leaves or grass clippings if you don’t have a bin yet.
Step 3: Build Your Base (for Piles/Bins)
If you’re building a pile or using an open bin, start with a layer of coarse brown material at the bottom (like small twigs or straw). This helps with aeration and drainage from the start.
Step 4: Layer Your Materials
This is where the “recipe” comes in. Aim for a good mix of greens and browns. A common guideline is to aim for a ratio of about 2 parts browns to 1 part greens by volume. Don’t stress too much about perfection; the microbes will figure it out!
Start layering like this:
- Browns: Begin with a 4-6 inch layer of “browns” (leaves, straw, shredded paper).
- Greens: Add a 2-3 inch layer of “greens” (grass clippings, kitchen scraps, plant trimmings).
- Moisten: Lightly sprinkle water on each layer. It should feel like a wrung-out sponge – damp, but not soaking wet.
- Repeat: Continue alternating layers of browns and greens, moistening as you go.
- Optional: Activator For a speed boost, you can add a shovel full of finished compost or garden soil on top of a few layers. This introduces beneficial microbes.
It’s a good idea to bury your kitchen scraps in the middle of the pile to deter pests and odors.
Step 5: Aerate (Turn) Your Compost
This is crucial for speedy decomposition and to prevent foul odors. Microbes need oxygen!
- How often: Aim to turn your compost pile or bin every 2-4 weeks.
- How to do it: Use a pitchfork or a compost aerator tool. Move the outer layers into the center and the core materials to the outside. If you have a tumbler, just give it a good spin!
- Why it matters: Turning introduces fresh air, distributes moisture, and helps the materials break down evenly.
For a visual guide on turning, check out resources from your Environmental Protection Agency, which provides great foundational information on composting and waste reduction.
Step 6: Be Patient and Monitor
Composting is a natural process, and it takes time. Depending on the materials, the weather, and how often you turn it, compost can be ready anywhere from 3 months to a year. Keep an eye on it:
- Moisture: If it’s too dry, add water. If it seems too wet or smells bad, add more browns and turn it.
- Temperature: A hot compost pile (around 130–160°F or 55–70°C in the center) breaks down fastest. You can feel the warmth with your hand, or use a compost thermometer.
- “Hot” vs. “Cold” Composting: A quickly decomposing, hot pile requires more attention (turning, balanced ingredients). A slower, “cold” compost pile needs less effort but takes longer. For beginners, a slightly slower, less fussy approach is perfectly fine!
What Does Finished Compost Look Like?
You’ll know your compost is ready when it:
- Looks like dark, crumbly soil.
- Smells earthy and pleasant, like a forest floor.
- No recognizable food scraps or yard waste are visible.
- The temperature has cooled down to ambient levels.
You might need to screen it through a ¼-inch mesh to remove any larger, un-composted bits. These bits can go back into your next compost batch!
Troubleshooting Common Composting Problems
Even with the best intentions, sometimes your compost pile might act up. Don’t worry, these issues are usually easy to fix.
Here’s a quick rundown:
Table 2: Compost Problem Solver
| Problem | Possible Cause | Solution |
|---|---|---|
| Smells like ammonia | Too much nitrogen (“greens”) | Add more carbon-rich “browns” (leaves, shredded paper) and turn. |
| Smells like rotten eggs or garbage | Too wet and not enough air (anaerobic) | Add more “browns” and turn thoroughly to aerate. Ensure good drainage. |
| Pile is not heating up / decomposing slowly | Too dry, not enough nitrogen, or not enough volume | Add water, add more “greens,” or add more material to increase size. Ensure good aeration. |
| Attracting Pests (flies, rodents) | Exposed food scraps, wrong ingredients | Bury food scraps deep in the pile. Avoid meat, dairy, and oily foods. Ensure the pile is enclosed or covered if using an open system. |
| Pile is too dense and wet | Lack of coarse materials for aeration | Add more “browns” like small twigs, straw, or shredded cardboard. Turn to break up clumps. |
Quick Summary: Your Effortless Composting Checklist
For a super quick reminder, here’s what to keep in mind:
- Location: Partial shade, well-drained, accessible.
- Ingredients: Good mix of Greens (nitrogen) and Browns (carbon) – aim for 2:1 Browns to Greens ratio.
- Moisture: Damp like a wrung-out sponge.
- Aeration: Turn every 2-4 weeks.
- Patience: It takes time!
Using Your Finished Compost
Once your compost is ready, you’ve got a fantastic soil amendment. Here’s how to use it:
- Soil Amendment: Mix a few inches into garden beds before planting. It improves drainage in clay soils and water retention in sandy soils.
- Top Dressing: Spread a 1-2 inch layer around existing plants, trees, and shrubs.
- Potting Mix: Mix with other ingredients like perlite or coir to create your own healthy potting soil.
- Lawn Dressing: Rake a thin layer over your lawn in spring or fall to add nutrients and texture.
Using your own compost is a fantastic way to make your garden thrive naturally. It’s a sustainable practice that truly pays off.
Conclusion
See? Composting yard waste isn’t a complicated science experiment; it’s a wonderfully simple way to benefit your garden and the environment. By understanding the basics of “greens” and “browns,” choosing a method that suits your space, and giving your compost a little bit of air and moisture, anyone can turn their trimmings into nutrient-rich soil. So go ahead, gather those leaves, grab those grass clippings, and start your own compost pile. Your future garden will be absolutely thrilled!
Frequently Asked Questions About Composting Yard Waste
Got more questions swirling around? Hopefully, these common ones will help clear things up!
How long does it take for yard waste to compost?
It can take anywhere from 3 months to a year. Factors like the types of materials, the size of your compost pile, how often you turn it, and the weather all play a role. A “hot” compost system that’s actively managed will break down faster than a “cold” system that’s left to its own devices.
Can I just throw all my yard waste into a pile and forget about it?
Yes, you absolutely can! This is known as “cold composting.” It will break down eventually, but it will take longer, and the resulting compost might not be as nutrient-rich or as uniform as compost from a managed “hot” pile. For effortless composting, this is a perfectly valid approach, especially if you have plenty of space and aren’t in a hurry.
Do I need a special compost bin?
Nope! While bins and tumblers can make things neater and sometimes faster, a simple open pile works just fine. Many people start with just a heap in a corner of their yard. The most important thing is managing the “greens” and “browns” ratio and keeping it moist and aerated.
What if my compost pile smells bad?
Bad smells, especially rotten egg or ammonia odors, usually mean your compost is too wet and/or doesn’t have enough air. This is called anaerobic decomposition. The fix is to add more “brown” materials (like dry leaves or shredded cardboard) and turn the pile thoroughly to introduce oxygen. Ensure it has good drainage too.
How can I speed up the composting process?
To speed things up, ensure you have a good “green” to “brown” ratio, keep the pile moist (like a wrung-out sponge), turn it regularly (every 1-2 weeks if you’re aiming for speed), and chop or shred larger materials into smaller pieces. A larger pile (at least 3x3x3 feet) also helps it retain heat better, which speeds decomposition. For more advanced methods, you can research hot composting techniques.
Can I compost grass clippings?
Yes, grass clippings are excellent “greens”! However, it’s best to add them in thin layers (2-3 inches) and mix them with “browns.” If you add too much grass at once, it can mat down, become dense, reduce airflow, and start to smell unpleasant. Letting them dry out a bit before adding them can also help prevent matting.

I am passionate about home engineering. I specialize in designing, installing, and maintaining heating, ventilation, and air conditioning systems. My goal is to help people stay comfortable in their homes all year long.
Related Posts
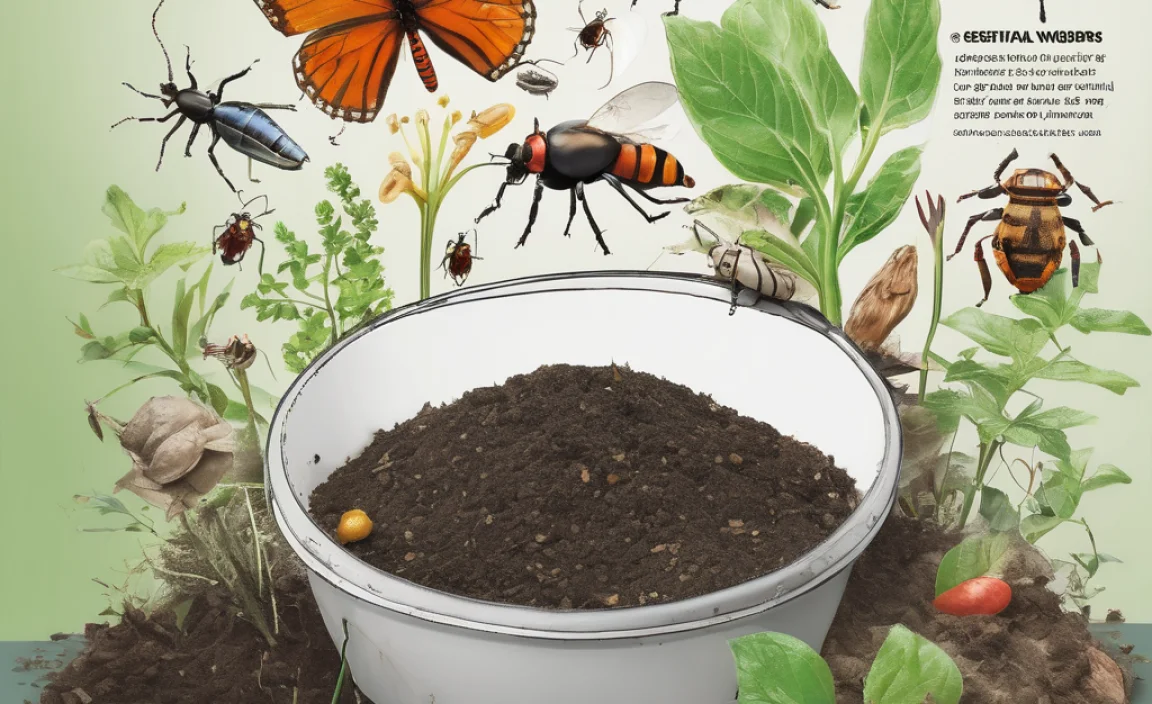
Compost Enzymes: Essential Bug Wonders- Boost Your Garden: Top Compost Starter Methods
- Best 120V 8 Gallon Compressor: Genius Choice
- Bokashi Composting Comparison: Essential Insights
- **The provided keywords “best 21 gallon air compressor” and the topic “how to cancel car wash subscription” are not directly related. Therefore, I cannot create a blog title that perfectly aligns with both while meeting all your requirements.** However, I can generate a title for the education niche based on the other criteria, or a title for the car wash subscription topic if you provide a relevant keyword. **Please clarify which keyword you’d like to focus on for the title.** If you meant to ask for a title related to “how to cancel car wash subscription” with a relevant keyword, please provide that keyword. If you meant to ask for a title related to “best 21 gallon air compressor” for the education niche, please let me know.
- Is Distilled Water Softened Water? The Powerful Truth!
Composting For Hotels Solutions: Essential Guide- Top Office Composting Mistakes to Avoid for Success!