Fed up with tossing out food scraps and garden waste? Wish you could turn that “trash” into garden gold? You’re not alone! Composting can seem a bit daunting if you’re just starting out. But honestly, it’s one of the most rewarding things you can do for your garden and the planet. This guide will make composting in Australia super simple. We’ll walk you through everything, step-by-step, so you can get started right away and feel confident. Ready to transform your kitchen and garden waste into nutrient-rich compost? Let’s dig in!
Why Compost? It’s a Win-Win-Win!
Composting is like giving Mother Nature a helping hand. By breaking down organic waste, you’re reducing the amount of rubbish heading to landfill. This is a big deal, as landfill waste produces harmful greenhouse gases like methane. But the benefits don’t stop there!
- Nourishes Your Garden: Compost is nature’s superfood for plants. It improves soil structure, helping it retain moisture and air, which plants absolutely love. It also feeds beneficial microbes, keeping your soil healthy and alive.
- Reduces Waste: Think about all the food scraps, coffee grounds, and yard clippings you throw away each week. Composting diverts a massive chunk of this from landfill.
- Saves Money: Healthy, compost-rich soil means healthier plants that need less watering and fewer (or no!) synthetic fertilisers. You’ll be saving cash on water bills and garden supplies.
- Environmentally Friendly: You’re actively participating in a natural cycle that benefits the environment. It’s a tangible way to make a positive impact right from your own backyard.
Getting Started: What You’ll Need
The great news is you don’t need fancy equipment to start composting. Depending on your space and how much waste you generate, you have a few excellent options. Let’s break them down:
Compost Bin Options in Australia
Choosing the right bin is key to successful composting. Here are the most popular choices you’ll find available in Australia:
| Bin Type | Pros | Cons | Best For |
|---|---|---|---|
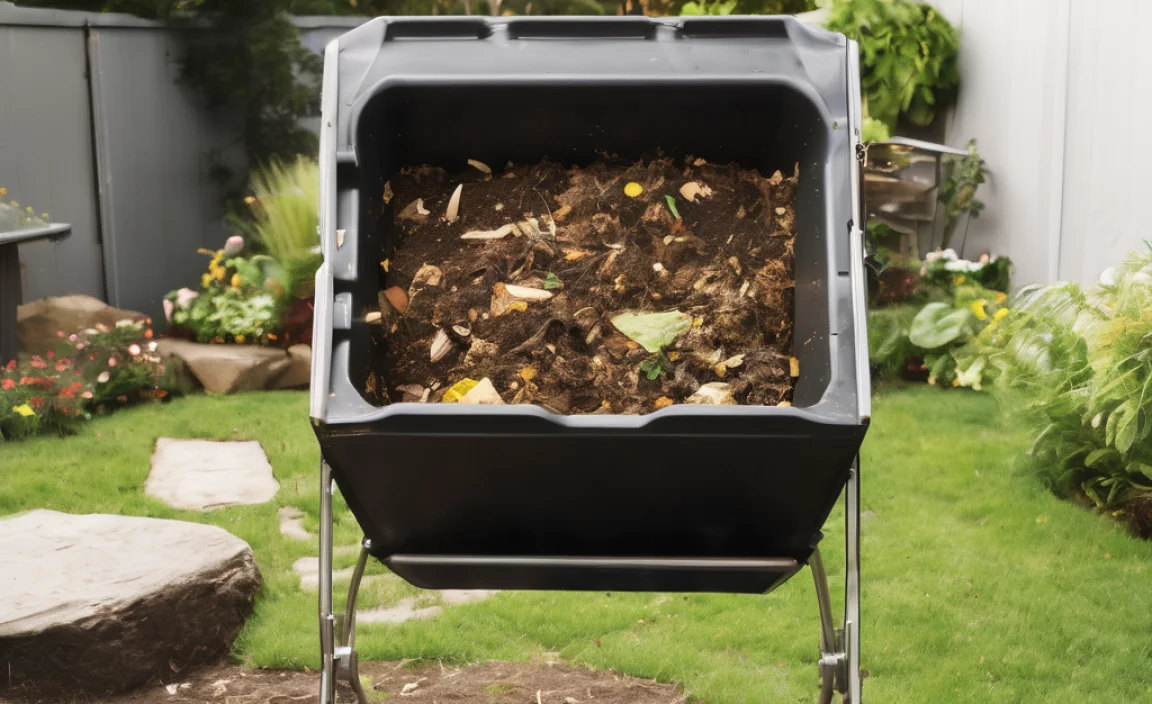
| Tumbler Composter |
Fast composting, easy to turn, keeps pests out, neat and tidy. |
Can be more expensive, smaller capacity, can dry out if not monitored. |
Apartment dwellers, small gardens, those wanting faster results. |
| Static Compost Bin (Open Pile or Enclosed) |
Simple, cheap to set up (can even be DIY), larger capacity. |
Slower decomposition, may attract pests if not managed, can look untidy. |
Homes with yards, larger gardens, budget-conscious individuals. |
| Worm Farm (Vermicomposting) |
Excellent for food scraps, produces nutrient-rich worm castings and liquid fertiliser, works well in small spaces. |
Specific feeding restrictions (no citrus, onions, meat), requires more hands-on care, temperature sensitive. |
Apartment living, small families, those who want premium fertiliser. |
| Bokashi Bin (Fermenting) |
Can compost all food scraps (meat, dairy, oils), fast fermentation, doesn’t smell, compact. |
Requires special Bokashi bran, the fermented waste needs further composting or burying, not a complete composting system on its own. |
People who produce a lot of cooked food waste, those with limited space, as a pre-composting step. |
What to Compost (The “Greens” and “Browns”)
Successful composting is all about balance! You need a good mix of “greens” and “browns.” Think of greens as nitrogen-rich materials and browns as carbon-rich materials.
“Greens” (Nitrogen-Rich):
- Fruit and vegetable scraps
- Coffee grounds and tea bags
- Grass clippings (in thin layers)
- Plant trimmings (non-diseased)
- Eggshells
“Browns” (Carbon-Rich):
- Dry leaves
- Cardboard (torn into small pieces, no glossy print)
- Paper (shredded, no glossy print)
- Straw or hay
- Wood chips or sawdust (from untreated wood)
- Pine needles (in moderation)
What NOT to Compost
It’s just as important to know what to leave out to avoid attracting pests or creating unpleasant smells:
- Meat, fish, and bones
- Dairy products (cheese, yogurt, milk)
- Oily or greasy foods
- Diseased plants
- Weeds that have gone to seed
- Pet waste (dog or cat faeces)
- Treated or painted wood
- Coal ash or charcoal briquettes
Setting Up Your Compost System: Step-by-Step
Alright, let’s get down to business! Whether you have a bin or are planning to build one, here’s how to set it up for success.
Step 1: Choose Your Location
Pick a convenient spot for your compost bin. Ideally, it should be:
- Easy to access: You’ll be adding scraps regularly.
- Partially shaded: Too much direct sun can dry out the compost, while constant shade can make it too wet.
- On bare soil: This allows worms and microbes to easily access the compost and helps with drainage. If you have a paved area, place a layer of soil or compostable material first. Ensure good drainage.
- Away from wooden structures: To prevent moisture damage.
Step 2: Start Layering – The Magic Mix
This is where the composting magic begins! Aim for a good mix of greens and browns. A common ratio is roughly 2 parts browns to 1 part greens.
- Base Layer: Start with a layer of coarse brown material, like twigs or straw. This helps with aeration and drainage. About 10-15 cm (4-6 inches) thick is good.
- Add Greens: Next, add a layer of your kitchen scraps and other green materials.
- Add Browns: Cover the greens with a layer of brown materials like dry leaves or shredded cardboard. This helps to control odours and deter pests.
- Repeat: Continue layering greens and browns as you add materials. Always try to finish with a layer of browns on top.
Tip: Chop up larger items, like vegetable peels and cardboard, into smaller pieces. This speeds up decomposition.
Step 3: Maintaining Your Compost
Composting isn’t a “set it and forget it” activity, but it’s far from high maintenance! Here’s what you need to do:
Moisture: The Damp Sponge Test
Your compost pile should be about as damp as a wrung-out sponge – moist, but not soaking wet.
- Too Dry? Add water, turning the pile as you go. Adding fresh green materials can also help retain moisture.
- Too Wet? Add more brown materials, like dry leaves or shredded cardboard, and turn the pile. Ensure good drainage from the base.
Aeration: Give it Some Air!
Composting microbes need oxygen to do their work. Turning your compost pile regularly helps with this.
- How Often: Aim to turn your compost every 1-4 weeks. The more frequently you turn it, the faster it will break down.
- How to Turn: Use a garden fork or a compost aerator tool. Mix the materials from the outside of the pile into the centre, and vice-versa. If you have a tumbler, simply give it a good rotation.
For Tumblers: Follow the manufacturer’s instructions, usually turning every few days for faster results.
What to Watch For:
Composting is usually pretty straightforward. However, keep an eye out for these:
- Smell: A healthy compost pile should smell earthy, like a forest floor. A rotten egg or ammonia smell usually indicates too many greens or too much moisture, or lack of air. Add more browns and turn the pile.
- Pests: If you’re attracting rodents or flies, ensure you’re not adding forbidden items like meat or dairy. Always cover fresh kitchen scraps with a layer of browns. A well-managed bin or tumbler is less likely to attract pests.
Composting in Different Australian Climates
Australia is a big place with diverse climates! Here’s how your composting might be affected:
- Tropical North (e.g., Cairns): High humidity and warmth mean decomposition can be fast. However, things can also go mouldy quickly if too wet. Ensure good aeration and consider a bin that allows good airflow. Tumblers can be great here as they offer more control over moisture and pests.
- Arid/Inland (e.g., Alice Springs): Dryness is the main challenge. You’ll need to add water more frequently and monitor moisture levels diligently. Insulated bins can help retain moisture. Covering your compost pile with a tarp can also reduce evaporation (but ensure it still gets some air!).
- Temperate South (e.g., Melbourne, Sydney): These climates are generally ideal for composting. You’ll have fewer extreme conditions to contend with. Follow the general guidelines, and your compost should thrive.
- Coastal Areas: Humidity can be high, so good aeration is key to prevent a “soggy” pile.
No matter where you are, a healthy compost bin is one that’s balanced in moisture, air, and materials. For more specific advice tailored to your local council’s waste and recycling services, check out resources like Waste Authority WA or your local council website.
Troubleshooting Common Composting Problems
Even the best composters run into a few bumps now and then. Here’s how to fix common issues:
Problem: My compost smells!
Cause: Usually too wet, too many ‘greens’, or not enough air. This often results in anaerobic decomposition (without oxygen), which smells bad.
Solution:
- Add more ‘brown’ materials like dry leaves, shredded cardboard, or straw.
- Turn or aerate the pile thoroughly to introduce oxygen.
- If it’s too wet, try to improve drainage or add more bulky browns.
- If using a bin, ensure the drainage holes are clear.
Problem: My compost is too dry and not breaking down.
Cause: Not enough moisture. This can happen in hot, dry weather or if you don’t add enough ‘green’ materials.
Solution:
- Water the pile thoroughly, turning as you add water.
- Add more ‘green’ materials, which are rich in nitrogen and moisture.
- Cover the pile loosely with a tarp to help retain moisture (but still allow some airflow).
Problem: I see lots of flies and pests.
Cause: Exposed food scraps, or the inclusion of forbidden items like meat, dairy, or oily foods.
Solution:
- Always bury fresh kitchen scraps deep within the pile.
- Cover the top layer with ‘brown’ materials.
- Ensure you are NOT adding meat, dairy, oils, or diseased plants.
- Consider a fully enclosed bin or a tumbler to deter pests.
Problem: Decomposition is too slow.
Cause: The mix of greens and browns might be off, the pile isn’t moist enough, or it’s not aerated well. The materials might also be too large.
Solution:
- Chop or shred larger items before adding them.
- Thoroughly mix your nitrogen-rich ‘greens’ with your carbon-rich ‘browns’.
- Ensure the moisture level is right (damp, not dry).
- Turn or aerate the pile more frequently.
- If using a bin, ensure it’s in a spot that gets decent warmth.
When Is My Compost Ready?
This is the exciting part! Compost is ready to use when it’s dark, crumbly, and smells pleasantly earthy. You won’t be able to identify the original materials.
The time it takes can vary from a few months to a year, depending on:
- The type of bin you use
- The materials you add
- How often you turn it
- Climate and moisture levels
How to Harvest:
For static bins, the compost at the bottom is usually ready first. You can scoop it out from the bottom hatch (if available) or carefully dig down to retrieve the finished compost. Add new materials to the top.
For tumblers, you simply empty the bin once everything is composted. You might need to let larger pieces break down a bit more in a separate pile.
Sieving: Some people like to sieve their compost to remove any large, undecomposed bits. These can be put back into the compost bin to continue breaking down. A simple sieve made from wire mesh or an old flyscreen works well.
Using Your Finished Compost
Congratulations, you’ve created black gold! Here’s how to use your homemade compost:
- Soil Amendment: Mix it into garden beds before planting. It improves soil structure, drainage, and nutrient content. A common ratio is to mix 1 part compost with 3-4 parts soil.
- Top Dressing: Spread a layer around established plants, shrubs, and trees. This feeds the soil and helps retain moisture.
- Potting Mix: Mix it with potting soil and perlite or sand to create a nutrient-rich mix for potted plants and containers.
- Lawn Dressing: Lightly rake compost over your lawn in spring or autumn to improve soil health and grass vitality.
For a wealth of gardening tips that pair perfectly with your compost, have a read at Gardening Know How – they have tons of great advice.
Frequently Asked Questions (FAQs)
Q1: How long does composting actually take?
A: It varies! A fast compost system like a well-managed tumbler might give you finished compost in 2-3 months, while a slower static pile could take 6-12 months or even longer. Factors like material size, moisture, aeration, and temperature all play a role.
Q2: Can I compost everything from my kitchen?
A: Almost! You can compost fruit and vegetable scraps, coffee grounds, tea bags, and eggshells. However, it’s best to avoid meat, fish, dairy, and oily foods as these can attract pests and cause bad smells.
Q3: My compost smells – what did I do wrong?
A: A smelly compost usually means it’s too wet, too full of ‘greens’ (nitrogen), or lacks air. Try adding more ‘brown’ materials (like dry leaves or cardboard) and turning the pile to aerate it.
Q4: Do I need a special bin, or can I just make a pile?
A: You can absolutely just make a pile! This is the simplest and cheapest way to start. However, an enclosed bin or a tumbler can help manage moisture, deter pests, and often speed up the process.
Q5: Is it okay to compost lawn clippings?
A: Yes, but in moderation! Lawn clippings are ‘greens’ and are high in nitrogen. If you add too much at once, they can become a dense, wet mat that prevents airflow and starts to smell. Always mix them with ‘browns’

I am passionate about home engineering. I specialize in designing, installing, and maintaining heating, ventilation, and air conditioning systems. My goal is to help people stay comfortable in their homes all year long.


