Welcome, neighbors! Ever looked at your kitchen scraps and thought, “Could this be more useful?” Or maybe you’ve seen the vibrant community garden down the street and wished you could chip in more than just your enthusiasm? You’re in the right place! Turning food waste into garden gold might sound tricky, especially when you live in an apartment, but it’s totally doable. I’m Troy D Harn, and I’m here to show you how composting for community gardens from your apartment can be simple, effective, and incredibly rewarding. We’ll break it down step-by-step, so you’ll be a composting pro in no time.
Composting for Community Gardens in Apartments: Your Apartment-Friendly Action Plan
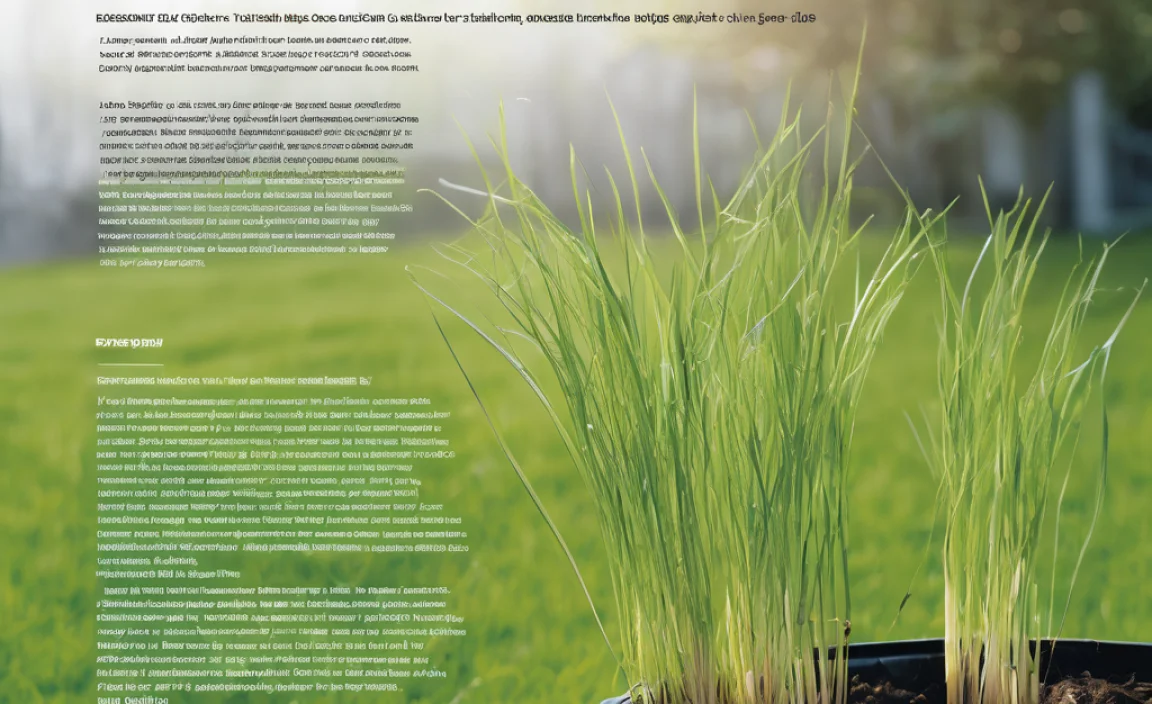
Living in an apartment doesn’t mean you’re cut off from the world of gardening and sustainable practices. Community gardens are fantastic spaces where shared effort creates beautiful results. And guess what? The best fertilizer often comes from ingredients you’d otherwise toss in the bin. Composting for community gardens when you’re an apartment dweller involves a few smart choices about what kind of composting system works best for your space and how you can get that nutrient-rich compost back to the garden.
We’ll cover everything from choosing the right composter for a small space to what goes in (and what stays out!) and how to transport your finished compost. It’s all about making this amazing process work for you, no matter how much space you have. Let’s get started and turn those scraps into something truly special for our green spaces!
Why Bother Composting for Your Community Garden?
You might be wondering why you should go through the effort of composting, especially from an apartment. Well, the benefits are huge, both for your community garden and for the planet.
- Enriches Garden Soil: Compost is like a superfood for soil. It improves its structure, helps it retain moisture, and provides essential nutrients that plants need to thrive. Your community garden will thank you with healthier, more abundant harvests!
- Reduces Waste: Think about all the food scraps and yard waste that ends up in landfills. Composting diverts a significant amount of this organic material, reducing methane gas emissions (a potent greenhouse gas) and lessening the burden on landfills.
- Saves Money: High-quality compost can be expensive to buy. By making your own, you’re essentially creating a valuable resource for free, which can save your community garden money on soil amendments.
- Connects You to Nature: Composting is a wonderfully grounding activity. It connects you to natural cycles and gives you a tangible way to contribute positively to your environment.
- Promotes Biodiversity: Healthy soil, rich in organic matter, supports a thriving ecosystem of microorganisms, worms, and beneficial insects that are crucial for plant health.
Choosing the Right Composting Method for Apartment Living
This is where apartment living requires a little extra thought. You probably don’t have a sprawling backyard for a big heap. But don’t worry, there are excellent options designed for smaller spaces and even indoor use.
1. Vermicomposting (Worm Composting)
This is a favorite for apartment dwellers because it’s compact, odorless (when done correctly!), and produces fantastic compost (called “worm castings”). You’ll need a special worm bin and specific types of worms, usually Red Wigglers (Eisenia fetida).
How it works: You feed food scraps to worms in a bin filled with bedding. The worms eat the scraps and bedding, and their nutrient-rich castings are your compost. It’s a natural, efficient system!
Pros:
- Odorless if managed well.
- Produces high-quality compost (worm castings).
- Compact and suitable for indoors.
- Relatively fast composting process.
Cons:
- Requires specific types of worms.
- Cannot handle large volumes of food scraps or certain materials (like meat/dairy).
- Initial setup cost for a bin and worms.
2. Bokashi Composting
Bokashi is a bit different. It’s actually a fermentation process that pickles your food scraps using a special bran inoculated with Effective Microorganisms (EM). It can handle items that traditional composting cannot, like meat, dairy, and oily foods.
How it works: You layer food scraps with bokashi bran in an airtight bin. The microorganisms ferment the waste. Once the bin is full, you let it sit for a couple of weeks, then bury the fermented material in soil (like in your community garden) to finish decomposing. It also produces a nutrient-rich liquid (bokashi tea) that can be diluted and used as a fertilizer.
Pros:
- Can compost meat, dairy, and oily foods.
- Fast initial fermentation process.
- The spent material is buried, which can be done at the community garden.
- Produces valuable liquid fertilizer.
Cons:
- Requires purchase of bokashi bran.
- The fermented material needs to be buried in soil to fully decompose.
- Can have a slightly pickled smell, though not typically unpleasant.
3. Tumbler Composter
If you have a small balcony or patio, a tumbler composter might be an option. These are enclosed bins that you can rotate or “tumble” to aerate the compost. They’re more contained and can speed up the composting process.
How it works: You add your “greens” and “browns” to the tumbler, then turn it periodically. The enclosed nature helps retain heat and moisture, and tumbling introduces oxygen.
Pros:
- Faster than a static pile.
- Contained, so it’s tidy and can deter pests.
- Easier to turn and aerate.
Cons:
- Requires space on a balcony or patio.
- Can be bulky.
- Some models can be heavy to turn when full.
4. Community Garden’s Composting System
The easiest method for an apartment dweller is often to contribute to an existing system at the community garden itself, if they have one. You’d simply collect your compostable materials and take them to the garden.
How it works: You collect suitable materials in a kitchen caddy or small bin and periodically transport them to the designated composting area at the community garden. You’ll need to follow their guidelines on what they accept.
Pros:
- No composter needed in your apartment.
- Leverages existing infrastructure.
- Contributes directly to the garden you use.
- Often can handle a wider variety of materials than indoor systems.
Cons:
- Requires regular trips to the community garden.
- Dependency on the garden’s composting practices and rules.
- Less control over the composting process.
Kitchen Collection & What to Compost (and What Not To!)
No matter which method you choose, efficient collection in your apartment is key. A small compost caddy with a lid on your counter or under the sink is perfect for daily collection. Some even have charcoal filters to minimize smells.
What Goes In (Your “Greens” and “Browns”)
Composting relies on a balance of nitrogen-rich “green” materials and carbon-rich “brown” materials. For apartment composting, especially vermicomposting or bokashi, the focus is primarily on food scraps.
“Greens” (Nitrogen-Rich) – Mostly kitchen scraps, adds moisture and nitrogen
- Fruit and vegetable scraps (peels, cores, rinds)
- Coffee grounds and paper filters
- Tea bags (staples removed)
- Eggshells (crushed)
- Fresh grass clippings (use sparingly in indoor systems, can get slimy)
- Houseplant trimmings
“Browns” (Carbon-Rich) – Provides structure and airflow
- Shredded newspaper (black and white ink only)
- Shredded cardboard (non-glossy)
- Paper towels and napkins (unsoiled by grease or chemicals)
- Dry leaves (if you have access to them)
- Sawdust/wood shavings (from untreated wood only)
What to Keep Out! (Crucial for Apartment Composting)
This is super important for preventing smells, pests, and ensuring the compost is healthy. Always check with your community garden if you’re contributing to their system.
- Meat, fish, and bones: Attract pests and can cause odors.
- Dairy products (milk, cheese, yogurt): Same reasons as meat.
- Oily or greasy foods: Can create anaerobic conditions (lack of air) and attract vermin.
- Diseased plants: Can spread pathogens to your garden.
- Weeds that have gone to seed: Seeds might survive the composting process and sprout in your garden.
- Pet waste (dog/cat feces): May contain pathogens harmful to humans.
- Chemically treated yard waste: Pesticides and herbicides can harm beneficial organisms and end up in your compost.
- Glossy or coated paper/cardboard: Takes too long to break down and may contain plastics.
- Inorganic materials: Plastic, metal, glass – they never break down.
Bokashi Exception: Remember, Bokashi can handle meat, dairy, and oily foods because it’s a fermentation process, not traditional decomposition. However, you still bury the end product.
Setting Up Your Apartment Composting System
Let’s get practical. Here’s how to set up the most common apartment-friendly systems.
Setting Up a Vermicomposting Bin
You can buy a specialized worm bin or make your own from opaque plastic bins. You’ll need at least two bins of the same size, one to go inside the other, and a lid.
- Prepare the Bins: Drill several small holes (about 1/4 inch) in the bottom and sides of one bin. This is your worm bin. In the other bin (your drip tray), drill a few holes near the top rim to allow for airflow and a spigot hole if you want to collect leachate (worm tea).
- Create Bedding: Moisten shredded newspaper, coco coir, or dried leaves so they are damp but not soaking wet – like a wrung-out sponge. Fill the worm bin about half to two-thirds full with this bedding.
- Add Worms: Gently place your Red Wiggler worms on top of the bedding. Leave the lid off for about 30 minutes to an hour; they’ll burrow down to escape the light.
- First Feeding: Bury a small amount of food scraps (like fruit and veggie peels) under the bedding in one corner of the bin.
- Assemble: Place the worm bin inside the drip tray bin. Put the lid on.
- Location: Find a cool, dark spot for your bin, ideally between 55-75°F (13-24°C). Under the sink or in a closet can work well.
Tip: Start with just a pound of worms. They’ll reproduce quickly if conditions are right!
Setting Up a Bokashi Bin
Bokashi bins are usually sold as a kit, often consisting of two stackable buckets with airtight lids and spigots at the bottom. One bucket is for active fermenting, and the other is for holding the fermented material or collecting tea.
- Prepare the Bin: Ensure the spigot is attached and sealed.
- Add Scraps: Add a layer of food scraps to the bottom of the active bin. Chop larger items into smaller pieces for faster fermentation.
- Add Bokashi Bran: Sprinkle a generous amount of bokashi bran (about 1-2 tablespoons per inch of scraps) over the food scraps.
- Compact: Press down on the scraps to remove air pockets.
- Layer and Repeat: Continue layering food scraps and bokashi bran until the bin is full.
- Seal: Once full, lightly sprinkle bran on top, firmly close the airtight lid, and let it sit for at least two weeks.
- Drain Excess Liquid: Regularly drain any liquid that accumulates using the spigot. This is bokashi tea, which can be diluted (1:100 with water) and used as a liquid fertilizer.
Important: Bokashi ferments, it doesn’t “compost” in the traditional sense. The byproduct needs to be buried to break down fully. This is where your community garden comes in!
Maintaining Your Apartment Composting System
Keeping your system happy and productive requires minimal effort. Think of it as an ongoing conversation with your compost.
Vermicomposting Care
- Feeding: Feed your worms every few days, depending on how much they eat. Bury the food in a different spot each time to encourage them to move throughout the bin. Don’t overfeed; wet, mushy food means too much is left.
- Moisture: The bedding should always feel like a damp sponge. If it’s too dry, add a little water or some damp bedding. If it’s too wet, add more dry bedding and a little worm food.
- Aeration: Gently fluff the bedding every week or two with a small garden fork or stick to ensure airflow.
- Temperature: Keep the bin within the ideal temperature range. If it gets too hot, move it to a cooler spot or add some frozen water bottles. If it’s too cold, move it somewhere warmer.
- Harvesting Castings: After 3-6 months, you’ll start to see a significant amount of dark, crumbly worm castings. You can harvest these by gently pushing the finished compost to one side and adding fresh bedding and food to the other, or by working the materials into distinct sections over time.
Bokashi Care
- Airtight Seal: Ensure the lid is always sealed tightly to maintain anaerobic conditions.
- Drainage: Don’t let the bokashi tea sit in the bin; drain it regularly.
- Microbe Activity: The effectiveness relies on the microbes in the bokashi bran. Use fresh bran for best results.
- Curing Time: After the initial two weeks of fermentation, the material needs an additional 2-4 weeks of burying in the soil to fully break down and become usable compost.
Table: What Compostable Materials Can Each System Handle?
This table gives you a quick overview of what works best for each apartment system:
| Material | Vermicomposting | Bokashi | Community Garden Bin (General) |
|---|---|---|---|
| Fruit & Veggie Scraps | ✅ Yes | ✅ Yes | ✅ Yes |
| Coffee Grounds & Filters | ✅ Yes | ✅ Yes | ✅ Yes |
| Eggshells | ✅ Yes | ✅ Yes | ✅ Yes |
| Meat & Dairy | ❌ No (attracts pests/smell) | ✅ Yes (ferments these) | ❌ Usually No (depends on garden) |
| Oily Foods | ❌ No (attracts pests/smell) | ✅ Yes (ferments these) | ❌ Usually No (depends on garden) |
| Diseased Plants | ❌ No | ✅ Yes (ferments these, but still best to check with garden) | Depends on garden policy, often No |
| Grass Clippings | ✅ Small amounts, can cause problems if too wet | ✅ Yes | ✅ Yes |
| Shredded Paper/Cardboard | ✅ Yes (good “brown” for worms) | ✅ Yes | ✅ Yes |
| Manure (herbivore) | ❌ No | ✅ Yes | ✅ Yes |
| Pet Waste (Dog/Cat) | ❌ No | ❌ No | ❌ Generally No |
From Your Apartment to the Community Garden: Transferring Your Compost
Once your compost is ready, the final step is getting it to your community garden. How you do this depends on your chosen method.</

I am passionate about home engineering. I specialize in designing, installing, and maintaining heating, ventilation, and air conditioning systems. My goal is to help people stay comfortable in their homes all year long.