Ever feel like your farm is drowning in waste? Vegetable scraps, animal manure, old straw – it all adds up! But what if I told you this “waste” is actually a goldmine for your farm’s health? Composting is a fantastic way to turn that farm “junk” into rich, fertile soil. It might sound like a lot of work, but it doesn’t have to be! We’ll break down some super simple, effective composting methods perfect for farmers. Get ready to boost your soil, cut down on waste, and feel great about what you’re doing for your land.
Composting for Farmers Methods: Your Guide to Richer Soil, Effortlessly

Hey there, fellow farmers and green thumbs! Troy D Harn here, from TopChooser. I know that running a farm means you’re always juggling a million things. The last thing you need is another complicated chore. But when it comes to your soil, you deserve the best. Composting is one of the most powerful ways to improve your soil naturally, leading to healthier crops and livestock. Think of it as nature’s ultimate recycling program, right on your farm!
The good news? Composting for farmers doesn’t need to be a massive undertaking. There are methods that are both effective and surprisingly low-effort. We’re talking about turning farm “waste” into “black gold” – nutrient-rich compost that your soil will absolutely love. Whether you’re dealing with kitchen scraps, crop residues, or animal manure, there’s a composting method that will fit your farm and your busy schedule.
In this guide, we’ll walk through some of the best and easiest composting methods for farmers. We’ll cover what you need, how to do it, and why it’s so good for your land. No fancy jargon, just straightforward advice to get you composting like a pro, without the stress. Let’s dig in and transform your farm’s fertility, one compost pile at a time!
Why Compost on Your Farm? The Big Wins
Before we dive into the “how,” let’s chat about the “why.” Composting isn’t just about getting rid of stuff; it’s about adding incredible value back to your farm. Here are some of the top reasons to get composting:
- Boosts Soil Health: Compost adds vital organic matter to your soil. This improves soil structure, making it easier for plant roots to grow and access water and nutrients.
- Increases Fertility: It’s packed with essential nutrients that plants need to thrive, reducing the need for synthetic fertilizers.
- Improves Water Retention: Compost acts like a sponge, helping your soil hold onto moisture. This is a lifesaver during dry spells and can reduce your watering needs.
- Suppresses Plant Diseases: Healthy soil rich in compost promotes beneficial microorganisms that can help fight off plant diseases and pests.
- Reduces Waste: It’s a fantastic way to manage farm waste, turning potential problems into a valuable resource.
- Saves Money: By creating your own soil amendment and reducing fertilizer costs, composting can directly benefit your farm’s bottom line.
- Environmentally Friendly: Composting reduces methane emissions from landfills and lowers the carbon footprint associated with transporting and manufacturing fertilizers.
Understanding Compost Ingredients: Browns vs. Greens
Composting is all about balance. Think of it like a recipe. For happy, healthy decomposition, you need a good mix of “browns” and “greens.”
- Browns (Carbon-Rich Materials): These materials are generally dry and woody. They provide carbon, which is the energy source for the microorganisms that break down organic matter.
- Dry leaves
- Straw and hay
- Wood chips and sawdust (use in moderation)
- Paper and cardboard (shredded, avoid glossy or colored inks)
- Crop residue (stems, stalks)
- Greens (Nitrogen-Rich Materials): These materials are typically moist and fresh. They provide nitrogen, which is essential for the growth and reproduction of the microorganisms.
- Vegetable and fruit scraps
- Grass clippings (in thin layers to prevent matting)
- Manure from herbivores (cows, horses, sheep, chickens – avoid pet waste)
- Coffee grounds and tea bags
- Plant trimmings (fresh)
The ideal ratio is often cited as about two to three parts browns to one part greens by volume. Don’t stress too much about exact measurements! Nature is forgiving. If your compost pile seems too wet and smelly, add more browns. If it’s dry and not breaking down, add more greens and some water.
Effortless Composting Methods for Farmers
Now for the good stuff! Let’s look at some super practical composting methods that are perfect for a farm setting. These focus on simplicity and effectiveness.
1. The Simple Pile (Cold Composting)
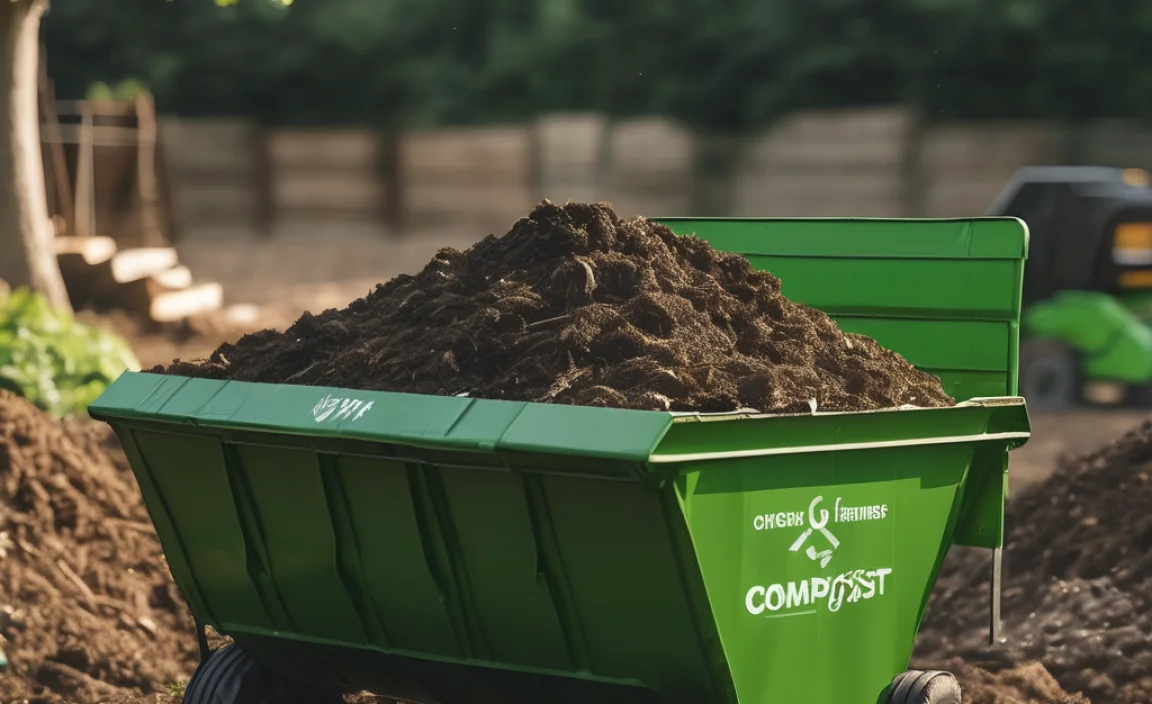
This is the most basic method, requiring minimal effort. You simply pile up your organic materials and let nature do the work over a longer period.
How it works:
- Choose a Location: Find a convenient spot on your farm that has good drainage and isn’t in the way. It can be directly on the ground.
- Start Piling: Begin layering your brown and green materials as you generate them. You don’t need to be precise with layers; just mix them as best you can. Aim for a pile that’s at least 3 feet by 3 feet by 3 feet. This size helps it retain heat and moisture.
- Add Materials Regularly: Continue adding kitchen scraps, manure, leaves, and other suitable materials. Try to bury fresh food scraps under other materials to deter pests.
- Occasional Turning (Optional but Recommended): While “cold” composting implies no turning, a few turns with a pitchfork every few months can speed things up and ensure better aeration. However, you can get compost without ever turning it, it just takes longer – sometimes up to a year or more.
- Moisture Check: If the pile seems too dry, give it a good watering. If it’s too wet, add more brown materials.
Pros:
- Extremely low effort.
- Requires no special bins or equipment.
- Great for large volumes of material.
Cons:
- Takes the longest time to decompose (6 months to 2 years).
- Less control over the process, so it might not kill weed seeds or pathogens.
- Can sometimes attract pests if food scraps are exposed.
2. The Aerated Static Pile (ASP)
This method is a step up from the simple pile, offering faster composting and better pathogen destruction without much turning. It involves forcing air through the pile.
How it works:
- Build a Base: Construct a base for your pile using perforated pipes or a layer of coarse woody material (like wood chips) to allow for airflow from below.
- Layer Materials: Build a large pile (at least 5 feet by 5 feet by 5 feet) with a mix of browns and greens. The key is to fluff up the materials as you add them to create air pockets.
- Install Aeration System: Place perforated pipes vertically or horizontally within the pile, or cover the base with a layer of coarse material that allows air to move through. This system can be passive (relying on natural convection) or active (using a blower fan). Active aeration drastically speeds up the process. For an active system, you’ll need a small electric blower connected to the pipes.
- Maintain Moisture: Keep the pile moist. The aeration system helps prevent it from getting waterlogged, but check regularly.
- Monitor Temperature: Use a compost thermometer. The pile should heat up significantly (131-160°F or 55-71°C) for at least 3-5 days. This heat is crucial for killing weed seeds and pathogens.
- Decomposition Time: With active aeration, compost can be ready in 4-8 weeks. Passive aeration takes longer, maybe 3-6 months.
Pros:
- Much faster than static piles.
- Effectively kills weed seeds and pathogens due to high temperatures.
- Requires minimal turning once built.
- Can handle large volumes.
- Good for managing manure.
Cons:
- Requires some initial setup for the aeration system (pipes, possibly a blower).
- Needs careful monitoring of temperature and moisture.
- The pile needs to be relatively large to work efficiently.
For more information on designing aeration systems, resources from university extension offices are excellent. For instance, the North Carolina State University’s Compost Facility offers detailed insights into ASP technology.
3. In-Vessel Composting
This method uses a contained system, like a bin or drum, to compost organic materials. It’s cleaner, faster, and excellent for smaller farms or those concerned about pests and aesthetics.
How it works:
- Choose Your Vessel: This could be a commercially made compost bin, a repurposed large plastic drum, or a custom-built wooden or metal container with aeration holes.
- Layer Materials: Start with a base layer of coarse browns for drainage and aeration. Then, alternate layers of greens and browns, ensuring a good mix.
- Manage Moisture: Keep the contents moist, like a wrung-out sponge. The enclosed nature of the vessel can help retain moisture.
- Aerate: Many vessels have built-in aeration systems, or you can manually turn the compost with a pitchfork or compost aerator tool every week or two. Some tumblers make this very easy.
- Temperature Monitoring: As with ASP, aim for high temperatures (131-160°F) to ensure pathogen and weed seed destruction.
- Decomposition Time: Typically 1-3 months, depending on the type of vessel and how actively you manage it.
Pros:
- Contains odors effectively.
- Keeps pests out.
- Results in faster composting due to better heat and moisture retention.
- Neater and more visually appealing.
- Good for smaller farms or for composting specific materials like kitchen scraps.
Cons:
- Requires an initial investment in a bin or materials to build one.
- Limited capacity compared to open piles or ASP.
- Manual turning can be a bit more work if using a static bin.
4. Windrow Composting
This is a popular large-scale method for farms and commercial operations. Organic materials are formed into long, narrow piles called “windrows.”
How it works:
- Choose Location: Select a large, well-drained area, preferably with a hard surface or gravel if possible.
- Build the Windrow: Use a tractor or front loader to build long, narrow piles (typically 8-10 feet wide and 4-6 feet high). Mix your greens and browns thoroughly as you build. The goal is to create a pile with good aeration.
- Aeration and Turning: This is the most labor-intensive part. Windrows need to be turned regularly (every 1-2 weeks) to introduce oxygen, mix materials, and manage temperature. Specialized compost turners are available for large operations, or a front-end loader can be used.
- Maintain Moisture: Regularly check moisture levels and add water if necessary, especially after turning.
- Monitor Temperature: Turn the windrow when the internal temperature starts to drop after reaching its peak, or between 131-160°F. This ensures proper decomposition and kills pathogens.
- Decomposition Time: Typically 6-12 weeks, depending on the frequency of turning and materials used.
Pros:
- Excellent for very large volumes of waste.
- Can produce high-quality compost efficiently with regular turning.
- Good temperature control is achievable.
Cons:
- Requires specialized equipment (tractor, turner).
- Labor-intensive due to frequent turning.
- Needs a significant amount of space.
- More susceptible to weather conditions.
For insights into large-scale composting like windrows, agricultural extension services often provide detailed guides. For instance, resources on manure management and composting from Penn State Extension can be very helpful for farmers.
Choosing the Right Method for Your Farm
With so many options, how do you pick the best one? Consider these factors:
| Factor | Simple Pile | Aerated Static Pile (ASP) | In-Vessel Composting | Windrow Composting |
|---|---|---|---|---|
| Volume of Waste | Small to High | Medium to High | Small to Medium | Very High |
| Effort Required | Very Low | Low to Medium | Medium | High (due to turning) |
| Time to Compost | Long (6-24 months) | Medium (4-8 weeks with active aeration) | Fast (1-3 months) | Medium (6-12 weeks) |
| Weed/Pathogen Kill | Low | High | High | High |
| Pest/Odor Control | Low | Medium | High | Medium |
| Equipment Needed | Minimal (pitchfork) | Pipes, Blower (optional) | Bin or Vessel | Tractor, Turner (ideal) |
| Space Needed | Moderate | Moderate to Large | Small | Very Large |
For a small hobby farm or a beginner, the Simple Pile or a basic In-Vessel Composter is an excellent starting point. They are forgiving and don’t require much upfront investment.
If you’re dealing with significant amounts of manure or crop residue and want faster results without constant turning, an Aerated Static Pile is a fantastic choice. It balances efficiency with manageable effort.
For larger commercial operations with heavy waste streams, Windrow Composting is the most efficient method, provided you have the equipment and space.
Tips for Effortless Composting Success
No matter which method you choose, here are some tips to make your composting journey as smooth as possible:
- Chop It Up: Smaller pieces of material break down much faster. If you have large stalks or tough greens, chop them up before adding them to the pile.
- Moisture is Key: Think of a damp sponge. Too dry, and decomposition slows to a crawl. Too wet, and it can become a stinky, anaerobic mess.
- Get Enough Air: Microorganisms need oxygen. Ensure your pile has good aeration, whether through turning, pipes, or a well-built bin.
- Be Patient: Composting is a natural process. Even with the best methods, it takes time. Don’t get discouraged if it’s not ready overnight.
- Learn By Doing: Your first few piles might not be “perfect,” and that’s okay! Observe your compost, see how it’s behaving, and adjust your browns, greens, moisture, or aeration accordingly.
- Know What NOT to Compost: Avoid meat, dairy, oily foods, diseased plants, pet waste, and treated wood. These can attract pests, create odors, or contain harmful pathogens.
When is Compost Ready? The Signs to Look For
You’ll know your compost is ready when it:
- Looks dark and crumbly, like rich soil.
- Smells earthy and pleasant, not sour or like ammonia.
- The original materials are no longer recognizable.
- The temperature of the pile has cooled down to
.lwrp.link-whisper-related-posts{
margin-top: 40px;
margin-bottom: 30px;
}
.lwrp .lwrp-title{}.lwrp .lwrp-description{
}
.lwrp .lwrp-list-container{
}
.lwrp .lwrp-list-multi-container{
display: flex;
}
.lwrp .lwrp-list-double{
width: 48%;
}
.lwrp .lwrp-list-triple{
width: 32%;
}
.lwrp .lwrp-list-row-container{
display: flex;
justify-content: space-between;
}
.lwrp .lwrp-list-row-container .lwrp-list-item{
width: calc(25% – 20px);
}
.lwrp .lwrp-list-item:not(.lwrp-no-posts-message-item){max-width: 150px;
}
.lwrp .lwrp-list-item img{
max-width: 100%;
height: auto;
object-fit: cover;
aspect-ratio: 1 / 1;
}
.lwrp .lwrp-list-item.lwrp-empty-list-item{
background: initial !important;
}
.lwrp .lwrp-list-item .lwrp-list-link .lwrp-list-link-title-text,
.lwrp .lwrp-list-item .lwrp-list-no-posts-message{}@media screen and (max-width: 480px) {
.lwrp.link-whisper-related-posts{}
.lwrp .lwrp-title{}.lwrp .lwrp-description{
}
.lwrp .lwrp-list-multi-container{
flex-direction: column;
}
.lwrp .lwrp-list-multi-container ul.lwrp-list{
margin-top: 0px;
margin-bottom: 0px;
padding-top: 0px;
padding-bottom: 0px;
}
.lwrp .lwrp-list-double,
.lwrp .lwrp-list-triple{
width: 100%;
}
.lwrp .lwrp-list-row-container{
justify-content: initial;
flex-direction: column;
}
.lwrp .lwrp-list-row-container .lwrp-list-item{
width: 100%;
}
.lwrp .lwrp-list-item:not(.lwrp-no-posts-message-item){max-width: initial;
}
.lwrp .lwrp-list-item .lwrp-list-link .lwrp-list-link-title-text,
.lwrp .lwrp-list-item .lwrp-list-no-posts-message{};
}

I am passionate about home engineering. I specialize in designing, installing, and maintaining heating, ventilation, and air conditioning systems. My goal is to help people stay comfortable in their homes all year long.


