Want to teach your kids about sustainability? Composting is a fantastic way to start! It turns kitchen scraps and yard waste into nutrient-rich soil for gardens. It’s simple, fun, and teaches valuable eco-lessons. Let’s get those little hands dirty and build some genius eco-habits together. We’ll guide you through setting up a kid-friendly compost system and what to do next.
Composting For Kids Sustainable: Genius Eco-Habits for Little Environmentalists
Hey there, neighbors! Troy D Harn here from TopChooser. You know, I’ve always believed that learning new skills, especially those good for our planet, should be straightforward and, dare I say, fun! Composting is one of those things that sounds a bit technical, but when you break it down, it’s as easy as baking cookies – maybe even easier!
And when it comes to teaching our kids about being kind to the Earth, composting is a real winner. It’s hands-on, it’s a bit messy (which kids usually love!), and it shows them firsthand how we can reduce waste and make something useful from what we’d otherwise throw away. This isn’t just about waste management; it’s about building a connection to nature and understanding the cycle of life.
If you’ve ever looked at your banana peels and coffee grounds and thought, “There must be a better way than just tossing them,” then you’re in the right spot. We’re going to walk through how to get started with composting for kids, making it a sustainable and engaging habit for the whole family. We’ll cover everything from choosing the right bin to what scraps are compost champions and which ones should sit this one out.
So, grab your gardening gloves (or just your sense of adventure!), and let’s get your little ones involved in making a big difference, one compost pile at a time. We’ll make this so simple, you’ll wonder why you didn’t start sooner!
Why Composting is a Superpower for Kids
Why all the fuss about composting for kids? Well, beyond the obvious benefit of reducing landfill waste, it’s a fantastic educational tool. Kids learn about where food comes from, the decomposition process, and the importance of recycling organic materials.
- Hands-on Learning: It’s a tangible way for kids to see science in action.
- Responsibility: Caring for a compost bin teaches accountability.
- Environmental Awareness: They develop an understanding of sustainability early on.
- Gardening Connection: The compost created feeds plants, closing the loop.
- Reduces Waste: They see how everyday items can be reused instead of trashed.
Think of it as giving your compost bin a “job” and your kids the important task of helping it succeed. It’s a small action with a huge impact, both for your garden and for teaching valuable life lessons.
Getting Started: Your Kid-Friendly Compost Toolkit
Setting up a composting system for kids doesn’t need to be complicated or expensive. The goal is to make it accessible and easy for them to participate. We’re aiming for “genius eco-habits,” and that starts with simple, reliable tools.
Choosing the Right Compost Bin
There are a few options for compost bins, and the best one for you might depend on your space and how much you plan to compost.
1. Tumbler Bins (The Speedy Spinner)
These are sealed bins that rotate. They can speed up composting because you can easily mix the contents and keep them moist and aerated. They also help keep pests out, which is a bonus!
- Pros: Faster composting, contained, less pest risk.
- Cons: Can be a bit pricier, might require adult help to turn initially.
2. Stationary Bins (The Classic Cooler)
These are often plastic or wooden bins with lids. You can buy them or even make one. They require manual turning with a pitchfork or aerator. They are generally more affordable.
- Pros: Cost-effective, simple design.
- Cons: Slower decomposition, may attract pests if not managed well.
3. Open Piles (The Natural Approach)
If you have a larger yard, you can simply create a pile in a corner. This is the most budget-friendly option. It’s less contained and might be more prone to critters, so it’s best for older kids supervised by adults.
- Pros: Free, easiest to start.
- Cons: Takes up more space, less controlled, potential pest issues.
Top Tip: For composting with kids, think about accessibility. If their arms can reach into the bin to toss scraps, they’ll feel more involved. A waist-high tumbler or a bin with an easily removable front panel works well.
Essential Tools for Little Composters
You don’t need fancy gadgets, just a few handy items to make the process enjoyable and effective.
- A Kitchen Compost Caddy: This is a small container with a lid that sits on your counter for collecting food scraps throughout the day. Look for one with a charcoal filter to reduce odors!
- A Small Shovel or Trowel: For kids to help add materials to the main bin.
- A Watering Can: To help keep the compost moist.
- Gardening Gloves: To keep little hands clean (or at least cleaner!).
- A Pitchfork or Compost Aerator: For larger bins, to help turn and mix the compost. (Adult supervision is key here!)
Remember, the goal is to make this accessible and fun. If the tools are easy for your child to use, they’ll be more enthusiastic about helping. Having their own dedicated caddy or trowel can be a big motivator!
The Compost Recipe: What Goes In (and What Stays Out!)
Composting is like preparing a special healthy meal for your compost bin. It needs a good mix of ingredients. The key to successful composting is balancing “greens” and “browns.”
Understanding “Greens” and “Browns”
Think of “greens” as nitrogen-rich materials that provide moisture and protein for the microbes. “Browns” are carbon-rich materials that provide energy and bulk.
“Greens” (Nitrogen-Rich)
- Fruit scraps (apple cores, banana peels, orange peels – chop large ones!)
- Vegetable scraps (carrot tops, cucumber ends, leafy greens)
- Coffee grounds and paper filters
- Tea bags (remove any staples or plastic tags)
- Grass clippings (use in thin layers to prevent matting)
- Eggshells (crushed)
“Browns” (Carbon-Rich)
- Dry leaves
- Shredded newspaper or cardboard (avoid glossy paper)
- Straw or hay
- Sawdust or wood chips (from untreated wood)
- Dried grass
- Paper towel rolls (torn up)
The Ideal Ratio: Aim for roughly 2 to 3 parts browns to 1 part greens. Too many greens can make the pile wet and smelly. Too many browns can slow down decomposition.
What NOT to Compost (The Compost No-Nos)
Some things can cause problems, like attracting pests, creating bad smells, or not breaking down properly. Here’s what to keep out:
- Meat, fish, and bones: These can attract pests and create strong odors.
- Dairy products (cheese, milk, yogurt): Similar to meat, they attract pests and smell.
- Oily or greasy foods: Can slow down decomposition and attract pests.
- Diseased plants: Might spread diseases to your garden.
- Weeds that have gone to seed: You don’t want to spread those in your garden!
- Pet waste (dog or cat): Can contain harmful pathogens.
- Chemically treated wood or yard waste: Avoid anything that might have pesticides or chemicals.
- Coal or charcoal ash: Can contain harmful substances.
Making it Kid-Friendly: The Kitchen Caddy Crew
Let your kids be in charge of the kitchen caddy! Teach them what scraps go in and which stay out. You can even make a fun chart together.
Example “Compost Crew” Chart
| Goes In Compost! (Yum!) | Stay Out! (No!) |
|---|---|
| Apple Cores | Chicken Bones |
| Banana Peels | Cheese |
| Carrot Tops | Greasy Pizza Box |
| Coffee Grounds | Dog Poop |
| Eggshells (Crushed) | Wilted Flowers (from the florist with chemicals) |
This visual guide makes it super easy for them to sort. When the caddy is full, they can help carry it to the main compost bin and add it in!
The Step-by-Step Guide to Composting Success
Ready to get your hands dirty? Here’s how to assemble your compost and keep it happy. This is where the real fun begins for your little eco-warriors!
Step 1: Set Up Your Bin
Place your chosen compost bin in a convenient spot. Ideally, it’s in a place that gets some sun but isn’t baking hot all day, and is accessible for adding materials and for you to turn it. If it’s a tumbler, make sure it has space to spin. For stationary bins or piles, clear the ground below. If you live in an area with a lot of insects, consider placing the bin on a base of wire mesh to deter burrowing creatures.
Step 2: Start with a Layer of Browns
Begin your compost pile with a four-inch layer of “browns.” This could be dry leaves, shredded cardboard, or straw. This layer helps with drainage and airflow right from the start. It’s like laying a good foundation for a house.
Step 3: Add Your First Greens
Now, add your first layer of kitchen scraps (“greens”). Don’t go overboard – a couple of inches will do. For kids, this is the exciting part of adding their collected food scraps.
Step 4: Bury Your Greens
Always cover your fresh kitchen scraps with another layer of browns. This is crucial for preventing odors and deterring pests like fruit flies. Imagine tucking your green materials into a cozy brown blanket.
Step 5: Keep it Moist
Your compost needs the moisture of a wrung-out sponge – not dripping wet and not bone dry. Sprinkle it with water if it looks dry. Kids can help with this using a watering can. If you add a lot of wet greens, you might need to add more browns.
Step 6: Layer and Turn
Continue adding layers of greens and browns as you generate them. The key to faster composting is aeration.
- For Tumbler Bins: Give it a few spins every 2-3 days.
- For Stationary Bins/Piles: Use a pitchfork or aerator to turn the materials from the outside to the inside every week or two. This mixes everything and introduces oxygen, which the composting microbes need to thrive.
Let your kids help with turning if they are strong enough and supervised. Even poking holes with a stick can help!
Step 7: Be Patient and Observe
Composting takes time. Depending on the bin, the materials, and how often you turn it, it can take anywhere from a few months to a year to produce finished compost. You’ll know it’s ready when it looks dark, crumbly, and smells earthy. You won’t be able to recognize the original food scraps anymore.
Encouraging Kids: Make a chart for them to track when they add scraps or when the pile gets turned. They can draw pictures of “compost monsters” (the good kind!) working in there.
Troubleshooting Common Composting Quirks
Even with the best intentions, your compost pile might give you a little trouble now and then. Don’t worry, these issues are usually easy to fix, and they’re great learning opportunities for kids!
The Smelly Situation
Problem: Your compost smells like rotten eggs or ammonia.
Likely Cause: Too many “greens” or not enough air.
Solution:
- Add a good layer of brown materials (dry leaves, shredded cardboard) to absorb excess moisture and balance the nitrogen.
- Turn the pile more frequently to introduce air. If it’s a tumbler, spin it more often. If it’s a stationary bin, give it a thorough turning.
The Dry and Dormant Pile
Problem: Your compost isn’t breaking down, and it feels dry.
Likely Cause: Not enough moisture or too many “browns.”
Solution:
- Add water! Aim for the consistency of a wrung-out sponge. You might need to add a good amount if it’s very dry.
- Add more “green” materials, which are richer in nitrogen and moisture.
- Turn the pile to distribute the moisture evenly.
The Pest Problem
Problem: You’re seeing fruit flies, ants, or other critters hanging around.
Likely Cause: Uncovered food scraps, or the pile is too wet/aerated.
Solution:
- Always bury fresh kitchen scraps under at least six inches of brown material.
- Ensure your bin isn’t too wet. A healthy, active compost pile can generate heat that deters some pests.
- For persistent pests like rodents, you might need a sturdier bin, possibly one with fine mesh on the bottom and sides, or a fully enclosed tumbler.
- Avoid adding meat, dairy, and oily foods, as these are major attractants.
By understanding these common issues, you and your child can become compost detectives, figuring out what needs a little adjustment to get the pile back on track. It’s all part of the learning process!
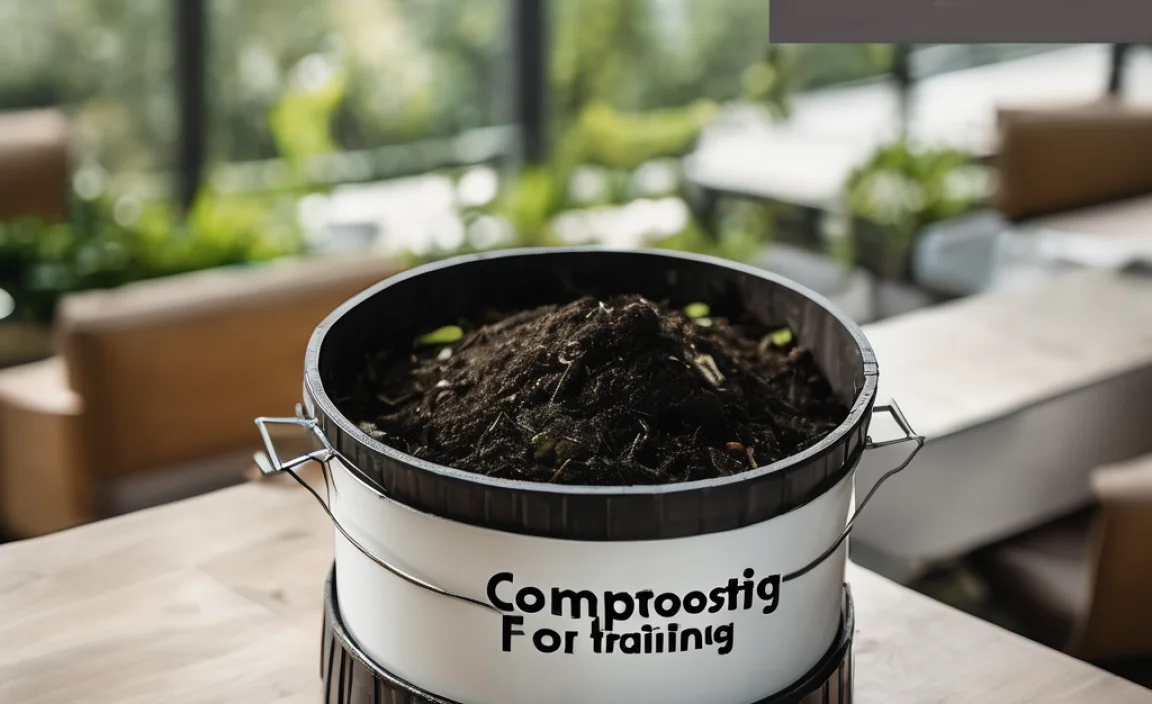
The Magic of Finished Compost: What to Do With Your Earthy Gold
After weeks or months of tending to your compost bin, the moment of truth arrives! Your pile will transform from a collection of scraps into dark, crumbly, nutrient-rich “black gold.” This is the payoff, and kids will be amazed to see the results of their hard work.
Identifying Finished Compost
You’ll know your compost is ready when:
- It has a dark brown color, like rich soil.
- It has an earthy, pleasant smell.
- You can no longer recognize the original food scraps or yard waste.
- It has a crumbly texture.
If you can still see recognizable bits, it needs more time. You can screen it through a sieve or a piece of hardware cloth to get a finer compost, removing any larger pieces that can go back into the new compost pile.
Using Your Compost
This is where the magic truly happens! Finished compost is a fantastic soil amendment that benefits plants in so many ways.
- Enriches Garden Beds: Mix compost into your vegetable garden, flower beds, or potting soil before planting. it improves soil structure, drainage, and aeration.
- Boosts Plant Health: Compost provides essential nutrients that plants need to grow strong and healthy. It’s like a multivitamin for your plants!
- Improves Soil Moisture Retention: Compost helps soil hold onto water, meaning you’ll need to water less often, which is great for busy families and thirsty plants.
- Suppresses Plant Diseases: Healthy soil built with compost can help plants resist diseases.
- Top Dressing: Spread a thin layer of compost around established plants, shrubs, and trees.
- Lawn Improvement: Rake a thin layer of compost into your lawn in spring or fall to improve soil quality.
Let your children help with spreading the compost they helped create. Seeing their efforts directly benefit the plants they might even help grow is incredibly rewarding for them. You can even start a small “kid’s garden” section where they manage planting and tending with their own compost!
For more information on soil health and the amazing benefits of organic matter, the U.S. Environmental Protection Agency (EPA) has fantastic resources on their website covering everything from home composting basics to its environmental impact.
Making Composting a Sustainable Family Habit
Composting with kids isn’t just a one-off project; it’s about building sustainable eco-habits that can last a lifetime. When composting becomes a regular part of your family’s routine, it reinforces the value of resourcefulness and environmental stewardship.
Involve the Whole Family
Make it a team effort! Assign roles: one person collects kitchen scraps, another adds them to the bin, someone else helps with watering, and everyone can help with turning. Regular family composting time can be a fun bonding activity.
Connect it to Other Eco-Activities
Show your kids how composting fits into a larger picture of reducing waste and living sustainably. Discuss recycling, reducing plastic use, and conserving water. This holistic approach helps them understand that small actions have a cumulative positive impact.
Celebrate Successes
Did your tomatoes grow extra big thanks to your compost? Did you significantly reduce your trash bin’s contents? Celebrate these wins! Acknowledge the effort your kids put in and highlight the positive outcomes. This positive reinforcement encourages them to stick with the habit.
Lead by Example
Children learn best by observing. When they see you taking composting seriously and understand its importance, they are much more likely to adopt the practice themselves. Share your enthusiasm and knowledge with them.
By integrating composting into your family’s life, you’re not just diverting waste from landfills; you’re planting the seeds of environmental consciousness that will grow with your children.
Conclusion: Your Journey to a Greener Future Starts Now
See? Composting is not some complicated science experiment reserved for master gardeners. It’s a simple, practical, and incredibly rewarding process that you can easily integrate into your family’s daily life. By introducing your kids to composting, you’re not just teaching them about waste reduction; you’re fostering a lifelong appreciation for our planet and the natural cycles that sustain us.
From setting up your bin to troubleshooting those occasional quirks, you’ve got the know-how to get started. Remember, the goal is progress, not perfection. A little bit of compost created is better than none at all. So, let the kids dig in, explore, and learn. You’ll be amazed at what they discover, and you’ll be building those genius eco-habits, one compostable scrap at a time.
Watching kitchen scraps transform into nutrient-rich food for your garden is a powerful lesson in patience, transformation, and sustainability. It’s a tangible way to show the cycle of life and how we can all play a part in taking care of our environment. So, go ahead, start your compost journey today. Your garden, your planet, and your kids will thank you for it. Happy composting!
FAQ: Your Composting Questions Answered by a Friend
Got questions? That’s totally normal when you’re starting something new! Here are some common queries folks have when they begin composting, especially with kids involved. I’ve broken them down into simple, easy-to-understand answers.
1. How long does it take to make compost?
It really depends! A fast-working compost pile in a tumbler bin, with good moisture and regular turning, might be ready in 2-3 months. A slower, stationary pile or lot often takes 6-12 months. Don’t rush it; good compost is worth the wait!
2. My compost bin smells bad. What’s wrong?
A healthy compost pile should smell earthy, like the forest floor after rain. If it smells like rotten eggs or ammonia, it’s usually too wet or has too many “greens” (nitrogen-rich stuff like food scraps) and not enough “browns” (carbon-rich stuff like leaves and cardboard). Try adding more browns and turning the pile to let it breathe!
3. Can I compost meat and dairy?
Generally, it’s best to avoid adding meat, fish, bones, and dairy products to your home compost bin. These items can attract pests like rodents and flies, and they can also lead to unpleasant odors. Stick to fruits, vegetables, coffee grounds, eggshells, and yard waste.
4. How much “green” stuff and “brown” stuff should I add?
The magic ratio is about 2 to 3 parts “browns” to 1 part “greens.” Think of it like building the compost heap: a good base of browns, then add your greens, and always finish with a layer of browns. This keeps things balanced for those tiny compost critters!
5. My compost bin is full of fruit flies. Help!
Fruit flies love exposed food scraps. The best way to get rid of them is simple: make sure all your kitchen scraps are buried under at least 6 inches of brown compost material. Also, ensure your bin isn’t too wet. Adding more browns can help dry it out a bit and make it less attractive to them.
6. What if I don’t have a yard? Can I still compost?
Absolutely! Even without a yard, you can compost. You can use a small compost bin or tumbler on a balcony or patio. If space is very limited, consider “vermicomposting” (composting with worms) indoors, or look for local community composting programs that accept food scraps.
7. How do I know when the compost is ready to use?
Finished compost is dark, crumbly, and smells like rich soil. You shouldn’t be able to see the original ingredients anymore. If you can still identify bits of banana peel or leaves, it needs more time to break down.

I am passionate about home engineering. I specialize in designing, installing, and maintaining heating, ventilation, and air conditioning systems. My goal is to help people stay comfortable in their homes all year long.