Composting for Apartments and Offices: Your Essential Guide
Ever feel like your kitchen scraps are just filling up the trash bin, destined for a landfill? It’s a common feeling, especially when space is tight. But what if I told you that you can turn that kitchen waste into valuable garden gold, even in a small apartment or a busy office? Composting might sound complicated, but it’s actually quite simple and incredibly rewarding. You can make a real difference for the planet and your plants, without needing a big backyard. Stick around, and I’ll show you exactly how to get started, step-by-step. We’ll cover everything you need to know to begin composting today, no matter your living or working situation.
This guide is designed to break down composting into easy-to-understand steps. We’ll talk about the different methods that work best for smaller spaces, what you can and can’t compost, and how to manage it all without any fuss or mess. By the end, you’ll feel confident and ready to start your own composting journey. Let’s dive in!
Quick Summary
Composting for apartments and offices is an achievable way to reduce waste and create nutrient-rich soil amendments. Key methods include vermicomposting (worm composting) and Bokashi, both well-suited for indoor environments. Essential considerations involve choosing the right bin system, understanding what materials are compostable, managing potential odors, and knowing where to use the finished compost. This guide provides a practical, beginner-friendly roadmap to successful small-space composting, making it easy to start reducing your environmental impact.
Why Compost When Space is Limited?
Living in an apartment or working in an office often means thinking twice about projects that require a lot of space. Composting is one of those things that might seem like it needs a big garden bin and open land. But the truth is, even the smallest living or working spaces can accommodate a composting system! The benefits are huge:
- Reduces Landfill Waste: A significant portion of household and office waste is organic material that could be composted. Keeping it out of landfills reduces methane gas production, a potent greenhouse gas.
- Creates Valuable Soil: Compost is often called “black gold” by gardeners. It’s a natural fertilizer that improves soil structure, fertility, and water retention. Even if you don’t have plants now, you might in the future, or you can give it to friends and family who do!
- Saves Money: Over time, you’ll buy fewer fertilizers and soil amendments for any plants you might tend to.
- Connects You to Nature: It’s a small but meaningful way to engage with natural cycles, even in an urban environment.
- Improves Air Quality (Indoors): Some composting methods can help absorb common household odors.
Choosing the Right Composting Method for Apartments and Offices
When you don’t have a backyard, traditional outdoor compost piles are out. But don’t worry, there are fantastic indoor-friendly options:
Vermicomposting (Worm Composting)
This is probably the most popular method for small spaces. It uses earthworms (specifically red wigglers, not your garden variety!) to break down food scraps. It’s efficient, relatively fast, and produces nutrient-rich worm castings, which are an excellent fertilizer.
How it Works: Red wigglers live in a specialized bin with bedding material. You feed them your kitchen scraps, and they process it, leaving behind castings. The worms reproduce, so you can maintain a healthy population.
Space Requirement: A worm bin can be as small as a couple of plastic storage tubs stacked on top of each other, making it perfect for a closet shelf, under a sink, or in a corner of a balcony.
Pros:
- Highly efficient at breaking down food scraps.
- Produces very nutrient-dense “worm tea” (liquid fertilizer) and castings.
- Relatively fast decomposition.
- Low odor potential when managed correctly.
- The worms themselves are fun to observe!
Cons:
- Requires specific types of worms, which need to be purchased.
- Worms can be sensitive to extreme temperatures (too hot or too cold).
- You need to be mindful of what you feed them (avoiding acidic or overly meaty foods).
Bokashi Fermentation
Bokashi is an anaerobic (without oxygen) fermentation process. Instead of breaking down waste, it pickles it using a special inoculant containing beneficial microbes. It works on a wider range of food scraps than vermicomposting, including meat and dairy.
How it Works: You add food scraps to an airtight Bokashi bin, sprinkle it with Bokashi bran (the inoculant), and press it down. Once the bin is full, you seal it for about two weeks to ferment, then bury the fermented material. This burial step is where it can be tricky for apartment dwellers. However, the fermented product can often be donated to community gardens or shared with friends who have larger composting setups.
Space Requirement: A Bokashi bin system is usually a bucket with a spigot at the bottom, designed to fit under a sink or in a small cupboard. It’s compact and self-contained.
Pros:
- Can compost meat, dairy, and oily foods.
- Very fast process for the initial fermentation stage.
- Produces a liquid “tea” that can be diluted and used as fertilizer.
- Airtight system means minimal odor during fermentation.
- The resulting fermented material is sterile and won’t attract pests.
Cons:
- Requires purchasing Bokashi bran regularly.
- The fermented material still needs to decompose further, which typically requires burial in soil or adding to a traditional compost pile. This is the biggest hurdle for apartment dwellers without access to outdoor space.
- The fermented material can smell pungent (like strong pickles) when you open the bin.
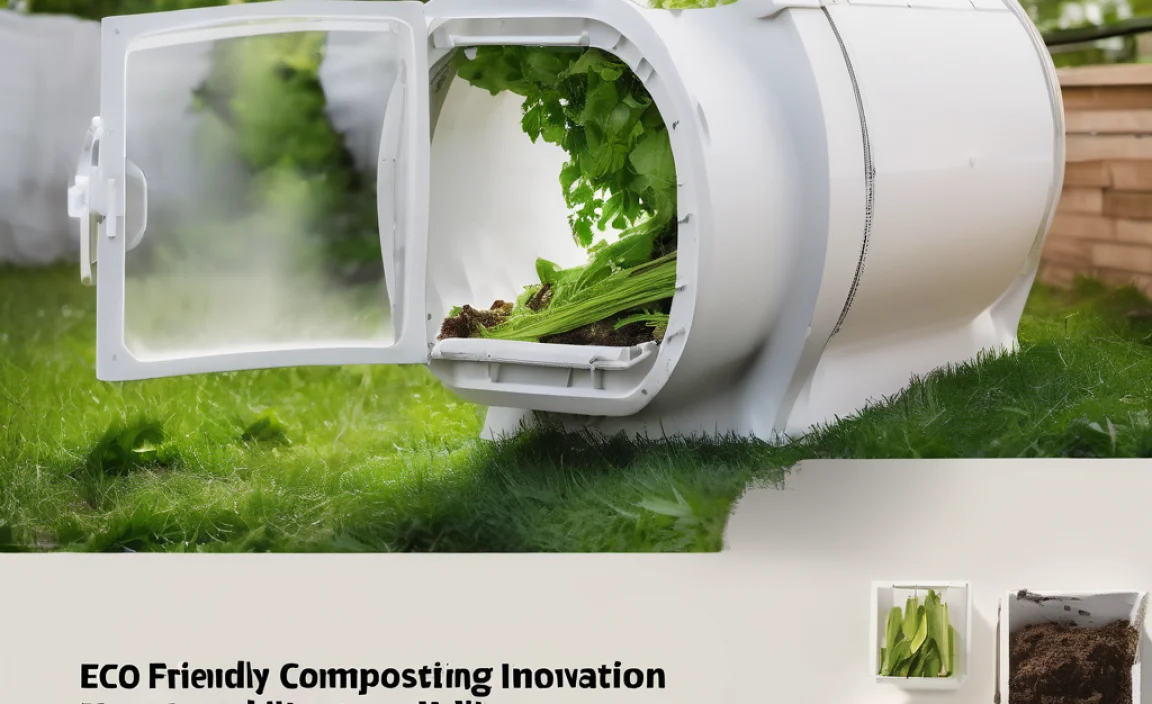
Electric Composters (Food Cyclers)
These countertop appliances use heat and aeration to significantly break down food scraps into a dry, soil-like amendment in a matter of hours. They are incredibly convenient and odor-free.
How it Works: You simply add food scraps to the appliance and turn it on. It grinds, heats, and aerates the material. The end product is usually about 90% smaller and can be used directly as a soil amendment or given to gardeners.
Space Requirement: They are about the size of a large bread maker and sit conveniently on a countertop or in a cabinet.
Pros:
- Extremely fast (~3 to 8 hours).
- Handles most food scraps, including meat and dairy.
- No smell during the process.
- Very simple to operate – just press a button.
- Significantly reduces the volume of food waste.
Cons:
- High initial cost compared to other methods.
- Requires electricity to run.
- The end product is dehydrated and needs to be mixed into soil over time to fully decompose and release nutrients – it’s not technically “compost” until microbes in the soil further break it down.
Community Composting and Drop-Off Programs
If indoor composting feels like too much hassle, or if your office doesn’t have policies allowing it, consider local options. Many cities have community gardens or composting facilities that accept food scraps.
How it Works: You collect your compostable waste in a designated container (often a small bin provided or purchased) and then drop it off at a designated location regularly. Some services even offer curbside pickup for a fee.
Space Requirement: Minimal. You only need a small container in your apartment or office to collect scraps between drop-offs.
Pros:
- No effort involved in the composting process itself.
- Can handle a wider range of materials depending on the program.
- Supports local environmental initiatives.
- No odor or mess in your space.
Cons:
- Requires regular trips to a drop-off location or paying for a collection service.
- You don’t get to keep the finished compost yourself.
- Availability varies greatly by location.
Getting Started: Practical Steps for Your Chosen Method
No matter which method you choose, preparation is key. Here’s a breakdown of what you’ll need and how to set it up.
For Vermicomposting (with Red Wigglers)
What You’ll Need:
- Worm Bin: You can buy a ready-made bin or make one from two opaque plastic storage totes (about 10-15 gallons each, with lids). Drill small holes in the bottom of one tote for drainage and ventilation, and drill a few holes in the lid for air.
- Bedding Material: Shredded newspaper (black ink only, no glossy paper), shredded cardboard, coconut coir, or aged leaves. About 5-6 inches deep is good.
- Red Wiggler Worms: Order these online from a reputable worm farm or find a local supplier. You’ll need about 1/4 to 1/2 pound of worms to start.
- Food Scraps: Primarily fruit and vegetable scraps, coffee grounds, tea bags (without staples), crushed eggshells.
- A Small Kitchen Caddy: To collect scraps before taking them to the worm bin.
- Optional: Worm Casting Bin – If you make your own bin using two stacked totes, the bottom tote acts as a collection bin for liquid “worm tea.”
Step-by-Step Setup:
- Prepare the Bin: If making your own, drill drainage holes in the bottom of one tote. Drill ventilation holes in the lid. Stack this tote inside the other, ensuring there’s space for liquid to drain into the bottom bin.
- Add Bedding: Moisten your bedding material until it’s like a wrung-out sponge. Fill about half to two-thirds of the prepared bin.
- Introduce the Worms: Gently place your red wigglers on top of the bedding. They will quickly burrow down to escape the light.
- Let Them Settle: Leave the worms for a day or two with no food to help them acclimate.
- Start Feeding: Begin by adding small amounts of food scraps. Bury them under the bedding to avoid attracting pests or creating odors.
- Harvest: After a few months, you can start harvesting the worm castings. A common method is to move the food to one side of the bin, encouraging worms to gather there, then harvest the castings from the empty side.
For Bokashi Fermentation
What You’ll Need:
- Bokashi Bin System: Typically comes as two airtight buckets, one with a spigot for draining liquid. You can buy these online or at some garden supply stores.
- Bokashi Bran: This is the key ingredient – look for it online or at specialty stores. It contains effective microorganisms (EM) that ferment the waste.
- Food Scraps: Anything from fruits and vegetables to meat, dairy, and small bones.
- A Kitchen Caddy: For collecting scraps.
- A Container to Bury or Compost the Final Product: This is crucial for apartment dwellers. You might need to find a community garden or a friend with a traditional compost pile.
Step-by-Step Setup:
- Prepare the Bin: Ensure the spigot is screwed tightly onto the bottom bucket.
- Add First Layer of Scraps: Put your food scraps into the bin. Chop larger items into smaller pieces to speed up fermentation.
- Sprinkle Bran: Sprinkle a generous layer of Bokashi bran over the food scraps (follow product instructions, usually a couple of tablespoons per layer).
- Press Down: Use a plate or your hand to press down the ingredients firmly. This removes air pockets.
- Seal and Repeat: Close the lid tightly. When you add more scraps, repeat steps 2-4.
- Drain the “Tea”: Regularly drain the liquid that collects at the bottom by opening the spigot. This “tea” is a potent liquid fertilizer, but it must be diluted (1:100 with water) before use and is best done after it’s fermented and stabilized.
- Ferment: Once the bin is full, seal it for at least two weeks (up to four is better) in a warm, dark place to allow fermentation to complete.
- Dispose of Fermented Waste: This is the tricky part for apartment dwellers. You must take the fermented food waste to a garden to be buried in soil, added to an active compost pile, or to a specialized Bokashi composting service if available. Do NOT add it directly to plants as it’s still acidic.
What Can I Compost (and What Should I Avoid)?
Understanding your “greens” and “browns” is important, though this balance is less critical for vermicomposting and Bokashi compared to traditional composting. However, knowing what worms and microbes like (or dislike) is still a good idea.
Here’s a handy table:
| Compostable (Greens & Browns) | Avoid / Limit |
|---|---|
| Fruits and vegetables (scraps, peels, cores) | Citrus peels (limit in worm bins, okay in Bokashi) |
| Coffee grounds and filters | Dairy products (milk, cheese, yogurt – okay in Bokashi) |
| Tea bags (staples removed) | Meat, fish, bones, and greasy/oily food scraps (okay in Bokashi and electric composters) |
| Eggshells (crushed well) | Heavily processed foods or those with artificial ingredients |
| Plain cooked pasta and rice (in moderation for worms) | Diseased plants or weeds gone to seed |
| Bread and grains (in moderation for worms) | Pet waste (dog and cat feces) and soiled cat litter |
| Shredded newspaper (black ink only) | Coal or charcoal ash |
| Shredded cardboard (uncoated) | Glossy paper or magazines |
| Yard trimmings (small amounts for worms, like leaves or grass clippings – watch out for pesticides/herbicides) | Treated wood or sawdust |
Important Notes:
- Worms: Red wigglers can be sensitive. Avoid large amounts of acidic foods (like citrus or tomatoes), spicy foods, and very oily foods. Smaller pieces are easier for them to digest.
- Bokashi: This method is more forgiving and can handle meat and dairy, which traditional composting and vermicomposting cannot.
- Electric Composters: Generally handle a very wide range of food scraps, similar to Bokashi.
Managing Odor and Potential Pests
This is a common worry for indoor composting. The good news is that when done correctly, most indoor methods have minimal to no odor.
Tips for Odor Control:
- Proper Balance (for Worms): Ensure you’re not overfeeding your worms. If it smells “sour” or like rotten food, you’ve likely added too much or not enough bedding. Bury your food scraps well under the bedding.
- Adequate Bedding (for Worms): The bedding acts as a buffer. Make sure there’s enough moist, carbon-rich bedding material.
- Airtight Lids: For Bokashi, ensure the lid is sealed tightly

I am passionate about home engineering. I specialize in designing, installing, and maintaining heating, ventilation, and air conditioning systems. My goal is to help people stay comfortable in their homes all year long.