Ever feel like your kitchen scraps and yard waste are just… waste? In rural areas, we have a fantastic opportunity to turn that “waste” into something amazing for our gardens and land. It might sound a bit messy, but composting is actually super straightforward and incredibly rewarding. I’m Troy D Harn from TopChooser, and I’m here to show you exactly how simple and beneficial composting can be, especially when you’ve got a bit more space to work with. We’ll break it down step-by-step, so you can start turning your scraps into garden gold in no time. Let’s dig in!
Composting for Rural Areas: Turning Yard Waste into Garden Gold

Living in a rural area often means you have more space, which is perfect for composting! Instead of sending your organic materials to a landfill, you can transform them into nutrient-rich compost. This “black gold” is a gardener’s best friend, and the benefits for your rural property are pretty significant. It helps reduce waste, improves your soil, and can even save you money. This guide is designed to make composting easy, even if you’ve never done it before. We’ll cover everything you need to know to get started and keep your compost thriving.
Why is Composting So Great for Rural Homes?
The biggest advantage of composting in a rural setting is space. You typically have more room for a compost pile or bin, lessening any aesthetic concerns you might have in closer living situations. This freedom allows for larger compost systems, which means you can compost more material – from kitchen scraps to larger yard debris like fallen branches and garden trimmings. Plus, rural areas often generate more organic waste from larger yards and gardens. Composting is an excellent way to manage this waste responsibly. It’s a win-win for your property and the environment.
Key Benefits of Composting in Rural Areas
Composting offers a heap of advantages, especially when you’re not limited by a small backyard. Here are some of the top reasons you should consider starting your compost pile today:
- Waste Reduction: A significant portion of household waste is organic material that can be composted. This diverts waste from landfills, which is especially important in rural areas where waste disposal options might be more limited or costly.
- Soil Improvement: Compost is packed with nutrients and beneficial microorganisms. When added to your soil, it improves its structure, aeration, and water retention. This means healthier plants and better kasvua (growth).
- Natural Fertilizer: Instead of buying chemical fertilizers, you can use your homemade compost. It’s a natural, slow-release fertilizer that feeds your plants steadily and reduces the risk of soil and water pollution from synthetic products.
- Water Conservation: Compost acts like a sponge, helping your soil hold more moisture. This reduces the need for frequent watering, which is a big plus, especially during dry spells common in many rural climates.
- Erosion Control: Healthy soil, enriched by compost, forms a better structure that is less prone to being washed or blown away. This is crucial for protecting your land.
- Cost Savings: By reducing the need for fertilizers, soil amendments, and potentially even waste disposal fees, composting can save you money over time.
- Supports Local Ecosystems: Healthy soil supports a diverse range of soil organisms, which are vital for a balanced local ecosystem.
Getting Started: Your First Compost Bin or Pile
The good news is you don’t need fancy equipment to start composting. For rural homes, you have a few excellent options:
Choosing Your Composting Method
Rural homeowners have the flexibility to go with open piles or dedicated bins. Both have their pros and cons:
| Method | Description | Pros | Cons |
|---|---|---|---|
| Open Pile | Simply a heap of organic materials piled up in a designated spot. Easy to start, requires no special equipment. | Simple, no cost for a bin, can be very large. | Can look untidy if not managed well, may attract pests if not layered correctly, can dry out or get too wet easier. |
| Enclosed Bin (DIY or Purchased) | A contained structure made of wood, wire mesh, plastic, or recycled materials. Can be single or multi-chambered. | Neater appearance, better at retaining moisture and heat, can deter pests more effectively. | Initial cost or effort for construction, may have smaller capacity than an open pile. |
| Tumbler Composter | A rotating drum that makes turning the compost easy. | Fast composting, easy to turn, enclosed and neat, good pest deterrence. | Higher initial cost, batch composting (can’t add new material easily once full), limited capacity. |
Location, Location, Location!
Where you put your compost setup matters. For rural areas, you have more choices, but consider these points:
- Convenience: Place it somewhere accessible from your kitchen and garden.
- Sunlight: A spot that gets some sun can help heat up the pile, speeding up decomposition. Too much intense sun can dry it out, though. Partial shade is often ideal.
- Drainage: Ensure the area drains well. You don’t want your compost sitting in a puddle.
- Water Source: Being near a water source (hose, spigot) is helpful for keeping the compost moist.
- Aesthetics & Neighbors: Even in rural settings, consider how it looks and if it’s too close to property lines or outdoor living spaces.
What Can You Compost? The “Greens” and “Browns” Explained
The secret to good compost is balancing two types of materials: “greens” and “browns.” Think of it like a recipe for healthy decomposition.
“Green” Materials (Nitrogen-rich)
These are typically moist, fresh materials that provide nitrogen, which helps the microorganisms multiply and heat up the pile.
- Fruit and vegetable scraps
- Coffee grounds and tea bags
- Grass clippings (in thin layers to avoid matting)
- Plant trimmings
- Manure from herbivores (like chickens, cows, horses – avoid pet waste!)
“Brown” Materials (Carbon-rich)
These are drier, bulkier materials that provide carbon, which is food for the microbes. They also help create air pockets, preventing the pile from becoming a soggy, smelly mess.
- Dry leaves
- Shredded newspaper and cardboard (uncoated)
- Straw and hay
- Small twigs and wood chips
- Sawdust (from untreated wood)
What NOT to Compost
Some things will slow down decomposition, attract pests, or could harm your garden if composted. It’s best to keep these out:
- Meat, fish, and bones
- Dairy products (cheese, milk, yogurt)
- Oils, fats, and grease
- Diseased plants
- Weeds that have gone to seed
- Pet waste (dog and cat feces)
- Treated wood products
- Coal or charcoal ash
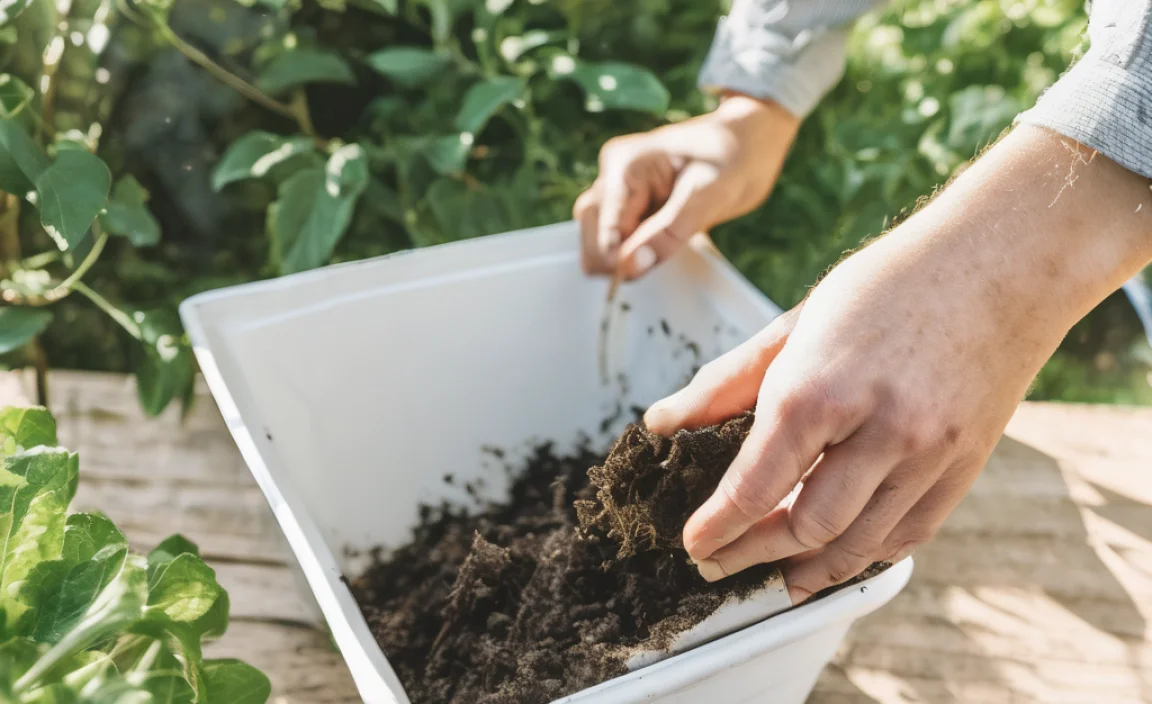
Building Your Compost Pile: A Step-by-Step Approach
Let’s get our hands dirty (figuratively, for now!) and build that compost pile.
Step 1: Choose Your Location
As we discussed, pick a convenient, well-drained spot that gets some sun. If you’re using a bin, set it up according to the manufacturer’s instructions or your DIY plan.
Step 2: Start with a Base Layer
Begin with a layer of coarse “brown” materials, like small twigs or straw. This helps with aeration and drainage from the bottom.
Step 3: Layer Your Materials
Now, start adding your greens and browns. Aim for a good mix. A general rule of thumb is to have about two to three parts “browns” for every one part “greens.” You can do this by layering, or if you’re feeling ambitious, you can mix them together as you add them.
- Add a layer of kitchen scraps (greens).
- Cover it with a layer of dry leaves or shredded newspaper (browns).
- Add some grass clippings or garden trimmings (greens).
- Cover with more brown materials.
This layering keeps things balanced and helps prevent odors. Think of the browns as the blankets that tuck in the greens!
Step 4: Add Water
Your compost pile needs to be moist, like a wrung-out sponge. If it’s too dry, decomposition slows down. If it’s too wet, it can get anaerobic and smelly. Sprinkle water on the layers as you add them, especially the dry brown materials.
Step 5: Turn Your Compost (Aeration is Key!)
This is where you “turn” your compost. Using a pitchfork or a compost aerator, mix the materials periodically. Turning introduces oxygen, which is vital for the aerobic bacteria that do the work of breaking down your organic matter. How often you turn depends on how quickly you want compost. Turning weekly will speed things up considerably. Turning every few weeks or once a month is still effective, just slower.
For those using a tumbler, simply give it a few spins every few days. It’s that easy!
Step 6: Maintain Moisture and Balance
Keep an eye on the moisture level. If it feels dry, add water. If it seems too wet, add more brown materials like shredded cardboard or dry leaves. Continue to add greens and browns as you generate them, always trying to maintain that balance.
Troubleshooting Common Composting Issues
Even with the best intentions, you might run into a few bumps. Here’s how to fix them:
- Smelly Compost: Usually too wet or too many greens. Add more brown materials (leaves, shredded cardboard) and turn the pile to aerate it. Ensure good drainage.
- Not Heating Up: The pile might be too small, too dry, or lack enough nitrogen. Make sure you have enough material (aim for at least 3x3x3 feet for an open pile), add some water, and mix in more green materials like grass clippings or kitchen scraps.
- Attracting Pests: This is usually due to exposed food scraps or improper materials. Make sure your greens are well-covered by browns, avoid meat/dairy, and consider using an enclosed bin or tumbler.
- Slow Decomposition: Not enough air, moisture, or the materials are too large. Turn the pile more regularly, check moisture levels, and chop or shred larger items before adding them.
When is Compost Ready?
Patience is a virtue in composting! Your compost is ready to use when it is dark, crumbly, and smells earthy – like a forest floor after rain. You shouldn’t be able to recognize the original materials anymore. This process can take anywhere from a few months to over a year, depending on your turning frequency, materials, and climate.
Using Your Finished Compost
Once your compost is ready, you can simply scoop it out and use it in a variety of ways:
- Soil Amendment: Mix it into your garden beds before planting. It’s fantastic for improving the soil structure and fertility of vegetable gardens, flower beds, and around trees and shrubs. A good starting point is mixing 2-4 inches into the top 6-8 inches of soil.
- Top Dressing: Spread a thin layer of compost around established plants. This feeds them slowly and helps retain moisture.
- Potting Mix: Mix compost with other ingredients like peat moss or perlite to create a nutrient-rich potting mix for containers and hanging baskets. A common mix is 1/3 compost, 1/3 peat moss, and 1/3 perlite.
- Lawn Top Dressing: Spread a thin layer over your lawn in the spring or fall to improve soil health and grass vitality.
Advanced Composting Techniques for Rural Settings
Once you’ve mastered the basics, you might want to try some more advanced methods that suit a rural lifestyle:
Cold Composting
This method is the simplest: just pile everything up and let nature take its course. It takes longer (often 1-2 years) but requires minimal effort. It’s great for bulky yard waste you aren’t in a hurry to process.
Hot Composting: Achieving Faster Results
Hot composting involves managing your compost pile carefully to reach temperatures of 130-160°F (55-70°C). This kills weed seeds and pathogens quickly. To achieve this:
- Maintain a good balance of greens and browns.
- Start with a pile of at least 3x3x3 feet.
- Turn the pile frequently (every 4-7 days) to keep it aerated and mixed.
- Ensure adequate moisture.
Sheet Composting (or Lasagna Gardening)
Instead of a separate pile, you build compost directly on the garden bed. Layer organic materials like cardboard, leaves, grass clippings, and kitchen scraps directly onto the soil where you want to plant. Over time, it breaks down, creating rich soil. This is excellent for preparing new garden plots.
Composting Animal Manures
Rural properties often have access to manure from horses, cows, chickens, or rabbits. This is a fantastic nitrogen-rich addition to your compost, but it’s crucial to compost it properly. Fresh manure can burn plants and may contain pathogens. Hot composting is essential for animal manures to ensure they are safe to use. Avoid using cat or dog waste due to potential pathogens.
Using Compost for Larger Landscapes
In rural areas, you might be managing larger acreage. Compost can be spread using a tractor and spreader for fields, pastures, or large lawn areas. This broad application helps improve soil health across your entire property, benefiting everything from your vegetable patch to your hayfield. For more information on sustainable land management practices, the USDA Natural Resources Conservation Service offers valuable resources.
Is Composting Worth It? The Economic and Environmental Payoff
Absolutely! When you look at the long-term benefits, composting is one of the most rewarding activities for any rural homeowner. You’re not just reducing waste; you’re actively creating a resource that enhances your land. Healthier soil means healthier plants, which can lead to better yields from your vegetable garden or fruit trees. It also means a more resilient landscape that can better withstand drought and heavy rains. Embracing composting is a sustainable practice that pays dividends for years to come. It’s a simple, natural cycle that benefits your wallet and the planet.
Frequently Asked Questions About Composting in Rural Areas
Q1: How much space do I really need for a compost pile?
A1: For an open pile, the ideal size for efficient composting is around 3 feet wide x 3 feet deep x 3 feet high. Smaller piles will still compost, just more slowly. If you’re using a bin, the size will depend on the bin dimensions, but the principle of having enough material for the microorganisms to work effectively still applies.
Q2: Will my compost pile smell bad and attract unwanted animals?
A2: A properly managed compost pile shouldn’t smell bad; it should have an earthy aroma. Bad smells usually indicate too much moisture or not enough air, or an imbalance of greens and browns. To deter animals, avoid adding meat, dairy, and oily foods, and ensure food scraps are well-covered with brown materials. An enclosed bin or tumbler is also a good deterrent.
Q3: How often should I turn my compost pile?
A3: Ideally, turn your compost pile every 1-2 weeks for faster decomposition. However, if you’re short on time, turning it once a month or even just a few times a year will still work, it will just take longer. Tumbler composters make turning very easy.
Q4: Can I compost diseased plants from my garden?
A4: It’s generally not recommended to compost diseased plants, especially if you plan to use the compost in the same garden. The heat in a compost pile might not be high enough to kill all pathogens, and you could spread the disease back into your garden. For best results, remove diseased plants from your compost system.
Q5: What’s the difference between hot and cold composting, and which is better for me?
A5: Hot composting is an active process that heats up the pile to kill weed seeds and pathogens, producing compost faster (months). It requires regular turning and a good balance of materials. Cold composting is a passive process; you just pile materials and let them break down over a longer period (a year or
.lwrp.link-whisper-related-posts{
margin-top: 40px;
margin-bottom: 30px;
}
.lwrp .lwrp-title{
}.lwrp .lwrp-description{
}
.lwrp .lwrp-list-container{
}
.lwrp .lwrp-list-multi-container{
display: flex;
}
.lwrp .lwrp-list-double{
width: 48%;
}
.lwrp .lwrp-list-triple{
width: 32%;
}
.lwrp .lwrp-list-row-container{
display: flex;
justify-content: space-between;
}
.lwrp .lwrp-list-row-container .lwrp-list-item{
width: calc(25% – 20px);
}
.lwrp .lwrp-list-item:not(.lwrp-no-posts-message-item){
max-width: 150px;
}
.lwrp .lwrp-list-item img{
max-width: 100%;
height: auto;
object-fit: cover;
aspect-ratio: 1 / 1;
}
.lwrp .lwrp-list-item.lwrp-empty-list-item{
background: initial !important;
}
.lwrp .lwrp-list-item .lwrp-list-link .lwrp-list-link-title-text,
.lwrp .lwrp-list-item .lwrp-list-no-posts-message{
}@media screen and (max-width: 480px) {
.lwrp.link-whisper-related-posts{
}
.lwrp .lwrp-title{
}.lwrp .lwrp-description{
}
.lwrp .lwrp-list-multi-container{
flex-direction: column;
}
.lwrp .lwrp-list-multi-container ul.lwrp-list{
margin-top: 0px;
margin-bottom: 0px;
padding-top: 0px;
padding-bottom: 0px;
}
.lwrp .lwrp-list-double,
.lwrp .lwrp-list-triple{
width: 100%;
}
.lwrp .lwrp-list-row-container{
justify-content: initial;
flex-direction: column;
}
.lwrp .lwrp-list-row-container .lwrp-list-item{
width: 100%;
}
.lwrp .lwrp-list-item:not(.lwrp-no-posts-message-item){
max-width: initial;
}
.lwrp .lwrp-list-item .lwrp-list-link .lwrp-list-link-title-text,
.lwrp .lwrp-list-item .lwrp-list-no-posts-message{
};
}
Related Posts
- Are Diphtheroids Normal in Urine? Powerful Facts!
Compost Toilet Urban: Genius Essential Setup- Compost Tumbler Flies: Essential Pest Control
- Best Oil-Free 17 Gallon Air Compressor: Essential Guide

I am passionate about home engineering. I specialize in designing, installing, and maintaining heating, ventilation, and air conditioning systems. My goal is to help people stay comfortable in their homes all year long.