Ever feel overwhelmed by composting? You’re not alone! Many folks think it’s complicated, but it’s really not. Getting started with composting is simpler than you might imagine. We’ll break down exactly what you need to know. You’ll be turning kitchen scraps into garden gold before you know it!
This guide will walk you through the basics, step-by-step. We’ll cover what composting is, why it’s great for your garden, and the essential skills you need to succeed. Get ready to make your garden happier and your trash bin lighter!
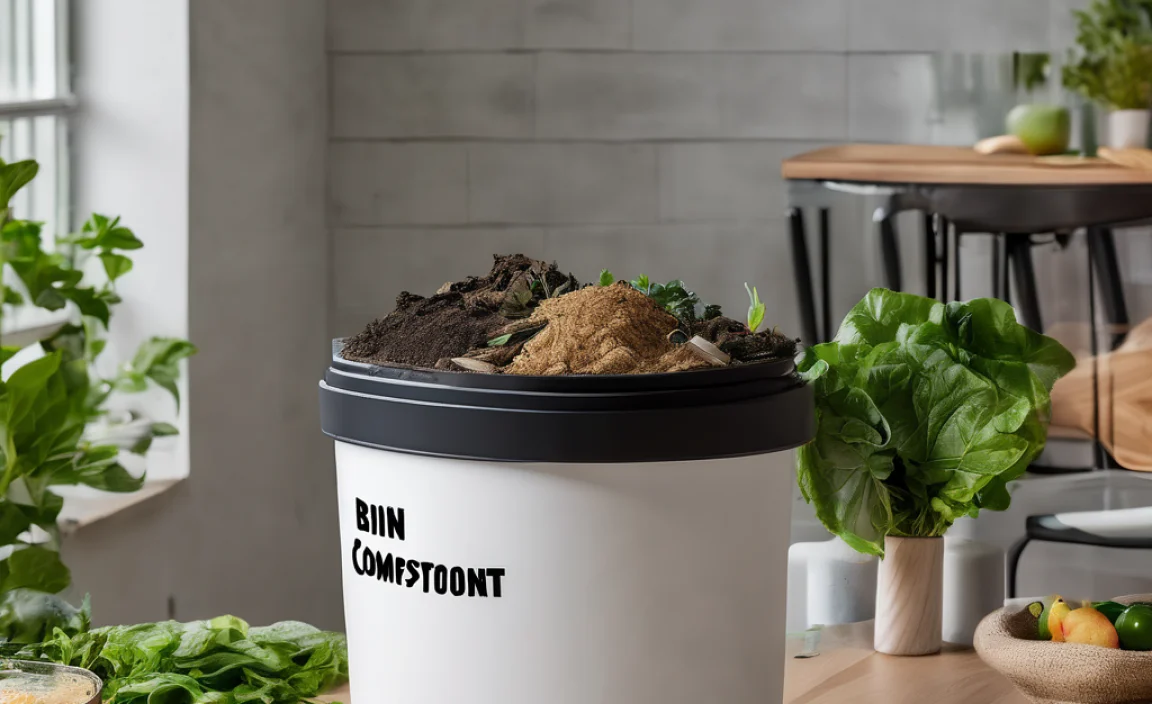
What is Composting, Anyway?
Simply put, composting is nature’s way of recycling. It’s the process of breaking down organic materials—like food scraps and yard waste—into a nutrient-rich soil amendment called compost. Think of it as a super-powered meal for your plants!
This dark, earthy material is packed with nutrients that help plants grow strong and healthy. It also improves the soil’s structure, making it better at holding water and air. It’s like giving your garden a big, healthy drink and a good breath of fresh air all at once!
Why Should You Start Composting?
Composting offers a bunch of fantastic benefits, for your garden and for the planet. It’s a win-win situation!
- Reduces Waste: A large portion of household trash is actually compostable material. By composting, you divert this from landfills, which helps reduce methane gas produced by decomposing waste.
- Enriches Soil: Compost is a natural fertilizer. It provides essential nutrients for your plants, leading to healthier growth and better yields in your garden.
- Improves Soil Structure: Adding compost helps sandy soils retain moisture and nutrients, and it loosens up clay soils, allowing for better drainage and aeration.
- Saves Money: You’ll buy fewer fertilizers and soil amendments for your garden. Plus, you’re reducing your contribution to waste hauling fees.
- Environmentally Friendly: Composting is a sustainable practice that supports a circular economy, turning waste into a valuable resource.
Essential Composting Skills for Beginners
Don’t let the idea of composting intimidate you. There are just a few key skills to master, and they are surprisingly easy to learn. We’ll break them down so you can feel confident.
Skill 1: Knowing What to Compost (and What Not To)
This is probably the most important skill to get right. Putting the wrong things in your compost bin can cause problems, like attracting pests or creating unpleasant smells. It’s all about balance!
Think of your compost pile like a balanced diet for microorganisms. They need a mix of “greens” and “browns.”
What to Add (Greens – Nitrogen-Rich Materials)
These items are wet and tend to break down quickly. They provide nitrogen, which fuels the composting process.
- Fruit and vegetable scraps
- Coffee grounds and filters
- Tea bags (remove staples)
- Grass clippings (in thin layers to avoid matting)
- Plant trimmings (non-diseased)
- Eggshells (crushed)
- Manure from herbivores (like rabbits, horses, cows – not dogs or cats)
What to Add (Browns – Carbon-Rich Materials)
These items are dry and provide carbon, which is like the energy source for the microorganisms. They also help with aeration.
- Dry leaves
- Shredded newspaper and cardboard (avoid glossy paper)
- Straw and hay
- Wood chips and sawdust (in moderation)
- Twigs and small branches (chopped up)
- Paper towels and napkins (unsoiled by grease or chemicals)
What to Avoid (The No-Nos)
These items can cause problems like odors, attract pests, or contain harmful pathogens.
- Meat, fish, and dairy products (attract pests and smell bad)
- Oily or greasy foods
- Diseased plants (can spread disease)
- Weeds that have gone to seed (you’ll just spread them)
- Pet waste (from cats and dogs – can carry pathogens)
- Chemically treated wood or yard waste
- Coal or charcoal ash
- Non-biodegradable items (plastics, metals, glass)
Skill 2: Building the Right Compost Ratio
Getting the mix right is key for fast, efficient composting. Too much of one thing can slow down decomposition or make your pile smelly. A good rule of thumb is to aim for a ratio of about 2 parts “browns” to 1 part “greens” by volume. This provides the right balance of carbon and nitrogen for the microbes doing the hard work.
Don’t worry about being perfectly precise. You’ll get a feel for it as you go. If your pile starts smelling sour, you probably need more browns. If it’s not heating up and just looks like a damp pile, you might need more greens.
Skill 3: Creating the Ideal Environment
Composting happens best when the microorganisms have what they need: air, water, and warmth. You can help create these conditions.
Aeration (Oxygen is Key!)
Composting is an aerobic process, meaning it needs oxygen. Turning your compost pile regularly helps to introduce air. This also mixes the materials, speeding up decomposition and preventing anaerobic (oxygen-starved) conditions, which lead to bad smells.
How to Aerate:
- Turning: Use a pitchfork or compost aerator tool to turn the pile. Aim to do this every 1-2 weeks. Mix the outer layers into the center and vice versa.
- Layering: When you add new materials, try to bury greens within browns or vice versa to help with airflow.
- Bin Type: Some compost bins are designed with built-in aeration systems or are open on the sides to allow for better air circulation.
For more on bin types, check out this helpful guide from the U.S. Environmental Protection Agency (EPA).
Moisture (Just Right, Not Too Wet or Dry)
Your compost pile should feel like a damp, wrung-out sponge. It shouldn’t be soggy, nor should it be bone dry. Too dry, and the microbes can’t work effectively. Too wet, and you risk anaerobic conditions and odors.
How to Manage Moisture:
- Checking: Grab a handful of compost. If water drips out, it’s too wet. If it’s crumbly and dry, it’s too dry.
- Adding Water: If it’s too dry, sprinkle water on it while turning the pile.
- Adding Browns: If it’s too wet, mix in more dry brown materials like shredded paper, leaves, or straw.
- Covering: During very wet weather, you might need to cover your pile with a tarp to prevent it from becoming waterlogged.
Temperature (The Hot or Cold Debate)
Composting can happen in two ways: hot composting or cold composting.
- Hot Composting: This is the faster method. It involves building a pile with the right ratio of greens and browns, keeping it moist, and turning it regularly. A well-managed hot compost pile can reach temperatures of 130-160°F (55-70°C). This heat kills weed seeds and pathogens and breaks down materials quickly, often producing compost in 1-3 months.
- Cold Composting: This is the “set it and forget it” method. You simply add materials as you have them. It takes longer, usually 6-12 months or more, and doesn’t always reach high temperatures, meaning some weed seeds might survive. It’s less effort but takes patience.
For beginners, either method can work. Cold composting is easier to start with, while hot composting yields faster results if you have the time and materials.
Skill 4: Knowing When Your Compost is Ready
This is the rewarding part! Finished compost is a dark, crumbly material that smells earthy, like a forest floor after rain. You shouldn’t be able to identify the original materials you added.
Signs of Finished Compost:
- Appearance: Dark brown or black, crumbly, and uniform in texture.
- Smell: Pleasant, earthy, and mild. No sour or ammonia-like odors.
- Texture: No recognizable food scraps or yard waste.
- Temperature: Cooled down to ambient temperature.
If you’re unsure, give it a bit more time. It’s better to wait a little longer than to use immature compost, which can still contain materials that aren’t fully broken down.
Choosing the Right Composting Method/Bin
There are several ways to compost, and the best method for you depends on your space, budget, and how much effort you want to put in.
1. Compost Bins
These are enclosed containers designed to hold your compost materials. They come in various types:
- Stationary Bins: These are typically made of wood, wire mesh, or recycled plastic. You add materials from the top and remove finished compost from a door at the bottom. They are good for holding heat.
- Tumbler Bins: These are sealed drums that you rotate or “tumble” to mix and aerate the compost. They are often faster and easier to turn than stationary bins but can be more expensive.
Table: Pros and Cons of Common Compost Bin Types
| Bin Type | Pros | Cons |
|---|---|---|
| Stationary Bins (Wood/Wire/Plastic) | Affordable, easy to build, good for large volumes. | Can be harder to turn, may attract pests if not managed well. |
| Tumbler Bins | Easy to turn, faster composting, keeps pests out. | More expensive, can be smaller capacity, can get heavy when full. |
| Worm Composting (Vermicomposting) | Great for apartment dwellers, produces nutrient-rich castings, can be done indoors. | Limited to specific types of food scraps, requires special worms (red wigglers), can be sensitive to temperature. |
| Open Piles | No cost, can handle large volumes of yard waste. | Requires a lot of space, less tidy, harder to control moisture and temperature, can attract pests if not managed. |
2. Worm Composting (Vermicomposting)
This is a fantastic option for people with limited outdoor space, like apartment dwellers. You use special composting worms (usually red wigglers) to do the bulk of the work in a contained bin.
A worm bin is typically a shallow plastic bin with added bedding material (like shredded newspaper or coconut coir). You add your kitchen scraps, and the worms munch away, producing high-quality worm castings, which are an excellent fertilizer.
For more detailed instructions on vermicomposting, you can refer to resources from your local master gardener program or university extension offices. Many offer free guides.
3. Open Piles
If you have a large yard and a lot of yard waste, simply creating an open pile in a corner of your yard can work. This is the simplest method but requires the most space and is the least controlled.
To make an open pile work better, try to loosely contain it with some branches or chicken wire to keep it tidier and help with air circulation.
Troubleshooting Common Composting Problems
Even with the best intentions, you might run into a few hiccups. Don’t get discouraged! Most composting problems have simple solutions.
Problem: My compost pile smells bad (like ammonia or rotten eggs).
Cause: Usually too many “greens” (nitrogen-rich materials) or it’s too wet, leading to anaerobic conditions.
Solution:
- Add more “browns” (carbon-rich materials) like shredded paper, dry leaves, or sawdust.
- Turn the pile thoroughly to aerate it.
- If it’s too wet, try to cover it during rain and mix in dry browns.
Problem: My compost pile isn’t breaking down and is just sitting there.
Cause: It might be too dry, lack enough “greens” (nitrogen), or not enough air circulation.
Solution:
- Check the moisture level. If it’s dry, add water while turning the pile.
- Add more “greens” like kitchen scraps or grass clippings.
- Turn the pile to introduce more air.
- Ensure you have a good mix of greens and browns.
Problem: My compost pile is attracting pests (flies, rodents).
Cause: Often caused by adding meat, dairy, or oily foods, or by exposed food scraps.
Solution:
- Avoid adding prohibited items like meat, dairy, and oils.
- Bury food scraps deep within the pile, covering them with brown materials.
- Ensure your compost bin has a lid and is in good repair.
- Turning the pile regularly can also deter some pests.
Quick Summary: Your Composting Checklist
Here’s a handy checklist to keep your composting journey on track:
- Know Your Stuff: Stick to greens and browns. Avoid the no-nos.
- Ratio is Key: Aim for roughly 2 parts browns to 1 part greens.
- Moisture Check: Keep it as damp as a wrung-out sponge.
- Air it Out: Turn your pile regularly for good aeration.
- Be Patient: Nature takes its time.
- Troubleshoot: Don’t be afraid to adjust if things smell or stop moving.
Conclusion
See? Composting isn’t some mysterious art known only to seasoned gardeners. With these essential skills under your belt—understanding what goes in, getting the right mix, managing moisture and air, and knowing when it’s ready—you’re well on your way to becoming a composting pro.
It’s a simple, rewarding process that benefits your garden, your home, and the environment. Start small, learn as you go, and don’t be afraid to experiment. Before you know it, you’ll be transforming everyday kitchen scraps and yard waste into black gold that makes your plants thrive. Happy composting!
FAQ: Your Beginner Composting Questions Answered
What is the fastest way to compost?
Hot composting is the fastest method. This involves maintaining the right balance of green and brown materials, keeping the pile moist, and turning it regularly to introduce air. A well-managed hot compost pile can produce finished compost in as little as 1-3 months.
Do I need a special bin to compost?
No, you don’t strictly need a special bin. You can start with an open pile, use wire mesh to create a simple enclosure, or even use a large trash can with holes drilled into it. However, bins and tumblers can help manage the process, keep things tidy, and deter pests.
How often should I turn my compost pile?
For faster composting (hot composting), aim to turn your pile every 1 to 2 weeks. If you’re doing cold composting or have a tumbler, you might turn it less frequently, perhaps once a month or even less.
Can I compost diseased plants?
It’s generally best to avoid composting diseased plants, especially if you’re not actively practicing hot composting. High temperatures in a hot compost pile can kill pathogens, but cooler or slower piles might not reach high enough temperatures to sterilize the material, potentially spreading diseases in your garden.
How do I know if my compost is “finished”?
Finished compost is dark brown or black, crumbly, and smells earthy. You won’t be able to recognize the original food scraps or yard waste. It should also be cool to the touch, meaning it has finished its active decomposition phase.
What if my compost freezes in winter?
Composting naturally slows down or stops in cold weather and when a pile freezes. Don’t worry! Once the weather warms up, the microorganisms will become active again, and decomposition will resume. You can continue adding materials, but progress will be slower until it thaws.

I am passionate about home engineering. I specialize in designing, installing, and maintaining heating, ventilation, and air conditioning systems. My goal is to help people stay comfortable in their homes all year long.