Living in a small apartment doesn’t mean you have to miss out on the joys of composting. Many people think composting is only for those with big yards, but that’s a myth! If you’re looking to reduce waste and create amazing food for your plants, even from a tiny space, you’re in the right place. We’ll break down exactly how to compost in your apartment, making it super simple and mess-free. Get ready to turn your kitchen scraps into garden gold, effortlessly!
Composting for Small Apartments: Your Effortless Guide to Kitchen Gold
Hey there! Troy D Harn here, your go-to guy for making home and garden projects easy as pie. Today, we’re tackling something that might sound a bit intimidating if you’re an apartment dweller: composting. Lots of my readers in apartments have asked, “Can I really compost without a garden?” The answer is a resounding YES! It’s totally doable and incredibly rewarding. We’re going to walk through the whole process, step-by-step, showing you just how simple and clean apartment composting can be. Forget the mess and the confusion; this guide is all about making it effortless, reliable, and successful for you, no matter your living space. Let’s get started on turning those kitchen scraps into valuable compost!
Why Compost in Your Apartment? More Than Just Being Green
Composting in a small space is more than just a trendy eco-habit; it’s a practical way to make a real difference. For starters, it dramatically cuts down the amount of trash you send to the landfill. Think about all those food scraps you toss every day – well, they can become something useful instead! This means less waste, which is fantastic for the planet. Plus, if you’ve got a balcony garden, a few indoor plants, or even just a windowsill herb garden, homemade compost is pure gold. It’s a natural, nutrient-rich fertilizer that helps your plants thrive, often better than store-bought options, and at no extra cost!
Beyond the environmental and gardening benefits, composting can be a surprisingly calming and satisfying activity. It connects you to natural cycles and gives you a tangible sense of accomplishment. It’s a small action with big impacts, both for your plants and your peace of mind. You’ll be amazed at how much food waste you can divert and how much healthier your green friends become. So, let’s dive into how you, right in your apartment, can make this happen.
Choosing Your Apartment Composting Method: What Fits Your Space?
The first big decision for apartment composting is picking the right method. Since you don’t have a backyard, we need systems that are compact, odor-free, and easy to manage indoors. Fortunately, there are a few excellent options designed specifically for smaller living spaces. Each has its own quirks, but all can deliver fantastic compost.
1. Worm Composting (Vermicomposting)
This is perhaps the most popular and practical method for apartment dwellers. Vermicomposting uses specialized composting worms (like Red Wigglers, Eisenia fetida) to break down your food scraps. These worms are super-efficient eaters and don’t produce any foul odors when managed correctly. It’s a quick process and yields a nutrient-dense compost, often called “worm castings” or “worm poop,” which is incredibly potent for plants.
How it Works
You set up a worm bin, typically a layered container system, with bedding material (like shredded newspaper or coconut coir). You then add your food scraps directly to the bin, and the worms do the rest. They eat the scraps, digest them, and excrete nutrient-rich castings. It’s a living ecosystem in a box!
Pros of Worm Composting:
- Odorless: When balanced correctly, there are no bad smells.
- Fast: Red wigglers are voracious and break down material relatively quickly.
- High-Quality Output: Worm castings are packed with nutrients and beneficial microbes.
- Compact: Worm bins are designed to fit easily under a sink or in a closet.
- Educational: It’s a fascinating way to observe a natural process.
Cons of Worm Composting:
- Initial Setup: You need to purchase worms and a bin.
- Feeding Restrictions: Certain foods (like citrus, onions, meat, dairy) should be avoided or given in moderation to keep worms happy.
- Temperature Sensitive: Worms prefer a moderate temperature range (around 55-77°F or 13-25°C).
2. Bokashi Composting
Bokashi is a bit different from traditional composting. It’s technically a fermentation process rather than decomposition. You use a special Bokashi bran, inoculated with Effective Microorganisms (EM), to pickle your food waste. This method can handle almost all food scraps, including meat, dairy, and oily foods, which are usually off-limits for other methods. While Bokashi doesn’t produce finished compost directly, it ‘pre-composts’ your waste, making it ready for a final decomposition stage.
How it Works
Food scraps are layered in an airtight Bokashi bin with the Bokashi bran sprinkled on top. The microorganisms in the bran create an anaerobic (oxygen-free) environment, fermenting the waste. After the bin is full and has fermented for about two weeks, the pickled waste needs to be buried in soil (community garden, a large planter, or even a traditional compost pile if you have access) to finish breaking down.
Pros of Bokashi Composting:
- Handles All Food Waste: Great for kitchen scraps that can’t go into worm bins.
- Airtight and Odor-Free: The fermentation process seals in smells.
- Quick Pre-Composting: Waste is ready for the next stage relatively quickly.
- Produces Nutrient-Rich Leachate: The liquid produced can be diluted and used as a potent fertilizer for plants.
Cons of Bokashi Composting:
- Requires Post-Fermentation: You still need a place to bury the fermented waste to finish composting.
- Specific Product Needed: You need to buy the Bokashi bran and bins.
- Leachate Management: The “tea” needs to be drained and used or disposed of.
3. Electric Composters/Food Cyclers
These countertop appliances are the most high-tech and fastest solution. Electric composters use heat and agitation to dehydrate and break down food scraps in a matter of hours. They drastically reduce the volume of your food waste, turning it into a dry, soil-amendment-like material.
How it Works
You simply toss your food scraps into the appliance and press a button. The machine heats, dries, and grinds the material into a fine, odorless substance.
Pros of Electric Composters:
- Extremely Fast: Turns waste into usable material in hours, not weeks or months.
- Odorless: Most models have excellent odor filters.
- Convenient: Very little hands-on effort required.
- Handles Most Food Waste: Similar to Bokashi, they can break down meat, dairy, and even small bones.
Cons of Electric Composters:
- Expensive: These appliances are a significant upfront investment.
- Energy Consumption: They use electricity to operate.
- Not “True” Compost: The output is more of a dehydrated food ground-up, which still needs to break down further in soil to become living compost. It lacks the microbial life of traditional methods.
Comparing Apartment Composting Methods
To help you decide, here’s a quick look at how the methods stack up:
| Feature | Worm Composting (Vermicomposting) | Bokashi Composting | Electric Composter |
|---|---|---|---|
| Speed | Moderate (weeks to months) | Pre-composting in weeks, final in soil | Hours |
| Odor Control | Excellent when balanced | Excellent (sealed fermentation) | Excellent (filters) |
| Handles All Food Waste? | No (eats fruit/veg scraps, coffee grounds, tea leaves) | Yes (meat, dairy, oily foods) | Yes (meat, dairy, oily foods, some bones) |
| Output | Nutrient-rich castings (finished compost) | Fermented waste (needs further decomposition) & Leachate fertilizer | Dehydrated food material (needs further decomposition) |
| Space Required | Small bin (under sink, closet) | Two airtight bins (stackable) | Countertop appliance |
| Upfront Cost | Low to Moderate | Moderate | High |
My Pick for Beginners: If you’re new to composting and want a system that produces actual finished compost that’s great for plants, I highly recommend starting with worm composting. It’s affordable, effective, and once you get the hang of it, it’s incredibly low-maintenance. If you’re dealing with more varied food waste and have access to a community garden or friend with a yard, Bokashi is a fantastic option. Electric composters are great for ultra-convenience and speed but come with a higher price tag and don’t create living compost directly.
Getting Started with Worm Composting (Vermicomposting)
Let’s dive deeper into worm composting, as it’s the most common and rewarding method for apartment dwellers. It’s a truly elegant in-home solution.
What You’ll Need for Your Worm Farm
Don’t worry, it’s not complicated at all. You just need a few key items:
- A Worm Bin: You can buy a ready-madeworm composting bin (often called a Happy Worm Farm or similar) or DIY one from opaque plastic storage totes. Look for bins designed for stacking and with adequate ventilation. The key is to keep light out, as worms are sensitive to it.
- Composting Worms: You’ll need about 1 pound (approx. 0.45 kg) of composting worms. Species like Red Wigglers (Eisenia fetida) or European Nightcrawlers are ideal. You can buy these online from reputable worm farms or sometimes from local garden centers. Avoid regular earthworms from your garden – they won’t thrive in a bin.
- Bedding Material: This is what the worms live in. Good options include:
- Shredded newspaper (avoid glossy inserts)
- Shredded cardboard
- Coconut coir (often sold for reptile habitats)
- A mix of these works well.
- Food Scraps: The worm’s chow! We’ll cover what to feed them below.
- A Small Aeration Tool: A hand trowel, garden fork, or even a sturdy stick to gently mix the bedding and food.
- A Scrape/Spatula: For moving food scraps around.
- A Spray Bottle: For keeping the bedding moist.
Step-by-Step: Setting Up Your Worm Bin
Here’s how to get your worm condo ready for its new residents:
- Prepare the Bin: If you’re DIYing, drill several small holes (about 1/4 inch or 6mm) in the bottom for drainage and a few more near the top for airflow. If you bought a bin, it likely already has these. You’ll also need a tray or another bin to collect any liquid (worm leachate) that drains out.
- Add Bedding: Moisten your chosen bedding material so it’s damp like a wrung-out sponge. You don’t want it dripping wet. Fill your bin about 2/3 full with the damp bedding. Break up any large clumps.
- Introduce the Worms: Gently place your pound of worms on top of the bedding. Leave the lid off for about 30 minutes to an hour; they’ll burrow down away from the light. This gives them time to acclimate.
- Add First Food (Optional but helpful): You can mix a small amount of pre-composted food scraps (like coffee grounds or very finely chopped vegetable peels) into one corner of the bedding. This gives the worms something to munch on as they settle in.
- Cover It Up: Put the lid back on securely. Ensure it’s not airtight – some airflow is crucial.
- Placement: Find a spot for your bin that maintains a consistent temperature, ideally between 55-77°F (13-25°C). A closet, under the kitchen sink, or a cool corner of your living room often works well. Avoid direct sunlight or drafty spots near heaters or air conditioners.
Feeding Your Worms: What’s on the Menu?
Worms are picky eaters in their own way. Their digestive systems are delicate, so think of feeding them as providing a balanced diet. Generally, you want to feed them a good variety of fruits and vegetables.
Worm-Approved Foods (“Greens” and “Browns”):
- Vegetable and fruit scraps (peels, rinds, cores – chopped into small pieces)
- Coffee grounds and paper filters
- Tea bags (remove staples and synthetic silken bags)
- Crushed eggshells (a good source of grit and calcium)
- Plain cooked pasta and rice (in moderation)
- Paper shreds (unprinted)
Foods to Avoid or Limit:
- Citrus: Too acidic.
- Onions and Garlic: Can be strong and deter worms.
- Meat, Fish, Dairy, Oily Foods: Can attract pests and create odors.
- Spicy Foods: Irritate worms.
- Diseased plants or pet waste.
- Glossy or colored paper.
How Much to Feed: Start small! A good rule of thumb is to feed your pound of worms no more than about 1/4 to 1/2 pound of food scraps per day, or about 1/2 to 1 pound every other day, once they’re established. Observe your bin; if the food disappears within a few days, you can feed a bit more. If it sits around, you’re feeding too much. Bury the food scraps in the bedding to prevent odors and pests. You can create a new feeding spot each time, working your way around the bin.
Worm Bin Maintenance: Keeping Things Happy
Your worms need a bit of care to thrive:
- Moisture: The bedding should always feel like a wrung-out sponge. If it gets dry, spray it with water. If it’s too wet, add more dry bedding material.
- Aeration: Every week or two, gently turn the top few inches of bedding. This prevents compaction and ensures good airflow.
- Temperature: Keep them in their preferred temperature range. If your apartment gets too hot, you might need to move the bin or use methods to cool it down. If it gets too cold, move it to a warmer spot.
- Harvesting: After 2-4 months, you’ll start seeing dark, crumbly worm castings. To harvest, you can try a few methods:
- Migration Method: Stop adding food scraps to one side of the bin and start feeding only on the other side. The worms will migrate to the new food. Once most worms are on the feeding side, you can harvest the castings from the other.
- Light Method: Dump the bin contents onto a tarp in a brightly lit area or sunlight. The worms will burrow down to avoid the light. Scrape off the top layer of castings, and repeat until you have mostly worms. Then, return the worms and any uncomposted material to the bin with fresh bedding.
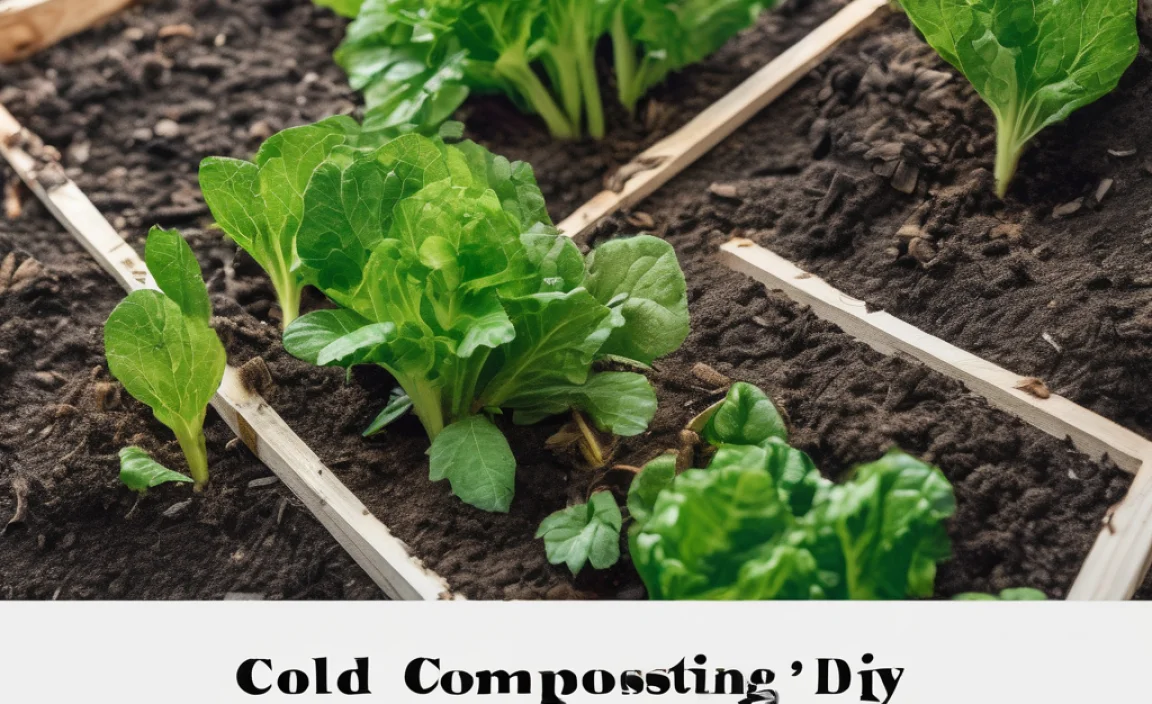
- Using Castings: Your worm castings are a super-powered fertilizer! Mix them into the soil of your houseplants, balcony garden, or windowsill herbs at a ratio of about 1 part castings to 4-10 parts soil.
Troubleshooting Common Worm Composting Issues
Even with the best intentions, you might encounter a few hiccups. Don’t panic! Most issues are easily fixed.