Have you ever thought about making your own sink? Imagine having a unique and stylish concrete sink right in your home. A do-it-yourself concrete sink can be a fun project that saves you money. Plus, it gives your space a personal touch.
Making something with your own hands feels great. It’s satisfying to see your creation come to life. You can customize your sink to fit your style and needs. Did you know that many people love concrete for its durability? It’s strong and can last for years.
In this article, we will explore how you can create your own do-it-yourself concrete sink. We will provide easy steps and tips that anyone can follow. So, are you ready to dive into this exciting project? Let’s get started!
Create Your Own Stunning Do It Yourself Concrete Sink
Do It Yourself Concrete Sink
Creating a do-it-yourself concrete sink is easier than you think! First, gather your materials, like concrete mix and a mold. You can personalize your sink with unique shapes and colors. Imagine the satisfaction of designing your own feature! This project also saves you money compared to store-bought sinks. Plus, concrete is durable and stylish. With some patience, you’ll have a stunning concrete sink that impresses your friends and family. Why not give it a try?
Materials Needed for a DIY Concrete Sink
List of essential materials (mixing concrete, molds, etc.). Recommended tools for the project.
To create a do it yourself concrete sink, you’ll need some key materials and tools. First, gather the essentials:
- Concrete mix
- Water
- Mixing container
- Molds for shaping
- Reinforcement mesh (optional)
Now, for tools:
- Shovel or trowel
- Level
- Saw (for mold adjustments)
- Sandpaper
- Protective gear (gloves and mask)
Having these items ready will help you make a strong and stylish sink!
What tools do I need for a concrete sink project?
You will need basic tools like a shovel, a level, and a saw for adjustments. Don’t forget gloves and a mask for safety!
Choosing the Right Mold for Your Concrete Sink
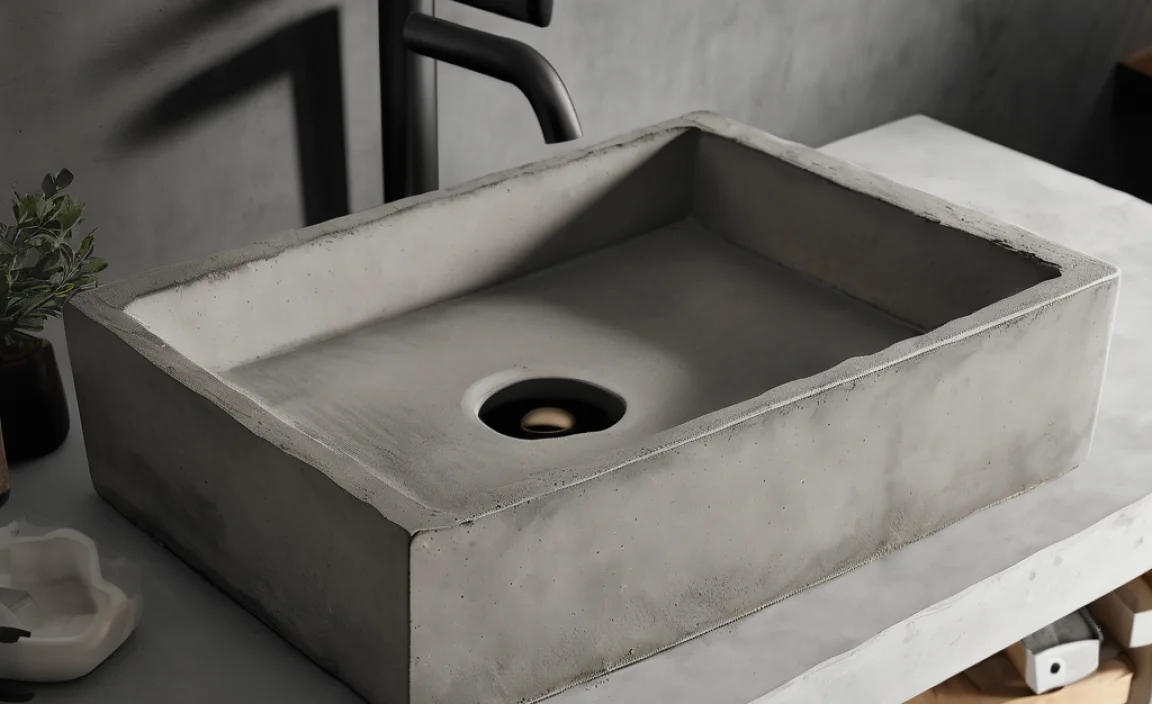
Types of molds you can use (reusable, custom, etc.). Tips for selecting the mold size and shape.
Choosing the right mold is important for making your concrete sink. There are different types of molds you can use:
- Reusable molds: These are durable and can be used many times.
- Custom molds: You can design these for unique shapes and sizes.
Consider these tips for the mold:
- Think about the sink size you want.
- Choose a shape that fits your space.
- Ensure the mold is sturdy and won’t leak.
Using the right mold makes a big difference in your project.
What size should my mold be?
Measure the space where the sink will go. Make sure to leave a little extra room for any fittings. This helps the sink fit well in your home.
Can I make my own custom mold?
Yes, you can create a custom mold using wood or plastic. It lets you design the sink exactly how you want it.
Step-by-Step Instructions for Mixing Concrete
Ideal concrete mix ratio for sinks. Detailed mixing process and consistency checks.
Mixing concrete for your sink is like baking a cake—get the recipe right, and you’re golden! For sinks, the perfect mix usually follows a 1:2:3 ratio: one part cement, two parts sand, and three parts gravel. You want the mix to be thick but pourable, like frosting that won’t slide off your cake.
| Ingredient | Ratio |
|---|---|
| Cement | 1 part |
| Sand | 2 parts |
| Gravel | 3 parts |
While mixing, add water slowly. The goal is a smooth, lump-free batter. You know it’s ready when it holds shape but gives a little when poked—like that “just right” feeling when you sit down on a comfy chair! If it’s too runny, you’ll have a sink that could double as a swimming pool. Get it right, and you’re on your way to a solid DIY project!
Pouring the Concrete into the Mold
Techniques for pouring and leveling the concrete. Tips to avoid air bubbles and imperfections.
Pouring your concrete sink can feel like a fun science experiment! First, make sure to pour slowly from one side to avoid splashes. Use a trowel to help spread it out smoothly. Don’t forget to tap the mold to release air bubbles—nobody wants a sink with holes! If you spot any imperfections, you can easily fix them with a little extra mix. Remember, patience is key; good things take time even if I’m just waiting for my snack!
| Tip | Details |
|---|---|
| Slow Pour | Start at one corner to reduce splashing. |
| Tapping Mold | This helps to release stubborn air bubbles. |
| Fixing Imperfections | Use more mix to smooth out any bumps! |
Finishing Techniques for a Professional Look
Methods for smoothing the surface. Options for staining or sealing the concrete.
If you want your concrete sink to shine, smoothing the surface is key. Use a trowel to spread and flatten the mix. For the final touch, sand the surface with fine grit paper. You want it to feel like a cloud—but not one that rains! Now, let’s make it pretty. Staining adds color, while sealing protects it. Choose a stain that matches your kitchen vibe. Remember, your sink should be a style statement, not just a wash-up zone!
| Finishing Techniques | Tips |
|---|---|
| Smoothing | Use a trowel for an even finish. |
| Sanding | Fine grit sandpaper for a soft touch. |
| Staining | Pick a color that pops. |
| Sealing | Choose a sealant to protect your masterpiece. |
Installing Your DIY Concrete Sink
Preparation for sink installation. Connecting plumbing and ensuring watertight seals.
Before diving into your exciting concrete sink project, get ready! First, gather your tools: a mixer, molds, and safety gear. Measure the space where the sink will sit. A good fit avoids splashy surprises! Next, plumbing is key. Connect the pipes carefully to ensure they won’t leak. A watertight seal is your best friend here—imagine a sink with a mind of its own, splashing everywhere! Use this handy table for quick checks:
| Step | Tip |
|---|---|
| Preparation | Measure Twice, Mix Once! |
| Plumbing Connection | Use sealant for no leaks! |
Follow these steps, and your DIY sink will be fabulous, and functional too!
Maintenance Tips for Concrete Sinks
Best practices for cleaning and upkeep. How to repair common issues (cracks, stains).
Keeping your concrete sink looking fresh is easier than you think! For daily cleaning, use a mild soap and a soft sponge. Avoid harsh chemicals that could harm the surface. Did you spill something? Don’t panic! For stubborn stains, a paste of baking soda and water does wonders. For cracks, fill them with concrete patch compound. And don’t forget to seal your sink once a year to keep it shiny and protected. Looks like maintenance can be quick and fun!
| Maintenance Task | Frequency |
|---|---|
| Daily Cleaning | Every Day |
| Stain Treatment | As Needed |
| Crack Repair | As Needed |
| Sealing | Once a Year |
Common Mistakes to Avoid in Your DIY Concrete Sink Project
Frequently encountered pitfalls during the process. Solutions and preventative measures.
Starting a DIY concrete sink project? Watch out for sneaky mistakes! One common pitfall is not measuring correctly. If your sink turns out lopsided, it’s not a new design trend—just a miscalculation. Another oops moment is skipping the sealing step. Without it, your sink could be as absorbent as a sponge! To stay safe, always double-check those measurements and seal your concrete like it’s going to the ball. Here’s a handy table for quick reference:
| Common Mistake | Solution |
|---|---|
| Poor measurements | Always measure twice, cut once! |
| Not sealing | Apply sealant to protect against spills. |
| Using wrong mix | Follow the right concrete recipe for strength. |
Keep these tips in mind, and your project will be a splash, not a flop!
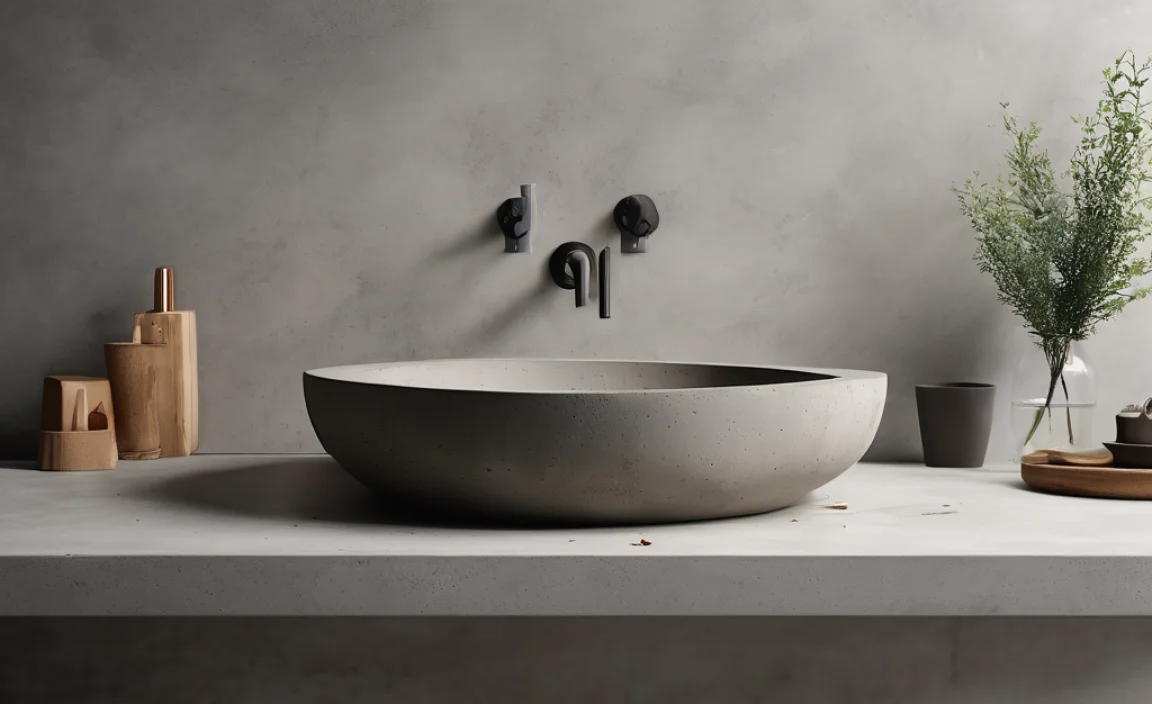
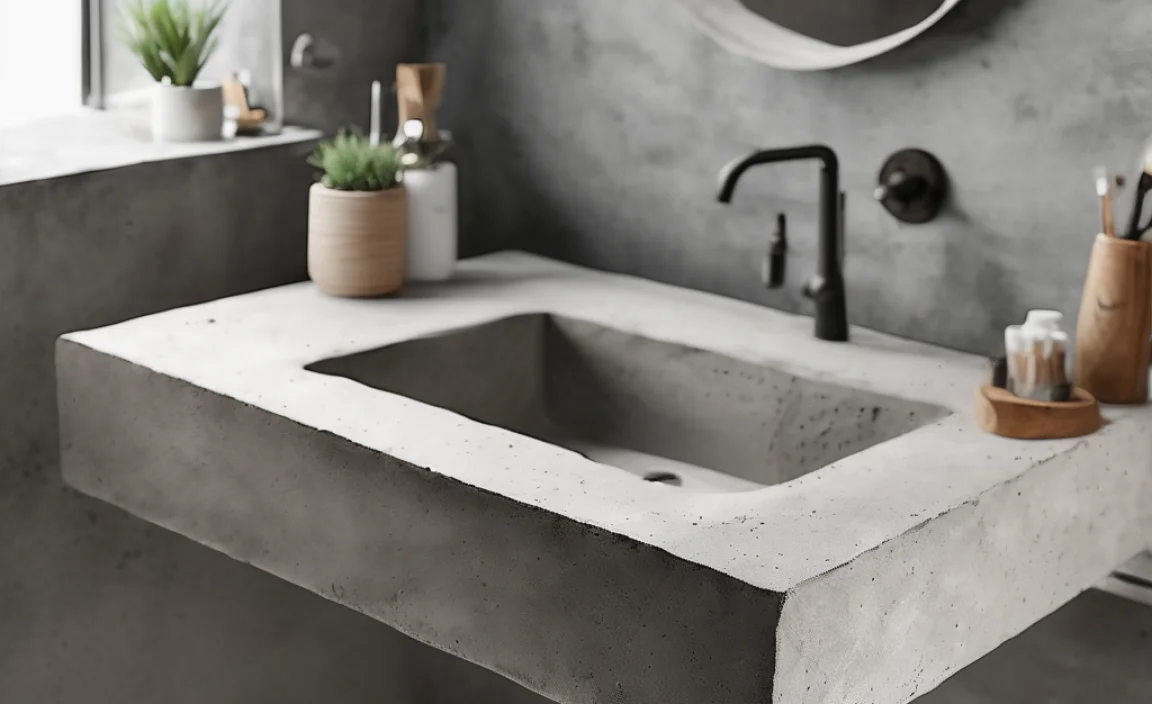
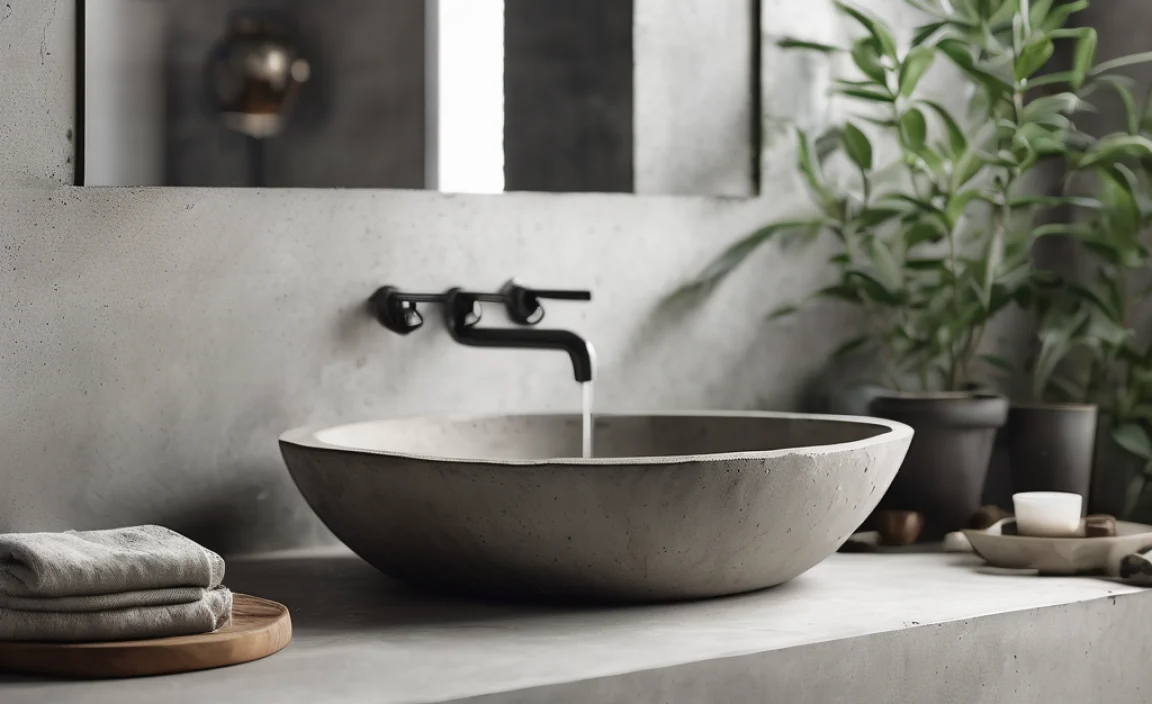
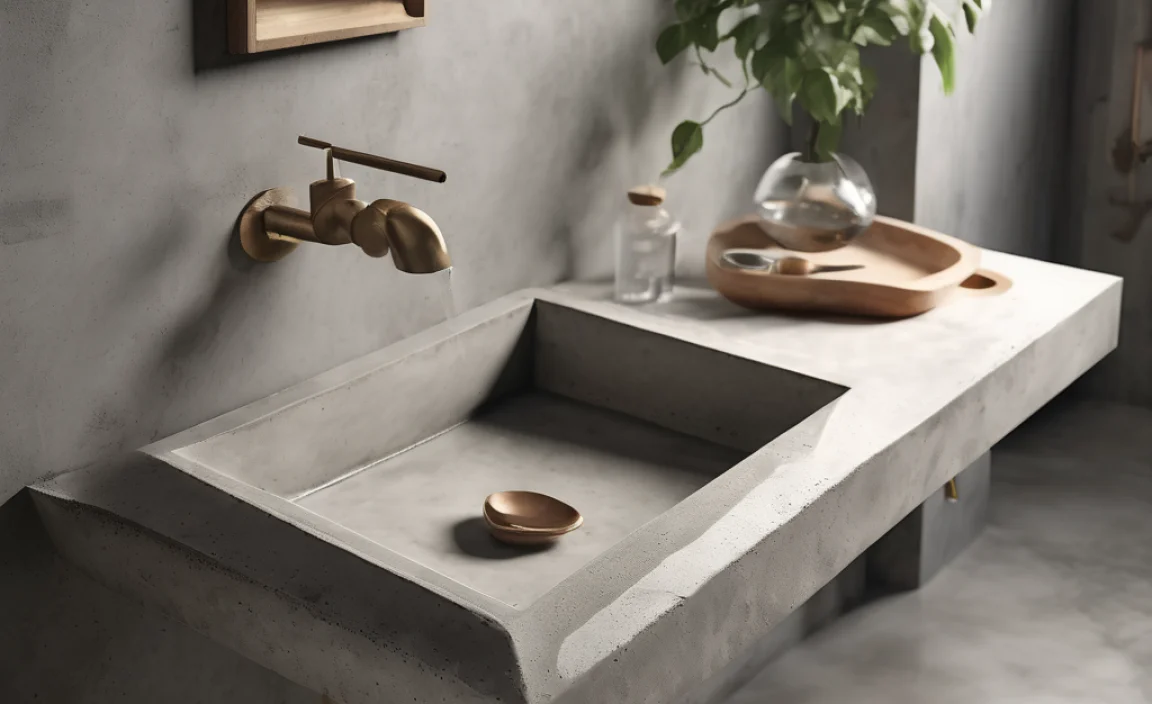
Inspiration: Unique Designs for Concrete Sinks
Variations in design (shapes, colors, finishes). Showcasing creative ideas to personalize your sink.
Concrete sinks offer many creative options. You can choose different shapes, like round, square, or even funky designs. Colors are endless, from natural gray to bright blues and greens. Finishes can be shiny or textured, adding a special touch. Personalizing your sink can make it truly yours. Try these ideas:
- Mix colors for a fun look.
- Add unique patterns or designs.
- Include a cool faucet or basin.
- Use stencils for fun shapes.
What are some creative ideas for concrete sinks?
You can create a unique sink by using stencils, adding colors, or mixing shapes and sizes.
Conclusion
In conclusion, a do-it-yourself concrete sink is a fun project you can tackle. It offers a unique look and is durable. You can customize its shape and size to fit your needs. Gather your materials and follow step-by-step guides online for the best results. Start your creative journey today and explore more ideas to make your space special!
FAQs
What Materials Are Needed To Create A Diy Concrete Sink, And Where Can I Source Them?
To make a DIY concrete sink, you need some key materials. First, get concrete mix, which you can find at a hardware store. You’ll also need a mold, like an old plastic container, to shape the sink. Don’t forget sandpaper to smooth the edges and a sealant to protect the sink. You can find these supplies at local home improvement stores or online.
What Are The Key Steps Involved In The Process Of Pouring And Shaping A Concrete Sink?
To make a concrete sink, you first need to create a mold. This is usually made from wood or plastic. Next, you mix the concrete and pour it into the mold. After the concrete sets, you can shape the edges and make any designs you want. Finally, let it cure for a few days before using your new sink!
How Can I Ensure That My Diy Concrete Sink Is Both Functional And Aesthetically Pleasing?
To make your DIY concrete sink work well and look nice, start with a good design. Choose a shape and size that fits your space. Add colorful paint or tiles to make it pretty. You can also smooth the surface for a nice feel. Finally, remember to seal the concrete so it stays clean and lasts longer.
What Finishing Techniques Can Be Used To Seal And Protect A Concrete Sink From Stains And Water Damage?
To protect your concrete sink, you can use sealers. Sealers make the surface harder to stain and easier to clean. You can apply a clear coat or a penetrating sealer. Make sure to follow the instructions on the product. This will help keep your sink looking nice and safe from water damage!
Are There Any Common Mistakes To Avoid When Building A Concrete Sink For My Bathroom Or Kitchen?
When you build a concrete sink, avoid using too much water in your mix. This can make the concrete weak. Make sure to use a strong mold so the sink holds its shape. Don’t forget to seal the sink well, or it might get stains. Lastly, let the concrete cure properly before you use it.