Are you looking to turn your kitchen scraps and yard waste into rich, nutrient-filled compost for your garden, but feel a little overwhelmed by where to start? You’re not alone! Many folks think composting takes ages or is a complicated process. The truth is, with the right approach, you can speed up “home composting time” significantly and create amazing compost without all the fuss. We’re here to show you a proven, simple method that makes composting effortless and rewarding. Get ready to say goodbye to landfill waste and hello to happy plants!
Why Bother with Home Composting? It’s Easier Than You Think!
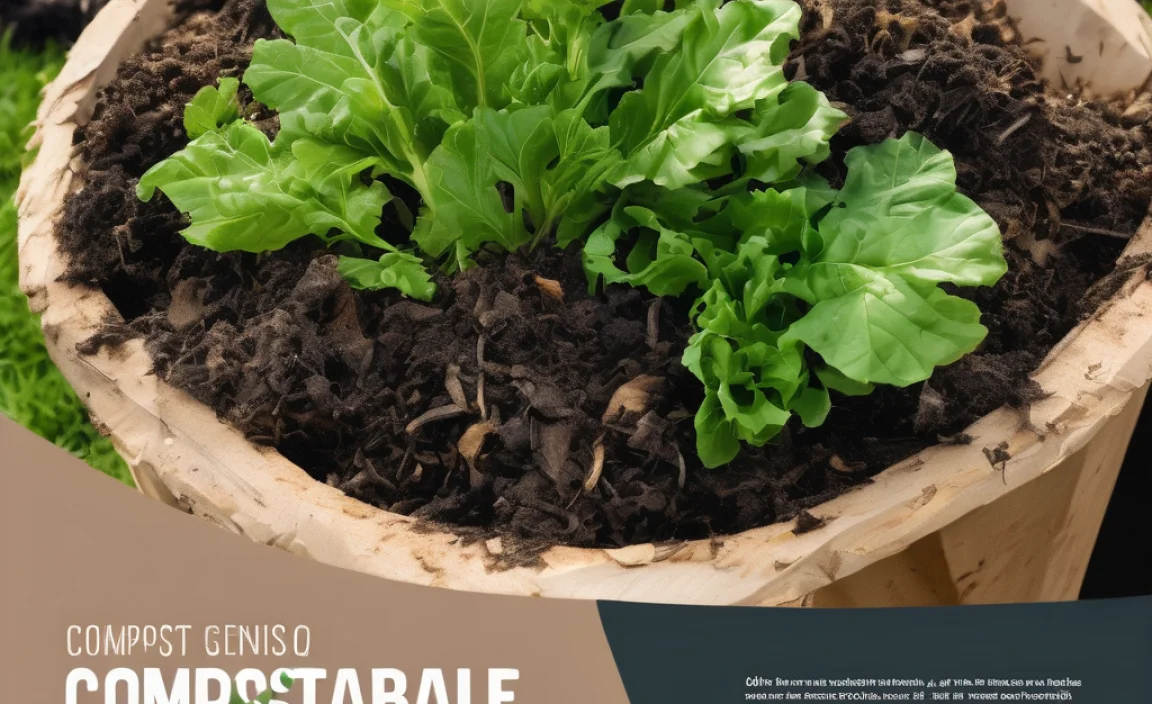
Composting might sound like a chore, but it’s actually one of the easiest and most beneficial things you can do for your home and garden. Think of it as nature’s recycling program. Instead of throwing away valuable organic materials like fruit peels, coffee grounds, and grass clippings, you’re transforming them into a super-powered soil amendment. This “black gold” feeds your plants, improves soil structure, and helps your garden retain moisture, meaning less watering for you!
The best part? You don’t need a massive amount of space or a degree in soil science to get started. With the right technique, you can significantly reduce the time it takes for your compost to mature. We’re talking about making top-quality compost in weeks, not months or years. Ready to discover the secret to faster, easier composting?
Understanding the Keys to Faster Composting
The speed of your compost pile depends on a few crucial factors working together. It’s all about creating the perfect environment for those tiny, helpful microorganisms that do the real work of breaking down your organic materials. Think of them as your compost crew – they work best when they have the right conditions and plenty of food.
The main ingredients of quick composting are:
- The Right Mix: It’s about balancing “greens” (nitrogen-rich materials) and “browns” (carbon-rich materials).
- Airflow: Microbes need oxygen to thrive.
- Moisture: A damp environment is essential, but not soggy.
- Temperature: An active compost pile heats up, which speeds decomposition.
- Particle Size: Smaller pieces break down faster.
Getting these elements right is the core of an effortless and speedy composting system. We’ll break down each one and show you how to achieve it without breaking a sweat.
The Effortless “Green & Brown” Balance: Your Compost Recipe
This is the heart of successful composting. Your compost pile needs a good blend of nitrogen-rich materials (the “greens”) and carbon-rich materials (the “browns”). If you lean too heavily on one, your pile will either smell or won’t break down efficiently. The magic ratio is often said to be around 25-30 parts carbon to 1 part nitrogen by volume, but don’t worry about exact numbers – aim for roughly equal amounts of greens and browns by volume as you add them.
What are “Greens”?
Greens are your moist, nitrogen-rich materials. They provide the protein for your compost microbes and help heat up the pile. Think of them as the “fuel” that gets the composting engine running.
- Fruit and vegetable scraps (peels, cores, rinds)
- Coffee grounds and tea bags (remove staples and plastic)
- Grass clippings (add in thin layers to avoid matting)
- Fresh plant cuttings
- Eggshells (crushed)
- Manure from herbivores (cow, horse, rabbit – never from cats or dogs)
What are “Browns”?**
Browns are your dry, carbon-rich materials. They provide the energy for your microbes and help with airflow, preventing your pile from becoming a soggy, smelly mess. They are the “crunchy” bits.
- Dried leaves
- Straw or hay
- Shredded cardboard (uncoated, plain brown)
- Shredded newspaper (black and white ink only)
- Wood chips or sawdust (use sparingly, especially if treated)
- Paper towels and napkins (unsoiled by grease)
- Dried grass clippings
What to AVOID in Your Compost Pile
Some things just don’t belong in a home compost pile. They can attract pests, spread disease, or simply not break down effectively. Let’s keep our compost healthy and safe!
- Meat, bones, dairy products (attract pests and can harbor pathogens)
- Oily or greasy foods (slow down decomposition, attract pests)
- Diseased plants (can spread diseases to your garden)
- Weeds that have gone to seed (you’ll just be planting weeds in your garden)
- Pet waste (cat or dog feces can contain harmful pathogens)
- Treated wood or sawdust (chemicals can leach into your compost)
- Synthetics or plastics
- Coal ash
Choosing Your Composting Bin: Simplicity is Key
You don’t need fancy equipment to compost. The goal is a container that holds your materials and allows for airflow. For an effortless method, consider these options:
Option 1: The Open Pile (Easiest for Beginners)
If you have a bit of yard space, a simple open pile is incredibly easy. Just designate a corner of your yard and start layering your greens and browns directly onto the ground. You can shape it into a nice pile. The ground contact helps beneficial microbes and earthworms find their way in.
- Pros: No cost for a bin, easy to turn/mix, good aeration.
- Cons: Can look a little messy, might be less contained if you have a very active critter population.
Option 2: Wire Mesh Bin
A simple cylinder made from hardware cloth or chicken wire is an excellent and inexpensive choice. Shape it into a circle, secure the ends, and you have a ready-made compost bin. It offers fantastic airflow.
How-To:
- Purchase a roll of sturdy wire mesh (like hardware cloth, at least 3 feet high and some length).
- Cut a piece 3-4 feet long.
- Form it into a cylinder, overlapping the ends by a few inches.
- Secure the overlap with wire ties, zip ties, or small carabiner clips.
- Place it in your chosen spot.
- Pros: Excellent aeration, inexpensive, easy to build, good containment.
- Cons: Can dry out faster, might not hold heat as well as a solid bin.
Option 3: Tumbler Composter
These are enclosed, rotating bins. They make turning the compost super easy – just give them a spin every few days. They are great for keeping pests out and can speed up the composting process by making it easy to aerate.
- Pros: Pest-proof, easy to turn and aerate, can speed up composting, contained.
- Cons: Can be more expensive, capacity might be limited.
For an “effortless method,” a tumbler is a strong contender because the turning is built-in. However, a well-managed open pile or wire bin is just as effective and far more budget-friendly.
The Effortless Step-by-Step Composting Method
Ready to get your hands dirty (but not too dirty!)? Follow these simple steps to create fantastic compost efficiently.
Step 1: Choose Your Location and Bin
Select a spot that’s convenient for you to access, preferably with some sun (sun helps heat the pile, but too much direct sun can dry it out quickly). Place your chosen bin (open pile, wire bin, or tumbler) in this spot.
Step 2: Start Layering!
Begin your compost pile with a base layer of coarse brown material, like small twigs or straw. This helps with drainage and airflow from the bottom. Then, start alternating layers of greens and browns. A good starting point is about 2-4 inches of browns, followed by 2-4 inches of greens.
Tip: Chop or shred your larger items (like cardboard or large vegetable scraps) into smaller pieces. This dramatically speeds up decomposition. A good pair of gardening shears can be a lifesaver here.
Step 3: Add Water (The Damp Sponge Test)
As you add layers, lightly water them. Your compost pile should be as moist as a wrung-out sponge – damp, but not soaking wet. Squeeze a handful; if water drips out, it’s too wet. If it crumbles apart, it’s too dry. A good compost aerator tool can help distribute moisture evenly.
Step 4: Maintain the Balance and Aeration
This is where the “effortless” magic happens. Aim to add a mix of greens and browns as you generate them. Don’t let it become all one thing. If you just added a lot of grass clippings (greens), try to top it off with a good layer of shredded leaves or cardboard (browns).
Turning Your Pile:
- Open Pile/Wire Bin: Every week or two, use a pitchfork or compost aerator to turn the pile. Move the outside material into the center and vice versa. This ensures everything gets a chance to decompose evenly and provides necessary oxygen.
- Tumbler: Rotate the tumbler 5-10 times every 2-3 days.
Consistent turning is key to faster composting. It keeps the microbes happy and working efficiently.
Step 5: Monitor Moisture and Temperature
Check the moisture level regularly, especially in hot or dry weather. If it seems dry, add water while turning. If it’s too wet and starts smelling sour (like ammonia), add more brown materials and turn it more frequently.
An active compost pile can generate heat, sometimes reaching 130-160°F (54-71°C). This “hot composting” process kills weed seeds and pathogens, and it’s a sign your pile is working hard! If your pile isn’t heating up, you might need more greens, more moisture, or more consistent turning.
Step 6: Harvesting Your Compost
Your compost is ready when it looks and smells like rich, dark soil. You won’t be able to identify the original materials anymore. It should be crumbly and earthy-smelling. This can take anywhere from 4 weeks to a few months, depending on how actively you manage your pile and the ingredients used.
How to Harvest:
- Open Pile/Wire Bin: You can either dig out finished compost from the bottom layers or turn the entire pile and sift out the finished material. Any larger, unfinished pieces can be tossed back into a new compost pile to continue breaking down.
- Tumbler: Empty the contents once they are finished.
Pro Tip: Sifting your compost through a screen (a simple hardware cloth stretched over a wooden frame works well) will give you a finer texture, ideal for starting seeds or top-dressing delicate plants.
Troubleshooting Common Composting Hiccups
Even with an effortless method, you might run into a few issues. Don’t get discouraged; these are easily fixed!
Problem: My compost smells bad (like rotten eggs or ammonia)!
Cause: Too many greens or not enough air. This indicates anaerobic conditions (lack of oxygen) and a surplus of nitrogen.
Solution: Add more brown materials (leaves, cardboard, straw) and turn the pile thoroughly to introduce air. Ensure it’s not too wet.
Problem: My compost isn’t breaking down and feels cold.
Cause: Too many browns, not enough nitrogen, or too dry. The microbes don’t have enough to eat or the right conditions.
Solution: Add more green materials (food scraps, grass clippings). Check the moisture – it might be too dry. Give it a good watering and turn it. If it’s a very large pile and feels cold, it might not be getting enough initial “kick” from greens or turning.
Problem: There are flies or fruit flies buzzing around.
Cause: Exposed food scraps (greens) are an invitation to pests.
Solution: Always bury fresh food scraps under a layer of brown material. Covering the top of your pile with a thick layer of leaves or straw can also help deter them. For tumblers, ensure the lid is secure.
Problem: My compost is too wet and slimy.
Cause: Too much moisture, too many greens, or poor drainage.
Solution: Add more dry brown materials (shredded cardboard, dry leaves, sawdust). Turn the pile frequently to help it dry out and aerate. If using an open pile, ensure the base has good drainage.
Key Composting Complements: Tools to Make it Easier
While you can compost with just your hands and a pitchfork, a few tools can make the process even more effortless and efficient:
- Compost Aerator Tool: This long, corkscrew-like tool is fantastic for turning and aerating piles without the heavy lifting of a pitchfork. It’s especially useful for deeper piles.
- Pitchfork: A garden staple. Essential for turning larger piles and mixing materials.
- Gardening Gloves: Keeps your hands clean and protected.
- Shovel: For moving larger amounts of material and harvesting finished compost.
- Spray Bottle or Garden Hose with Nozzle: For easily controlling moisture levels.
- Shredder (Optional): A garden shredder or even a regular paper shredder can quickly break down cardboard, newspaper, and yard trimmings, significantly speeding up decomposition.
Quick Comparison: Effortless Composting Methods
To help you decide, here’s a quick look at how different approaches stack up for an “effortless” experience.
| Method | Effort Level | Speed | Cost | Space Needed | Pest Control |
|---|---|---|---|---|---|
| Open Pile | Low (turning every 1-2 weeks feels like gardening) | Medium (4-12 months) | None | Medium to Large Backyard | Moderate (bury food scraps) |
| Wire Bin | Low to Medium (weekly turning) | Medium (4-12 months) | Low ($20-$50) | Medium Backyard | Moderate (bury food scraps) |
| Tumbler Composter | Very Low (spinning is easy & fast) | Fast (4-8 weeks for some) | High ($100-$300+) | Small to Medium Backyard/Patio | Excellent |
| Bokashi (Indoor Fermentation) | Very Low (small amounts daily, requires special starter) | Fast (pre-compost stage in 2 weeks, needs burial) | Medium ($50-$100 for kit) | Indoor/Small Balcony | Excellent (sealed system) |
For the absolute beginner wanting a proven, effortless method for home composting time, a combination of a wire bin or open pile with consistent layering and turning is excellent. If budget allows and you prioritize speed and minimal physical effort, a tumbler is a fantastic choice.
The Environmental Benefits of Home Composting
Beyond creating amazing soil for your plants, home composting has significant positive impacts on the environment. By diverting organic waste from landfills, you’re:
- Reducing Methane Emissions: Organic materials decomposing in oxygen-deprived landfills produce methane, a potent greenhouse gas. Composting, which is aerobic, avoids this. According to the U.S. Environmental Protection Agency (EPA), food scraps and yard waste make up more than 30% of what we throw away.
- Conserving Landfill Space: Less waste going to landfills means they last longer, reducing the need for new sites.
- Reducing the Need for Chemical Fertilizers: Compost enriches soil naturally, decreasing reliance on synthetic fertilizers, the production of which can be energy-intensive and contribute to water pollution.
- Improving Soil Health and Water Retention: Compost builds healthy soil that can absorb and hold more water, reducing runoff and the need for frequent irrigation – a crucial benefit in many climates.
It’s a small effort at home that contributes to a much larger positive change for our planet.
Conclusion: Your Effortless Path to Garden Gold
See? Home composting time doesn’t have to be a mystery or a daunting task. By understanding the simple balance of greens and browns, ensuring good airflow and moisture, and choosing a bin that suits your space and effort level, you’re well on your way to creating fantastic compost. Whether you opt for a no-cost open pile, a simple wire bin, or a convenient tumbler, the journey to “black gold” is achievable and rewarding.
Remember, patience and consistency are your best friends here. Don’t strive for perfection on day one; just start layering, adding a bit of water, and turning when you can. You’ll quickly get a feel for what your compost needs. Soon, you’ll be enjoying the benefits of healthier soil, less waste, and the immense satisfaction of nurturing your garden with your own homemade, nutrient-rich compost. Happy composting!
Frequently Asked Questions About Home Composting Time
Q1: How long does it actually take for compost to be ready?
A1: With the effortless method focusing on greens, browns, air, and moisture, your compost can be ready in as little as 4-8 weeks if using a hot composting method (like a tumbler or actively managed pile) and breaking down materials well. A more passive pile might take 3-12 months. Finished compost looks dark, crumbly, and smells like fresh earth.
Q2: Do I need to turn my compost pile every day?
A2: No, not necessarily for an effortless method. For faster composting, turning it every 1-2 weeks (or spinning a tumbler every few days) is usually sufficient. The goal is to introduce air and mix materials, not to make it a daily chore. More frequent turning speeds up the process but isn’t essential for success.
Q3: Can I compost in the winter?
A3: Yes, but the cold will slow down the decomposition process significantly. If you have an insulated bin or a large pile, it might continue to break down slowly. For faster results, it’s best to manage your pile in warmer months or keep it going through winter with layers of greens and browns, understanding it will take longer to finish.
Q4: What’s the difference between hot composting and cold composting?
A4: Hot composting involves actively managing the “greens,” “browns,” moisture, and aeration to create a microbial reaction that heats the pile up to 130-160°F. This kills weed seeds and pathogens and breaks down materials quickly (weeks to months). Cold composting is more passive – you just add materials and let them break down over a longer period (6-12+ months) with little management. The effortless method leans towards making hot composting easier.
Q5: My compost is attracting rodents. What should I do?
A5: This usually means you’re adding things you shouldn’t, like meat, dairy, or oily foods, or that your compost isn’t contained well enough. Always bury food scraps deep within the pile and cover them with browns. Using a compost bin with a lid or a tumbler can significantly deter rodents. Avoid adding problematic items altogether.
Q6: Can I compost diseased plants?
A6: It’s generally best to avoid composting diseased plants unless you are confident in your pile reaching very high temperatures (160°F+) consistently for an extended period, which is typical of hot composting. If you’re unsure, it’s safer to discard diseased plants in the trash to avoid spreading the disease to your garden.

I am passionate about home engineering. I specialize in designing, installing, and maintaining heating, ventilation, and air conditioning systems. My goal is to help people stay comfortable in their homes all year long.