Hot Composting: Buy the Best, Effortless System

<h1>Hot Composting: Buy the Best, Effortless System</h1>

<p>
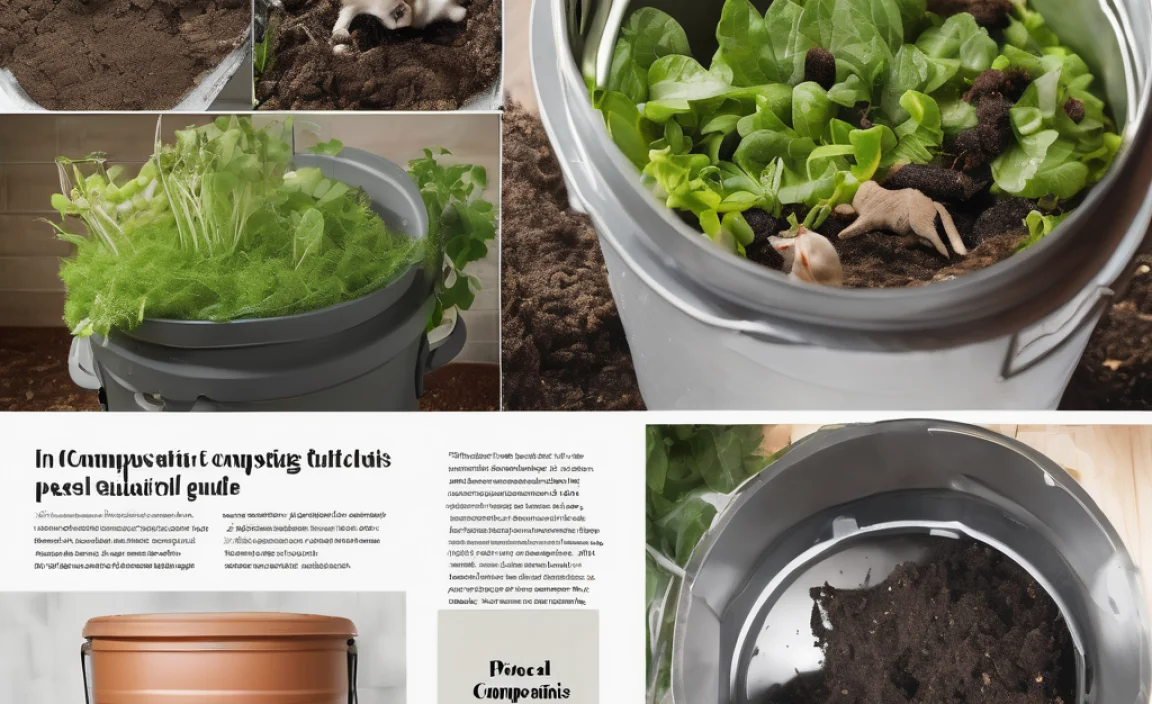
Tired of that overflowing trash can or seeing perfectly good food scraps go to waste? Composting sounds great, but the thought of it being slow, smelly, or complicated can be a real turn-off. You want rich, black gold for your garden, but the idea of a messy bin and a long wait can feel like too much work. What if there was a way to speed things up and do it with minimal fuss?</p>

<p>There is! It’s called hot composting, and with the right system, it’s surprisingly easy. We’ll walk you through exactly what to look for when buying a hot composting system, so you can get started with confidence. Let’s transform your kitchen scraps and yard waste into garden riches, the fast and easy way!</p>

<h2>What is Hot Composting and Why Should You Care?</h2>

<p>Think of composting as nature’s recycling program. You toss in organic stuff like fruit peels, coffee grounds, and grass clippings, and over time, tiny microbes munch it all up and turn it into nutrient-rich soil amendment. <strong>Hot composting</strong> is just a faster, more active version of this process. Instead of waiting months, you can often have finished compost ready in weeks!</p>

<p>How does it get so hot? It’s all about balance. You need the right mix of “greens” (like food scraps, grass clippings – nitrogen-rich) and “browns” (like dried leaves, shredded paper – carbon-rich), plus enough air and moisture. When these elements come together in the right proportions, the beneficial microbes get busy, multiply, and create heat, often reaching temperatures between 130°F and 160°F (54°C to 71°C). This high heat is fantastic because it:</p>

<ul>
<li><strong>Speeds up decomposition:</strong> The microbes work much faster at these temperatures.</li>
<li><strong>Kills weed seeds and pathogens:</strong> The heat helps to sterilize your compost, meaning fewer weeds pop up in your garden from the compost, and any harmful stuff gets neutralized.</li>
<li><strong>Reduces odors:</strong> A well-managed hot compost pile usually smells earthy, not rotten.</li>
</ul>

<p>Why should you care? Because hot composting lets you:</p>

<ul>
<li><strong>Reduce landfill waste:</strong> A significant portion of household waste is compostable. Keep it out of the dump!</li>
<li><strong>Create amazing fertilizer:</strong> Your garden will thank you with healthier, more vibrant plants.</li>
<li><strong>Save money:</strong> You won’t need to buy commercial fertilizers and soil conditioners.</li>
<li><strong>Get results quickly:</strong> Enjoy the benefits of your compost much sooner than with traditional methods.</li>
</ul>

<h2>Choosing the Right Hot Composting System: What to Look For</h2>

<p>When you’re ready to <strong>buy a hot composting system</strong>, you’ll notice there are a few main types. Each has its pros and cons, and the “best” one for you depends on your space, your budget, and how much effort you want to put in.</p>

<h3>Types of Hot Composting Systems</h3>

<p>The most common systems designed for easier hot composting are tumblers and multi-chamber bins. Here’s a quick look:</p>

<h4>1. Compost Tumblers</h4>
<p>These are self-contained units, usually barrel-shaped and mounted on a frame so you can rotate them like a big hamster wheel. They’re great for containing everything, keeping pests out, and making turning the compost easy.</p>
<p><strong>Pros:</strong></p>
<ul>
<li>Easy to turn/aerate.</li>
<li>Often pest-resistant.</li>
<li>Neater appearance, good for smaller spaces.</li>
<li>Faster batch composting – you add ingredients, seal it, turn it, and wait for a batch to finish.</li>
</ul>
<p><strong>Cons:</strong></p>
<ul>
<li>Can be more expensive.</li>
<li>Limited capacity per batch.</li>
<li>Some can be tricky to empty when full.</li>
<li>May require more effort to maintain ideal moisture and carbon-to-nitrogen ratios for fast hot composting.</li>
</ul>

<h4>2. Multi-Chamber Bins</h4>
<p>These are usually sturdy bins with two or three sections. You add new material to one section, let it compost while you start a new batch in another, and move partly-composted material to a faster-composting finishing section. This continuous-flow system is ideal for hot composting.</p>
<p><strong>Pros:</strong></p>
<ul>
<li>Can handle larger volumes.</li>
<li>Allows for continuous composting – always have a fresh batch starting and a finished batch ready.</li>
<li>Better aeration and temperature control possible than single bins.</li>
<li>Often more durable construction.</li>
</ul>
<p><strong>Cons:</strong></p>
<ul>
<li>Require more space.</li>
<li>Turning/moving material between chambers takes more physical effort.</li>
<li>Can be more expensive than basic bins.</li>
</ul>

<h3>Key Features to Look For When You Buy:</h3>

<p>No matter the type, consider these features to make your <strong>hot composting buy</strong> a great decision:</p>

<h4>Material and Durability</h4>
<p>You want something that will last. Look for sturdy, UV-resistant plastic (like high-density polyethylene – HDPE) for tumblers and bins. Metal frames are also a good sign. Avoid flimsy materials that will crack or degrade in the sun and weather.</p>

<h4>Size and Capacity</h4>
<p>
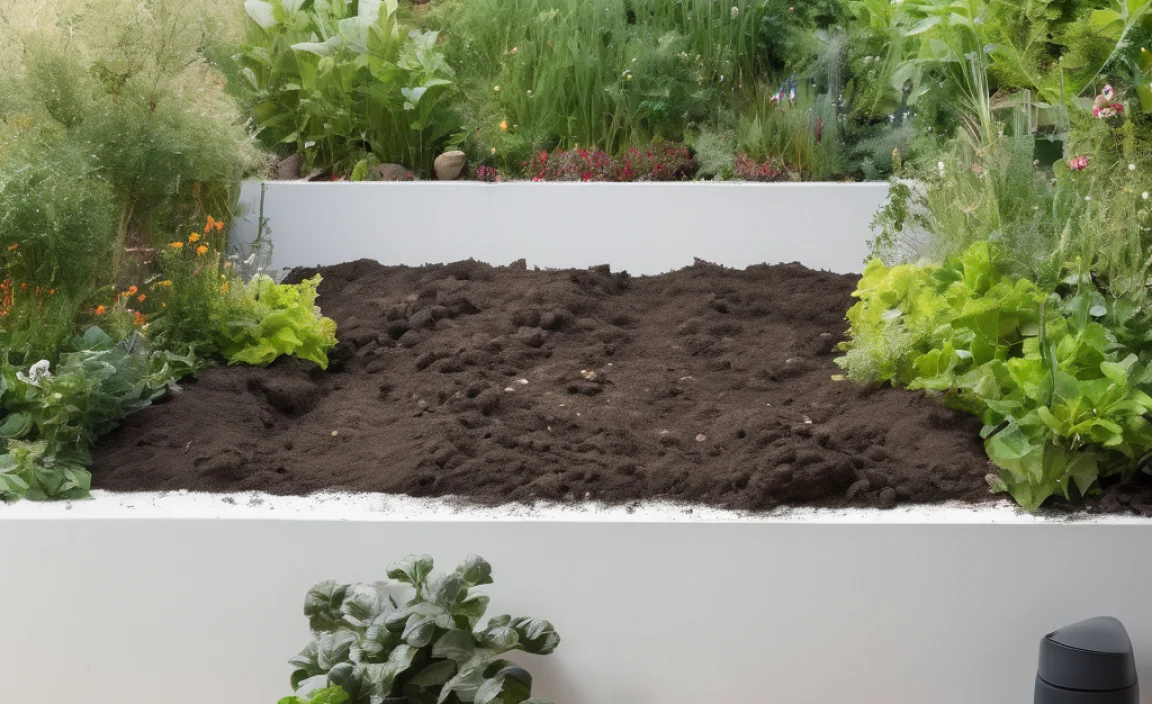
How much kitchen and yard waste do you generate? A good rule of thumb for hot composting is to aim for a pile or bin that’s at least 3 feet x 3 feet x 3 feet (1 cubic yard or meter) for optimal heat retention if you’re building your own or choosing a free-standing bin. For tumblers, check the internal volume (often measured in gallons or liters). Think about how much you’ll be adding regularly.</p>

<h4>Aeration (Airflow)</h4>
<p>This is CRUCIAL for hot composting. Without oxygen, your compost will go anaerobic (stinky and slow). Tumblers usually have holes or vents. For bins, look for designs that allow air to circulate easily through the material. Some have built-in aeration tubes or clever vent designs.</p>

<h4>Ease of Turning/Mixing</h4>
<p>For tumblers, a good handle or easy-to-grip design is key. For multi-chamber bins, consider how easy it will be to shovel or fork material from one section to the next. If you have mobility issues, this is a big factor.</p>

<h4>Ease of Adding Materials and Harvesting Compost</h4>
<p>Does it have a wide opening to toss in scraps? Can you easily remove the finished compost from the bottom or side, or do you have to empty the entire bin? Some systems have clever sliding doors or pull-out trays for harvesting.</p>

<h4>Pest Resistance</h4>
<p>If critters are a concern in your area (raccoons, rodents), a fully enclosed tumbler is usually the best bet. Some well-designed bins also have finer mesh or other features to deter pests.</p>

<h3>DIY vs. Buying: When Buying Is Better for Beginners</h3>

<p>While you can certainly build a hot compost pile or bin yourself, buying a dedicated system often makes it much more foolproof for beginners. Why?</p>

<ul>
<li><strong>Built-in Features:</strong> Purchased systems are designed with aeration, moisture retention, and ease of use in mind. You don’t have to guess if your DIY design is adequate.</li>
<li><strong>Speed:</strong> A good tumbler or multi-chamber system is engineered to facilitate the conditions needed for fast composting.</li>
<li><strong>Simplicity:</strong> They take the guesswork out of the equation. You can focus on learning the right mix of greens and browns.</li>
</ul>

<h2>Top-Rated Hot Composting Systems for Effortless Results</h2>

<p>Based on user reviews and expert opinions, these types of systems tend to be popular for their ease of use and effectiveness in achieving hot composting. When you <strong>buy a hot composting system</strong>, looking at these brands or styles can be a good starting point.</p>

<table>
<caption>Popular Hot Composting System Styles</caption>
<thead>
<tr>
<th>System Type</th>
<th>Best For…</th>
<th>Considerations</th>
</tr>
</thead>
<tbody>
<tr>
<td>Single Batch Tumbler</td>
<td>Beginners, smaller households, quick compost batches.</td>
<td>Need to wait for one batch to finish before starting a new one; manageable size.</td>
</tr>
<tr>
<td>Dual Batch Tumbler</td>
<td>Continuous composting needs, slightly larger households.</td>
<td>Two chambers allow one to cure while the other active; can be larger/heavier.</td>
</tr>
<tr>
<td>Three-Bin System</td>
<td>Dedicated gardeners, larger yards, continuous high-volume composting.</td>
<td>Requires space; manual turning/moving between bins needs effort.
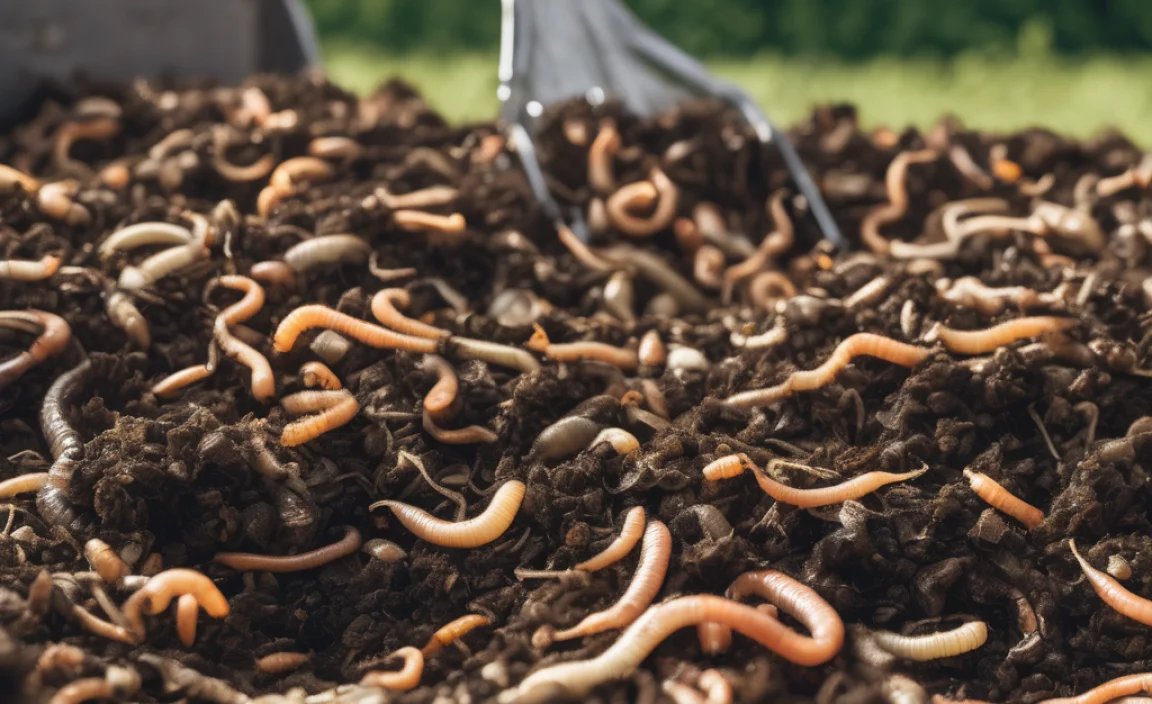
</td>
</tr>
<tr>
<td>Worm Composters (Vermicomposting)</td>
<td>Apartment dwellers, small patios, food scraps only.</td>
<td>Not technically “hot” composting, but very efficient for kitchen waste. Requires specific bedding materials and management.</td>
</tr>
</tbody>
</table>

<p>When exploring options, look for reputable brands like:</p>

<ul>
<li><strong>Tumbling Composter Brands:</strong> Many brands offer robust dual-chamber tumblers that are excellent for consistent hot composting. Look for well- reviews on ease of turning, durability, and efficient mixing. Examples include options from Sun Serious, Algreen Products, and Miracle-Gro.</li>
<li><strong>Stationary Bin Brands:</strong> For multi-chamber bins, consider brands known for sturdy construction that allows good airflow and easy access. Some are modular and can be expanded. Examples may include systems designed for higher temperatures like hot composters from Mantis or Gardener’s Supply Company.</li>
</ul>

<h3>Where to Buy Your System</h3>

<p>Where you <strong>buy a hot composting system</strong> can also be important. You have a few good options:</p>

<ul>
<li><strong>Online Retailers (Amazon, Home Depot, etc.):</strong> These offer a vast selection, competitive pricing, and customer reviews that can be incredibly helpful. You can compare models side-by-side easily.</li>
<li><strong>Garden Centers and Nurseries:</strong> If you prefer to see a compost bin in person, local garden stores are a great option. Staff can often offer advice tailored to your region.</li>
<li><strong>Manufacturer Websites:</strong> Buying directly from the manufacturer can sometimes offer extended warranties or special bundles.</li>
<li><strong>Second-hand Markets (Craigslist, Facebook Marketplace):</strong> You might find a great deal on a used system, but inspect it carefully for cracks or damage.</li>
</ul>

<h2>Getting Started with Your New System: The Basic Steps</h2>

<p>Once your new hot composting system arrives, it’s time to get to work! Don’t worry, it’s much simpler than it sounds. The key is understanding the “recipe” – the right balance of greens and browns.</p>

<h3>Step 1: Choose Your Location</h3>
<p>Find a spot that’s convenient for you to access, gets some sun to help with heating (but not scorching hot all day), and has decent drainage. If you’re using a multi-bin system, you’ll want enough space to work around it.</p>

<h3>Step 2: Gather Your “Greens” and “Brown

Leave a Comment

Hot Composting Buy: **Proven** Essential Method

Hey there, neighbor! Ever look at your kitchen scraps and yard waste, thinking, “There’s got to be a better way than just tossing this stuff”? You’re not alone. It can feel like a waste, and it certainly doesn’t help our planet. But what if I told you there’s a super-powered composting method that turns that organic “trash” into garden gold in no time? That’s where hot composting comes in. It might sound fancy, but I’m here to break it down the TopChooser way – simple, practical, and totally doable. Let’s get your compost cooking!

What is Hot Composting, Anyway?

So, what’s the big deal with “hot” composting? Think of it as super-speed composting. Instead of waiting months, or even a year, for your compost pile to break down slowly, hot composting uses specific ingredients and techniques to get things heating up. This high heat is like a natural sterilizer, killing weed seeds and pathogens. It’s theproven essential method for anyone looking for quick, high-quality compost for their garden.

Why is this a big deal for home gardeners? Because you get nutrient-rich compost much faster. This means healthier soil, happier plants, and a fantastic way to reduce waste. It’s a win-win for your garden and the environment. We’re going to cover everything you need to know to get started, from what you need to buy (if anything!) to how to build your first hot compost pile.

The Science Behind the Heat

Don’t let the “science” part scare you! It’s actually pretty straightforward and explains why hot composting is so effective. The heat in a compost pile is generated by billions of tiny microorganisms – bacteria, fungi, and actinomycetes. When these microbes get a good buffet of carbon-rich “browns” and nitrogen-rich “greens,” along with plenty of air and moisture, they go to town!

As they feast and multiply, they release energy, and a good portion of that energy comes out as heat. A truly “hot” compost pile can reach temperatures between 130°F (54°C) and 160°F (71°C). That’s hot enough to make a real difference:

  • Kills Pathogens: Keeps harmful bacteria and disease-causing organisms in check.
  • Destroys Weed Seeds: Zaps those pesky weed seeds before they get a chance to sprout in your garden.
  • Speeds Up Decomposition: Breaks down organic materials much faster than cool composting methods.

The key is balancing the “ingredients” and conditions. It’s all about giving those hardworking microbes exactly what they need to thrive and generate that beneficial heat.

Hot Composting: To Buy or Not To Buy?

This is where the “buy” part of “Hot Composting Buy” comes in. You might be thinking, “Do I need to buy a special setup for hot composting?” The great news is, often, you don’t! The most essential “buy” for hot composting, if anything, is a good pitchfork or compost aerator. But the core of hot composting is about the materials and the method, not necessarily a fancy bin.

However, some people prefer to invest in a good compost bin to keep things tidy and contained. If you’re looking for options, here’s a quick rundown of what’s out there:

Types of Compost Bins (Optional Purchases)

  • Tumblers: These are great for quick turning and look neat. They often have two chambers, so you can fill one while the other matures. They can be pricey but speed up the process by making turning easy.
  • Stationary Bins: These are usually enclosed bins, often made of wood, plastic, or recycled materials. They are good for keeping things contained and can retain heat well. Some have doors at the bottom for easy compost removal.
  • Open Piles: Don’t underestimate the power of a simple pile! If you have space, a well-managed open pile can work beautifully for hot composting. You just need to be mindful of containing it somewhat.

For hot composting, the bin’s main job is to help retain heat and moisture, and provide a structure for building your pile correctly. If you’re on a budget, a simple DIY bin made from pallets or wire mesh works just fine. The real “buy” is understanding the method itself.

The “Browns” and “Greens” – Your Essential Ingredients

This is the heart and soul of hot composting. You need a smart mix of carbon-rich “browns” and nitrogen-rich “greens.” Think of it like a balanced diet for your compost microbes. Too much of one, and your pile won’t heat up. The ideal ratio is often cited as roughly 25-30 parts carbon to 1 part nitrogen by weight, but for beginners, a good starting point is about 2 to 3 parts browns to 1 part greens by volume.

Carbon-Rich “Browns”

These guys provide the energy for the microbes and help with aeration. They are typically dry and woody.

  • Dried leaves (oak leaves are great!)
  • Straw or hay
  • Shredded newspaper or cardboard (avoid glossy paper)
  • Wood chips or sawdust (use sparingly, can take a long time to break down)
  • Pine needles
  • Twigs and small branches (chopped up)

Nitrogen-Rich “Greens”

These provide the protein for the microbes and are usually moist. They are the activators of the pile!

  • Fruit and vegetable scraps (no meat, dairy, or oily foods!)
  • Coffee grounds and tea bags
  • Grass clippings (use in thin layers to avoid matting)
  • Plant trimmings (non-diseased)
  • Manure from herbivores (cow, horse, chicken, rabbit – a great nitrogen boost!)
  • Seaweed

What to Avoid (Crucial for Success!)

To keep your compost healthy and safe, and avoid attracting pests, steer clear of:

  • Meat, fish, and bones
  • Dairy products
  • Oily foods or grease
  • Diseased plants
  • Weeds that have gone to seed
  • Pet waste (dog and cat feces – can contain harmful pathogens)
  • Coal or charcoal ash
  • Treated wood

Getting this balance right is the secret sauce to kickstarting that hot composting magic. It might take a little experimenting, but you’ll get the hang of it quickly.

Building Your Hot Compost Pile: The Proven Method Step-by-Step

Alright, ready to build this thing? We’re going for a minimum size to help retain heat – aim for at least 3 feet x 3 feet x 3 feet (about 1 cubic meter). This size is crucial for getting the core of the pile hot. We’ll build it in layers, like making a lasagna!

Here’s your practical guide:

  1. Step 1: Choose Your Location

    Find a spot that’s relatively level, has good drainage, and is accessible with your materials. Partial shade is ideal – too much sun can dry it out, and too much shade can keep it too cool. It’s also helpful to have it somewhere you don’t mind a bit of steam or earthy smell!

  2. Step 2: Prepare the Base

    Start with a layer of coarse, twiggy brown material (like small branches or wood chips) about 4-6 inches deep. This helps with airflow right from the bottom.

  3. Step 3: Add Your First “Green” Layer

    Add a layer of nitrogen-rich “greens,” about 2-3 inches thick. If you have kitchen scraps or grass clippings, this is where they go. Don’t pack it down too much.

  4. Step 4: Add a “Brown” Layer

    Cover the greens with a thicker layer (4-6 inches) of carbon-rich “browns,” like dried leaves or shredded cardboard. This layer helps insulate the greens and provides the carbon the microbes need.

  5. Step 5: Add Moisture

    Lightly water each layer as you build. The pile should be as damp as a wrung-out sponge – not soaking wet, but not dry either. A good sprinkle is usually enough.

  6. Step 6: Repeat and Layer

    Continue alternating layers of greens and browns, watering as you go. Try to finish with a brown layer to help prevent odors and flies.

  7. Step 7: The “Activator” (Optional but Recommended)

    To give your pile a head start, you can sprinkle a shovel-full of finished compost or garden soil between layers. This introduces a good population of microbes to kickstart the decomposition process.

  8. Step 8: Monitor Temperature and Moisture

    After a day or two, insert a compost thermometer into the center of the pile. You’re aiming for 130°F to 160°F. Check the moisture regularly. If it’s too dry, add water. If it’s too wet, add more brown material.

  9. Step 9: Turning Your Pile (The Key to Speed!)

    This is critical for hot composting. Within 4-7 days of the pile starting to heat up, you need to turn it. Use your pitchfork to move the outer layers (which are cooler) into the center, and bring the hot center material to the outside. This reintroduces oxygen, which the microbes need to keep working. Continue turning every 1-2 weeks as the temperature peaks and then starts to fall.

  10. Step 10: Let it Cure

    Once turned, the pile should reheat. When the turning process no longer results in a significant temperature rise (usually after a few turns and a few weeks), you can let it sit and cure for another 2-4 weeks. It will cool down and the compost will finish breaking down into a rich, dark material.

The whole process, from building to finished compost, can take as little as 4-8 weeks if managed well, compared to many months for cooler composting methods.

What Do You Need To “Buy” for Hot Composting?

Let’s talk practicalities. If you’re starting from scratch, here are the most useful items you might consider buying to make hot composting easier and more efficient. Remember, many of these you might already have around the house!

Essential Tools

These are the workhorses that will make managing your pile a breeze.

  • Pitchfork or Compost Aerator Tool: Absolutely essential for turning the pile. A pitchfork is versatile, while a dedicated aerator tool can make the job easier.
  • Compost Thermometer: This is highly recommended for hot composting. It tells you if your pile is active and hot enough to kill pathogens and weed seeds effectively. Look for one that’s at least 18-24 inches long to reach the core.
  • Water Source: A hose with a spray nozzle or a rain barrel with a watering can is needed to maintain the right moisture level.

Optional Purchases (for Convenience)

These can enhance your composting experience, but aren’t strictly necessary to start.

  • Compost Bin/Tumbler: As mentioned earlier, a bin can help contain materials and retain heat. Tumblers make turning very easy, while sturdy stationary bins offer good insulation.
  • Shredder/Chipper: If you have a lot of yard waste, a shredder can break down larger items into smaller pieces, which speeds up decomposition.
  • Watering Wand: For more even water distribution, especially in larger piles.

For the “Hot Composting Buy” focus, the most critical items to invest in would be a sturdy pitchfork and a compost thermometer if you don’t already own them. These will directly impact the success and speed of your hot composting.

Troubleshooting Common Hot Composting Issues

Even with the best intentions, your compost pile might throw you a curveball. Here are some common problems and how to fix them, the TopChooser way – simple solutions!

Problem: My Pile Isn’t Heating Up

  • Cause: Not enough nitrogen (too many browns), too dry, or the pile is too small.
  • Solution: Add more greens (kitchen scraps, grass clippings, manure). Add water if it’s dry. Make sure your pile is at least 3x3x3 feet. Turn it to mix ingredients and introduce air.

Problem: My Pile Smells Bad (Like Rotten Eggs or Ammonia)

  • Cause: Too much nitrogen (too many greens) or it’s too wet and lacking oxygen (anaerobic).
  • Solution: If it smells like ammonia, add more browns (leaves, cardboard) to soak up excess nitrogen. If it smells rotten, it’s likely too wet and needs air. Turn the pile thoroughly and add dry browns.

Problem: My Pile is Too Wet and Slimy

Cause: Excessive moisture, often from too many wet greens like grass clippings or fruit scraps without enough browns to absorb the liquid.

Solution: Mix in plenty of dry brown materials like shredded newspaper, straw, or dried leaves. Turn the pile well to incorporate the browns and improve aeration.

Problem: My Pile is Too Dry

Cause: Not enough moisture added during construction, or it’s drying out too quickly due to sun or wind.

Solution: Water the pile thoroughly. You might need to turn it as you water to ensure moisture penetrates the core. Consider adding more moist “green” materials.

Problem: Pests are Showing Up (Flies, Rodents)

Cause: Exposure of food scraps, lack of heat, or improper materials in the pile.

Solution: Always bury food scraps under a layer of brown material. Ensure your pile is hot enough to deter pests. Avoid adding meat, dairy, and oily foods. Consider using a bin with a lid if pests are a persistent problem.

Don’t get discouraged! Composting is a living process, and a little adjustment often does the trick. For more detailed troubleshooting, resources like the EPA’s composting page offer excellent guidance.

When is My Hot Compost Ready?

One of the best things about hot composting is how quickly you get usable compost. Your “finished” compost will:

  • Be dark brown and crumbly in texture, resembling rich soil.
  • Smell earthy and pleasant, not sour or like ammonia.
  • No longer be recognizable as the original materials (no identifiable food scraps or leaves).
  • Have cooled down to ambient temperature; it won’t be hot anymore.

You can use a simple visual and smell test. If it looks, smells, and feels like good soil, it’s ready to use! This typically happens within 1 to 3 months, depending on how actively you manage the pile.

Using Your Finished Compost

Now for the reward! You’ve created “black gold.” Here’s how to put your hot compost to good use:

  • Soil Amendment: Mix it into your garden beds before planting. It improves soil structure, drainage, and aeration, and adds essential nutrients. Aim for a mix of about 25-30% compost to 70-75% native soil.
  • Mulch: Spread a layer of compost around trees, shrubs, and perennials. It helps retain moisture, suppress weeds, and slowly release nutrients.
  • Top Dressing for Lawns: Rake a thin layer (about ¼ to ½ inch) over your lawn in spring or fall to boost its health and appearance.
  • Potting Mix: Combine your compost with other ingredients like perlite and peat moss to create a rich potting mix for containers and seedlings.
  • Compost Tea: Steep finished compost in water to create a nutrient-rich liquid fertilizer.

Using your own compost is one of the most satisfying parts of the process. It’s a closed-loop system that benefits your garden tremendously.

A Quick Summary Table: Browns vs. Greens

To recap, here’s a simplified look at what goes where. Remember our target ratio: roughly 2-3 parts Browns to 1 part Greens by volume.

Category Role Examples
“Browns” (Carbon-

Leave a Comment

Hot Composting Buy: Your Genius Essential

Ever feel like your yard waste is just…well, waste? You toss leaves and grass clippings, and they just sit there, taking up space. It’s a common problem for gardeners and homeowners looking to tidy up. But what if there was a way to turn that “waste” into garden gold? It sounds like magic, but it’s called hot composting, and it’s surprisingly simple to get started. Think of it as a super-fast way to make nutrient-rich compost for your plants. We’ll walk you through finding the perfect setup, making it easy and effective. Get ready to transform your yard!

What is Hot Composting, Anyway?

Hot composting is a technique that speeds up the decomposition process by creating an environment where beneficial microorganisms thrive. Unlike traditional cold composting, which can take months or even years, hot composting can produce finished compost in as little as a few weeks to a few months, depending on your effort and the materials you use. The key is maintaining the right balance of “greens” (nitrogen-rich materials) and “browns” (carbon-rich materials), along with adequate moisture and aeration.

These hot compost piles get surprisingly warm inside – sometimes reaching temperatures of 130-160°F (54-71°C)! This high heat is the secret weapon. It helps break down organic matter quickly and, importantly, kills off weed seeds and most pathogens. This means you get a cleaner, more potent compost much faster. It’s a genius way to tackle yard and kitchen scraps while enriching your garden soil.

Why a “Hot Composting Buy” is Your Genius Essential

When you’re ready to get serious about faster compost, a dedicated hot composting system makes a huge difference. Sure, you can build a simple pile, but a good buying choice, or “buy,” is an essential tool for success. It’s not just about throwing stuff in a bin; it’s about creating the ideal conditions for microbes to do their work efficiently. A well-chosen system helps you:

  • Control the Environment: A good bin or tumbler helps manage moisture, heat, and airflow, which are critical for hot composting.
  • Achieve Faster Results: Without a controlled system, your compost pile might just sit there. A “hot composting buy” is designed to accelerate the process.
  • Keep Things Tidy: It contains the materials, preventing a messy pile and deterring pests.
  • Make Turning Easier: Many systems are designed for easy turning or mixing, which is vital for aeration.
  • Save Time and Effort: While it still requires some work, the right system minimizes the fuss.

Think of it like this: you can hammer a nail with a rock, but a good hammer makes the job so much easier and more effective. A hot composting system is your composting hammer!

Choosing Your Hot Composting System: The Top Contenders

When you’re looking to buy, you’ll mostly find two main types of systems designed for hot composting: static bins and tumblers. Each has its own pros and cons, and the “best” one really depends on your space, budget, and how much effort you want to put in.

1. Hot Composting Tumblers

Tumblers are enclosed barrels or bins that sit on a stand, allowing you to turn them by rotating the drum. This makes mixing and aeration incredibly easy.

Pros of Tumblers:

  • Easy Turning: A few cranks or spins can thoroughly mix your compost ingredients.
  • Faster Decomposition: The ease of turning helps maintain ideal aerobic conditions for quick breakdown.
  • Pest Resistant: Being fully enclosed, they do a great job of keeping rodents and other critters out.
  • Neat and Tidy: They look good in most yards and keep everything contained.
  • Good for Small Spaces: Many are compact enough for smaller gardens or even patios.

Cons of Tumblers:

  • Can Get Heavy: Once full, especially with wet ingredients, they can be difficult to turn if they are very large.
  • Batch Composting: You usually add material and then wait for it to finish before harvesting a full batch. This can be less convenient for ongoing composting.
  • Initial Cost: They tend to be more expensive upfront than basic static bins.
  • Can Get Dry: Sometimes the tumbling action can dry out the compost if not monitored.

What to Look For in a Tumbler:

  • Capacity: How much compost do you plan to make? Tumblers come in various sizes, from 20 gallons to over 70 gallons.
  • Ease of Turning: Look for designs that are easy to crank or rotate, perhaps with built-in handles or a gear system.
  • Dual Chamber Designs: Some tumblers have two compartments. This allows you to keep one batch composting while you start filling the other, making for a continuous process.
  • Durability: Made from UV-stable plastic or metal that won’t degrade in the sun.
  • Ventilation: Sufficient air vents are crucial for oxygen flow.

2. Hot Composting Static Bins (or Tumbling Bins)

These are typically enclosed boxes, often made of wood, recycled plastic, or wire mesh. They sit in one place, and you add materials from the top. Some have doors at the bottom for harvesting finished compost. While some static bins are designed for slow composting, specific designs and management techniques are best for hot composting.

Pros of Static Bins:

  • Larger Capacity: You can often compost more material at once compared to many tumblers.
  • Continuous Composting: You can continually add new materials to the top, making it great for ongoing kitchen scraps and yard waste.
  • Lower Cost: Generally more affordable than tumblers, especially DIY options.
  • Retain Heat Well: Their larger mass can help retain heat better than smaller tumblers.

Cons of Static Bins:

  • Turning is More Labor-Intensive: You’ll need a compost fork or aerator to turn the pile, which can be hard work.
  • Might Attract Pests: Open-bottom designs can sometimes be accessed by animals if not managed carefully.
  • Less Aeration: It can be harder to ensure good, consistent airflow throughout the entire pile.
  • Can Get Soggy: Without good airflow, they can become compacted and wet, hindering the hot composting process.

What to Look For in a Static Bin for Hot Composting:

  • Good Insulation: Materials like thick plastic, wood, or insulated panels help retain heat.
  • Ventilation: Look for bins with plenty of air vents or slats.
  • Removable Door or Panels: Essential for easy turning and harvesting of finished compost from the bottom.
  • Consider a “3-Bin System”: While not a single buy and more of a DIY project, a three-bin system excels at hot composting by allowing you to move material from one stage to the next, turning it naturally as you transfer.
  • Lid: A secure lid helps regulate moisture and temperature.

Choosing Between Tumblers and Static Bins

Feature Hot Composting Tumbler Hot Composting Static Bin
Ease of Turning Very Easy Labor-Intensive
Speed of Compost Fast (if managed well) Can be fast, but requires diligent turning
Pest Resistance Excellent Good (with proper design/management)
Batch vs. Continuous Primarily Batch Primarily Continuous
Ideal For Those who want easy turning, pest protection, and are okay with batch composting. Suitable for smaller yards. Those who compost large volumes, prefer continuous adding, and don’t mind manual turning. Can be better for larger yards.
Initial Cost Higher Lower to Moderate

The “Greens” and “Browns” for Your Hot Compost

No matter what system you buy, the recipe for hot composting is crucial. You need a good mix of nitrogen-rich “greens” and carbon-rich “browns.” A common ratio guideline for hot composting is roughly 25-30 parts carbon (browns) to 1 part nitrogen (greens) by dry weight. In simpler terms, think of it as needing a lot more brown material than green material.

“Greens” (Nitrogen-Rich):

  • Kitchen Scraps: Fruit and vegetable peels, coffee grounds, tea bags, eggshells (crushed). Avoid meat, dairy, and oily foods as they can attract pests and smell.
  • Grass Clippings: Fresh, green grass is a great nitrogen source. However, add them in thin layers to avoid matting and anaerobic conditions.
  • Weeds (before they go to seed): Lush, green weeds are good.
  • Plant Trimmings: Fresh, leafy green plant cuttings.

“Browns” (Carbon-Rich):

  • Dry Leaves: A fantastic source of carbon.
  • Shredded Cardboard and Paper: Non-glossy, plain paper products work well. Shred them into small pieces.
  • Straw or Hay: Dried grass or straw works well.
  • Wood Chips or Sawdust: Use sparingly, as they break down slowly. Ensure it’s from untreated wood.
  • Twigs and Small Branches: Chop them up to speed decomposition.

Tip: Chop up larger items like branches, cardboard, and tough vegetable scraps. The smaller the pieces, the more surface area for microbes to work on, leading to faster composting.

How to Get Your Hot Composter Buzzing: A Step-by-Step

Once you have your chosen hot composting system, it’s time to get it started. The goal is to create that perfect environment for thermophilic (heat-loving) bacteria to multiply.

Step 1: Choose the Right Location

Pick a spot that’s convenient to access with your kitchen scraps and garden waste. It should also have good drainage so it doesn’t get waterlogged. Some sun is good to help heat the pile, but too much direct, intense sun could dry it out too quickly. An area that gets morning sun and afternoon shade is often ideal.

Step 2: Create Your Base Layer

Start with a generous layer of coarse brown material at the bottom. This could be small twigs, straw, or shredded cardboard. This layer helps with drainage and provides initial airflow. Aim for about 4-6 inches.

Step 3: Start Layering Greens and Browns

This is where the magic of hot composting begins. You want to build your pile with alternating layers of greens and browns. Think of it like making a lasagna.

  • Add a layer of green material.
  • Cover it with a thicker layer of brown material.
  • Continue layering, aiming for that crucial ratio of more browns than greens.

As you add kitchen scraps (greens), always cover them with a good layer of browns from your yard or recycling bin. This helps prevent odors and keeps pests away.

Step 4: Add Water

Moisture is vital. Your compost pile should feel like a damp, wrung-out sponge. If it’s too dry, the decomposition process slows to a crawl. If it’s too wet, it can become anaerobic and smelly. As you build layers, add water to moisten them thoroughly. If you’re using a tumbler, you might add water when you add new ingredients.

Step 5: Aerate (Turn Your Compost)!

This is the most critical step for hot composting. You need to introduce oxygen to feed the aerobic bacteria. How often you turn depends on your system and how fast you want compost.

  • For Tumblers: Rotate the tumbler vigorously for a few minutes every 2-3 days.
  • For Static Bins: Use a compost fork or aerator to mix the materials, bringing outer materials to the center and vice-versa. Aim for turning every 3-7 days.

When you turn the pile, you should notice it heats up significantly within 24-48 hours if you’ve got the right mix and moisture. This heat is a sign that the microbes are hard at work!

Step 6: Monitor and Maintain

Keep an eye on your compost pile. If it seems too dry, add water during turning. If it’s too wet and smelly, add more brown material and ensure good airflow. You’re looking to maintain that “damp sponge” consistency throughout the process.

Step 7: Harvest Your Compost

If you’re diligent with turning, moisture, and the right balance, you’ll start to see materials breaking down into a dark, crumbly, earthy-smelling substance. This is your finished compost!

  • Tumblers: Once the material inside looks finished (dark, crumbly, no recognizable food scraps), you can stop adding new material and let it cure for a couple of weeks, or empty the entire batch.
  • Static Bins: You can harvest finished compost from the bottom access door after 1-3 months. You can continue adding new materials to the top while the bottom is cooking.

You can sift your compost to remove any larger, unfinished pieces and return them to the bin. Your newly created compost is ready to be mixed into garden beds, used as mulch, or added to potting soil.

Troubleshooting Common Hot Composting Issues

Even with the best buy, you might run into a few snags. Here’s how to fix them.

Problem Possible Cause Solution
Pile isn’t heating up. Too dry, too many browns (not enough nitrogen), pile is too small, or not enough aeration. Add water, add more green materials (kitchen scraps, grass clippings), make the pile larger (at least 3x3x3 feet if open, or fill your bin/tumbler), turn more frequently.
Pile smells bad (like ammonia or rotten eggs). Too wet, too many greens (not enough carbon), poor aeration (anaerobic). Add plenty of dry brown materials (leaves, shredded paper/cardboard), turn the pile thoroughly to introduce air, ensure good drainage.
Compost is taking too long. Materials are too large, not enough greens, not enough moisture, infrequent turning, or starting too small. Chop materials smaller, ensure a good green-to-brown ratio, check moisture (damp sponge!), turn more often, make sure your bin/pile is sufficiently sized.
Attracting pests (rodents, flies). Exposed food scraps, not enough browns to cover greens, improper bin construction. Always bury kitchen scraps under a layer of browns, ensure your bin is fully enclosed or has a secure lid, avoid adding meat, dairy, or oily foods.

Maintaining Your Hot Composting System

A bit of maintenance will ensure your hot composting buy serves you well for years.

  • Regular Cleaning: After harvesting, especially with tumblers, give the inside a rinse to remove residue.
  • Inspect for Wear and Tear: Check hinges, latches, and the structure itself for any damage, particularly after harsh weather.
  • Keep it Accessible: Ensure the area around your composter remains clear for easy access and turning.
  • Lubricate if Necessary: Some tumblers with moving parts might benefit from occasional lubrication on axles or gears, using a food-grade lubricant.

Where to Find More Information

For those who like to dive deeper, understanding the science behind composting can be fascinating. Organizations like the Environmental Protection Agency (EPA) offer excellent resources on composting basics and benefits. University Extension offices are also fantastic local resources, often providing guides specific to your climate and soil types. For instance, many Alabama Cooperative Extension System sites have robust gardening and composting sections.

Frequently Asked Questions about Hot Composting Buys

Q1: How much does a good hot composting system cost?

<

Leave a Comment