Have you ever seen a wooden fence with holes? Or maybe a deck with soft spots? That is rotted wood. It can happen to any wood outside. Rain and bugs can cause wood to rot. You can fix it! This article will show you how to fill in rotted wood. It is easier than you think.
Wood rot is no fun. It makes things look bad. It can also be dangerous. Rotted wood can break easily. You do not want a deck step to break. Let’s learn how to fill in rotted wood. We can make things strong and safe again.
Sometimes you can fix the wood. Other times, you need to replace it. But first, try to fix it. Keep reading to learn more. We will show you the steps. Soon you will know how to fill in rotted wood.
Key Takeaways
- Knowing how to fill in rotted wood helps maintain your home’s value and safety.
- Use wood hardener and filler for small areas of wood rot to restore strength.
- Remove all the rotted wood before you start filling the area.
- For large damage, consider replacing the entire piece of wood.
- Always wear safety glasses and a mask when working with wood.
How to Detect Rotted Wood Early
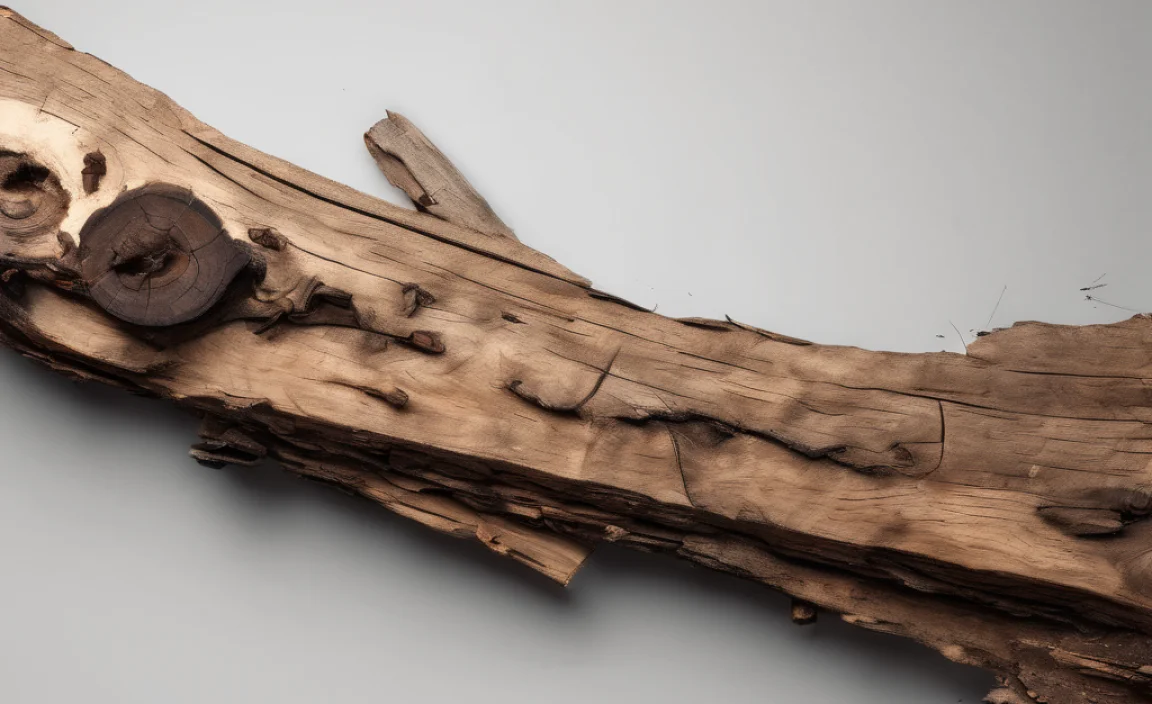
Finding rotted wood early can save you time and money. Look for changes in the wood. Does the wood look different? Is it a different color? Is the texture strange? Soft spots are a sign of rot. Use a screwdriver to check. Gently poke the wood. If the screwdriver goes in easily, the wood is likely rotted. Also, look for cracks. Cracks can let water in. Water makes the rot worse. Smell the wood too. Rotted wood often has a musty smell. Check places that stay wet longer. These are more likely to have rot. Remember to check wood near the ground. Bugs can also cause damage that looks like rot. Early detection means you can fix it faster and with less work. Keeping an eye on your wood can prevent big problems.
- Check wood after rain.
- Look for soft spots.
- Smell for musty odors.
- Inspect wood near the ground.
- Check for color changes.
- Look for cracks in the wood.
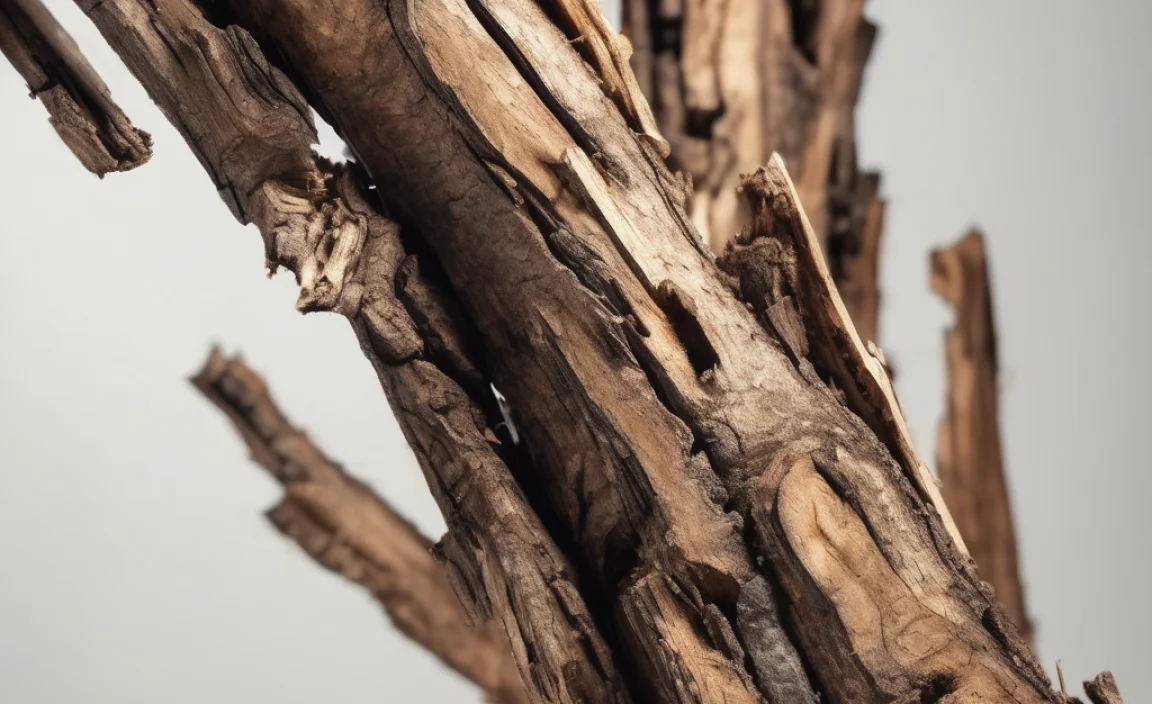
Sometimes, rotted wood is hidden. It might be under paint or siding. Tap the wood to listen for hollow sounds. Hollow sounds mean the wood might be rotted inside. You might need to remove some paint to check. Use a scraper to remove the paint. Then, poke the wood with a screwdriver. If you find rot, decide if you can fix it. Small areas can be filled. Big areas might need to be replaced. Fixing rotted wood yourself can save money. But be sure to do it right. If you are not sure, ask a professional. They can help you decide what to do. Taking care of your wood keeps your home safe and looking good.
Fun Fact or Stat: Wood rot is caused by fungi that digest parts of the wood cells, leading to structural weakness.
Is the Wood Soft or Spongy?
Is the wood soft and spongy? This is a big sign of rotted wood. Healthy wood is hard and solid. Rotted wood feels soft when you touch it. It might feel like a sponge. Press your finger into the wood. If it easily dents, it is likely rotted. The wood might also crumble. Small pieces might break off. This happens because the fungi have eaten away the wood. The wood loses its strength. Soft and spongy wood needs to be fixed. You can fill small areas. But large areas might need new wood. Ignoring soft spots can cause more damage. Check your wood often to catch problems early. Fixing it fast can prevent bigger issues later. Remember, soft wood is a warning sign. Take action to protect your home.
Does the Wood Change Color?
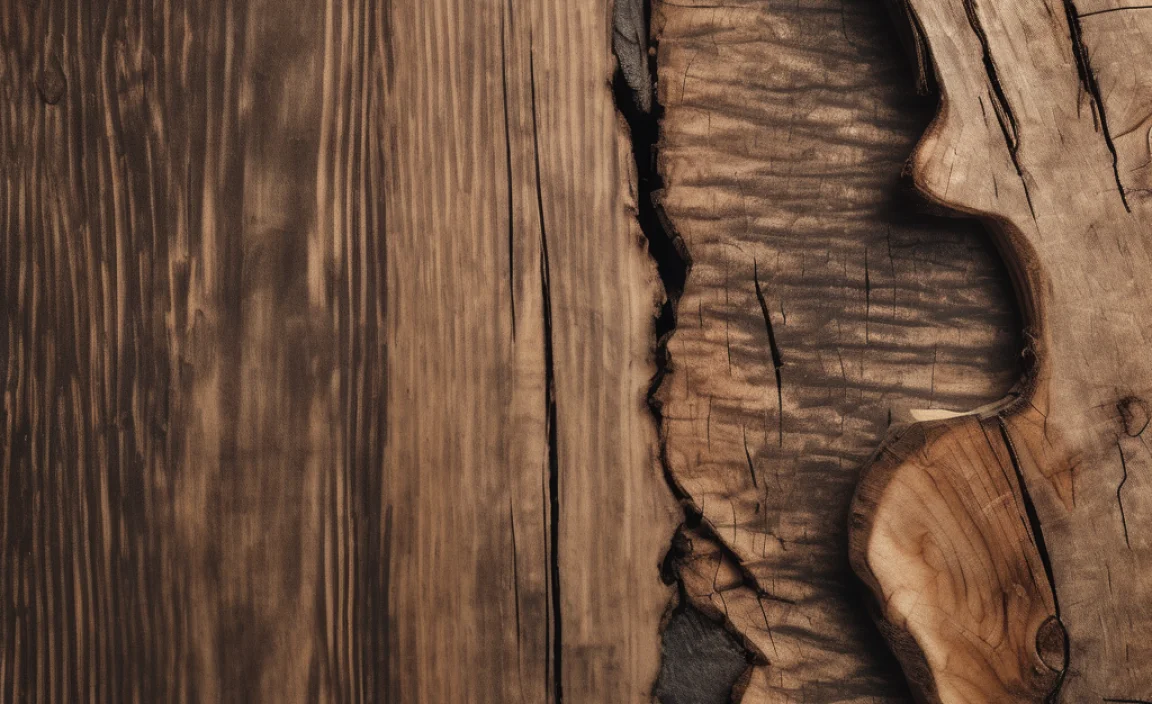
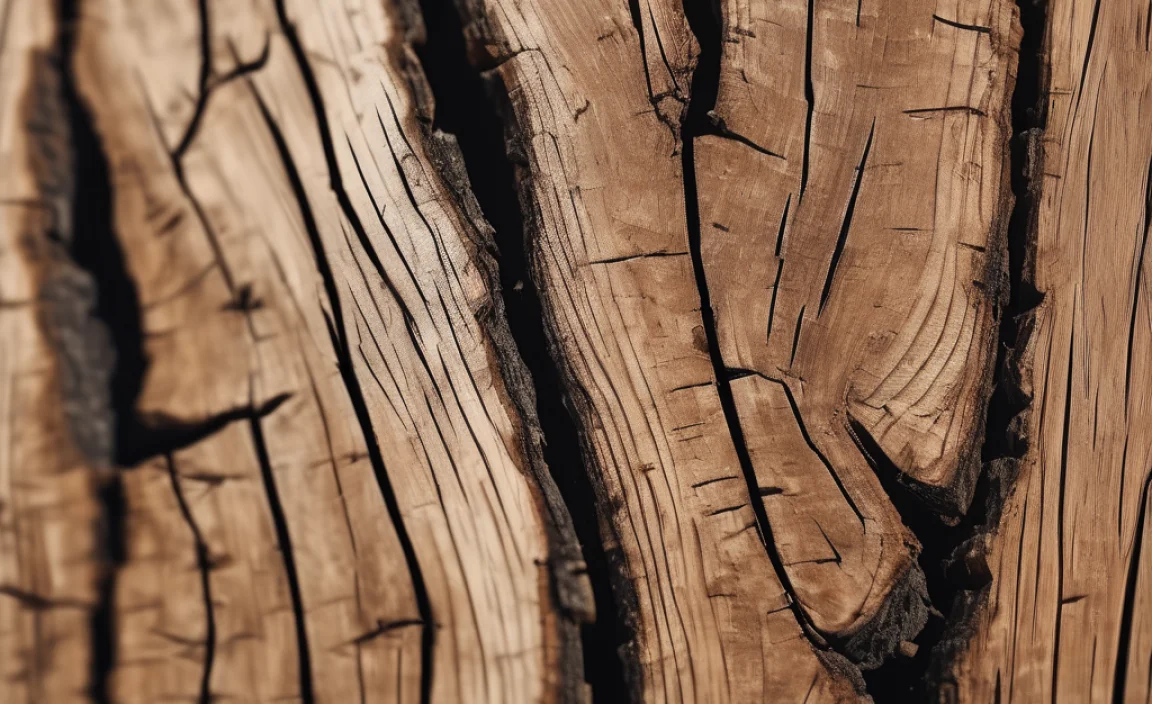
Has the wood changed color? This is another clue that wood is rotting. Healthy wood has a natural color. Rotted wood might turn darker. It can also turn gray or even white. The color change is caused by fungi. These fungi break down the wood. This changes its color. Look for spots that are different from the rest of the wood. These spots might be rotted. Scrape away any paint to see the wood better. If the wood underneath is a different color, it could be rot. Not all color changes mean rot. But it is worth checking. Use a screwdriver to poke the area. If it is soft and the color is different, it is likely rotted wood. Addressing color changes early can prevent further damage.
Are There Visible Cracks?
Do you see cracks in the wood? Cracks can be a sign of rotted wood. Cracks let water get inside the wood. Water makes rot worse. Look closely at the cracks. Are they getting bigger? Is the wood around the cracks soft? If so, the wood might be rotted. Use a tool to check inside the cracks. A small screwdriver works well. Gently scrape inside the crack. If the wood comes out easily, it is likely rotted. Cracks can also hide rot. The rot might be deeper inside the wood. You might need to remove some wood to see. Fixing cracks early can stop rot from spreading. Fill the cracks with wood filler. This keeps water out. Regular checks can help you find cracks before they cause big problems.
Tools Needed to Fill Rotted Wood
To fill rotted wood, you need the right tools. A scraper helps remove loose rotted wood. A screwdriver is good for testing wood for rot. A stiff brush cleans the area. Sandpaper smooths the surface. A wood hardener strengthens the wood. Wood filler fills the holes. A putty knife applies the filler. Safety glasses protect your eyes. A dust mask protects your lungs. Gloves keep your hands clean. A mixing stick mixes the filler. A container holds the filler. These tools make the job easier. They also help you do a good job. Using the right tools makes the wood stronger and last longer. Always wear safety gear. This keeps you safe while working. Having everything ready before you start saves time. Now you are ready to fill rotted wood.
- Scraper for removing rotted wood.
- Screwdriver to test for soft spots.
- Sandpaper to smooth surfaces.
- Putty knife to apply filler.
- Safety glasses to protect eyes.
- Dust mask for breathing protection.
Choosing the right wood filler is important. There are many types of fillers. Some are better for small holes. Others are better for large holes. Epoxy fillers are strong and waterproof. They are good for outdoor wood. Latex fillers are easy to sand. They are good for indoor wood. Read the labels carefully. Choose a filler that matches your wood. The color should be close. You can also paint the filler after it dries. Make sure the filler is compatible with paint. Some fillers need a primer first. A primer helps the paint stick. Follow the instructions on the filler. This will help you get the best results. Using the right filler makes your repair look professional. It also makes the wood stronger. Remember to clean your tools after using them.
Fun Fact or Stat: Epoxy wood fillers are known for their exceptional strength and resistance to shrinking, making them ideal for structural repairs.
What Kind of Scraper Should You Use?
What kind of scraper should you use? A good scraper is important. It helps you remove rotted wood. There are different types of scrapers. A putty knife is good for small areas. It has a flexible blade. This helps you get into tight spaces. A stiff scraper is good for larger areas. It has a stronger blade. This helps you remove more wood. Choose a scraper that is comfortable to hold. You will be using it for a while. Make sure the blade is sharp. A sharp blade makes the job easier. Be careful not to damage the good wood. Only remove the rotted wood. A good scraper helps you prepare the wood for filling. This makes the repair stronger and look better. Remember to wear gloves to protect your hands.
Why Do You Need a Stiff Brush?
Why do you need a stiff brush? A stiff brush helps clean the area. After you remove the rotted wood, there will be dust and debris. The brush helps you remove this. It cleans the surface. This helps the wood hardener and filler stick better. A clean surface is important for a strong repair. Use a brush with stiff bristles. This will remove the dust and debris. You can also use a vacuum cleaner. But a brush is often easier. Brush the area well. Get into all the corners. Make sure the surface is clean and dry. Now you are ready to apply the wood hardener. A clean surface helps the hardener soak into the wood. This makes the wood stronger. Remember to wear a dust mask when brushing. This protects your lungs from dust.
How Does Sandpaper Help?
How does sandpaper help? Sandpaper smooths the surface. After you apply the wood filler, it might be rough. Sandpaper makes it smooth. This makes the repair look better. It also helps the paint stick. Use different grits of sandpaper. Start with a rough grit. This removes the bumps. Then use a finer grit. This smooths the surface. Sand in the direction of the wood grain. This helps hide the repair. Be careful not to sand too much. You do not want to remove the filler. Sand until the surface is smooth and even. Wipe away the dust with a clean cloth. Now you are ready to paint. A smooth surface makes the paint look better. Sandpaper is an important tool for a professional-looking repair. Remember to wear a dust mask when sanding.
How to Remove Rotted Wood Safely
Removing rotted wood safely is very important. Always wear safety glasses. This protects your eyes from flying debris. A dust mask protects your lungs from dust. Gloves protect your hands from splinters. Use a scraper to remove the rotted wood. Be careful not to damage the good wood. Only remove the soft, rotted parts. Work slowly and carefully. If the rot is deep, you might need to use a chisel. A chisel helps you remove larger pieces of rotted wood. Be sure to keep your work area clean. This prevents accidents. Dispose of the rotted wood properly. Do not burn rotted wood. It can release harmful chemicals. By following these safety tips, you can remove rotted wood safely. This will help you prepare the area for repair.
- Wear safety glasses.
- Use a dust mask.
- Wear gloves.
- Remove only rotted wood.
- Work slowly and carefully.
- Dispose of rotted wood properly.
Before you start removing rotted wood, check for hazards. Are there any electrical wires nearby? If so, turn off the power. Are there any pipes in the area? Be careful not to damage them. If you are working on a ladder, make sure it is stable. Have someone hold the ladder for you. Keep children and pets away from the work area. Rotted wood can be sharp and splintery. It is important to be careful. If you are not comfortable removing the rotted wood yourself, hire a professional. They have the experience and tools to do the job safely. Remember, safety is always the top priority. Taking these precautions helps ensure a safe and successful repair. Always think safety first.
Fun Fact or Stat: When removing rotted wood, it’s essential to work in a well-ventilated area to avoid inhaling harmful particles.
Why is Safety Gear Important?
Why is safety gear important? Safety gear protects you from injury. Safety glasses protect your eyes. Flying pieces of wood can hurt your eyes. A dust mask protects your lungs. Rotted wood can create a lot of dust. This dust can be harmful to breathe. Gloves protect your hands. Rotted wood can be sharp and splintery. Gloves prevent cuts and splinters. Proper clothing also helps. Wear long sleeves and pants. This protects your skin. Wear sturdy shoes. This protects your feet. Safety gear is not just for professionals. Everyone should wear safety gear when working with wood. It is a simple way to prevent injuries. Always put on your safety gear before you start working. It is better to be safe than sorry.
How Do You Know When to Stop Removing Wood?
How do you know when to stop removing wood? You should only remove the rotted wood. Healthy wood is strong and solid. Rotted wood is soft and crumbly. Use a screwdriver to test the wood. Poke the wood with the screwdriver. If it goes in easily, the wood is rotted. Keep removing wood until you reach solid wood. Stop when the screwdriver does not go in easily. You want to remove all the rot. But you do not want to remove good wood. This can weaken the structure. Take your time and be careful. It is better to remove too little than too much. You can always remove more later. But you cannot put wood back. Knowing when to stop is important for a strong repair. Remember to check the wood carefully.
What Do You Do With the Rotted Wood?
What do you do with the rotted wood? You cannot just throw it away. Rotted wood can contain harmful fungi. These fungi can spread to other wood. You should dispose of it properly. Check with your local waste management. They might have special rules for rotted wood. Some places allow you to put it in the regular trash. Other places require you to take it to a special facility. Do not burn rotted wood. Burning it can release harmful chemicals into the air. You can also bury rotted wood. But make sure it is far away from other wood. This will prevent the fungi from spreading. Always follow the local rules for disposing of rotted wood. This helps protect the environment and your community.
Applying Wood Hardener for Strength
Applying wood hardener makes the wood stronger. Wood hardener soaks into the wood. It fills the soft spots. This makes the wood harder. It also prevents more rot. You should apply wood hardener after removing rotted wood. Clean the area first. Make sure it is dry. Then apply the hardener. Use a brush to apply it. Cover the entire area. Let the hardener soak in. It might take a few hours. Apply more hardener if needed. The wood should be hard when you are done. Wood hardener is important for a strong repair. It helps the filler stick better. It also protects the wood from future rot. Always follow the instructions on the hardener. This will help you get the best results.
- Clean the area before applying.
- Use a brush to apply hardener.
- Cover the entire area.
- Let the hardener soak in.
- Apply more if needed.
- Follow the instructions.
Choosing the right wood hardener is important. There are different types of hardeners. Some are better for small areas. Others are better for large areas. Some hardeners dry faster than others. Read the labels carefully. Choose a hardener that is right for your project. Make sure the hardener is compatible with the filler. Some hardeners need to dry completely before you apply filler. Others can be filled while they are still wet. Follow the instructions on the hardener. This will help you get the best results. Using the right hardener makes your repair stronger. It also protects the wood from future damage. Remember to clean your brush after using the hardener. This will help it last longer.
Fun Fact or Stat: Wood hardener works by penetrating into the wood fibers and solidifying, creating a strong, stable base for repairs.
How Long Does Wood Hardener Take to Dry?
How long does wood hardener take to dry? Drying time depends on the product. Some hardeners dry in a few hours. Others take longer. Check the instructions on the can. The instructions will tell you how long to wait. Temperature and humidity can affect drying time. Warm and dry conditions help the hardener dry faster. Cold and humid conditions slow it down. Make sure the area is well-ventilated. This also helps the hardener dry faster. Do not apply filler until the hardener is completely dry. If you apply filler too soon, it might not stick properly. This can weaken the repair. Be patient and let the hardener dry completely. This will help you get the best results.
Can You Apply Too Much Wood Hardener?
Can you apply too much wood hardener? Yes, you can. Applying too much hardener can make the wood too hard. This can make it difficult to sand and paint. It can also prevent the filler from sticking properly. Apply just enough hardener to soak into the wood. Do not let it pool on the surface. Wipe away any excess hardener with a clean cloth. Follow the instructions on the can. They will tell you how much to apply. It is better to apply too little than too much. You can always apply more later if needed. But you cannot remove it if you apply too much. Be careful and apply the hardener evenly. This will help you get the best results.
What Happens If You Skip This Step?
What happens if you skip this step? Skipping the wood hardener step can cause problems. The wood might not be strong enough. The filler might not stick properly. The rot might come back. Wood hardener strengthens the wood. It also prevents future rot. It is an important part of the repair process. If you skip it, the repair might not last. You might have to do it again later. It is better to take the time to apply wood hardener. It will make the repair stronger and last longer. Do not skip this step. It is worth the effort. You will be glad you did it. A strong repair protects your home.
How to Mix Wood Filler Correctly
Mixing wood filler correctly is important. Follow the instructions on the container. Some fillers are ready to use. Others need to be mixed. Use a clean container and mixing stick. Add the hardener to the filler. The instructions will tell you how much hardener to add. Mix the filler well. Make sure there are no lumps. The filler should be smooth and creamy. If the filler is too thick, add a little water. If it is too thin, add more filler. Mix until you get the right consistency. Work quickly. Some fillers dry fast. Apply the filler to the wood. Use a putty knife. Smooth the surface. Let the filler dry completely. Then sand it smooth. Mixing the filler correctly helps it stick better. It also makes the repair stronger.
- Follow the instructions.
- Use a clean container.
- Add the hardener.
- Mix well.
- Adjust the consistency.
- Work quickly.
There are different types of wood fillers. Some are better for small holes. Others are better for large holes. Epoxy fillers are strong and waterproof. They are good for outdoor wood. Latex fillers are easy to sand. They are good for indoor wood. Choose a filler that matches your wood. The color should be close. You can also paint the filler after it dries. Make sure the filler is compatible with paint. Some fillers need a primer first. A primer helps the paint stick. Follow the instructions on the filler. This will help you get the best results. Using the right filler makes your repair look professional. It also makes the wood stronger. Remember to clean your tools after using them.
Fun Fact or Stat: The ideal consistency for wood filler is similar to that of peanut butter – smooth and easily spreadable.
What Happens if You Don’t Mix It Well?
What happens if you don’t mix it well? If you do not mix the wood filler well, it can cause problems. The filler might not harden properly. It might be soft and crumbly. It might not stick to the wood. This can weaken the repair. Make sure to mix the filler thoroughly. Scrape the sides and bottom of the container. Mix until there are no lumps. The filler should be smooth and creamy. This ensures that the hardener is evenly distributed. The hardener is what makes the filler harden. If it is not mixed well, the filler will not be strong. Take the time to mix the filler properly. It will make the repair stronger and last longer.
How Much Hardener Do You Need?
How much hardener do you need? The amount of hardener depends on the filler. Check the instructions on the container. The instructions will tell you how much hardener to add. Adding too much or too little hardener can cause problems. Too much hardener can make the filler dry too fast. It can also make it brittle. Too little hardener can make the filler dry too slowly. It can also make it soft and crumbly. Measure the hardener carefully. Use a measuring cup or spoon. Follow the instructions exactly. This will help you get the best results. If you are not sure, start with a little less hardener. You can always add more if needed. But you cannot take it out. Accurate measurements are key for a successful repair.
Can You Use Expired Wood Filler?
Can you use expired wood filler? It is not a good idea. Expired wood filler might not work properly. The hardener might not be effective. The filler might not stick to the wood. It might also dry out and crack. Check the expiration date on the container. If the filler is expired, throw it away. Do not use it. It is better to buy new filler. This will ensure that the repair is strong and lasts longer. Using expired filler is a waste of time and money. It might seem like you are saving money. But it will cost you more in the long run. Buy fresh filler for the best results. This will give you peace of mind.
Best Ways to Apply the Wood Filler
Applying wood filler the right way is key. Use a putty knife to apply the filler. Press the filler into the hole. Make sure to fill all the gaps. Overfill the hole slightly. This allows for sanding. Smooth the surface with the putty knife. Remove any excess filler. Let the filler dry completely. This might take a few hours. Check the instructions on the container. Sand the surface smooth. Use fine-grit sandpaper. Sand in the direction of the wood grain. Wipe away the dust with a clean cloth. Now you are ready to paint or stain. Applying the filler correctly helps it stick better. It also makes the repair look professional. Take your time and be careful. This will help you get the best results.
- Use a putty knife.
- Press the filler into the hole.
- Overfill the hole slightly.
- Smooth the surface.
- Let the filler dry completely.
- Sand the surface smooth.
| Wood Filler Type | Pros | Cons | Best Use |
|---|---|---|---|
| Epoxy Filler | Strong, waterproof, durable | More expensive, harder to sand | Outdoor repairs, large holes |
| Latex Filler | Easy to sand, paintable, affordable | Not waterproof, less durable | Indoor repairs, small holes |
| Acrylic Filler | Flexible, paintable, good for gaps | Can shrink, less strong | Caulking, filling small cracks |
| Cellulose Filler | Easy to use, quick-drying, lightweight | Less durable, prone to cracking | Minor repairs, cosmetic fixes |
Before you apply the wood filler, prepare the surface. Make sure the surface is clean and dry. Remove any loose debris. Sand the surface lightly. This helps the filler stick better. Apply wood hardener if needed. Wood hardener strengthens the wood. It also prevents future rot. Let the hardener dry completely before applying the filler. Use a putty knife to apply the filler. Press the filler into the hole. Make sure to fill all the gaps. Overfill the hole slightly. This allows for sanding. Smooth the surface with the putty knife. Remove any excess filler. Take your time and be careful. This will help you get the best results. A well-prepared surface ensures a strong and lasting repair.
Fun Fact or Stat: Applying wood filler in thin layers prevents air bubbles and ensures even drying, leading to a stronger repair.
How Do You Avoid Air Bubbles?
How do you avoid air bubbles? Air bubbles can weaken the repair. They can also make the surface look uneven. To avoid air bubbles, apply the filler in thin layers. Press the filler firmly into the hole. This helps force out any air. Use a putty knife to smooth the surface. Work slowly and carefully. Tap the putty knife gently. This helps release any trapped air. Do not mix the filler too vigorously. This can create air bubbles. Let each layer dry completely before applying the next layer. This prevents air bubbles from forming. Taking these steps will help you avoid air bubbles. Your repair will be stronger and look better. Remember to be patient and work carefully.
What If the Hole Is Very Deep?
What if the hole is very deep? Deep holes need special attention. Apply the filler in multiple layers. Let each layer dry completely before applying the next layer. This prevents the filler from shrinking and cracking. Use a strong filler for deep holes. Epoxy filler is a good choice. It is strong and waterproof. You can also use a backing material. A backing material supports the filler. It prevents it from falling through the hole. Use a piece of wood or mesh. Place it inside the hole. Then apply the filler. Make sure the backing material is secure. This will help the filler stay in place. Deep holes take more time and effort. But with patience and the right materials, you can repair them successfully.
How Do You Match the Wood Grain?
How do you match the wood grain? Matching the wood grain makes the repair look seamless. It helps hide the repair. Use a wood graining tool. A wood graining tool creates artificial wood grain. You can also use a brush to create wood grain. Practice on a piece of scrap wood first. This will help you get the hang of it. Apply the filler smoothly. Then use the wood graining tool or brush to create the grain. Follow the direction of the existing wood grain. Let the filler dry completely. Then sand it lightly. This blends the repair with the surrounding wood. Matching the wood grain takes skill and patience. But it is worth the effort. It makes the repair look professional.
Sanding and Finishing the Repaired Area
Sanding and finishing the repaired area makes it look great. After the filler dries, sand it smooth. Use fine-grit sandpaper. Sand in the direction of the wood grain. This helps hide the repair. Wipe away the dust with a clean cloth. Apply a primer if needed. Primer helps the paint or stain stick better. Let the primer dry completely. Then paint or stain the area. Match the color to the surrounding wood. Apply multiple coats if needed. Let each coat dry completely before applying the next coat. A good sanding and finishing job makes the repair look seamless. It blends in with the surrounding wood. Take your time and be careful. This will help you get the best results. A well-finished repair protects the wood and enhances its beauty.
- Use fine-grit sandpaper.
- Sand in the direction of the grain.
- Wipe away the dust.
- Apply primer if needed.
- Paint or stain the area.
- Match the color.
Choosing the right sandpaper is important. There are different grits of sandpaper. Coarse grits remove material quickly. Fine grits smooth the surface. Start with a medium grit. Then use a fine grit. This will give you a smooth finish. Use a sanding block. A sanding block helps you sand evenly. It also protects your fingers. Sand in the direction of the wood grain. This helps hide the scratches. Wipe away the dust with a clean cloth. This helps you see the surface better. Sanding takes time and effort. But it is worth it. A smooth surface makes the paint or stain look better. It also protects the wood. Remember to wear a dust mask when sanding. This protects your lungs from dust.
Fun Fact or Stat: The smoothness of the final finish is directly related to the quality of sanding; the finer the sandpaper, the smoother the result.
What Grit Sandpaper Should You Use?
What grit sandpaper should you use? The grit of sandpaper tells you how rough it is. Lower numbers are rougher. Higher numbers are smoother. Start with 120-grit sandpaper. This will remove any bumps or unevenness. Then use 220-grit sandpaper. This will smooth the surface. For a very smooth finish, use 320-grit sandpaper. Choose the right grit for the job. Rougher grits are good for removing material. Smoother grits are good for finishing. You might need to use several different grits. Start with a rougher grit and work your way up to a smoother grit. This will give you the best results. Remember to sand in the direction of the wood grain.
How Do You Blend the Repair With the Surroundings?
How do you blend the repair with the surroundings? Blending the repair makes it look seamless. It helps hide the repair. Sand the edges of the repair. This feathers the edges. It helps them blend in with the surrounding wood. Use a wood graining tool. A wood graining tool creates artificial wood grain. This helps match the wood grain of the surrounding wood. Use a stain or paint that matches the surrounding wood. Apply the stain or paint evenly. Let it dry completely. Then apply a clear coat. This protects the finish. Blending the repair takes skill and patience. But it is worth the effort. It makes the repair look professional.
Why Is a Clear Coat Important?
Why is a clear coat important? A clear coat protects the finish. It also adds shine. It makes the wood look more beautiful. A clear coat protects the paint or stain from scratches. It also protects it from water damage. Apply the clear coat evenly. Let it dry completely. You might need to apply several coats. Let each coat dry before applying the next coat. Choose a clear coat that is right for your project. Some clear coats are better for outdoor use. Others are better for indoor use. Read the labels carefully. Follow the instructions on the can. A clear coat is the final step in the repair process. It protects the wood and enhances its beauty.
Summary
Rotted wood is a common problem. It can damage decks, fences, and other wooden structures. But you can fix it! First, find the rotted wood. Look for soft spots and color changes. Then, remove the rotted wood. Use a scraper and be careful. Next, apply wood hardener. This strengthens the wood. Then, mix wood filler. Apply it to the hole. Let it dry. Finally, sand and finish the area. This makes it look new again. Knowing how to fill in rotted wood can save you money. It can also protect your home.
How to fill in rotted wood is not hard. It just takes some time and effort. Use the right tools and materials. Follow the steps carefully. And always wear safety gear. If you are not sure how to do it, ask a professional. They can help you. But if you are willing to try, you can fix rotted wood yourself. You will be proud of your work. And you will have protected your home. So, do not let rotted wood ruin your day. Fix it and enjoy your beautiful wood again.
Conclusion
Fixing rotted wood is a great way to protect your home. It saves you money. It also makes your home look nicer. You learned the steps in this article. Now you know how to fill in rotted wood. Remember to be safe. Wear your safety glasses and mask. Take your time. Do a good job. You will be happy with the results. Your wood will be strong and beautiful again. So, go ahead and fix that rotted wood!
Frequently Asked Questions
Question No 1: Why does wood rot in the first place?
Answer: Wood rots because of fungi. These tiny organisms eat the wood. They need moisture to survive. So, wood that stays wet is more likely to rot. This often happens outside. Rain and snow can make wood wet. Also, wood that touches the ground can rot. The ground is often damp. Protecting wood from moisture is important. Paint and sealants can help. These keep water out. Regular checks can also help. Look for signs of rot. Catching it early can prevent big problems. Wood rot is a natural process. But you can slow it down. You can even stop it with the right care.
Question No 2: Is it always necessary to call a professional?
Answer: No, you do not always need a professional. Small areas of rotted wood can be fixed yourself. If the damage is small, you can remove the rot. Then, you can fill the hole with wood filler. But large areas of rot might need a professional. If the damage is structural, call a professional. Structural damage means the wood supports the building. This kind of damage can be dangerous. A professional can assess the damage. They can tell you if it needs to be replaced. They can also do the work safely and correctly. If you are not sure, it is always best to ask a professional. They can give you peace of mind.
Question No 3: Can I prevent wood rot from happening?
Answer: Yes, you can prevent wood rot! Keep the wood dry. Water causes wood to rot. Make sure water runs away from the wood. Use gutters to move water away from your house. Seal the wood with paint or stain. Sealant keeps water out of the wood. Check the wood often. Look for soft spots or changes in color. Clean the wood regularly. Remove dirt and leaves. These can trap water. Use treated wood for outdoor projects. Treated wood resists rot. Preventing rot