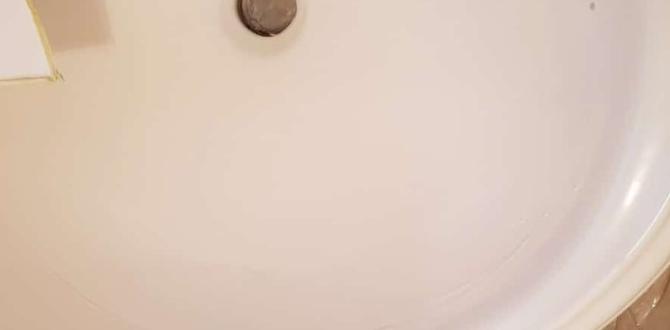
Have you ever noticed a crack in your sink basin? It’s annoying, isn’t it? A cracked sink can ruin your day. You might think it’s time to buy a new one. But wait! What if I told you that you can fix it yourself?
Many people face this problem. It’s common. Surprisingly, many sink basins can be repaired quickly and easily. You could save money and feel proud of your work. Just imagine showing off your handy skills!
In this article, we will explore how to fix a cracked sink basin. You’ll discover simple steps that anyone can follow. Whether it’s a small chip or a bigger crack, don’t worry! You can tackle this repair with confidence. Are you ready to find out more? Let’s dive in!
How To Fix A Cracked Sink Basin: Step-By-Step Guide

How to Fix a Cracked Sink Basin
Repairing a cracked sink basin can save you money and frustration. First, identify the crack’s location and type. Clean the area thoroughly. Use a suitable epoxy or sealant to fill the crack, ensuring it bonds well. Allow it to dry completely before using the sink again. Always check for leaks after repair. Did you know? Many minor cracks are easier to fix than you think! Regular maintenance can help prevent bigger issues later.Identifying the Type of Crack
Types of cracks: superficial vs. structural. Tools needed for proper assessment.Cracks in a sink can be tricky. First, you must know what type of crack you have. There are two main types: superficial cracks and structural cracks. Superficial cracks are small and may only look bad. Structural cracks are deeper and can lead to leaks. To figure out what kind of crack you have, here are some tools you might need:
- A flashlight for better visibility
- A measuring tape to check the size
- A mirror to see hard-to-reach areas
Knowing these details helps you plan how to fix the problem.
What are the signs of a structural crack?
Look for signs like water stains or wet spots around the sink. These can mean a bigger problem. Act fast to avoid larger repairs later!
Materials Required for Repair
List of essential materials (epoxy, putty, sandpaper). Recommended brands and where to buy.For fixing a cracked sink basin, you need some key materials. Start with epoxy, a strong glue for hard surfaces. Putty helps fill in gaps and cracks. Lastly, sandpaper smooths rough edges. Here are some recommended brands and where to find them:
- Epoxy: Gorilla Epoxy, available at Home Depot and Amazon
- Putty: Loctite Plumber’s Putty, found at Lowe’s and Walmart
- Sandpaper: 3M Sandpaper, can be bought at any hardware store
What materials do I need to fix a cracked sink basin?
You will need epoxy, putty, and sandpaper to make the repair. These materials help ensure a strong and smooth finish.
Preparation Steps Before Repair
Cleaning the sink basin effectively. Safety precautions to take.Before you fix your cracked sink basin, it’s important to clean it well. Use warm soapy water and a soft cloth. This removes dirt and grease. Next, think about safety. Always wear gloves to protect your hands. If you use any strong cleaners, wear a mask too. Here are the preparation steps:
- Clean the sink basin with soapy water.
- Wear gloves for hand protection.
- Use a mask with strong cleaners.
These simple steps will set you up for a successful repair.
What is the best way to clean a sink basin?
The best way to clean a sink basin is by using warm soapy water with a soft cloth. This helps to keep the area safe and ready for repair.
Step-by-Step Repair Process
Detailed instructions for repairing superficial cracks. Guidelines for repairing structural cracks.Fixing your cracked sink can feel like a daunting task, but fear not! First, for superficial cracks, clean the area with soap and water. Dry it well, then apply a strong epoxy filler. Smooth it out like butter on toast and let it cure according to the instructions. Now, for structural cracks, start by reinforcing the area with a backing material. Apply a special epoxy designed for deep repairs, making sure to work it into the crack. In no time, your sink will be as good as new, and maybe even ready to host a rubber duck race!
| Repair Type | Steps |
|---|---|
| Superficial Cracks |
1. Clean Surface 2. Apply Epoxy Filler 3. Smooth Out 4. Cure Time |
| Structural Cracks |
1. Reinforce with Backing 2. Use Deep Repair Epoxy 3. Work Into Crack 4. Allow to Set |
Finishing Touches and Reinstallation
How to smooth and match the surface. Tips for reinstalling fixtures without damage.First, smooth the sink’s surface. Use fine-grit sandpaper to gently buff any rough spots. It’s like giving your sink a spa day! Once smooth, apply a matching touch-up paint. This helps hide the repair and makes everything look snazzy again.
Next, when reinstalling fixtures, be careful. Avoid twisting too hard. You want them snug, not Hulk-smash tight! Use a soft cloth to create a buffer between tools and the surface. This keeps your sink looking lovely and scratch-free.
| Tip | Details |
|---|---|
| Smooth it out | Use fine sandpaper for a gentle touch. |
| Match the color | Touch-up paint does wonders! |
| Reinstall carefully | A soft cloth prevents scratches. |
Preventive Measures to Avoid Future Cracks
Best practices for maintaining your sink basin. Common mistakes that lead to cracks.Taking care of your sink basin is important. Here are some best practices:
- Clean regularly with gentle cleaners.
- Avoid harsh chemicals that can damage surfaces.
- Don’t let heavy items fall into the sink.
- Check for small chips or cracks often.
Some common mistakes can lead to cracks:
- Ignoring leaks or drips.
- Using the sink as a cutting board.
- Overloading the sink with heavy dishes.
Protect your sink basin to enjoy it longer!
How can I maintain my sink basin?
Regular cleaning and careful use can keep your sink looking great! Avoid dropping items and use soft cloths for cleaning.
When to Consider Professional Help
Signs that indicate a repair is beyond DIY. Cost comparison: DIY vs. hiring a professional.Sometimes it’s hard to tell if a sink crack is a small problem or a big disaster waiting to happen. Watch for signs like leaks or growing cracks. If you have more water on the floor than in the sink, it may be time to call in a pro. DIY repairs can save you cash, but mishaps could lead to bigger bills. Let’s look at how costs stack up:
| Method | Average Cost |
|---|---|
| DIY Repair | $20 – $50 |
| Professional Repair | $100 – $300 |
So, if you’re over your head or fearful of becoming a puddle-pirate, a pro is worth the investment!
Conclusion
In conclusion, fixing a cracked sink basin is simple if you follow a few steps. Start by cleaning the area and then choose the right epoxy or glue. Remember to apply it carefully and allow it to dry completely. For tougher cracks, you might need to look into replacement. Stay informed by reading more about sink repairs to help you next time!FAQs
What Are The Common Materials Used For Sink Basins And How Do They Affect The Repair Process For A Crack?Common materials for sink basins include stainless steel, porcelain, and cast iron. Each material behaves differently when you repair a crack. Stainless steel is easy to fix but may need special glue. Porcelain can chip when you try to repair it, and cast iron can be tough to work with. Knowing the material helps you choose the right repair method!
What Tools And Materials Do I Need To Effectively Repair A Cracked Sink Basin?To fix a cracked sink basin, you need a few simple tools and materials. First, get some sandpaper to smooth the edges of the crack. Then, buy a strong epoxy glue or a special sink repair kit. You might also need a clean cloth to wipe the area. Finally, gather some gloves to keep your hands safe while you work.
Should I Use Epoxy Or A Specific Type Of Adhesive For Fixing A Cracked Sink, And How Do I Apply It?You should use epoxy to fix a cracked sink. Epoxy is a strong glue that works well on sinks. First, clean the crack with soap and water. Then, mix the epoxy according to the instructions. Apply it carefully into the crack and let it dry completely before using the sink again.
Are There Any Temporary Solutions For A Cracked Sink Basin That Can Prevent Leaks Until A Permanent Fix Is Made?Yes, you can use some temporary fixes for a cracked sink. First, clean the crack and dry it. Then, you can use clear tape to cover the crack. This will help keep water inside. You can also use a special sealant that you find at stores. Make sure to plan for a permanent fix soon!
How Can I Determine If A Crack In My Sink Basin Is Repairable Or If I Need To Replace The Entire Sink?To see if a crack in your sink is fixable, start by checking how big it is. If it’s very small and shallow, you might be able to use glue. If it’s big or deep, it’s better to get a new sink. You can also look for water leaks. If water drips out, it’s time to replace the sink.


