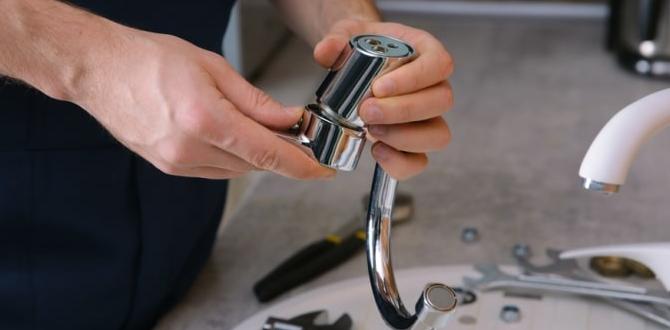
Have you ever noticed a small puddle forming under your sink? It often happens when a sink handle starts to leak. Many people think fixing it is hard, but it’s easier than you might think.
Imagine you are washing your hands, and water drips each time you move the handle. It can be annoying! The good news is that you can fix a leaking sink handle in no time. With just a few tools and simple steps, you can stop that drip.
In fact, did you know that a single dripping faucet can waste over 3,000 gallons of water a year? That’s a lot of water down the drain! Learning how to fix a leaking sink handle can help save both water and money.
Let’s dive into how you can quickly and easily tackle this issue. Your sink will thank you!
How To Fix A Leaking Sink Handle: A Step-By-Step Guide A Leaking Sink Handle Can Be More Than Just An Annoyance; It Can Lead To Increased Water Bills And Potential Damage To Your Cabinetry Or Flooring. Fortunately, Fixing A Leaking Sink Handle Is Often A Straightforward Process That You Can Tackle On Your Own. Below Is A Comprehensive Guide On How To Address This Common Plumbing Issue. Identifying The Problem Before Diving Into The Repair, It’S Essential To Understand Why Your Sink Handle Might Be Leaking. Common Causes Include Worn-Out Washers, Loose Fittings, And Corroded Parts. Follow These Steps To Troubleshoot The Issue. Gather Your Tools Before Starting The Repair, Collect The Necessary Tools: – Adjustable Wrench – Screwdriver (Flathead And Phillips) – Replacement Washers Or O-Rings – Plumber’S Tape – Towels Or Sponge Turn Off The Water Supply Safety First! Locate The Water Supply Valves Under The Sink And Turn Them Off. If You Can’T Find These, Turn Off The Main Water Supply For Your Home. It’S Also Wise To Drain The Faucet By Turning It On After Shutting Off The Supply. Disassemble The Faucet Handle 1. **Remove Decorative Caps:** If Your Faucet Has Decorative Caps, Pry Them Off Gently Using A Flathead Screwdriver. 2. **Unscrew The Faucet Handle:** Locate The Screw That Holds The Handle In Place And Remove It Using The Appropriate Screwdriver. 3. **Lift Off The Handle:** Once The Screw Is Removed, You Should Be Able To Pull The Handle Off. Inspect Parts For Damage Examine The Washers, O-Rings, And Other Components For Wear And Tear. If They Appear Damaged Or Corroded, It’S Time To Replace Them. Most Hardware Stores Carry Replacement Parts Suitable For Various Faucet Models. Replace Washers And O-Rings 1. **Remove Old Parts:** Carefully Take Out The Old Washers And O-Rings Using Your Fingers Or A Small Tool. 2. **Install New Parts:** Place The New Washers And O-Rings In Their Respective Spots. Make Sure They Fit Snugly To Prevent Future Leaks. Reassemble The Faucet 1. **Reattach The Handle:** After Replacing The Necessary Parts, Position The Faucet Handle Back Onto The Assembly. 2. **Secure It:** Screw The Handle Back In Place And Replace Any Decorative Caps That Were Removed. Turn The Water Supply Back On Once Everything Is Secure, Turn The Water Supply Back On. Check For Any Leaks Around The Handle. If There Are No Leaks, Congratulations! You’Ve Successfully Fixed Your Leaking Sink Handle. Test The Faucet Test The Faucet By Turning It On And Off Several Times. Observe If Any Water Drips From The Handle. If All Is Well, Your Diy Plumbing Job Is Complete! Conclusion Fixing A Leaking Sink Handle Doesn’T Have To Be A Daunting Task. By Following The Steps Above, You Can Save Time And Money While Enhancing Your Plumbing Skills. Regular Maintenance And Prompt Repairs Can Help You Enjoy A Leak-Free Sink For Years To Come.

How to Fix a Leaking Sink Handle
A leaking sink handle is more than just annoying; it can waste water and increase your bills. Fixing it is simpler than you think! First, gather tools like a wrench and a screwdriver. Turn off the water supply to avoid a mess. Carefully remove the handle to check for worn parts. Replace any damaged washers or O-rings to stop the drip. Voila! You’ll save water and money, plus enjoy a quiet sink again. Isn’t that a win-win?Understanding the Causes of a Leaking Sink Handle
Common reasons for leaks in sink handles. The impact of wear and tear on plumbing fixtures.A leaking sink handle can cause annoyance and wasted water. Several common issues can lead to these leaks. Worn washers often fail to create a tight seal. Corroded parts can break down over time, letting water escape. If you notice a leak, it might also be due to poor installation. Remember, wear and tear happens in plumbing too. Regular inspections help find problems early. Regular maintenance can save you from bigger fixes later.
What are the common causes of a leaking sink handle?
Common causes include worn washers, corroded parts, and poor installation.
Key Points
- Worn washers: These small parts can wear down over time.
- Corroded parts: Metal parts can rust and break.
- Poor installation: If not installed right, leaks can happen.
Essential Tools and Materials Needed
List of tools required for repair. Recommended materials such as washers and Orings.To tackle a leaking sink handle, you’ll need the right tools and materials. Grab a crescent wrench, a screwdriver, and some plumber’s tape. They are like your trusty superhero squad for the job! Don’t forget to stock up on washers and O-rings too. These little guys help seal things tight and stop those pesky drops. Here’s a quick list:
| Tools | Materials |
|---|---|
| Crescent Wrench | Washers |
| Screwdriver | O-rings |
| Plumber’s Tape | Sealant (if needed) |
With these essentials, you’re all set to save your sink handle. And remember, fixing it can be way more fun than watching paint dry!
Step-by-Step Guide to Fixing a Leaking Sink Handle
Detailed instructions for disassembling the sink handle. Procedures for replacing washers and Orings.Start by turning off the water supply. Next, use a screwdriver to take off the handle. Look for screws hidden under the decorative cap. Once the handle is off, you can see the washer and O-ring. If they are worn out or damaged, they need to be replaced. Remove the old parts and switch them with new ones. Then reassemble everything, making sure to tighten screws securely. Finally, turn the water back on and check for leaks.
How do I know if I need to replace washers or O-rings?
If you see water leaking from the sink handle, it’s likely time to replace washers or O-rings. These parts wear out over time, causing leaks. Check for any damage or stiffness. If they look worn, it’s best to replace them.
- Turn off the water supply.
- Remove the handle carefully.
- Inspect washers and O-rings for wear.
- Replace damaged parts with new ones.
- Reassemble the handle securely.
- Check for leaks after turning the water back on.
Common Mistakes to Avoid During Repair
Highlighting frequent errors made by DIYers. Tips for ensuring a proper seal and fitting.Many DIYers make silly mistakes while fixing leaks. One big blunder is forgetting to turn off the water. It’s like trying to eat soup with a fork—messy and pointless! ✨ Another common error is using the wrong size washer. Always measure first; a washer that’s too big will lead to more leaks. Check seals and fittings carefully. If they don’t fit snugly, leaks will return faster than you can say “plumber”! Here’s a quick guide to avoid these mishaps:
| Error | Tip |
|---|---|
| Not turning off water | Always shut off the main valve. |
| Wrong size washer | Measure your existing parts. |
| Poor seal application | Ensure seals are tight and even. |
Maintaining Your Sink Handle to Prevent Future Leaks
Regular maintenance tips for plumbing fixtures. When to seek professional help.Keep your sink handle in good shape to stop leaks. Regular checks are easy and important. Look for wear or rust. Tighten loose screws. Clean any dirt or grime. This helps your sink last longer.
- Check for cracks or wear regularly.
- Tighten screws to keep things secure.
- Clean around the handle to prevent gunk build-up.
If your sink still leaks, it might be time to ask a pro. Professional help can solve tricky plumbing issues. Don’t hesitate to call when things get complicated, like broken parts or too much noise. Regular care can save you money and hassle!
When should I seek professional help for my sink handle?
If your sink is still leaking after regular checks, it’s best to contact a plumber. They can fix issues that are too tough for DIY solutions.
Conclusion
In summary, fixing a leaking sink handle is simple. First, turn off the water supply. Then, remove the handle and check for worn washers or seals. Replace any damaged parts, reassemble, and turn the water back on. If you need more help, check online tutorials or ask an adult. With these steps, you can fix it easily!FAQs
Sure! Here Are Five Related Questions On The Topic Of Fixing A Leaking Sink Handle:Sure! To fix a leaking sink handle, you can start by turning off the water. Next, you need to take off the handle. You might find a loose screw or a washer that’s broken. Replace those parts, and then put the handle back on. Finally, turn the water back on to see if it stops leaking!
Sure! Please provide the question you’d like me to answer, and I’ll be happy to help.
What Are The Common Causes Of A Leaking Sink Handle?A leaking sink handle can happen for a few reasons. First, a worn-out washer might be letting water escape. Second, dirt or rust can build up around the handle, causing leaks. Lastly, a loose handle might need to be tightened to stop the drip. If you notice a leak, it’s good to check these things!
How Do I Determine The Type Of Sink Handle And Faucet I Have Before Attempting Repairs?To find out what type of sink handle and faucet you have, first, look closely at the handle. Is it a single handle or two separate ones? Check if the handle turns or lifts up and down. Next, look at the faucet’s shape. Some are wide, and some are narrow. Understanding these details will help you know what you need for repairs.
What Tools And Materials Do I Need To Fix A Leaking Sink Handle?To fix a leaking sink handle, you’ll need a few tools and materials. Get a wrench to loosen parts. You also need a screwdriver to take off any screws. Don’t forget to buy rubber washers or O-rings, as they might be worn out. A bucket can help catch any water that drips while you work!
What Are The Step-By-Step Instructions For Replacing A Washer Or O-Ring In A Sink Handle?To replace a washer or O-ring in a sink handle, start by turning off the water. Next, use a screwdriver to take off the handle. Look for the washer or O-ring, which is usually round and rubbery. Take it out and put the new one in the same spot. Finally, put the handle back on and turn the water back on. Check for leaks.
When Should I Consider Calling A Plumber Instead Of Fixing A Leaking Sink Handle Myself?You should call a plumber if the leak is very bad or you can’t stop it. If you don’t have the right tools, it’s better to ask for help. If you tried fixing it and it still leaks, a plumber can do it right. Plumbers are experts, and they can fix problems you might not see.


