Imagine stepping into your kitchen, and the first thing you see is a beautiful undermount sink. It looks clean and modern, doesn’t it? This popular choice sits neatly under the countertop, making the whole space feel bigger and brighter.
But how do you install an undermount sink? It may sound tricky, but it’s easier than you think. With a few simple steps, you can have a gorgeous sink that impresses your family and friends.
Did you know that many people struggle with this task? They fear it’s too complex or requires special skills. However, if you follow our guide, you’ll realize it’s all about patience and attention to detail.
Ready to dive in? Let’s explore how to install your undermount sink and transform your kitchen into a space you love!
How To Install Undermount Sink: A Step-By-Step Guide
Key Points on How to Install an Undermount Sink

Installing an undermount sink can transform your kitchen. First, measure your countertop correctly. This ensures a proper fit for your sink. Next, use silicone adhesive to attach it beneath the counter. Secure the sink with brackets for extra support. Don’t forget to connect your plumbing neatly. Did you know that an undermount sink can make your kitchen look more spacious? With a little patience, anyone can achieve this sleek design!
Understanding Undermount Sinks
Definition and benefits of undermount sinks. Comparison with dropin sinks and farmhouse sinks.
An undermount sink is a modern kitchen gem, mounted under the countertop for a sleek look. These sinks offer easy cleaning—no pesky edges to trap crumbs! Compared to drop-in sinks, which sit on top, undermounts give a seamless appearance. Farmhouse sinks, on the other hand, are deeper and often have a vintage style. So, if you want a clean kitchen and a splash of style, an undermount sink is a great choice!
| Type of Sink | Installation Style | Appearance | Cleaning |
|---|---|---|---|
| Undermount | Under countertop | Sleek and modern | Easy, no edges |
| Drop-in | On countertop | Traditional | Can trap debris |
| Farmhouse | Partially exposed | Rustic charm | Moderate effort |
Tools and Materials Needed

List of essential tools for installation. Recommended materials for securing the sink.
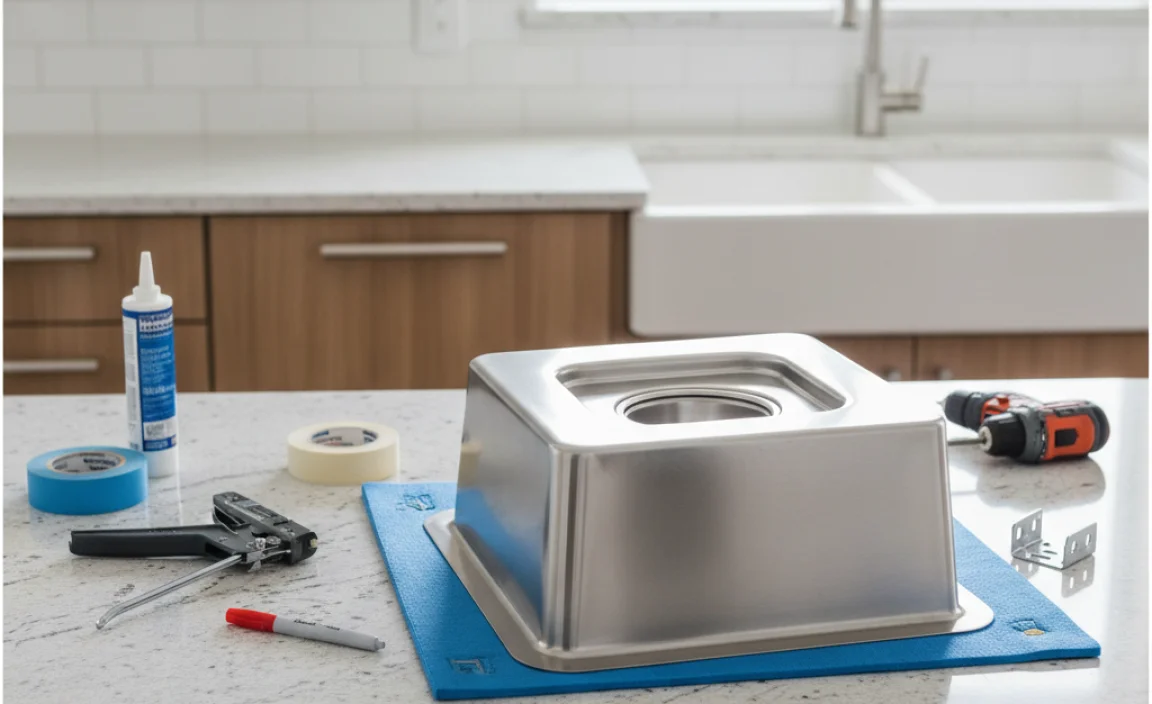
Before you start, gather your tools! Here’s a list of what you need:
- Measuring tape: For accurate sizes.
- Level: To keep the sink straight.
- Drill: To make holes for brackets.
- Screwdriver: For securing parts together.
- Caulk gun: To seal gaps.
Also, you will need some good materials to secure your sink:
- Silicone sealant: Prevents leaks.
- Screws and brackets: Holds the sink in place.
With these tools and materials, you’ll be ready to install your undermount sink!
What tools do I need for an undermount sink installation?
You need a few essential tools. Make sure you have a measuring tape, level, drill, screwdriver, and caulk gun. This will help you to install your sink correctly.
Preparation for Installation
Measuring and selecting the right sink size. Preparing the countertop and workspace.
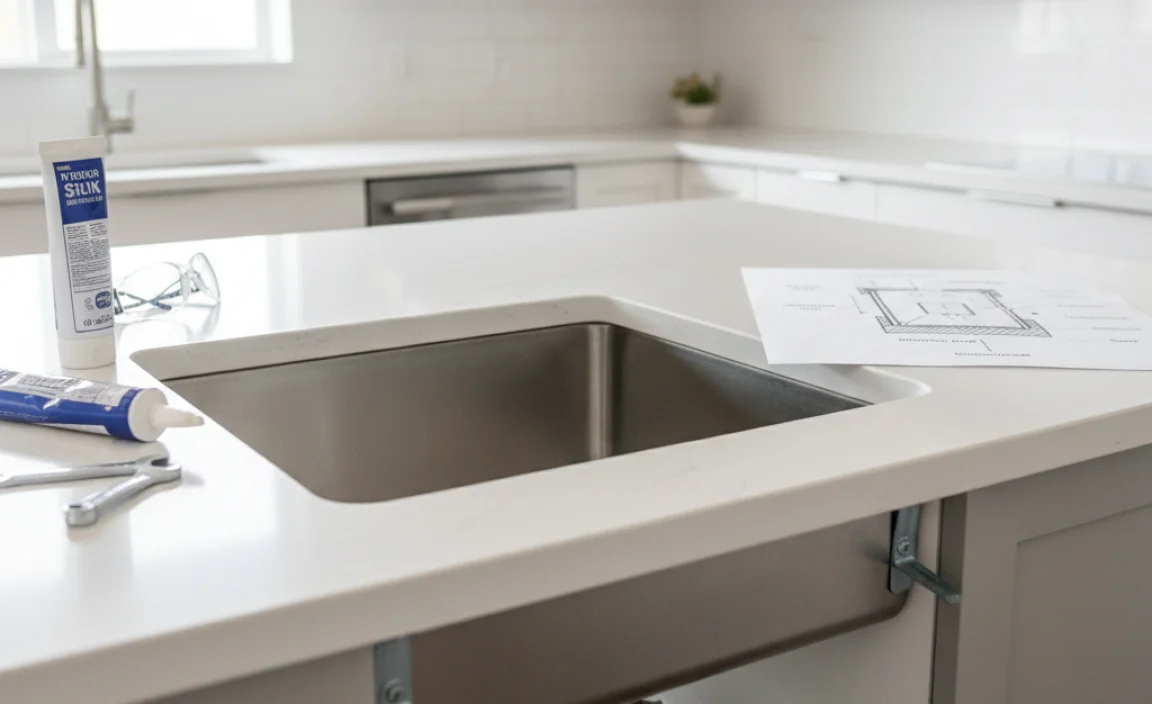
Before diving into the fun of installing an undermount sink, preparation is key! First, measure your space carefully. A sink that’s too big could lead to some watery regrets. Next, it’s time to prepare your countertop. Clear away any clutter and make sure the surface is clean. You want a smooth area to work, not a treasure hunt! Don’t forget to check for any hidden pipes or electrical wires that may surprise you during installation.
| Preparation Steps | Description |
|---|---|
| Measure Sink Size | Use a measuring tape to find the right fit for your space. |
| Clear Workspace | Remove all items from the countertop for a neat area. |
| Check for Obstacles | Look for pipes or wires that could be in your way. |
Installing the Undermount Sink
Stepbystep installation instructions. Tips for securing the sink properly.
First, gather your tools: a drill, screws, and silicone. Begin by marking where the sink will go on the countertop. Drill holes for the mounting brackets. Next, apply an adhesive sealant on the edge of your sink. Set the sink in place and press down gently. Secure it using the brackets from underneath. It’s like a game of hide and seek; just don’t let it run away!
| Step | Action |
|---|---|
| 1 | Gather tools and materials. |
| 2 | Mark sink location. |
| 3 | Drill holes for brackets. |
| 4 | Apply sealant to sink edges. |
| 5 | Set sink and secure with brackets. |
Don’t forget to clean up any excess silicone. Lastly, let everything dry for a while. Remember, patience is key—unlike a toddler waiting for dessert!
Finishing Touches
Caulking and sealing around the sink. Cleaning the sink and countertop postinstallation.
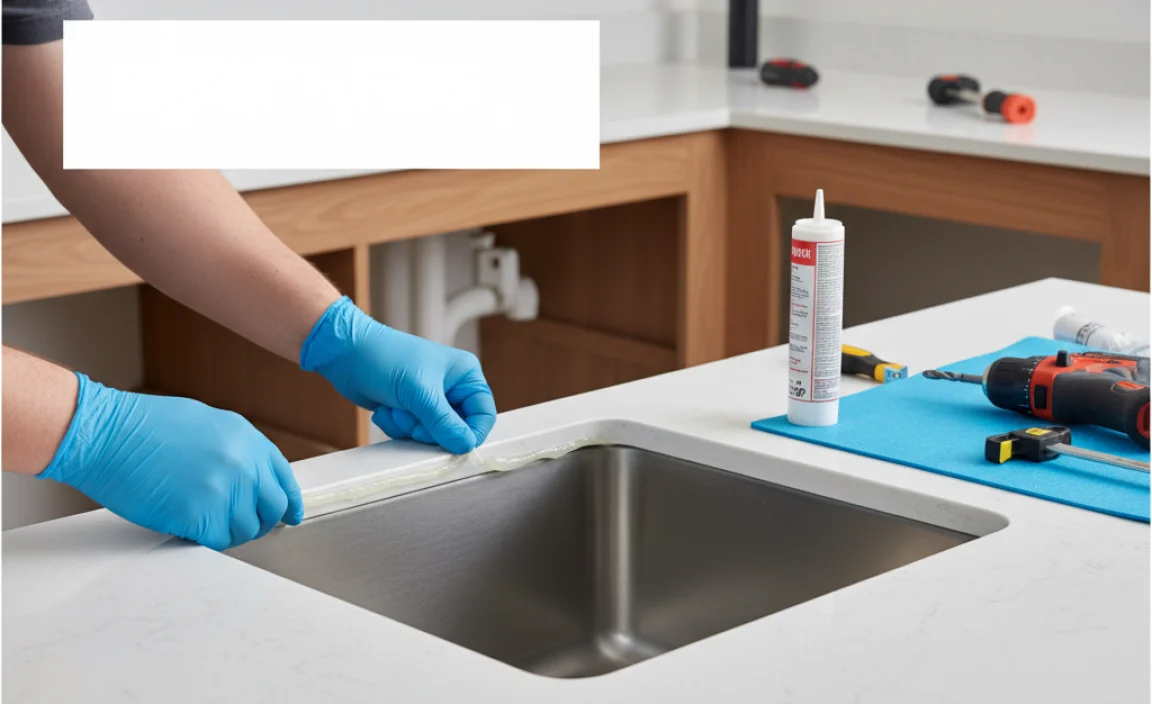
After installing your undermount sink, it’s time for the finishing touches. First, apply caulk around the edges of the sink. This will help keep water from dripping. Use a caulk gun and smooth it out with your finger.
Next, clean your sink and countertop. Use a gentle cleaner to make everything shiny. Wipe away dust and any leftover mess. Enjoy your new sink!
Why is caulking important?
Caulking creates a waterproof seal that prevents leaks.
Steps to clean your sink and countertop:
- Use a soft cloth or sponge.
- Apply a mild cleaner.
- Wipe away any grime.
- Rinse with water.
- Dry with a towel.
Common Issues and Troubleshooting
Frequent problems encountered during installation. Solutions and preventive measures.
Installing an undermount sink can be tricky. You might face a few hiccups. One common issue is misalignment. If your sink isn’t properly lined up, it may look like a crooked picture on the wall. Another problem is sealing. If you don’t seal it well, water might sneak underneath and create a mini swimming pool.
To troubleshoot, check alignment first. Use a level for accuracy. For sealing, apply caulk generously around the edges. This will keep water out and help avoid future leaks. Here’s a simple table with some common problems and solutions:
| Common Issues | Solutions |
|---|---|
| Misalignment | Adjust and use a level. |
| Poor sealing | Apply caulk correctly. |
| Damage to counters | Use protective padding. |
Remember, a little humor goes a long way! If things go wrong, just say, “Well, that sink’s a little *too* undermounted!”
Maintenance Tips for Undermount Sinks
Best practices for cleaning and maintaining the sink. Avoiding common pitfalls with usage.
To keep your undermount sink happy and shiny, remember these fun tips! First, always use a soft cloth and gentle cleaner. Scrubbing too hard can lead to scratches, and nobody wants a sink that looks like it got into a fight. Also, wipe up spills quickly; it’s easier than explaining stains to your friends. Lastly, avoid putting heavy stuff on the edges. It’s not a shelf, after all! Adding these steps to your routine can make your sink shine like a star.
| Maintenance Tips | Dos | Don’ts |
|---|---|---|
| Cleaning | Use soft cloths | Don’t use harsh scrubbers |
| Spills | Wipe them up quickly | Don’t let stains sit |
| Usage | Handle with care | Don’t overload the edges |
Conclusion
In conclusion, installing an undermount sink is simple. Make sure you have the right tools and materials. Follow each step carefully, from measuring to sealing. You can achieve a clean, stylish look for your kitchen or bathroom. For more tips, check out guides or videos online. Now, let’s get started on your new sink project!
FAQs
What Tools And Materials Do I Need To Install An Undermount Sink?
To install an undermount sink, you need a few tools and materials. Get a drill, a screwdriver, and a measuring tape. You’ll also need some clamps, silicone sealant, and a sink mounting kit. Don’t forget safety gloves and a towel for cleanup!
How Do I Prepare The Countertop For Undermount Sink Installation?
To prepare your countertop for an undermount sink, first, take everything off the counter. Next, clean the area well so it’s nice and smooth. Then, you need to mark where the sink will go. After that, cut out the shape carefully using the right tools. Make sure the edges are even to fit the sink properly.
What Is The Best Method For Sealing An Undermount Sink To Prevent Leaks?
To seal an undermount sink, you should use silicone caulk. First, clean the area around the sink well. Then, squeeze the caulk into the gap between the sink and the countertop. Smooth it out with your finger for a tight seal. Let it dry completely before using the sink. This will help prevent leaks.
How Do I Properly Secure And Support An Undermount Sink During Installation?
To properly support an undermount sink, first, you need to clean the area where it will sit. Then, put a thick bead of silicone glue around the top edge of the sink. Next, carefully place the sink under the countertop and make sure it fits snugly. Use clamps to hold it in place while the glue dries. After a few hours, remove the clamps and check that it’s secure!
Are There Any Specific Plumbing Considerations To Keep In Mind When Installing An Undermount Sink?
When you install an undermount sink, make sure to check the plumbing below. We need to ensure the pipes fit well and don’t leak. It’s also important to have the right height for easy use. Remember to seal the edges to stop water from getting underneath. Finally, keep the drain clear so water flows smoothly.