Have you ever looked at your old bathtub and thought, “It’s time for a change?” Many people feel the same way. Bathrooms can seem boring with an outdated tub. Replacing it can bring new life to your space.
But removing a bathtub can sound like a tough job. Where do you even start? Don’t worry! With the right steps, you can tackle this task. In fact, did you know that many people successfully remove their bathtubs themselves? It’s true! They save money and learn something new.
If you’ve decided to jump into this DIY project, you’re in the right place. We’ll guide you on how to remove a bathtub safely and easily. Whether you want a modern look or just need extra space, we are here to help. So, let’s get started!
How To Remove A Bathtub: Step-By-Step Guide And Tips

How to Remove a Bathtub
Removing a bathtub may seem tough, but it can be simple. First, gather tools like a pry bar, wrench, and safety goggles. Drain the water and disconnect plumbing. Have you thought about the mess? Cover the floor to protect it! Once you remove the tub, inspect the area for damage. Did you know? Some bathtubs weigh over 300 pounds! Remember, taking it out safely is key to a successful renovation.Essential Tools for Bathtub Removal
List of necessary tools (e.g., pry bar, utility knife, wrenches). Tips for selecting the right tools for efficiency and safety.Starting a bathtub removal project? Pack your toolbox with the right gear! You’ll need a pry bar to sneak under that tub, a utility knife for cutting through pesky caulk, and a set of wrenches for those stubborn plumbing parts. Don’t forget gloves and goggles to stay safe. It’s better to look cool than to get hurt! Choosing tools that fit well and are easy to use can make your job smoother. Remember, the right tool can save you from the bathtub wrestling match!
| Essential Tools | Purpose |
|---|---|
| Pry Bar | To lift the tub smoothly |
| Utility Knife | To cut through caulk |
| Wrenches | To remove plumbing parts |
Preparing the Bathroom for Bathtub Removal
Steps to remove surrounding fixtures and protect the area. Importance of sealing off the work area to prevent debris spread.Before tackling that bathtub, get your bathroom ready! Start by removing any fixtures around the tub like the faucet and showerhead. This makes your job easier and avoids unfortunate splashes. Protect your space by laying down a drop cloth. Who likes cleaning up after a tiny battle? Sealing off the area with painter’s tape keeps dust and debris from spreading to other rooms. It’s like putting a “Do Not Enter” sign on your work zone—super important!
| Step | Action |
|---|---|
| 1 | Remove surrounding fixtures |
| 2 | Cover the floor with a drop cloth |
| 3 | Seal the work area with painter’s tape |
Steps to Disconnect Plumbing
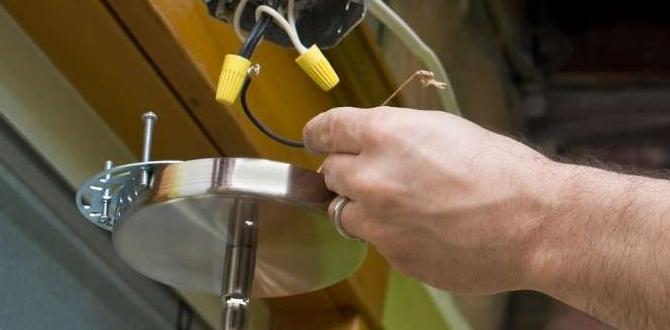
Detailed instructions on shutting off water supply. How to disconnect drain and faucet components safely.First, you need to turn off the water supply to avoid a splash zone. Look for the main valve in your home. It’s usually near the water meter, and sometimes it plays hide and seek! Once that’s done, drain the pipes by turning on the faucet until no water comes out. This might take a minute, but hey, it’s better than a sudden fountain later!
Next, disconnect the drain and faucet components. You may need a wrench for this part. Be gentle, as plumbing parts can be stubborn. Once you’re done, don’t forget to put the parts in a safe place—unless you enjoy playing treasure hunt later!
| Step | Action |
|---|---|
| 1 | Turn off the main water supply. |
| 2 | Open the faucet to drain water. |
| 3 | Use a wrench to disconnect drain and faucet. |
| 4 | Store parts safely. |
Follow these steps, and you’ll be a bathtub removal champ in no time!
Methods to Remove the Bathtub
Different strategies for removing various types of bathtubs (e.g., alcove, freestanding). Considerations for heavy or builtin bathtubs.When you’re ready to say goodbye to that old bathtub, there are a few clever methods to try! For alcove tubs, removing them usually means taking out the surrounding wall panels. Freestanding tubs are a bit simpler; just lift and wiggle them out (if you’re strong enough). Heavy or built-in tubs? They might need some serious muscle and planning. Pro tip: always wear safety gear—trust me, nothing beats a helmet for bathtub removal confidence!
| Type of Tub | Removal Method |
|---|---|
| Alcove Tub | Remove wall panels & pull out |
| Freestanding Tub | Lift & wiggle out |
| Heavy/Built-in Tub | Use tools & extra hands |
Dealing with Potential Challenges
Common obstacles (e.g., stubborn caulk, tight spaces) and solutions. Safety precautions to avoid injuries during removal.Removing a bathtub can be tricky! Stubborn caulk can stick like that last piece of candy no one wants. Tight spaces can make it feel like you’re trying to dance in a phone booth. But don’t fret! A utility knife can help slice through stubborn caulk. For those tight spots, sometimes a little creativity is needed—like a jigsaw puzzle with a splash of humor!
Safety is key, so grab some gloves and goggles. This isn’t just about style; it’s about keeping your fingers and eyes safe. Trust me, no one wants a surprise injury when they’re battling a bathtub!
| Obstacle | Solution |
|---|---|
| Stubborn Caulk | Use a utility knife to slice it away. |
| Tight Spaces | Use elongation and twist your body like a pretzel! |
Just remember, every bathtub removal adventure can turn into a story! And that, my friend, is worth the effort.
Disposing of the Old Bathtub
Options for disposal: recycling vs. landfill. Local regulations and where to take discarded materials.Getting rid of your old bathtub can be tricky. You have two main choices: recycling or sending it to the landfill. Recycling helps reduce waste and is often better for the planet. Check local rules to see what’s allowed in your area. You might find a recycling center nearby that accepts bathtubs. If recycling isn’t an option, look for a landfill that takes large items.
- Find a recycling center.
- Contact your local waste management office.
- Follow safety guidelines for disposal.
What should I do with my old bathtub?
Check with your local authorities. **They can guide you on recycling options and where to take your bathtub.**
Preparing for Bathtub Replacement
Steps to take after removal for proper installation of the new tub. Importance of assessing plumbing and subfloor conditions.Once you remove the old bathtub, you need to check a few things. First, look at the plumbing. Make sure there are no leaks. This keeps water inside, where it belongs. Then, check the subfloor. Look for damage or soft spots, as these can lead to bigger problems later. It’s smart to fix these before the new tub goes in. A solid base helps your new tub last longer.
- Inspect plumbing for any leaks.
- Examine the subfloor for damage.
- Repair any issues before installation.
What should I check after removing my bathtub?
You should check the plumbing and subfloor for leaks and damage.Common Mistakes to Avoid
Pitfalls to be aware of during the removal process. How to mitigate potential damage to plumbing or flooring during removal.Many people make simple mistakes while removing a bathtub. Avoid rushing the process. This can cause damage to your plumbing and flooring. Before starting, check if the water supply is off. Use protective gear to keep yourself safe. Common pitfalls include:
- Not having the right tools handy.
- Forgetting to remove nearby fixtures.
- Neglecting to protect the floor.
Take your time to prevent costly repairs. Always carefully detach pipes and cover floors with a tarp or cardboard. This keeps everything safe and sound!
What should I check before removing a bathtub?
Check if the water supply is shut off and that you have all necessary tools.
Conclusion
In conclusion, removing a bathtub requires careful planning and the right tools. First, gather the necessary supplies. Next, follow safety steps and start disconnecting pipes. Finally, lift out the tub with help. Always take your time and be cautious. If you’re unsure, consider asking a professional. For more tips, check out online guides or videos to help you along the way!FAQs
What Tools Do I Need To Safely Remove A Bathtub?To safely remove a bathtub, you will need a few tools. Get a screwdriver to take off screws. Use a pry bar to pull the tub away from the wall. You might also need a utility knife to cut any caulk or sealant. Don’t forget to wear gloves for safety!
How Do I Disconnect The Plumbing Before Removing The Bathtub?To disconnect the plumbing before you remove the bathtub, start by turning off the water. Then, you need to find the pipes. Use a wrench to loosen the nuts that hold the pipes together. Be careful not to damage the pipes. Finally, remove the drain by twisting it off.
What Safety Precautions Should I Take When Removing A Bathtub?When removing a bathtub, you should wear safety goggles and gloves to protect your eyes and hands. Make sure to turn off the water supply to avoid any spills. Check for electrical wires or plumbing pipes before you start. If the tub is heavy, ask someone to help you lift it. Finally, clean up any sharp edges or pieces to keep your area safe.
Are There Specific Techniques For Removing Different Types Of Bathtubs, Such As Fiberglass Or Cast Iron?Yes, different bathtubs need different ways to be taken out. For fiberglass tubs, you can often cut them into smaller pieces. This makes them lighter and easier to carry away. For heavy cast iron tubs, you usually need help to lift them. You might also have to break them with a hammer if they’re stuck. Always be careful and wear safety gear!
What Is The Best Way To Dispose Of An Old Bathtub After Removal?You can dispose of an old bathtub in a few ways. First, check if your town has a special junk pickup day. If not, you can take it to a landfill that accepts large items. Recycling centers might take bathtubs made of certain materials. Always ask your parents for help if you’re not sure!