Have you ever looked at your laundry sink and thought it’s time for a change? A grimy or outdated sink can make laundry day feel even worse. You might wonder, how can I replace my laundry sink easily without calling a plumber?
Replacing a laundry sink might sound tricky, but it can be a fun weekend project. Picture this: you make a few changes, and suddenly, your laundry area feels fresh and new! You can save money and feel proud of what you accomplish.
In this article, we will guide you through the simple steps on how to replace a laundry sink. You’ll learn about the tools you need and some helpful tips along the way. Let’s dive into making your laundry space cleaner and better!
How To Replace Laundry Sink: Step-By-Step Guide
How to Replace Laundry Sink

Replacing a laundry sink can be a fun weekend project! Start by turning off the water and disconnecting the old sink. Always check for hidden pipes. Choose a new sink that fits your space. Did you know some sinks come with built-in features? Installing is easier than you think—just follow the steps carefully. With the right tools and a bit of patience, you’ll have a shiny new laundry sink in no time!
Understanding the Need for a Replacement
Common problems that necessitate replacing a laundry sink. Benefits of upgrading to a new laundry sink.
Many homeowners face problems with their laundry sinks. A sink may leak or become clogged. Old sinks can also look worn and outdated. These issues often make it necessary to replace the sink. Upgrading to a new laundry sink brings many benefits. A new sink can improve the look of your laundry room. It can also work better and save water.
- Fixes leaks and damages
- Enhances appearance
- Increases efficiency
- Saves water and energy
What are common laundry sink problems?
Common problems include leaks, clogs, and poor appearance.
What benefits come from upgrading a laundry sink?
Upgrading improves efficiency, looks nicer, and saves resources.
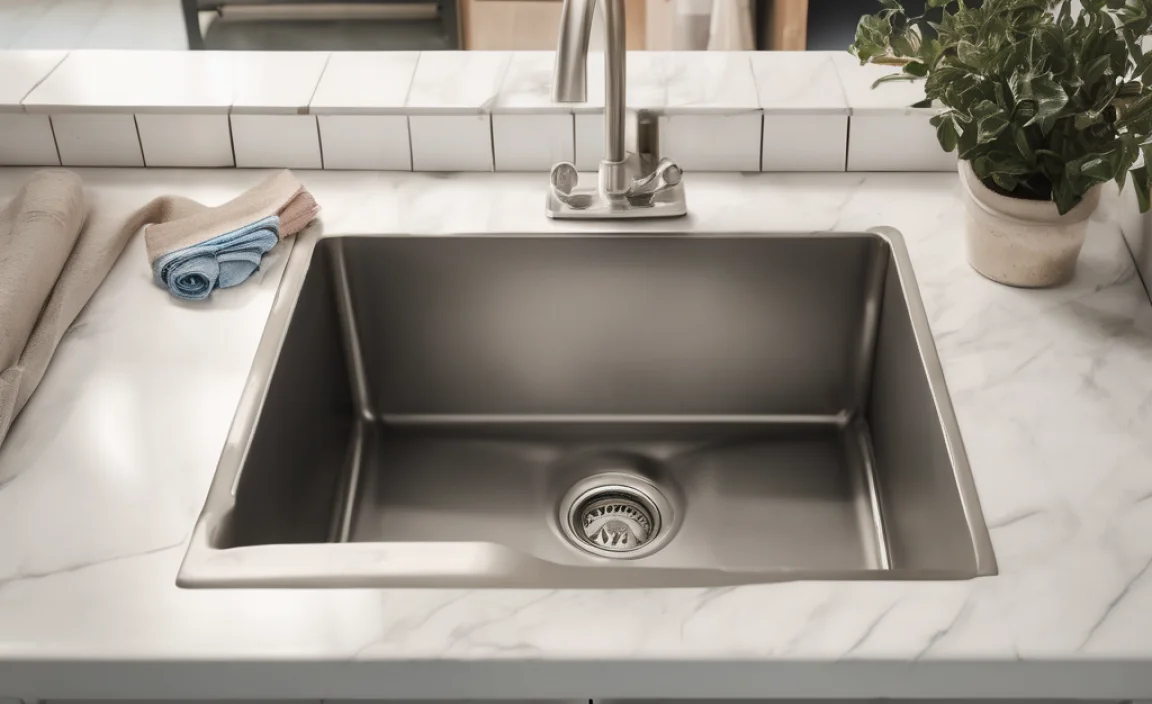
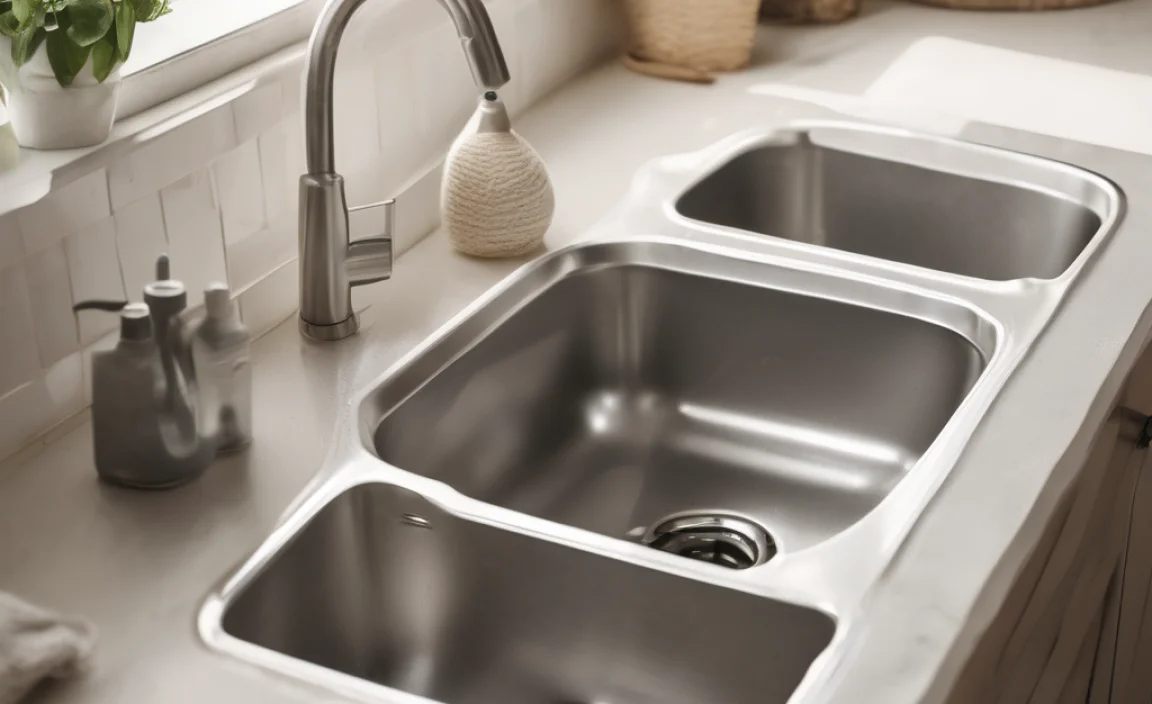
Choosing the Right Laundry Sink

Factors to consider: size, material, and design. Popular styles and features available on the market.
Picking the right laundry sink can feel like finding a needle in a haystack. First, think about size. You want enough room to wash your big items without turning it into a splash zone. Then, there’s the material. Stainless steel is tough, while plastic is lighter and cheaper. Lastly, consider the design. Do you want a simple basin or something fancy with storage? Popular styles include farmhouse sinks and wall-mounted options. Check out the table below for a quick comparison of different styles!
| Style | Material | Features |
|---|---|---|
| Farmhouse | Porcelain | Deep basin, vintage look |
| Wall-Mounted | Stainless Steel | Space-saving, modern design |
| Utility Sink | Plastic | Lightweight, budget-friendly |
Preparing for the Replacement Process

Tools and materials needed for the replacement. Safety precautions to take before starting the project.
Before you dive into replacing your laundry sink, gather your tools and materials. You’ll need a wrench, some plumber’s putty, a bucket, and a new sink (the star of the show!). Now, let’s not forget safety! Wear gloves and goggles to protect those pretty hands and eyes. Trust me; you don’t want to end up looking like a raccoon after this project! Here’s a handy list:
| Tools/Materials | Purpose |
|---|---|
| Wrench | To loosen and tighten pipes |
| Plumber’s Putty | To seal leaks |
| Bucket | To catch any drips |
| New Sink | Your replacement hero! |
Now that you’re ready, you can tackle that sink like a pro! Happy replacing!
Step-by-Step Guide to Removing the Old Sink
Shutting off water supply and draining pipes. Detaching the sink from the plumbing and countertop.
First, grab that trusty wrench and shut off the water supply. It’s usually hiding nearby, like a shy turtle. Next, drain the pipes. This helps avoid a splash zone—you don’t want to turn your laundry room into a water park! Now, it’s time to detach the sink. Use your wrench again to loosen the plumbing connections. Don’t forget to load on some muscle grease; the sink can be stuck tighter than a cat in a bag! Finally, unscrew the sink from the countertop. Your future self will thank you for this adventure.
| Task | Tools Needed |
|---|---|
| Shut off water supply | Wrench |
| Drain pipes | Bucket |
| Detach plumbing | Wrench |
| Unscrew sink | Screwdriver |
Installing the New Laundry Sink
Preparing the area for installation. Connecting the plumbing and ensuring proper sealing.
Before putting in your new laundry sink, prepare the area carefully. Make sure the space is clean and clear of old materials. Remove the old sink and check for any damage around the plumbing. For installation, you’ll need to connect the plumbing correctly. Use plumber’s tape to seal any joints. This helps avoid leaks. Make sure everything is tight and secure. Finally, double-check for leaks once the water is running.
How do I prepare the area for a new sink?
Clear the area, clean any debris, and check plumbing for damage.
Key Steps for Installation:
- Clear the old sink and clean the area.
- Inspect the plumbing for any issues.
- Connect the new sink’s plumbing with plumber’s tape.
- Check all connections for tightness.
- Run water to check for leaks.
Testing the New Installation
and ensuring proper drainage. Tips for final adjustments to improve functionality.
After your laundry sink is installed, it’s time to test it. Start by checking for leaks. Run water and look closely at joints and connections. Next, check if the water drains well. If it pools, there might be a clog. For final touches, consider these tips:
- Adjust the faucet for a better flow.
- Ensure the drainpipe angles downward.
- Add a sink strainer to catch debris.
These steps will help you enjoy a functional and leak-free laundry sink!
How Can I Check for Leaks After Installation?
To check for leaks, run the faucet for a few minutes. Look for drips around the pipes and connections. Fix any leaks right away to prevent water damage.
Maintenance Tips for Your New Laundry Sink
Best practices for keeping your laundry sink in top condition. Common issues and how to address them quickly.
To keep your laundry sink happy and healthy, clean it regularly with soapy water. A quick scrub removes grime and helps avoid clogs. Check for leaks, too—nobody likes a surprise splash! If you see water pooling, tighten the fittings or replace the washers. Also, avoid putting heavy objects in your sink; it’s not a superhero! It’s a sink, after all. Here’s a handy table for quick fixes:
| Issue | Solution |
|---|---|
| Slow Drain | Use a plunger or a drain snake. |
| Leaky Faucet | Tighten or replace the washer. |
| Bad Smell | Run hot water and a little vinegar. |
Remember, a happy sink means a happy laundry day! Keep it clean and check it often, and your laundry adventures will be smooth sailing.
Conclusion
In conclusion, replacing a laundry sink is a simple DIY project. First, you should gather your tools and materials. Next, follow clear steps to remove the old sink and install the new one. Remember to check for leaks afterward. If you want more tips, explore DIY guides online. You can confidently tackle this project and enjoy your new laundry sink!
FAQs
Here Are Five Related Questions About Replacing A Laundry Sink:
To replace a laundry sink, first, you need to turn off the water supply. Then, remove the old sink by unscrewing it from the wall. Next, grab your new sink and attach it to the same spot. Don’t forget to connect the water pipes again. Finally, turn the water back on and check for leaks.
Sure! Please provide the question you want me to answer.
What Are The Steps Involved In Removing An Old Laundry Sink?
To remove an old laundry sink, first, turn off the water. Then, unplug the sink and empty it. Next, use a wrench to loosen the pipes connected to the sink. After that, you can lift the sink out of its place. Finally, clean up any mess and check for leaks in the pipes.
How Do I Choose The Right Size And Style Of Laundry Sink For My Space?
To choose the right laundry sink, first measure the space where you want it. Think about how you will use the sink. If you wash big items, a bigger sink is better. For style, pick one that matches your home. Don’t forget to check how deep the sink is!
What Tools And Materials Do I Need To Replace A Laundry Sink?
To replace a laundry sink, you need some tools and materials. You will need a wrench to turn nuts and bolts. A screwdriver is used to take off screws. You should also have new plumbing pipes, a bucket, and a towel. Don’t forget the new sink!
How Can I Ensure Proper Plumbing Connections When Installing A New Laundry Sink?
To ensure proper plumbing connections when installing a new laundry sink, start by turning off the water. Use pipe wrenches to tighten all the connections securely. Check for leaks by turning the water back on slowly. Make sure the drain connects well so water flows easily. Don’t forget to ask for help if you need it!
Are There Any Common Mistakes To Avoid When Replacing A Laundry Sink?
Yes, there are some mistakes to avoid when you replace a laundry sink. First, don’t forget to turn off the water supply; this stops any leaks. Make sure you measure the space correctly so the new sink will fit. Also, check the pipes and connections to ensure they match the new sink. Finally, read the instructions carefully to avoid missing any steps.