Ever stare at your food scraps and think, “There’s got to be a better way than the trash can?” You’re not alone! Many of us want to compost but worry about space, smell, or cost. Good news! Composting at home, especially indoors, doesn’t have to be complicated or expensive. We’re going to break down how to start your own cheap indoor composting system. You’ll learn exactly what you need and how to do it, turning kitchen waste into garden gold. Ready to get started?
Indoor Composting Cheap: Your Effortless, Essential Guide
Hey neighbors! Troy D Harn here from TopChooser. I love helping you tackle home projects, and today, we’re diving into something that’s good for your wallet and the planet: indoor composting. Whether you live in a cozy apartment or a house with no backyard space, you can absolutely compost inside. Forget those fancy, expensive bins you see advertised. We’re going to focus on making this super affordable and surprisingly simple. Think of it as turning your kitchen scraps into black gold for your plants, all without breaking the bank. Let’s get this done!
Why Compost Indoors? More Than Just Saving Money
Composting is amazing. It reduces the amount of waste you send to the landfill, which is a huge win for the environment. Plus, the finished compost is fantastic for your plants, giving them nutrients they’ll love. But why do it indoors? And why focus on doing it cheaply?
- No Yard Needed: Perfect for apartment dwellers or those short on outdoor space.
- Year-Round Composting: Weather is never an issue! You compost rain or shine, hot or cold.
- Pest Control: Properly managed indoor systems are designed to keep critters out.
- Cost Savings: Making your own compost means less money spent on fertilizers and soil amendments for your houseplants or any small garden you might have.
- Reducing Your Footprint: Diverting food waste from landfills significantly cuts down on methane gas production.
The “cheap” part is key for many of us. We want to try new things without a big investment. Thankfully, the most effective indoor composting methods can be set up with items you likely already have or can find very affordably.
The Cheapest Ways to Start Indoor Composting
When we talk about “cheap,” we mean using readily available materials and avoiding costly specialized equipment. Here are the top contenders for budget-friendly indoor composting:
1. The Humble Worm Bin (Vermicomposting)
This is probably the most popular and effective method for indoor composting. Worms do the heavy lifting, breaking down your food scraps into nutrient-rich compost called “worm castings.” It’s surprisingly efficient and, when set up right, virtually odorless.
What You’ll Need (The Budget-Friendly Way):
- A Bin: Forget expensive worm bins. You can use a large plastic storage tote with a lid (about 10-18 gallons is a good starting size). Look for opaque ones, as worms prefer darkness. You can often find these at dollar stores or discount retailers.
- Drill or Awl: To make air holes and drainage holes.
- Bedding: This is what the worms live in and eat. Shredded newspaper (non-glossy), plain cardboard, coconut coir (often found in pet stores for reptiles), or aged leaves work perfectly. Rip it up into small strips.
- Red Wiggler Worms: These are the composting superstars. You can buy a pound of them online, from local fishing bait shops, or from other worm farmers. A pound is usually plenty to start.
- Food Scraps: Your kitchen waste! More on this in a bit.
Setting Up Your Worm Bin (Step-by-Step):
- Prepare the Bin: Take your plastic tote. Drill several small holes (about 1/8 to 1/4 inch) in the lid for air circulation. Drill a few more holes in the bottom for drainage. Place the bin inside a larger container or a second, solid tote to catch any excess moisture (this is crucial for preventing leaks and mess!).
- Add Bedding: Moisten your chosen bedding material (shredded paper, etc.) until it’s about as damp as a wrung-out sponge. You want it moist but not waterlogged. Fill the tote about 1/3 to 1/2 full with this moistened bedding. Fluff it up.
- Introduce the Worms: Gently place your red wigglers onto the surface of the bedding. Leave the lid off and the lights on for a few hours. Worms will burrow down away from the light, indicating they are settling in.
- Start Feeding: After a day or two, you can start feeding them. Bury small amounts of food scraps under the bedding in one corner of the bin. This encourages them to move around and also helps prevent odors.
- Maintain! Add new bedding as needed if it gets too wet or compressed. Keep the lid on.
2. Bokashi: The Fermenting Wonder
Bokashi isn’t technically “composting” in the traditional sense, but it’s an incredibly effective and compact indoor food waste solution. It uses a special bran inoculated with effective microorganisms (EM) to ferment your food scraps. The result is a pre-compost that breaks down rapidly when added to soil or a traditional compost pile.
What You’ll Need (Budget-Conscious):
- Airtight Containers: You need two buckets with airtight lids. Food-grade buckets are best, but any sturdy plastic buckets will do. You can often find these for free from restaurants or bakeries.
- Bokashi Bran: This is the special ingredient. You can buy it online. While there’s an upfront cost, it lasts a long time. Some DIYers make their own Bokashi bran, though this requires more effort.
- Food Scraps: Plus, Bokashi can handle things traditional composting can’t!
Using Bokashi (Step-by-Step):
- Layering: Add a layer of food scraps to the bottom of your container. Sprinkle a tablespoon or two of Bokashi bran over the scraps.
- Press Down: Press the scraps down firmly to remove air pockets.
- Repeat: Continue layering scraps and bran, pressing down each time.
- Seal It Up: Once the bucket is full, seal the lid tightly.
- Ferment: Let it sit for 2 weeks. You might hear a slight bubbling sound as fermentation occurs.
- Bury or Drain: At this point, you have “pickled” food. The liquid that drains out (called “Bokashi tea”) is a potent fertilizer for plants (dilute it first!). The solids need to be buried in soil (a large planter, a friend’s garden, or a traditional compost pile) where they will break down quickly.
3. The Simple “One Pot Wonder” (for smaller spaces)
This is for those who want a super minimal setup and don’t produce a ton of food waste. It’s essentially a small, contained composting system.
What You’ll Need:
- A Large Container: A sturdy, large pot or a plastic storage bin with a lid.
- Drill: For air holes.
- Compost Material: A mix of “greens” (food scraps) and “browns” (dry, carbon-rich material).
- Optional: Worms! You can add a few worms to speed things up.
How to Do It:
- Prepare Container: Drill air holes in the lid and sides of your container.
- Start Layering: Begin with a layer of brown material (shredded paper, dried leaves). Add a layer of green material (food scraps). Cover the greens with another layer of browns.
- Chop It Up: Smaller pieces break down faster.
- Maintain Moisture: Keep the contents moist like a wrung-out sponge.
- Turn Occasionally: Use a small shovel or stick to mix the contents every week or so to introduce air.
- Be Selective: Avoid meat, dairy, oily foods, and diseased plants.
What CAN and CAN’T Go In Your Indoor Compost Bin?
This is super important for success and preventing smells or pest issues.
Good Stuff (Greens & Browns) for Vermicomposting & Simple Bins:
Think of it as a balanced diet for your compost. You need a good mix of nitrogen-rich “greens” and carbon-rich “browns.”
“Greens” (Nitrogen-Rich):
- Fruit and vegetable scraps (peels, cores, ends)
- Coffee grounds and paper filters
- Tea bags (staples removed)
- Eggshells (crushed)
- Fresh grass clippings (in moderation)
“Browns” (Carbon-Rich):
- Shredded newspaper and junk mail (non-glossy)
- Shredded cardboard (plain, no tape or labels)
- Dryer lint (from cotton clothes)
- Sawdust (from untreated wood)
- Dried leaves
- Straw or hay
What to AVOID (Especially for Indoor Bins):
These can attract pests, create foul odors, or introduce pathogens.
- Meat and bones
- Dairy products (milk, cheese, yogurt)
- Oily or greasy foods
- Diseased plants
- Weeds that have gone to seed
- Pet waste (dog/cat feces – can contain harmful pathogens)
- Treated wood or sawdust
- Coal or charcoal ash
For Bokashi: Bokashi is more forgiving. You can add meat, dairy, and oily foods because the fermentation process pickles them rather than letting them rot. You still avoid things like large bones or diseased plants.
Keeping Your Indoor Compost System Smelling Fresh
This is often the biggest “fear” for beginners. With a little know-how, you can avoid any unpleasant odors!
- Balance Greens and Browns: A common cause of smell is too many nitrogen-rich “greens” and not enough carbon-rich “browns.” If it smells sour or like ammonia, add more browns!
- Bury Food Scraps: In worm bins and simple bins, always bury new food scraps under bedding material. This keeps them from being exposed to air and attracting smells.
- Chop It Up: Smaller food pieces break down faster and with less odor.
- Right Moisture Level: Too wet can lead to anaerobic decomposition (smelly!). Too dry, and things won’t break down. Aim for the dampness of a wrung-out sponge.
- Aerate Regularly: For simple bins, turning or mixing helps. Worm bins have air holes, and the worms themselves help with aeration.
- Don’t Overfeed: Start slow with feeding your worms or your simple bin. Add scraps only when the previous batch is mostly consumed.
- Use a Good Bin: Ensure your bin has proper ventilation and drainage. For worm bins, the overflow catch bin is crucial.
For Bokashi, the smell is usually a bit tangy, like pickles or vinegar – this is normal. If it smells truly rotten, something went wrong (like the lid wasn’t airtight).
Troubleshooting Common Indoor Composting Hiccups
Even the best of us run into a snag now and then. Here’s how to fix those common issues:
| Problem | Cause | Solution |
|---|---|---|
| Foul Odors (Ammonia/Rotten Eggs) | Too many “greens” (nitrogen), too wet, or not enough air. | Add more “browns” (shredded paper, cardboard). Ensure good airflow. Fluff the bedding. For worm bins, check drainage. |
| Fruit Flies/Small Gnats | Food scraps exposed on the surface. | Bury all food scraps completely under bedding. Cover fresh scraps with a thicker layer of browns. Consider a netting over the bin opening for a few days. |
| Worms Trying to Escape (Worm Bin) | Bin is too wet, too dry, too acidic, or has too much fresh food. | Check moisture levels. Add more bedding if too wet. Add a little more food if too dry. Add crushed eggshells or a small amount of garden lime to buffer acidity. Reduce feeding if you’re overfeeding. |
| Compost is Too Wet | Adding too many wet food scraps, poor drainage, or not enough “browns.” | Add dry bedding materials like shredded cardboard or newspaper. Ensure drainage holes are clear. For worm bins, empty the catch basin regularly. |
| Compost is Too Dry | Not enough moisture in bedding or food scraps, or it’s too hot/dry in your living space. | Add water gradually, mixing it in. Add wetter food scraps like melon rinds. If using a worm bin, ensure the bedding is consistently moist (wrung-out sponge dampness). |
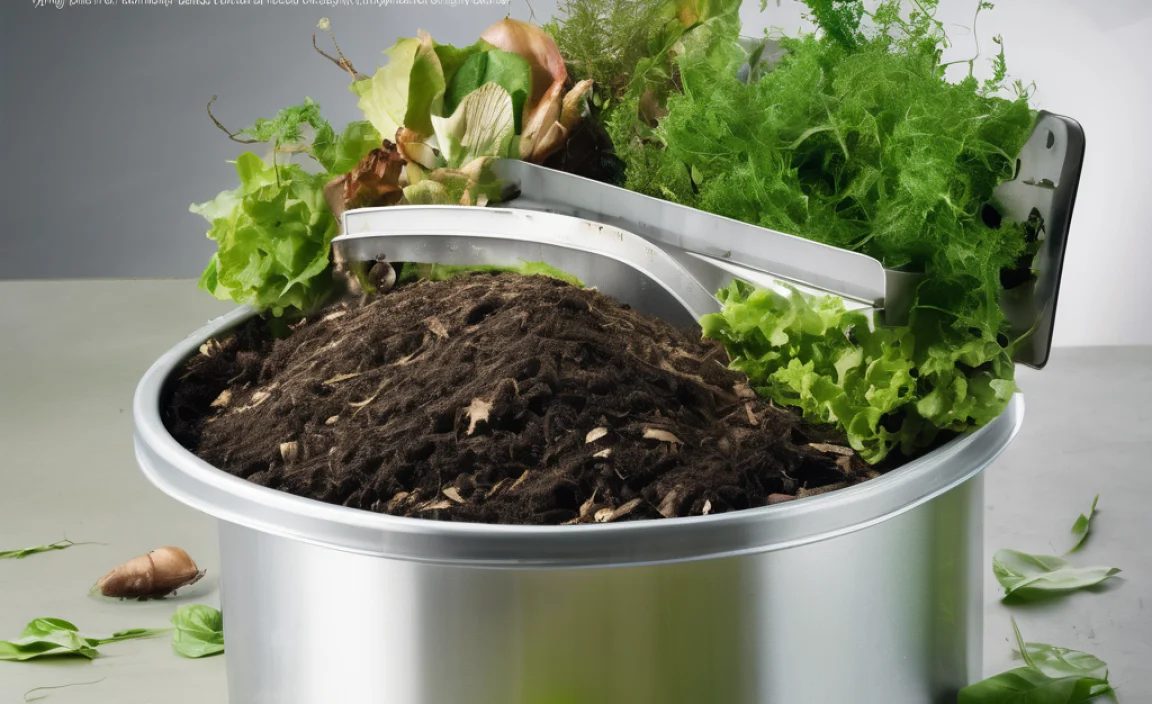
The “Black Gold”: When is Compost Ready?
This depends on your method:
- Worm Castings: When the bedding is mostly dark, crumbly, and you can no longer distinguish the original food scraps. It should smell earthy. This can take 3-6 months.
- Bokashi: The fermented solids are ready after the 2-week fermentation period, but they need to be buried in soil to fully decompose.
- Simple Bins: When the material is dark, crumbly, and smells like fresh soil. You won’t see recognizable food scraps. This can take varying amounts of time, from a few months to a year, depending on management.
Once ready, you can screen larger pieces out to add back to a new compost batch. Use your finished compost in houseplants, window boxes, or even a small balcony garden. It’s amazing stuff!
For more information on the science behind composting and worm composting specifically, check out resources from university extension offices. For example, Composting for Communities offers great insights, and resources like Cornell Cooperative Extension’s guides are invaluable.
The True Cost: What You Might Spend (Minimal!)
Let’s talk numbers. While we aim for “cheap,” there might be a few small costs:
- Tote Bin: $5 – $15 (or free if you find a used one)
- Hardware for holes: Minimal if you own a drill.
- Bedding: Free if using shredded paper/cardboard/leaves. A bale of coconut coir might be $10-$20 but lasts a very long time.
- Worms: $25 – $40 for a pound of Red Wigglers (this is often the biggest single cost, but they reproduce!). You can often split a pound with a neighbor or buy smaller starter cultures.
- Bokashi Bran: ~$20-$30 for a bag that can last months.
Compared to buying bags of fertilizer or potting soil amendments, even these small initial investments pay for themselves very quickly!
Your Indoor Composting Journey Starts Now!
See? Indoor composting doesn’t require a big budget or a lot of space. You can get started with things you likely have around the house or can find very affordably. Whether you go with the wiggly wonders of vermicomposting, the fermenting magic of Bokashi, or a simple contained bin, you’re making a positive impact. You’re reducing waste, creating valuable soil food, and doing something good for the planet, right from your kitchen!
Don’t be intimidated. Start small, learn as you go, and remember that a little bit of effort can yield incredible results. Your plants (and your wallet) will thank you.
Frequently Asked Questions About Cheap Indoor Composting
Q1: Can I really compost food scraps indoors without it smelling?
A: Absolutely! The key is proper management. Using methods like vermicomposting or Bokashi, balancing materials (greens and browns), burying food scraps, and ensuring good airflow and moisture control are essential for an odor-

I am passionate about home engineering. I specialize in designing, installing, and maintaining heating, ventilation, and air conditioning systems. My goal is to help people stay comfortable in their homes all year long.