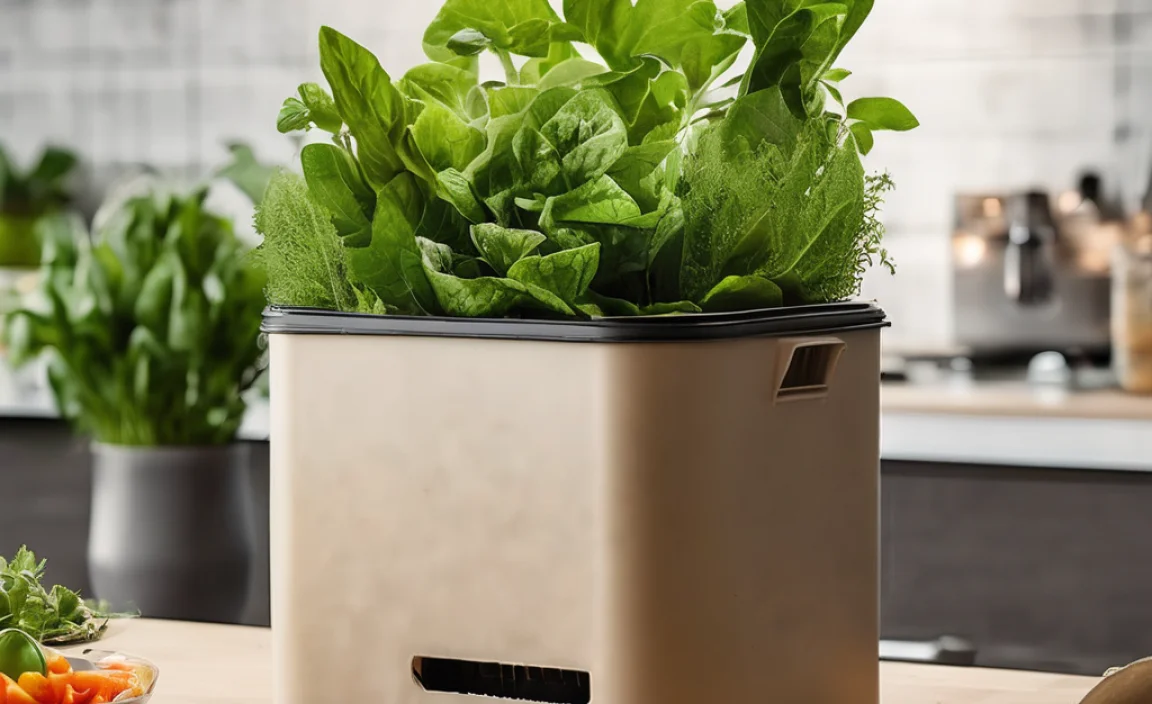
Got kitchen scraps piling up? Feeling a little guilty tossing food waste that could be useful? You’re not alone! Many of us want to be more eco-friendly but think composting is a big, smelly job for people with huge yards. But guess what? You can absolutely compost right inside your home, even if you live in a small apartment. It’s easier than you think, and we’re going to walk through exactly how to do it. Ready to turn your trash into treasure?
Indoor Composting DIY: Your Genius Eco-Tip for a Greener Home
Hey neighbors! Troy D Harn here from TopChooser, back with another quick and easy DIY that’s good for your wallet and great for our planet. Today, we’re tackling something a lot of folks find a bit daunting but is actually super simple: indoor composting. Yep, you heard me right! We’re going to set up a system that turns your food scraps into nutrient-rich soil right in your kitchen or on your balcony. No more guilt trips about throwing away those banana peels. Let’s get composting!
Why Bother with Indoor Composting?
Before we dive into the “how,” let’s chat about the “why.” Every year, tons of food waste end up in landfills. When organic matter decomposes in a landfill without air, it produces methane, a potent greenhouse gas contributing to climate change. Composting, on the other hand, is an aerobic (with oxygen) process that breaks down organic materials into a valuable soil amendment. It’s nature’s way of recycling!
- Reduces Landfill Waste: Significantly cuts down the amount of trash you send to the dump.
- Creates Nutrient-Rich Soil: Your plants, whether in pots or a garden, will love the homemade fertilizer.
- Saves Money: Less need to buy expensive potting soil and fertilizers.
- Environmentally Friendly: Helps combat climate change by reducing methane emissions.
- Educational Fun: It’s a fantastic way to learn about the natural cycle of decomposition and teach kids about sustainability.
Choosing Your Indoor Composting Method
There are a few popular ways to compost indoors, and the best one for you depends on your space, the amount of waste you produce, and how hands-on you want to be. For beginners, we’ll focus on the two most accessible methods:
1. The Worm Composting (Vermicomposting) Method
This is probably the most popular indoor composting method. You use special composting worms (like Red Wigglers, Eisenia fetida) to break down your food scraps in a contained bin. It’s efficient, odorless if done correctly, and produces amazing worm castings – worm poop basically, and it’s pure gold for plants!
Pros of Worm Composting:
- Fast processing of food scraps.
- Produces nutrient-rich worm castings and “worm tea” (liquid fertilizer).
- Relatively odorless.
- Can be kept indoors or on a balcony.
Cons of Worm Composting:
- Requires specific types of worms.
- Can be sensitive to temperature fluctuations.
- Some people are squeamish about worms (though you rarely see them!).
2. The Bokashi Method
Bokashi is a fermented composting system. Instead of letting your food scraps decompose aerobically, you use an anaerobic process with a special bran inoculated with effective microorganisms (EM). This pickling process breaks down the food scraps and neutralizes odors. The fermented material then needs to be buried in soil (in a garden bed, a large planter, or even a compost pile outdoors) to finish decomposing. It’s a great way to handle “problematic” food waste like meat and dairy that you can’t put in a traditional compost bin very easily.
Pros of Bokashi Composting:
- Can handle meat, dairy, and oily foods.
- Fast initial processing.
- No unpleasant smells during the fermentation stage; often described as “pickly.”
- Produces a nutrient-rich liquid that can be diluted and used as fertilizer.
Cons of Bokashi Composting:
- Requires purchasing Bokashi bran.
- The fermented material still needs to be buried to fully decompose.
- Requires a specific airtight bin with a spigot.
DIY Indoor Composting: Step-by-Step Guide for Vermicomposting
For most beginners, worm composting is the go-to indoor method. It’s incredibly rewarding and surprisingly simple once you get the hang of it. Let’s build your worm bin!
What You’ll Need:
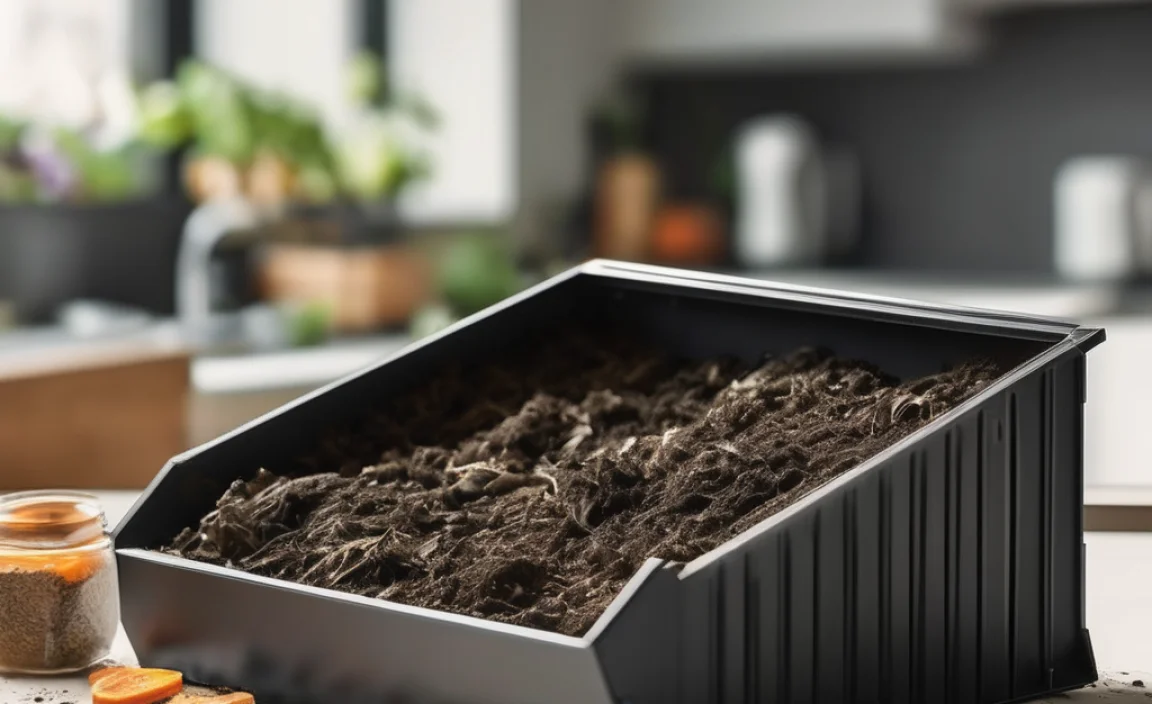
- A Worm Bin: You can buy specialized worm bins or DIY one using opaque plastic storage totes. A good size is around 10-15 gallons. You’ll need two identical bins.
- Drill with Bits: For making air and drainage holes.
- Composting Worms: Red Wigglers (Eisenia fetida) are the best choice. You can order them online from reputable suppliers. Don’t use regular earthworms from your garden; they won’t thrive. A pound of worms is a good starting point.
- Bedding Material: This is where your worms live. Good options include shredded newspaper (avoid glossy paper), shredded cardboard, coco coir, or peat moss. Moisten it so it’s like a wrung-out sponge.
- Food Scraps: Your kitchen waste! We’ll cover what’s best a bit later.
- A Spigot (Optional, for drainage): If you want to collect “worm tea” easily.
- A Small Stack of Bricks or Wood Blocks: To elevate the bin.
Setting Up Your Worm Bin:
This is where we get hands-on. Don’t worry; it’s straightforward.
- Prepare the Bins:
- Take one bin (this will be your main worm bin). Drill several small (about 1/8-inch) holes evenly spaced across the bottom for drainage.
- Drill more small holes in the lid for air circulation. You can also drill a few in the upper sides of the bin for more airflow.
- Take the second bin (this will catch liquid). Drill a few more holes in the bottom of this bin too – they just help with airflow and will allow any excess moisture to drain through if you don’t use a spigot.
- If you’re using a spigot for worm tea collection, drill a hole near the bottom of the main bin and install the spigot according to its instructions. Make sure it’s secure and doesn’t leak.
- Add the Bedding:
- Shred your newspaper or cardboard into strips, making sure to remove any tape or glossy inserts.
- Fluff up the shredded material and place it into the main worm bin.
- Add water and mix until the bedding is consistently moist, like a damp sponge that you can wring water out of. It shouldn’t be dripping wet.
- Add a handful of soil or a bit of finished compost. This helps introduce beneficial microbes and grit for the worms’ digestion.
- Introduce the Worms:
- Gently place your composting worms on top of the bedding.
- Leave the lid off for about 30 minutes to an hour. This gives the worms a chance to burrow down away from the light, indicating they are settling in.
- Assemble the Collection System:
- Place the bin with the bedding and worms on top of the second bin.
- Elevate the bottom bin slightly using bricks or wood blocks. This allows air to circulate around the main bin and ensures the drainage holes are clear. If you installed a spigot, this setup will let you place a container underneath to catch worm tea directly.
- Add the First Food Scraps:
- Start with a small amount of food scraps. Bury them under the bedding in one corner of the bin. This helps prevent odors and provides a moist environment for the worms.
- Place and Monitor:
- Keep your worm bin in a cool, dark place, like under a sink, in a closet, or on a shaded balcony. Ideal temperatures are between 55-77°F (13-25°C).
- Check on your worms every few days. Ensure the bedding stays moist and add food scraps gradually as the worms consume what you give them.
What to Feed Your Worms (and What to Avoid)
Your wormy friends are pretty good eaters, but they have some preferences and dislikes. Think of it as feeding them a balanced diet.
What Worms Love (<strong>Most</strong>):
- Fruit and vegetable scraps (apple cores, banana peels, carrot tops, potato peels)
- Coffee grounds and tea bags (remove staples and any plastic parts)
- Crushed eggshells (great for grit and neutralizing acidity)
- Plain bread and pasta (in moderation)
- Cooked, unseasoned vegetables
What Worms Can Eat (<strong>in Moderation or If Chopped Finely</strong>):
- Citrus peels (can be acidic, so offer sparingly)
- Onion and garlic scraps (can deter worms if fed in large quantities)
- Tomatoes
What to AVOID Feeding Worms:
- Meat, fish, and bones
- Dairy products (cheese, yogurt, milk)
- Oily foods or grease
- Spicy foods
- Heavily processed foods
- Anything that is rotten or moldy (besides what they are already processing in the bin)
- Diseased plant matter
- Pet waste (dog/cat feces)
Pro Tip: Chop up larger food scraps into smaller pieces. This speeds up decomposition and makes it easier for the worms to process.
Maintaining Your Worm Bin: A Simple Routine
Once your worm bin is set up, maintenance is minimal. Here’s what to keep an eye on:
- Moisture: The bedding should always feel like a damp sponge. If it’s dry, mist it with water. If it’s too wet, add more dry bedding material.
- Aeration: Gently fluff the bedding every week or two with a small trowel or by hand to ensure good airflow, which is crucial for preventing smells and keeping the worms happy.
- Feeding: Start by feeding a small amount every few days. As your worm population grows and processes food, you can gradually increase the amount. Wait until most of the previous food is gone before adding more. Bury the food scraps under the bedding.
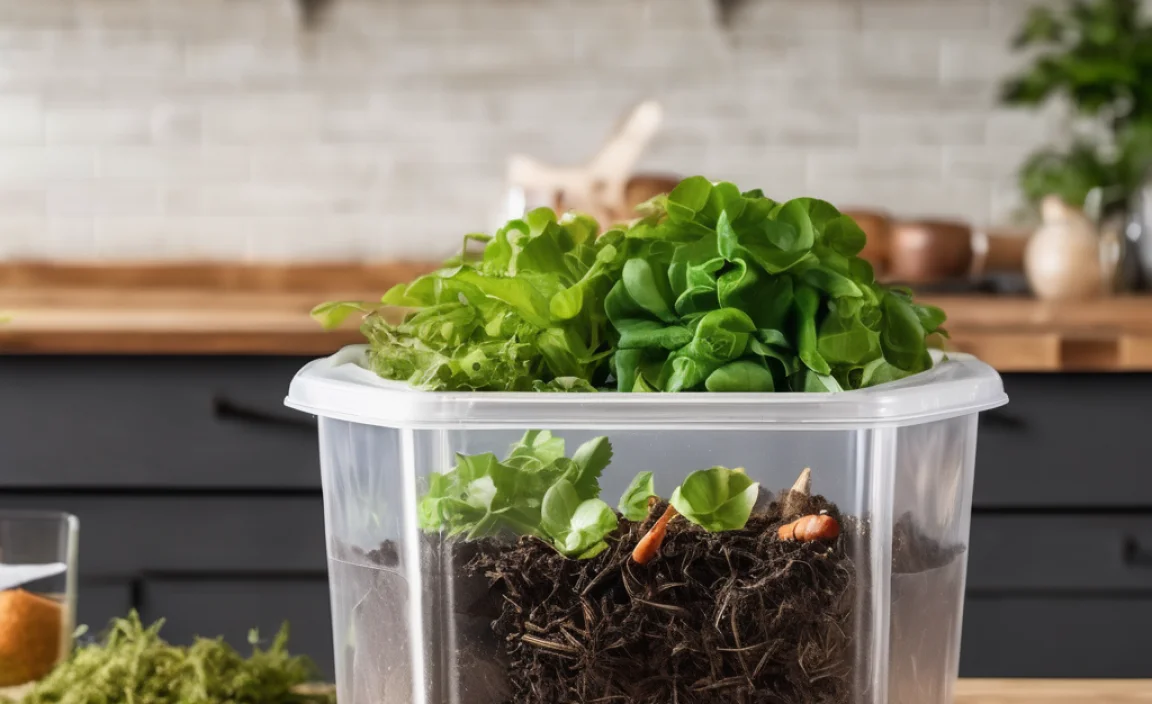
- Harvesting: After 2-4 months, you’ll start to see mostly dark, crumbly material – that’s your finished compost (worm castings)! You can harvest it by carefully sifting it and separating it from uncomposted material and the worms. A common method is to add fresh bedding and food to one side of the bin, forcing the worms to migrate to the fresh side, leaving finished compost behind. For detailed harvesting techniques, check out resources from organizations like the University of Minnesota Extension.
- Worm Tea: If you have a spigot, drain off any liquid that collects in the bottom bin every week or so. This “worm tea” is a powerful liquid fertilizer. Dilute it with water (about 1 part tea to 10 parts water) before using it on your plants.
DIY Indoor Composting: Step-by-Step for Bokashi
If you want to compost everything (including meat and dairy) and don’t mind finishing the process outdoors, Bokashi is a neat option.
What You’ll Need:
- Bokashi Bin: A special airtight bin with a spigot at the bottom. You can buy kits or DIY one using two buckets.
- Bokashi Bran: This is inoculated with effective microorganisms (EM). You can buy this online.
- Food Scraps: All types, including meat, dairy, and oily foods.
- A Place to Bury the Fermented Scraps: A garden bed, a large planter, or a compost pile.
Setting Up Your Bokashi System:
- Prepare the Bin: If DIYing, you’ll need two buckets of the same size. Drill holes in the bottom of one bucket (this is your inner bin). Stack it inside the other bucket (outer bin). Ensure the inner bucket has space at the bottom for liquid collection if it doesn’t have a spigot.
- Add Bedding and Scraps: Sprinkle a tablespoon or two of Bokashi bran into the bottom of the inner bin. Add your food scraps.
- Sprinkle Bran: Sprinkle another tablespoon or two of Bokashi bran over the food scraps. The goal is to coat the scraps lightly.
- Press Down: Press down the material to remove air. This is anaerobic!
- Seal the Bin: Close the lid tightly to ensure it is airtight. Make sure the spigot is closed.
- Continue Adding: Every time you add new food scraps, sprinkle bran and press down.
- Drain the Liquid: Every 2-3 days, drain the liquid (Bokashi leachate) from the spigot. Dilute this 1:100 with water and use it as a potent fertilizer for your plants.
- Bury Once Full: Once the Bokashi bin is full, seal it and let it sit for two weeks to ferment completely. After this, you must bury the fermented material in soil. Dig a trench in your garden, add the contents, cover with at least 6 inches of soil, and leave it for another 2-4 weeks to fully decompose before planting in that spot.
Troubleshooting Common Indoor Composting Issues
Even with the best intentions, you might run into a snag. Here’s how to fix them:
Worm Bin Smells Bad (Rotten Egg or Ammonia Smell):
- Cause: Too much moisture, not enough air, or you’re feeding too much, and the food is rotting instead of being eaten.
- Solution: Stop feeding for a week. Gently aerate the bin by fluffing the bedding. Add more dry bedding material (like shredded newspaper or cardboard) to soak up excess moisture. Ensure the lid has enough air holes. Check that you haven’t added prohibited items.
Fruit Flies or Pests in the Bin:
- Cause: Food scraps are exposed on the surface, or the bin is too wet.
- Solution: Always bury food scraps under the bedding. Ensure the lid is securely closed. If you have an infestation, place a shallow dish of apple cider vinegar near the bin to attract and trap flies. A generous layer of bedding can also help deter them.
Worms Trying to Escape:
- Cause: The bin’s conditions are unfavorable – too wet, too dry, too acidic, too alkaline, too hot, or too cold.
- Solution: Check moisture levels. Add dry bedding if too wet, or mist with water if too dry. Add crushed eggshells (for alkalinity) or more food scraps (if they’re starving). Ensure the bin is in a stable temperature zone.
Bokashi Leachate Smells Foul:
- Cause: The bin is not truly airtight, or the leachate wasn’t drained frequently enough.
- Solution: Ensure the lid is sealed properly and re-check the spigot for leaks. Drain leachate more often. The smell should ideally be slightly vinegary or “pickly,” not foul.
Tables for Quick Reference
Here’s a quick rundown of what you can and can’t put in your indoor composting systems.
Vermicomposting – What Goes In?
| Can Compost | Use Sparingly/Chop Fine | Avoid |
|---|---|---|
| Fruit & Veggie Scraps | Citrus Peels | Meat, Fish, Bones |
| Coffee Grounds & Tea Bags | Onion & Garlic | Dairy Products |
| Crushed Eggshells | Tomatoes | Oily Foods, Grease |
| Plain Bread & Pasta | Spicy Foods | |
| Cooked, Unseasoned Veggies | & |


I am passionate about home engineering. I specialize in designing, installing, and maintaining heating, ventilation, and air conditioning systems. My goal is to help people stay comfortable in their homes all year long.