Installing a new kitchen sink can be daunting, but with the right tools and basic knowledge, it can be done easily and efficiently. Before you begin, ensure you have all the necessary materials and tools.
This may include a new sink, faucet, plumbing supplies, and a wrench. It’s also important to turn off the water supply before beginning any installation work. However, Here we will take you through the step-by-step process of installing a new kitchen sink in details.
From removing the old sink to preparing the new one and finally testing the finished installation, we have got you covered. We will also discuss how to install a new kitchen sink, how much time it will take, and how much it will cost.

How To Install A New Kitchen Sink: In Details
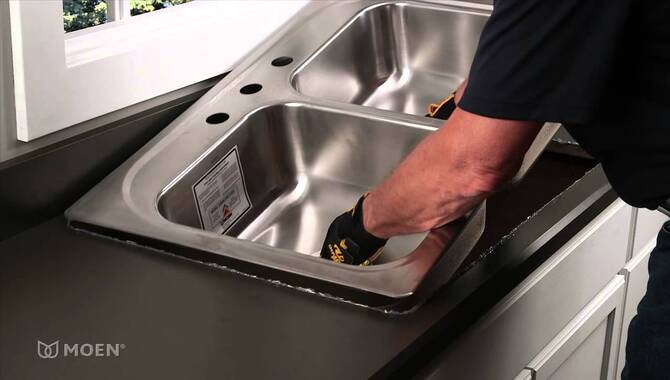
Here is the process on how to install a new kitchen sink. Installing a new kitchen sink requires specific tools such as a plumber’s putty knife, wrench, jigsaw, slip nut pliers, utility knife, or screwdriver. Start by turning off the water supply and disconnecting existing plumbing.
Remove the old sink carefully before checking that the new sink fits into your countertop hole. Install mounting brackets and secure your stainless steel basin using screws or clamps. Connect plumbing by installing faucet and strainer basket, attaching tailpiece to underside of the sink with fittings and slip nuts before connecting drain lines.
Turn on water supply valves to test for leaks before caulking around perimeter of the sink using silicone caulk to prevent any excess water from damaging your countertop.
What Tools Do You Need?
To install a new kitchen sink, you will need specific tools such as a plumber’s putty knife, wrench, jigsaw, slip nut pliers, utility knife, or screwdriver. Additionally, you will need a new sink, faucet, plumbing supplies, mounting brackets, and screws or clamps to secure the sink in place. Make sure to have all the necessary tools and materials before starting your installation process.
Removing The Old Sink
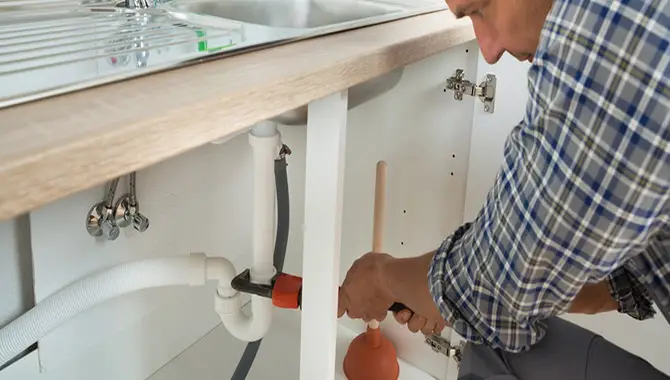
To start removing an old sink like a pro dyer does, you need to follow specific steps. Turn off the shutoff valves to cut off hot and cold water supply lines. Use pliers to loosen slip nuts on both ends of the P-trap located at the back of your existing sink.
After loosening these nuts with pliers or a wrench, detach them from the drainpipe connected to your wall or floor. Carefully lift out your old sink and scrape away excess caulk if necessary.
Disconnect The Water Supply Lines And Drainpipe
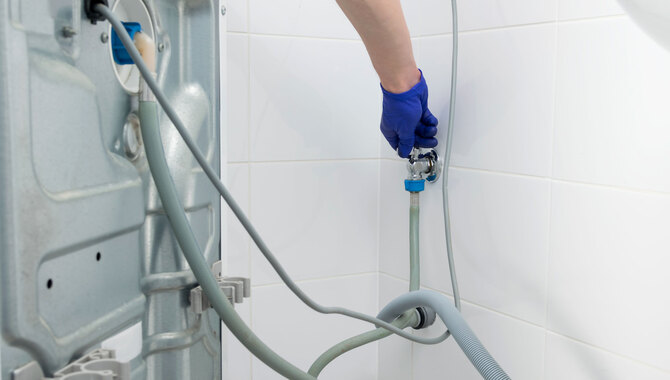
To ensure a seamless kitchen sink installation process while learning to install a new kitchen sink like a pro, it’s crucial to shut off the water supply and disconnect all plumbing connections before removing the old sink.
Loosen connectors with pliers or wrenches and keep a towel handy to avoid leaks. Examine fittings for signs of wear and replace when necessary then proceed with installing your new sink without further issues.
Remove The Sink Clips
After turning off the water supply and disconnecting plumbing connections in removing the old sink, locate sink clips beneath the countertop to loosen them with a screwdriver or pliers. To reinstall the new sink, keep track of all screws and clips. Ensure smooth flow from the previous topic and use 2-3 crisp paragraphs.
Preparing The New Sink
Before you begin installing your new kitchen sink, there are a few things you must do to prepare. First, take measurements to ensure the sink fits properly in the countertop opening. Check for any leaks or damage before proceeding with the installation process.
It is also important to gather all of the right tools, such as a wrench and plumber’s putty, to make sure you have everything you need on hand. Follow manufacturer instructions carefully for proper installation of your specific stainless steel or another type of sink model.
Check The Fit
When installing a new kitchen sink, it’s important to ensure it fits perfectly. To do this, measure its dimensions and compare them to the countertop opening. Make any necessary adjustments to accommodate it, and consider the mounting method used.
Check for leaks around plumbing fittings after slipping in the basin and clamping it down. Finally, ensure there is no excess silicone or caulk around the perimeter of the sink.
Install The Faucet And Strainer Basket
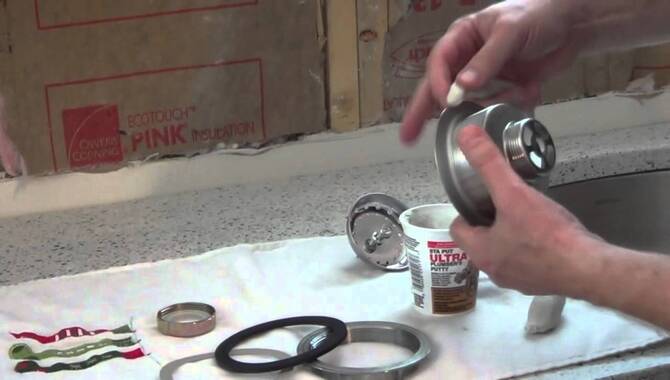
To successfully install a new kitchen sink, it’s essential to install the faucet and strainer basket correctly. Tighten nuts with a wrench to secure them properly and avoid leaks by applying a plumber’s putty or silicone sealant around their base. Test all connections before turning your water supply back on. Remember not to rush this step as it can lead to future plumbing problems.
Installing The New Sink
Installing a new kitchen sink requires following the manufacturer’s instructions thoroughly. Begin by turning off the water supply and disconnecting the old sink plumbing; then remove it and clean the area where your new stainless steel basin will fit snugly.
With right tools like a wrench or pliers, install and secure your new faucet through which cold/hot water flows with ease. After installing your garbage disposal or sprayer, check for leaks before sealing with silicone caulk or plumber’s putty: this step ensures no excess water seeps underneath your countertop or into your cabinetry.
Apply Plumber’s Putty Or Silicone Sealant
![]()
To create a watertight seal while installing a new kitchen sink, apply plumber’s putty or silicone sealant around its edges. Plumber’s putty is moldable and easy to shape, while silicone sealant is more durable and resistant to high temperatures, mildew, and stains. Applying either material evenly prevents gaps between the sink and countertop. Ensure efficient kitchen sink installation by choosing the right sealing agent.
Insert The Sink Into The Place
Carefully insert the new kitchen sink into its designated spot, ensuring it’s level and aligned with your countertop. Gently press down on the edges to secure its position. Tighten any mounting clips or brackets, making sure they’re evenly spaced and fully tightened.
Ensure a perfect fit by checking the sink’s rim against your countertop for gaps or unevenness. Once you’re satisfied with the placement, turn on the water supply and check all connections for leaks. Congratulations, you’ve successfully installed a new kitchen sink.
Secure The Sink With Clips And Screws

When installing a new kitchen sink, it is important to securely attach it to the countertop. This can be done using clips and screws. First, place the sink into the cutout on the countertop and make sure it is level. Then, attach the clips to the underside of the sink and tighten them with a screwdriver.
Next, use screws to attach the clips to the countertop. Be careful not to overtighten the screws, as this can cause damage to the sink or countertop. Once all clips and screws are securely placed, test the sink by running water and checking for leaks or movement. By following these steps, you can ensure that your new kitchen sink is safely and securely installed.
Testing And Finishing Up
After installing your new kitchen sink, it’s important to test and finish up properly. Turn on the shutoff valves for hot and cold water supply lines. Check for any leaks in pipes or fittings. Attach a garbage disposal if you have one.
Apply silicone caulk around the perimeter of the sink to prevent leaks under it. Install other accessories like a sprayer or soap dispenser as needed. Clean off any excess caulk or debris with paper towels. Enjoy your updated kitchen!
Turn On The Water Supply Valves
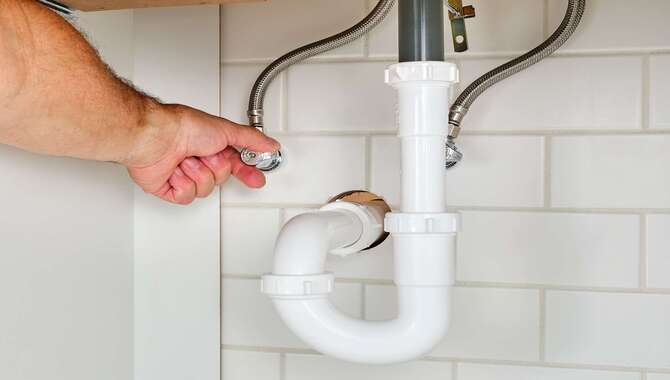
To avoid any future plumbing issues with your new kitchen sink installation, take extra care when turning on your water supply valves. Begin by checking for leaks around the sink area before slowly opening the hot and cold valves. Tighten connections if there are drips or leaks to ensure proper function. Run water for a few minutes afterward to remove any debris leftover from installation.
Check For Leaks
After installing a new kitchen sink, it’s crucial to check for leaks. Begin by filling up the basin with water and allowing it to drain out completely. Carefully inspect all the connections, using pliers or wrenches if needed to ensure they are tight enough to prevent leakage.
Look for any signs of moisture or dripping beneath the sink, as well as around the perimeter of the countertop opening. Clean up any debris from your work area using a paper towel or cloth – this can help prevent future problems with leaks.
Attach The Garbage Disposal (If Applicable)
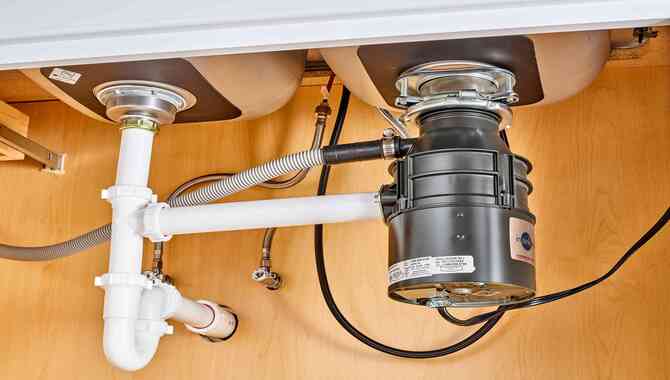
When installing a new kitchen sink, remember that attaching a garbage disposal requires extra care. Begin by ensuring that the mounting assembly is securely in place with screws. Next, connect all drain pipes carefully to prevent leaks, and test your work by running water and checking for proper drainage. Finally, seal around the edges of the sink with silicone caulk to finish your project perfectly.
How Much Time Will It Take?
Installing a new kitchen sink can be a great way to update your kitchen and improve its functionality. The time it takes to install a new sink will depend on several factors, including the type of sink you are installing and your level of experience with plumbing work.
Generally, it can take anywhere from a few hours to a full day to complete the installation process. It is important to set aside enough time for the project and carefully follow all instructions to ensure the job is done correctly. If you are unsure about any aspect of the installation process, it may be wise to consult with a professional plumber or handyman for assistance.
How Much Will It Cost?
The cost of installing a new kitchen sink will also depend on various factors, such as the type of sink you choose and the complexity of the installation process. On average, the cost can range from $200 to $500 for a basic installation, while more complicated projects may cost upwards of $1,000 or more.
Additionally, if you opt to hire a professional plumber or handyman for assistance, their services will add to the overall cost. Be sure to budget accordingly and shop around for affordable options when purchasing materials and supplies for your project.
Conclusion
Installing a new kitchen sink may seem like a daunting task, but with the right tools and steps, it can be done with ease. Remember to always turn off the water supply before starting any plumbing work. Taking accurate measurements and ensuring a proper fit for your new sink is crucial to prevent leaks and damage.
With careful attention to detail and following the steps outlined on how to install a new kitchen sink, you can successfully install a new kitchen sink and enjoy a refreshed and functional space in your home. However, if you are unsure about any aspect of the installation process, it’s always best to seek the assistance of a professional plumber.
Frequently Asked Questions:
[rank_math_rich_snippet id=”s-77dd82d9-1e28-4733-b9a5-4d8b65175d31″]

I am passionate about home engineering. I specialize in designing, installing, and maintaining heating, ventilation, and air conditioning systems. My goal is to help people stay comfortable in their homes all year long.

