Kitchen Compost in Asia: Your Easy Guide
Feeling overwhelmed by food scraps piling up in your kitchen? Many of us in Asia are looking for simple ways to reduce waste and give back to the earth. It might seem tricky, especially in smaller homes or busy cities, but kitchen composting is surprisingly doable! Think of it as turning your kitchen leftovers into garden gold. This guide will walk you through everything, step-by-step, making it easy for anyone to start. Get ready to transform your waste into something wonderful!
Why Compost Kitchen Scraps in Asia?
Composting your kitchen waste is a fantastic habit, and it’s especially relevant in Asia. Here’s why it makes so much sense:
- Reduces Landfill Waste: Food scraps make up a big chunk of what we throw away. Composting diverts this from overflowing landfills common across many urban Asian centers.
- Creates Nutrient-Rich Soil: Compost is like a superfood for your plants. It adds vital nutrients, improves soil structure, and helps plants grow stronger and healthier.
- Saves Money: By making your own compost, you significantly cut down on the need to buy expensive fertilizers and soil conditioners for your gardens or potted plants.
- Environmentally Friendly: Less waste in landfills means fewer harmful greenhouse gases, like methane, are released into the atmosphere. It’s a simple act with a big positive impact.
- Fits Urban Living: Many composting methods are designed for small spaces, balconies, or even indoor use, making them perfect for apartments and homes in densely populated Asian cities.
Understanding the Basics: Kitchen Composting 101
At its heart, composting is nature’s way of recycling. It’s a process where organic materials (like your food scraps) break down over time with the help of tiny organisms like bacteria and fungi. To get these little helpers working efficiently, they need a good mix of “greens,” “browns,” air, and water.
The Green and Brown Diet
Think of composting like feeding a balanced diet to your compost pile:
- “Greens” (Nitrogen-Rich): These are typically wet materials that provide nitrogen, which helps the microbes multiply and heat up the pile.
- Fruit scraps (peels, cores, rinds)
- Vegetable scraps (stems, leaves, peels)
- Coffee grounds and tea bags (remove staples)
- Grass clippings (in moderation)
- “Browns” (Carbon-Rich): These are dry, woody materials that provide carbon. They add bulk, allow air to circulate, and prevent the pile from becoming dense and smelly.
- Dry leaves
- Shredded newspaper and cardboard (avoid glossy paper)
- Twigs and small branches
- Sawdust (from untreated wood)
- Straw or hay
The ideal ratio is roughly 2 parts browns to 1 part greens. Don’t stress too much about this – it’s a guideline! Too many greens can lead to a slimy, smelly pile, while too many browns will slow down decomposition.
The Ingredients for Success: Greens and Browns in Asia
When living in Asia, you’ll find many common kitchen items fit perfectly into the “greens” and “browns” categories:
| “Green” Materials (Nitrogen-Rich) | “Brown” Materials (Carbon-Rich) |
|---|---|
| Vegetable peels and scraps (e.g., potato peels, carrot tops) | Shredded newspaper or junk mail (non-glossy) |
| Fruit scraps (e.g., banana peels, apple cores) | Shredded cardboard boxes (like broken-down cereal boxes) |
| Leftover cooked rice or noodles (in moderation, avoid oily ones) | Dry leaves from your yard or local park (if accessible) |
| Coffee grounds and used tea leaves (from daily consumption) | Small, dry twigs or wood shavings (if you have access to them) |
| Eggshells (crushed) | Sawdust from untreated wood (if available) |
What NOT to Compost: Common Pitfalls
Just as important as knowing what to add is knowing what to leave out. Certain items can cause problems:
- Meat, Fish, and Dairy Products: These can attract pests (like rodents and flies) and produce foul odors. They also take a long time to break down and can harbor harmful bacteria.
- Oily Foods: Large amounts of cooking oil or greasy food scraps can create an anaerobic (oxygen-poor) environment, slowing decomposition and causing smells.
- Diseased Plants: If you compost plants from your garden, avoid those showing signs of disease, as the pathogens might survive the composting process and infect new plants.
- Pet Waste (Dog and Cat): These can contain pathogens harmful to humans and should be disposed of separately.
- Weeds with Seeds: Weed seeds might survive the composting process and sprout in your garden when you use the compost.
- Chemically Treated Materials: Avoid anything treated with pesticides or herbicides, as these chemicals can harm your plants and contaminate your compost.
Choosing Your Composting Method for Asian Homes
The best composting method for you depends on your living space, how much kitchen waste you generate, and your personal preference. Here are some popular options well-suited for the Asian context:
1. The Balcony Bin or Small Outdoor Composter
If you have a small balcony, patio, or a tiny patch of yard, this is a great way to go. These systems are designed to be compact and contained.
How it Works:
You essentially create a mini compost pile in a bin. You’ll layer your greens and browns, ensuring good aeration and moisture. Some bins have a turning mechanism or are designed for easy access and harvesting of compost.
Pros:
- Suitable for small outdoor spaces common in urban settings.
- Contains odors and keeps pests away reasonably well.
- Relatively quick decomposition if managed properly.
Cons:
- Requires some outdoor space, even if small.
- Can require a bit more effort to maintain the right moisture and air balance.
What You Need:
- A Compost Bin: Many types are available, from simple plastic bins with lids to tumblers. Look for one with good ventilation.
- Kitchen Caddy: A small container with a lid to collect scraps indoors before taking them out to the bin.
- Tools: A small garden fork or aerator to turn the pile, and a watering can.
2. The Worm Farm (Vermicomposting)
This method uses special composting worms (like red wigglers) to break down food scraps. It’s incredibly efficient and perfect for smaller kitchens or limited outdoor space.
How it Works:
Worms live in a special bin filled with bedding material (like shredded newspaper or coco coir). You feed them your kitchen scraps, and they eat them, leaving behind nutrient-rich worm castings (worm poop!), which is an amazing fertilizer.
Pros:
- Excellent for small spaces, can be kept indoors or on a balcony.
- Produces high-quality compost (castings) very quickly.
- Relatively odorless if managed correctly.
- Engaging and great sensory activity for families.
Cons:
- Requires specific types of worms that need to be purchased.
- Worms have dietary preferences and can be sensitive to extreme temperatures.
- Cannot process large quantities of tough materials like woody stems.
What You Need:
- Worm Bin: Can be bought or made from plastic tubs. Needs specific drainage and ventilation.
- Composting Worms: Red wigglers (Eisenia fetida) are the most common.
- Bedding Material: Shredded newspaper, coco coir, shredded cardboard.
- Kitchen Caddy: For collecting scraps.
- Water: To keep the bedding moist.
For more on setting up a worm farm, the U.S. Environmental Protection Agency (EPA) offers great basic principles that apply globally.
3. Bokashi: An Anaerobic Pre-Composting Method
Bokashi is a unique system that uses fermentation rather than decomposition. It can handle a wider range of food scraps, including meat and dairy (though it’s best to limit these if you’re a beginner).
How it Works:
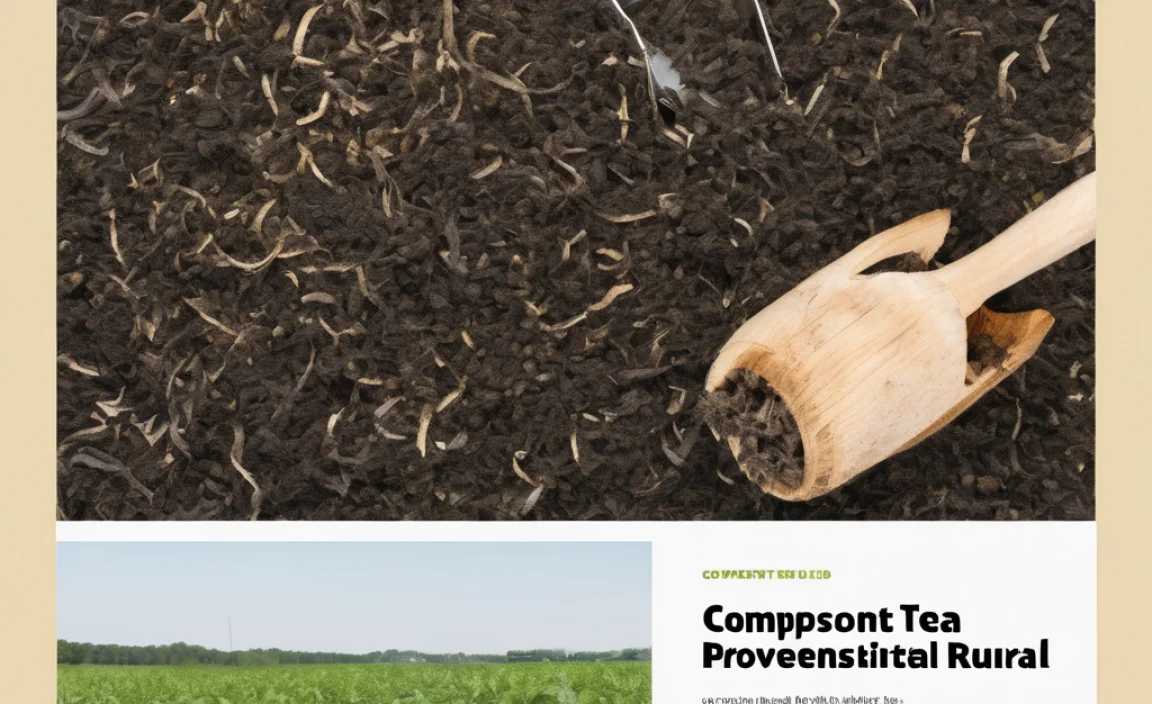
Food scraps are layered in an airtight Bokashi bin and sprinkled with an “activator” – a bran inoculated with effective microorganisms (EM). These microbes ferment the waste, pickling it rather than rotting it. After a few weeks, the fermented material is buried in soil or added to a traditional compost pile to finish breaking down. The liquid drained from the bin (Bokashi tea) is an excellent, potent fertilizer.
Pros:
- Can handle meat, dairy, and oily foods.
- Very compact, suitable for small kitchens or apartments.
- Produces a nutrient-rich “tea” liquid fertilizer.
- Fast initial processing of scraps.
Cons:
- Requires purchase of specialized Bokashi bins and activator.
- The fermented product still needs to be composted further (buried or added to a pile) before it can be mixed directly into soil, as it’s acidic.
- Has a distinct, slightly sour smell during fermentation, but not rot.
What You Need:
- Bokashi Bin: An airtight container with a spigot for draining liquid.
- Bokashi Bran/Activator: Specially inoculated bran sold online or at specialty stores.
- Kitchen Caddy: For collecting scraps.
- A Place to Bury the Fermented Waste: If you don’t have a garden, ask a friend or neighbor, or add it to a larger compost pile.
4. Community Composting Programs
In many Asian cities, local governments or community groups are setting up composting facilities or collection points. This is a great option if you have very limited space or time.
How it Works:
You collect your kitchen scraps and drop them off at a designated community collection spot or have them picked up. The larger facility does the composting.
Pros:
- No work required at home beyond collecting scraps.
- Handles larger volumes of waste.
- Supports local initiatives.
Cons:
- Availability depends heavily on your location; might not be an option everywhere.
- You don’t get to keep the finished compost.
What You Need:
- A container for scraps.
- Information on local programs and drop-off points.
To find programs near you, check with your local municipality or search online for “community composting [your city name]”.
How to Get Started with Kitchen Composting: A Step-by-Step Guide
Let’s get composting! We’ll focus on a simple bin or outdoor composter method, as it’s a great starting point for many.
Step 1: Gather Your Supplies
Before you start, have these handy:
- Kitchen Caddy: A small countertop bin with a lid to collect fruit and veggie peels, coffee grounds, etc.
- Compost Bin: A suitable bin for your space (balcony, yard, or even indoors if it’s a sealed system like Bokashi or a high-quality worm bin).
- “Browns”: Collect dry leaves, shredded newspaper, or cardboard. Store them somewhere dry.
- Tools: A small garden fork or aerator for turning.
- Water Source: A watering can or hose.
Step 2: Set Up Your Compost Bin
For Outdoor Bins:
Choose a level spot that gets some sun but not too much intense heat.
Place your bin directly on soil if possible, to allow worms and beneficial microbes to enter. If on concrete, this is less critical for static bins.
Ensure good drainage.
For Indoor Bins (Worm Farms/Bokashi):
Follow the manufacturer’s instructions carefully. Worm farms generally prefer darker, cooler spots. Bokashi bins are usually kept in the kitchen.
Step 3: Start Adding Materials
Begin by adding a layer of “browns” (about 3-4 inches) at the bottom of your bin. This helps with aeration and drainage. Then, start adding your kitchen scraps (your “greens”).
Pro Tip: Chop larger scraps into smaller pieces to speed up decomposition.
When you add kitchen scraps, try to cover them with a layer of browns. This is key to preventing odors and deterring pests.
Step 4: Maintain the Balance: Greens and Browns
Continue adding your kitchen scraps (greens) as you generate them. Remember to always top them off with a layer of dry brown material. Aim for a good mix over time. If your bin seems wet and smells a bit sour, add more browns. If it seems dry and isn’t breaking down, add more greens and a bit of water.
Step 5: Air and Moisture
Composting microbes need air to breathe! Turn your compost pile every 1-2 weeks. You can use a garden fork or a compost aerator tool. The goal is to introduce oxygen and mix the materials.
Your compost should be as damp as a wrung-out sponge. Too dry, and decomposition slows down. Too wet, and it can become anaerobic and smelly. If it’s too dry, add water. If it’s too wet, add more browns and turn it.
Step 6: Knowing When It’s Ready
Finished compost will look dark brown, crumbly, and smell earthy, like a forest floor. You shouldn’t be able to recognize the original food scraps.
The time it takes varies greatly depending on the method, temperature, and how actively you manage it. It can take anywhere from a few weeks (for worm farms or well-managed hot compost) to several months (for simpler, cooler piles).
Step 7: Harvesting and Using Your Compost
Once your compost is ready, you can harvest it! For bin composters, you might be able to scoop out the finished compost from the bottom. For tumblers, you empty the whole batch. For worm farms, you typically harvest the castings from the bottom layers.
Sift out any large, unfinished pieces and return them to the bin. Use your finished compost to:
- Enrich potting soil for your indoor plants.
- Mix into

I am passionate about home engineering. I specialize in designing, installing, and maintaining heating, ventilation, and air conditioning systems. My goal is to help people stay comfortable in their homes all year long.