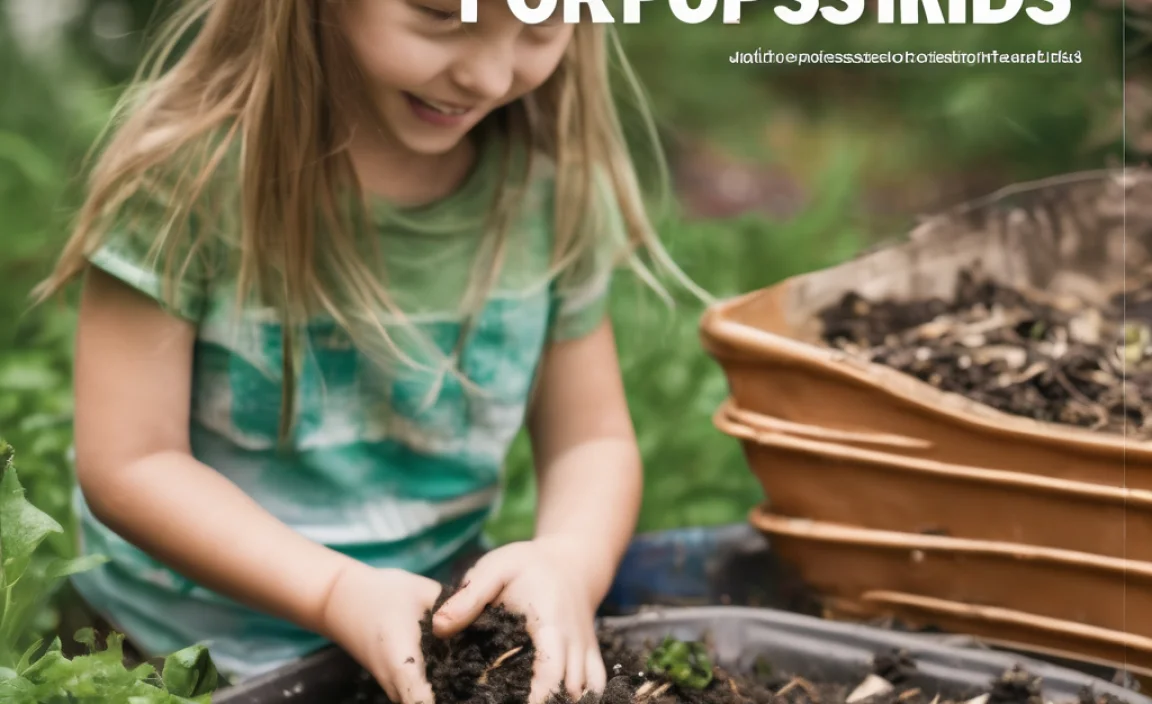
Ever look at your kitchen scraps and garden waste and think, “There has to be a better way than the trash bin?” You’re right! Composting is fantastic, but sometimes those bins can feel… complicated. If you’re looking for a super simple, almost hands-off way to turn that waste into garden gold, then pit composting might be your new best friend. It’s a method that has worked for ages because it’s so straightforward. Let’s dig in!
What is Pit Composting and Why is it So Easy?
Pit composting, also called trench composting or soil composting, is exactly what it sounds like: you compost directly in the ground. Instead of building a pile or using a bin, you dig a hole or a trench, add your compostable materials, and cover them up. Nature does most of the hard work for you!
The beauty of pit composting lies in its simplicity. There’s no special bin to buy, no turning to worry about (at least not as much!), and it takes up very little visible space in your yard. It taps into the existing microbial life in your soil, which are eager to break down organic matter. Plus, by burying your waste, you help deter pests and the compost enriches your soil right where it will feed your plants.
The Genius Behind the Pit
The “genius” aspect comes from leveraging the natural decomposition process and the environment right under your feet. Here’s why it’s so effective:
- Moisture Control: Being underground helps maintain consistent moisture, which is key for decomposition. The soil acts as a natural insulator.
- Temperature Regulation: The earth helps keep the composting material at a more stable temperature, preventing it from getting too hot or too cold.
- Pest Deterrence: Burying your scraps makes them less accessible to curious critters like raccoons, rats, or stray cats.
- Soil Enrichment: As the material breaks down, it directly enriches the surrounding soil, creating a fantastic nutrient bank for your plants. It’s like a slow-release fertilizer built right into your garden beds.
- Aesthetics: No unsightly compost bins cluttering your yard! It’s a hidden process.
Effortless Results for Beginners
For those new to composting, pit composting significantly lowers the barrier to entry. You don’t need to learn about the perfect “green to brown” ratio or master the art of turning a compost pile to get decent results. While a good mix is always beneficial, the soil is quite forgiving. This method is perfect for busy people or those who want to start composting without feeling overwhelmed.
Getting Started with Pit Composting: A Step-by-Step Guide
Ready to give it a try? It’s far less daunting than it sounds. Here’s how you can get your pit composting system up and running:
Step 1: Choose Your Location
Finding the right spot is important. You can compost in various places:
- Vegetable Garden Beds: This is ideal because the compost will directly feed your growing vegetables later. You can dig trenches between rows or directly into empty beds.
- Flower Beds: Similar to vegetable gardens, it benefits your ornamental plants.
- Fruit Tree Drip Lines: Burying compost around the base of fruit trees (but not too close to the trunk) can provide excellent nutrients.
- Underside of Hedges or Shrubs: A less conspicuous spot that still benefits your plants.
Key Considerations:
- Drainage: Avoid areas that tend to get waterlogged after rain.
- Sunlight: While not critical, a spot that gets some sun can help warm the compost and speed decomposition slightly.
- Accessibility: Make sure you can easily get to it with your kitchen scraps and garden waste.
- Distance from House: While pests are less of an issue, keep it a reasonable distance from your living areas.
Step 2: Dig Your Pit or Trench
The size and depth depend on how much material you have and what you’re composting.
- For continuous composting (like a trench): Dig a trench about 12-18 inches deep and 1-2 feet wide. You can make it as long as you need.
- For a one-time fill (like a single pit): Dig a hole that’s about 2-3 feet deep and 2-3 feet wide. This is good if you have a large amount of material to add at once.
- For smaller amounts: A hole about 1-2 feet deep and 1-2 feet wide is sufficient.
You can use a spade, shovel, or even a mattock if your soil is hard. The goal is simply to create a space beneath the surface to hold your organic waste.
Step 3: Start Adding Your Materials
Now for the fun part – feeding your compost! You can add a wide variety of organic materials:
What to Add:
- Kitchen Scraps:
- Fruit and vegetable peels and scraps
- Coffee grounds and filters
- Tea bags (remove staples)
- Eggshells (crushed)
- Stale bread, pasta, and rice
- Yard Waste:
- Grass clippings (in thin layers to avoid matting)
- Leaves (chopped or shredded are best)
- Small twigs and branches (chopped)
- Spent flowers and plants
- Weeds (avoid those that have gone to seed!)
- Other:
- Paper and cardboard (shredded, no glossy ink)
- Hair and fur
- Sawdust and wood ash (in moderation, from untreated wood)
What NOT to Add:
Some things can cause problems or simply won’t break down well, and can attract pests:
- Meat, fish, and dairy products
- Oily or greasy foods
- Diseased plants
- Weeds that have gone to seed (unless you’re sure your composting temperature gets high enough to kill them)
- Pet waste from carnivores (dog or cat feces)
- Chemically treated wood or plant material
- Coal ash
Step 4: Layer and Balance Your Materials (Optional but Helpful)
While pit composting is forgiving, adding a mix of “greens” (nitrogen-rich, like kitchen scraps and grass clippings) and “browns” (carbon-rich, like leaves and shredded paper) will speed up decomposition. Aim for roughly 2-3 parts browns to 1 part greens.
Pro Tip: If you add a lot of wet kitchen scraps, try to mix in some dry leaves or shredded cardboard to absorb excess moisture and maintain airflow.
Step 5: Cover Your Compost
This is crucial for pest deterrence and maintaining moisture. You have a few options:
- Soil: The simplest method is to backfill the trench or hole with the soil you dug out. Cover the added materials completely with at least 4-6 inches of soil.
- Mulch: A layer of wood chips, straw, or shredded leaves also works well.
- A Tarp or Plywood: If you’re concerned about waterlogging, you can place a piece of plywood or a tarp over the compost pit. Weigh it down with rocks or bricks.
Step 6: Continue Adding Materials
If you’ve dug a trench or a large pit that you’ll be adding to over time, simply repeat steps 3, 4, and 5. Dig a section, add your waste, mix a little if you like, and cover it.
Trench Composting Strategy: Dig a trench, fill one end. As it decomposes, start a new trench next to it, or down the line. By the time you get back to the first trench, the compost will be well on its way to being ready.
Step 7: Harvesting Your Compost
The waiting game is the hardest part! Decomposition time varies depending on factors like temperature, moisture, and the materials used. It can take anywhere from a few months to a year or more.
How to Know When It’s Ready:
- It will look dark and crumbly, like rich soil.
- You shouldn’t be able to recognize the original materials (no recognizable food scraps, leaves, etc.).
- It will smell earthy and pleasant, not sour or rotten.
Harvesting Methods:
- Digging it up: If you’ve created a specific pit, you can simply dig out the finished compost from the bottom or sides.
- Sifting: You might find some larger, undecomposed bits. You can sift these out and put them back into a new pit to finish decomposing.
- In-place Enrichment: If you composted directly in your garden beds, you might not need to “harvest” it in the traditional sense. The surrounding soil will become enriched as it decomposes. You can gently fork it into the top few inches of soil when planting.
Pros and Cons of Pit Composting
Like any method, pit composting has its upsides and downsides. Understanding these will help you decide if it’s the right fit for your home and lifestyle.
| Pros | Cons |
|---|---|
| Simplicity: Very easy to learn and do. Minimal effort required. | Slower Decomposition: Can be slower than actively managed hot composting because it’s less aerated. |
| Low Cost: No need to buy bins or specialized equipment. Uses basic tools. | Can Attract Pests (if not covered well): While generally good at deterring them, improper covering can still attract digging animals. |
| Aesthetically Pleasing: It’s hidden, so no visual clutter in the yard. | Harder to Monitor: You can’t easily see the compost and check its temperature or moisture levels. |
| Direct Soil Enrichment: Nutrients go directly into the ground where they can be used. | Requires Digging: Digging pits or trenches can be labor-intensive depending on soil type and your physical ability. |
| Good for Colder Climates (in some ways): Being underground offers some insulation. | Can Become Waterlogged: If your chosen spot has poor drainage, the compost can become too wet. |
| Ideal for Beginners: Low risk of failure, great way to start composting. | Not Suitable for All Yard Designs: May not be practical for tiny balconies or areas with very hard, rocky soil. |
Pit Composting Essentials: Tools and Tips
You don’t need much to get started, but a few basic items can make the process smoother.
Essential Tools:
- Shovel or Spade: For digging. A garden fork can also be useful.
- Gloves: To protect your hands.
- Wheelbarrow (Optional): Handy for moving larger volumes of material or soil.
- Watering Can or Hose (Optional): To add moisture if the compost becomes too dry, though often the soil keeps it adequately moist.
Helpful Tips for Success:
- Chop it Up: Smaller pieces of material decompose much faster. Chop up large vegetable scraps, shred leaves, and break cardboard into smaller bits.
- Maintain Moisture: The compost should be as damp as a wrung-out sponge. If it’s too dry, decomposition slows dramatically. Add a little water. If it’s too wet, add more dry “brown” materials like shredded paper or leaves.
- Aeration (A Little Goes a Long Way): While pit composting is low-effort, occasionally poking a few holes into the compost with a stick or fork can help introduce oxygen and speed things up. This isn’t as crucial as with pile composting, but it can make a difference.
- Location, Location, Location: As mentioned, choose a spot with good drainage. This is more important than you might think! A waterlogged pit will become a stagnant, smelly mess.
- Be Patient: This is a marathon, not a sprint. Embrace the slow, steady process of decomposition. The earthworms and microbes are working hard for you!
- What About Existing Piles? If you already have a compost bin or pile, you can still use pit composting for specific items. For example, if you have a lot of garden prunings that break down slowly, or if you want to dispose of kitchen scraps without a bin, you can bury them directly.
Understanding Decomposition in the Soil
When you bury organic matter in your garden, you’re essentially creating a localized composting zone within the soil. This zone becomes teeming with life:
- Bacteria: These are the primary decomposers, breaking down materials into simpler compounds.
- Fungi: They are excellent at breaking down tougher materials like leaves and woody bits.
- Actinomycetes: These are a type of bacteria that give compost its characteristic “earthy” smell.
- Micro-arthropods and Larger Organisms: As decomposition progresses, earthworms, nematodes, and other small invertebrates move in, further breaking down the material and aerating it.
The soil provides the perfect environment: it holds moisture, offers protection from extreme temperatures and sunlight, and is already home to the necessary microbial populations. For more on the science of decomposition, resources from university extension offices, such as University of New Hampshire Extension, offer great insights into the biological processes involved.
Pit Composting vs. Other Methods
It’s helpful to see how pit composting stacks up against other popular composting techniques:
| Method | Effort Level | Speed | Cost | Space | Ease for Beginners |
|---|---|---|---|---|---|
| Pit Composting | Low | Medium to Slow | Very Low | Minimal (underground) | Very High |
| Open Pile Composting | Medium (requires turning) | Medium to Fast (especially hot composting) | Low (materials) | Medium to High | Medium |
| Bin Composting (Tumbler/Stationary) | Medium (tumblers require less turning) | Medium to Fast | Medium to High (cost of bin) | Medium | Medium to High |
| Vermicomposting (Worm Composting) | Medium (feeding, maintaining bin) | Fast (for specific materials) | Medium to High (cost of worms, bin) | Low (best for indoors/small spaces) | Medium (requires understanding worm needs) |
As you can see, pit composting truly shines in its simplicity and minimal cost, making it an excellent entry point for anyone wanting to compost.
Troubleshooting Common Pit Composting Issues
Even with an “effortless” method, you might run into a small snag now and then. Here’s how to fix common problems:
- Issue: Smelly Compost (Rotten Egg or Ammonia Odor)
- Cause: Too much “green” material (nitrogen-rich) or not enough air circulation, leading to anaerobic (without oxygen) conditions.
- Solution: Dig a few holes or poke

I am passionate about home engineering. I specialize in designing, installing, and maintaining heating, ventilation, and air conditioning systems. My goal is to help people stay comfortable in their homes all year long.