Ever look at your yard waste and kitchen scraps and think, “There has to be a better way to deal with this?” You’re not alone! Many folks struggle with finding simple, effective ways to manage organic waste without a lot of fuss. Some composting methods seem complicated, but what if there was a way that was straightforward and worked right in your own backyard? Let’s dive into pit composting. It’s a surprisingly easy method for turning your scraps into rich soil. We’ll walk through it step-by-step, so you can get started today!
What is Pit Composting? Your Backyard Soil Maker
So, what exactly is pit composting? Think of it as a no-frills, in-ground composting system. Instead of building bins or piles above ground, you dig a hole, fill it with your organic materials, and let nature do its thing. It’s a simple, almost set-it-and-forget-it approach that’s perfect for beginners or anyone who wants a low-maintenance way to compost.
The key is that the composting happens directly in the earth, allowing beneficial microbes and earthworms from the soil to get right to work. This method is fantastic because it’s discreet, requires minimal construction, and directly enriches the soil where you dig the pit.
Why Choose Pit Composting? The Best Bits
Pit composting might not get all the fancy press that some other composting methods do, but it’s got some serious advantages, especially for folks just starting out or those who value simplicity and efficiency. Let’s break down why this method is a genius choice:
- Super Simple: No fancy bins to build or buy! Just grab a shovel and dig.
- Low Maintenance: Once you fill it up, you can practically forget about it until you need the compost.
- Discreet: The composting action happens underground, so no unsightly piles in your yard.
- Direct Soil Improvement: The compost enriches the soil right where it’s made, which can be a bonus if you choose your pit locations wisely.
- Attracts Earthworms: The underground environment is a haven for earthworms, which are nature’s best composters.
- Cost-Effective: The biggest “cost” is your time and a shovel.
Things to Consider Before You Dig
While pit composting is wonderfully simple, a little planning goes a long way. Think about these points before you start digging your first pit:
- Location, Location, Location: Pick a spot that’s out of the way but accessible. Avoid areas that flood or are right next to valuable plants you don’t want compost interfering with. Also, consider sun exposure; while it doesn’t drastically affect pit composting, extreme heat or cold can slow things down. A spot that gets a bit of sun but isn’t scorching all day is ideal.
- Drainage: Make sure the area you choose has decent drainage. You don’t want your compost pit turning into a stagnant pond.
- Soil Type: Pit composting works best in general garden soil. If you have very sandy or heavy clay soil, it might take a bit longer for decomposition, but it will still work.
- What NOT to Compost: Just like any composting, you’ll want to avoid meat, dairy, oily foods, diseased plants, and pet waste (from cats and dogs) to prevent attracting pests and spreading pathogens.
The Pit Composting Process: Step-by-Step
Ready to get your hands dirty? This is where the magic happens. Follow these simple steps to set up and maintain your pit compost system.
Step 1: Choose Your Pit Site
As we touched on, pick a spot that’s out of the way but not impossible to get to. A corner of your yard, an unused garden bed, or even a spot you plan to turn into a garden bed later are good options. Ensure it’s not where you’ll be digging roots for edible crops anytime soon, as the composting process introduces decomposing matter.
Step 2: Dig Your Pit
This is the main “work” involved! The size of your pit depends on how much organic material you generate. A good starting size is about 2-3 feet wide and 2-3 feet deep. You don’t need to be exact; aim for a generous hole. You can dig a single pit or multiple pits if you plan to use them in rotation. If you’re digging multiple pits, space them at least a few feet apart.
Tool Tip: A good quality shovel is your best friend here. Something sturdy that won’t bend easily is worth the investment. A garden fork can also be helpful for loosening soil and mixing materials later.
Step 3: Layer Your Materials
Now, start filling your pit! The key to good composting is a balance of “greens” (nitrogen-rich materials) and “browns” (carbon-rich materials). Aim for a ratio of roughly 2 parts browns to 1 part greens. This helps the microbes work efficiently.
Greens (Nitrogen-rich):
- Fruit and vegetable scraps
- Coffee grounds and tea bags
- Grass clippings (in thin layers to avoid matting)
- Plant trimmings
Browns (Carbon-rich):
- Dry leaves
- Shredded newspaper or cardboard (avoid glossy paper)
- Straw or hay
- Small twigs and woody debris
- Sawdust (from untreated wood)
Start by adding a layer of browns at the bottom to help with drainage and aeration. Then, alternate layers of greens and browns as you add your materials. It’s like making a compost lasagna!
Step 4: Add Soil and Moisture
Every few layers, or on top of your mixed greens and browns, sprinkle some garden soil. This introduces the necessary microbes to kickstart the decomposition process. You can also add a shovel or two of compost from an established pile if you have one. Keep the materials moist, but not soggy. It should feel like a wrung-out sponge. If your materials are too dry, the decomposition will slow down. If they’re too wet, they can become slimy and anaerobic (lacking oxygen), leading to bad smells.
Pro Tip: If you’re adding a lot of dry brown material, give it a good watering before you bury it. If you’re adding wet green material, mix in more browns to soak up excess moisture.
Step 5: Bury and Wait (Mostly!)
Once your pit is full, or you’ve added a good amount of material, cover it with at least 4-6 inches of soil. This is crucial for keeping pests out and maintaining moisture and temperature. This soil “cap” also helps the decomposition process and prevents odors from escaping.
Now, for the easiest part: waiting! The microbes, worms, and other organisms underground will break down the materials. Decomposition can take anywhere from a few months to a year, depending on the materials you used, the weather, and the activity of the microorganisms. You don’t typically need to turn a pit compost pile, which is another big time-saver.
Step 6: Harvesting Your Compost
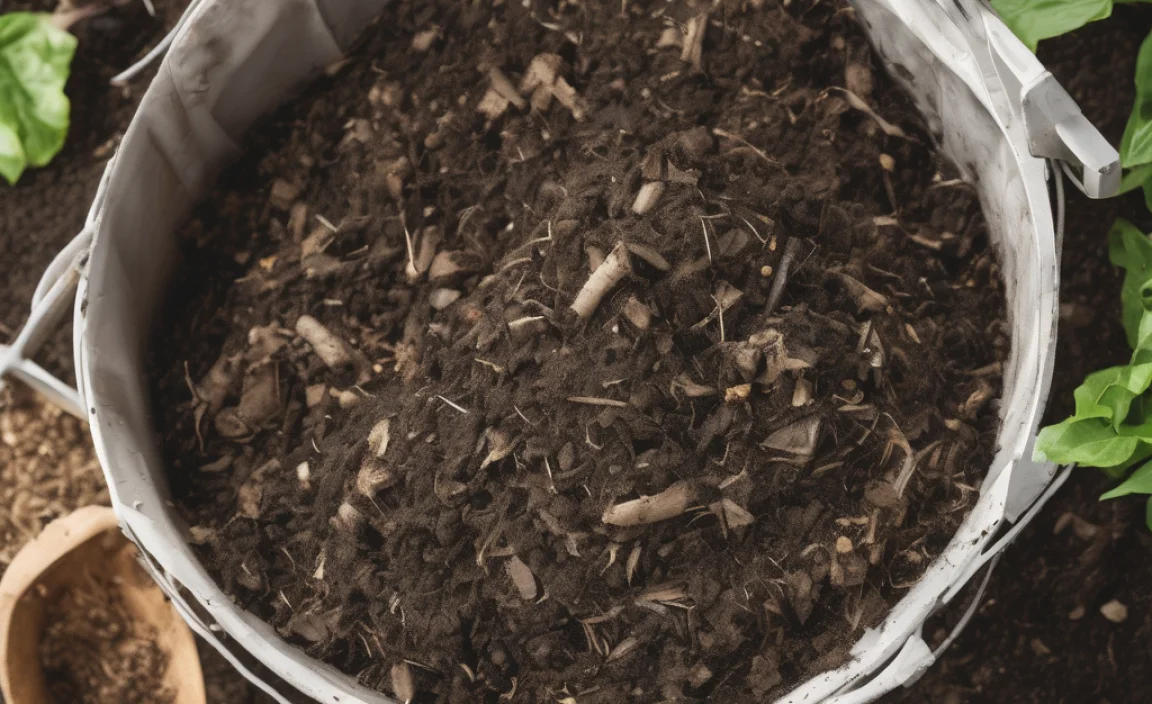
When is it ready? The compost will look dark, crumbly, and earthy, and you shouldn’t be able to recognize the original materials. If you dug your pit in an area you plan to plant in, you can simply dig into the soil around where the pit was. The decomposed material will have blended with the surrounding soil, enriching it.
If you want to harvest the compost specifically, you have a couple of options:
- Dedicated Pit(s): If you dug a specific pit for harvesting, you can carefully dig around the edges and bottom to extract the finished compost. It’s usually best to let the pit sit for a while after filling before harvesting, allowing the material to fully break down.
- Using as Soil Amendment: For pits dug in garden beds, the compost is essentially “ready” when you plant into that area. The nutrients will be released slowly as the plants grow.
You can sift the compost through a screen if you want a finer texture, but it’s not strictly necessary for garden use.
The Science Behind the Magic: How Pit Composting Works
It might seem like you’re just burying trash, but there’s a whole ecosystem at work beneath the soil. Pit composting relies on several natural processes:
Aerobic Decomposition: This is the most common and efficient type of decomposition. Microorganisms, primarily bacteria and fungi, break down organic matter in the presence of oxygen. The air pockets created by the browns and the soil layers allow oxygen to circulate. This process generates heat, which helps break down materials faster and kills weed seeds and pathogens. It’s a relatively odorless process when balanced.
Anaerobic Decomposition: If your pit becomes too wet or compacted, oxygen can be depleted. This leads to anaerobic decomposition, which is carried out by different types of microorganisms. This process is much slower and can produce unpleasant odors like sulfur (rotten egg smell). This is why ensuring good drainage and a mix of materials is important.
Vermicomposting (Worm Composting): The soil you sprinkle in and the surrounding earth are teeming with earthworms and other beneficial soil organisms. These creatures are attracted to the decomposing organic matter and actively consume and break it down, enriching the compost with their castings (worm poop), which are packed with nutrients.
Nutrient Cycling: As the organic materials break down, they release essential nutrients back into the soil. This process mimics what happens in nature on a forest floor, where fallen leaves and debris decompose to feed the surrounding plants. This is why composting is so beneficial for your garden!
To learn more about the science of decomposition and soil health, the U.S. Department of Agriculture (USDA) offers excellent resources on soil science and composting. For a deeper dive, check out their Soil Health section.
Pit Composting vs. Other Methods: A Quick Comparison
Pit composting is just one of many ways to compost. Here’s how it stacks up against some popular alternatives:
| Method | Pros | Cons | Best For |
|---|---|---|---|
| Pit Composting | Simple, discreet, low-maintenance, directly enriches soil. | Slower decomposition in some climates, requires digging, can’t easily harvest large amounts for specific use. | Beginners, small spaces, those wanting discreet composting, direct garden bed amendment. |
| Heap/Pile Composting | Can be done in various sizes, relatively simple, good aeration if managed. | Can be unsightly, requires turning for faster results, can attract pests if not managed well. | Larger yards, those with space for a compost pile, moderate to advanced composters. |
| Bin Composting (Wood, Plastic, Wire) | Neat, contained, can be aesthetically pleasing, pest-resistant designs available. | Requires purchase or construction of a bin, can be more effort to turn and manage. | Urban/suburban settings, those wanting a tidy compost system, pest-conscious individuals. |
| Tumbler Composting | Fastest decomposition, easy to turn, contained, pest-proof. | Can be expensive, limited capacity per batch, requires regular turning. | Busy individuals wanting fast compost, those with limited space who want quick results. |
| Worm Composting (Vermicomposting) | Excellent for kitchen scraps, produces high-quality compost (worm castings), can be done indoors or outdoors. | Requires specific conditions (temperature, moisture), cannot handle large volumes of yard waste, requires managing worms. | Kitchen scrap reduction, apartment dwellers, producing nutrient-rich fertilizer for houseplants. |
As you can see, pit composting truly shines in its simplicity and minimal effort required. It’s a fantastic entry point into the world of composting.
Troubleshooting Common Pit Composting Issues
Even with a simple system, you might run into a hiccup or two. Don’t worry, most issues are easy to fix!
- Smelly Compost: This is usually a sign of an imbalance, often too many greens or too much moisture, leading to anaerobic conditions.
- Fix: Add more brown materials (leaves, shredded paper) to absorb moisture and introduce air. If it’s very wet, try to gently fork in some dry browns without compacting it too much. Make sure the soil cap is allowing some air to escape but still keeping pests out.
- Slow / No Decomposition: Your compost isn’t breaking down.
- Fix: It might be too dry. Gently add water until it’s moist like a wrung-out sponge. It could also be too cold; decomposition naturally slows in winter. If you’re not adding enough greens, the microbes might not have enough nitrogen to work efficiently. Try adding a bit more nitrogen-rich material.
- Attracting Pests (Rodents, Flies): This is usually due to exposed food scraps.
- Fix: Ensure your soil cap is at least 4-6 inches thick and covers all the organic material completely. Avoid adding meat, dairy, or oily foods, as these are major attractants. Burying food scraps deeper within the pit can also help.
- Waterlogged Pit: Your pit is holding too much water.
- Fix: This indicates drainage problems. If possible, dig a few small drainage holes in the bottom of the pit (being careful not to disturb the main composting area too much). Layering more coarse brown materials like small twigs at the bottom can also help. Consider choosing a different site for future pits if drainage is consistently an issue.
Remember, composting is a natural process. A little patience and minor adjustments are usually all that’s needed to get things back on track. For more in-depth troubleshooting, resources like the EPA’s composting page offer great tips on managing common composting problems.
Conclusion: Your Easy Path to Rich Soil
Pit composting is a testament to the power of simplicity and nature. You don’t need fancy equipment or a degree in soil science to create valuable, nutrient-rich compost for your garden. By following these straightforward steps—digging a hole, layering your greens and browns, adding a bit of soil and moisture, and then covering it up—you’re well on your way to transforming waste into black gold.
It’s an accessible method for anyone, whether you have a sprawling backyard or a modest urban plot. It’s about working with the earth, rather than against it, to create a sustainable cycle. So, grab that shovel, and give pit composting a try. You’ll be amazed at how easy it is to contribute to a healthier garden and a healthier planet, one buried scrap at a time. Happy composting, neighbors!
Frequently Asked Questions About Pit Composting
Q1: How deep should a pit compost hole be?
A: Aim for a depth of about 2 to 3 feet. This provides enough space for the decomposition process and helps insulate the compost material.
Q2: Can I put meat or dairy in my pit compost?
A: It’s best to avoid meat, dairy, and oily foods in any compost system, including pit composting. These can attract pests and cause odors. Stick to plant-based kitchen scraps and yard waste.
Q3: How often do I need to turn my pit compost?
A: One of the biggest advantages of pit composting is that you generally don’t need to turn it. The soil and natural soil organisms do the work for you in situ.
Q4: How long does pit compost take to be ready?
A: It can take anywhere from 6 months to over a year. The speed depends on the materials used, the weather, and the specific soil conditions. You’ll know it’s ready when it looks, smells, and feels like rich, dark soil.
Q5: What if I fill up my pit before the compost is ready?
A: You have a couple of options. You can start a second pit and let the first one continue decomposing undisturbed. Or, if you’re using it for a specific garden bed, you can plant into the top layer of partially composted material, as it will continue to break down and enrich the soil as your plants grow.
Q6: Can I compost diseased plants in a pit compost?
A: While the heat from composting can kill some pathogens, it’s generally safer to avoid composting diseased plants, especially in a simple pit system where you have less control over temperature. Remove diseased plants and dispose of them in the trash to prevent spreading issues in your garden.

I am passionate about home engineering. I specialize in designing, installing, and maintaining heating, ventilation, and air conditioning systems. My goal is to help people stay comfortable in their homes all year long.