Ever looked at your kitchen scraps and garden waste and thought, “There’s got to be a better way than the overflowing trash can?” You’re not alone! Composting can seem a bit complicated, but what if I told you there’s a super simple method that turns that waste into fantastic garden food with very little fuss? Get ready, because we’re diving into the world of rotating bin composting. It’s easier than you think, and I’ve got all the best tips to make it genius and effortless for you.
What’s So Great About Rotating Bin Composting?
Think of a rotating compost bin as a personal mini-recycling plant for your home. Instead of just piling up scraps, you’re actively turning them into nutrient-rich soil for your plants, flowers, or veggies. This method is fantastic for beginners because it speeds up the composting process significantly. Plus, it requires a lot less manual turning than a traditional compost pile, saving you time and effort. It’s a win-win for your garden and your conscience!
Why Not Just a Regular Compost Pile?
| Feature | Rotating Bin Composting | Traditional Compost Pile |
|---|---|---|
| Speed | Faster (often 1-3 months) | Slower (often 6-12 months) |
| Effort | Less manual labor, just a few spins | Requires regular turning with a fork or shovel |
| Odor | Generally less odor due to contained nature | Can sometimes develop odors if not managed well |
| Pest Control | Better containment, deterring pests | Can attract pests if not properly built/maintained |
| Space | Compact and self-contained | Requires more open space |
A standard compost pile is great, but it demands more diligence. You need to actively fork it over to get air in, which helps it break down. A rotating bin does a lot of that work for you. By simply tumbling the contents, you introduce oxygen, which is a key ingredient for happy microbes that eat your food scraps. It’s a simpler science, really.
Choosing Your Rotating Bin: What to Look For
When you start shopping for a rotating compost bin, you’ll see a few different styles. Don’t get overwhelmed! Most of them work on the same basic principle: a sealed container that you can turn.
Types of Rotating Bins
- Single Chamber Bins: These are often the most affordable and simplest. You fill it, let it compost, and then empty the whole batch. It’s ideal for smaller households or if you don’t mind waiting for a full batch to finish before starting a new one.
- Dual Chamber Bins: These are super convenient! One side is for adding fresh scraps while the other side is already composting or finished. Once a chamber is full, you switch to filling the other one, giving the first side time to cook. This means you always have a batch that’s actively breaking down and potentially a finished batch ready to use.
- Multi-Chamber Bins: Less common for the average home gardener, but for those with larger composting needs, these offer even more compartmentalization for different stages of compost.
What Makes a Good Bin
- Durability: Look for sturdy, UV-resistant plastic. You want something that can withstand being outdoors in the sun and rain for years.
- Ease of Rotation: A good bin should spin easily. Some have handles, which are a nice touch. Others rely on you just pushing and nudging it. Try to imagine yourself turning it a few times a week – does it seem manageable?
- Capacity: How much space do you have, and how much waste do you produce? Bins range from about 15 gallons up to 70 gallons or more. A 30-40 gallon bin is usually a sweet spot for most average families.
- Ventilation: Small holes are important to let air in, but they shouldn’t be so large that moisture escapes too quickly or pests can easily get in.
- Airtight Seal (Mostly): While you need air, you don’t want it to be an open door. A lid that fits well helps retain moisture and heat, speeding up decomposition.
You can find these bins online from major retailers or at your local garden center. Some municipalities even offer rebates on compost bins, so it’s always worth checking your local government’s sustainability website! For example, the EPA offers great resources on composting, including selecting equipment.
The “Greens” and “Browns”: Your Compost Recipe
Composting is all about balance. You need a mix of “greens” (nitrogen-rich materials) and “browns” (carbon-rich materials). Think of it like making a cake – you need all the right ingredients in the right proportions for it to turn out well.
Greens (Nitrogen-Rich): Speed Up Decomposition
These are typically wet and act as the “food” for your compost critters.
- Fruit scraps (peels, cores, rinds)
- Vegetable scraps (stems, leaves, skins)
- Coffee grounds and filters
- Tea bags (remove the staple!)
- Grass clippings (in thin layers to avoid matting)
- Plant trimmings (non-diseased)
- Eggshells (crushed)
Pro Tip: Don’t put meat, dairy, oily foods, or diseased plants in. These can attract pests and cause foul odors.
Browns (Carbon-Rich): Provide Structure and Airflow
These are dry materials that help your compost breathe and prevent it from getting too dense or slimy.
- Dry leaves
- Shredded newspaper (black and white ink only)
- Cardboard (torn into small pieces)
- Straw or hay
- Wood chips or sawdust (untreated wood only)
- Paper towels and napkins (food-soiled is okay)
- Twigs and small branches
Pro Tip: If you’re adding a lot of green material (like grass clippings), make sure to balance it with plenty of browns. Too many greens can lead to a slimy, smelly mess.
The ideal ratio is often cited as roughly 2 parts browns to 1 part greens by volume. However, with a rotating bin, this ratio is a bit more forgiving because the tumbling action helps with aeration. Don’t stress too much about perfect measurements, a good general mix is key!
Getting Started: Your Simple Step-by-Step Guide
Ready to spin some magic? Here’s how to get your rotating bin composting journey started:
- Choose a Location: Find a spot that’s convenient for you to access with kitchen scraps and garden waste. Consider sunlight – a partly sunny spot is often ideal. Too much direct sun can dry it out, while too much shade might slow things down. Make sure it’s on level ground so it spins smoothly and safely.
- Start with a Base Layer: Toss in a few handfuls of browns – like dry leaves or shredded cardboard. This helps with drainage and airflow right from the start.
- Add Your Kitchen Scraps (Greens): Begin adding your fruit and vegetable peels, coffee grounds, and other suitable kitchen waste. Chop larger items into smaller pieces if you can; they’ll break down faster.
- Layer with Browns: After adding your greens, cover them with a layer of browns. This is crucial for managing moisture and preventing odors. Think of it as tucking your greens in!
- Start Tumbling: Once you have a decent amount of material in the bin, give it a good spin for 20-30 seconds. If you have a dual-chamber bin and are using the second side, just fill it as needed.
- Feed and Spin Regularly: Continue adding your kitchen scraps and garden waste, always topping them with a layer of browns. Aim to spin the bin every few days, or at least 2-3 times a week. This is the key to fast, effective composting in a rotating bin.
- Moisture Check: Your compost should feel like a wrung-out sponge – moist but not dripping wet. If it’s too dry, add a bit of water. If it’s too wet, add more browns and spin well.
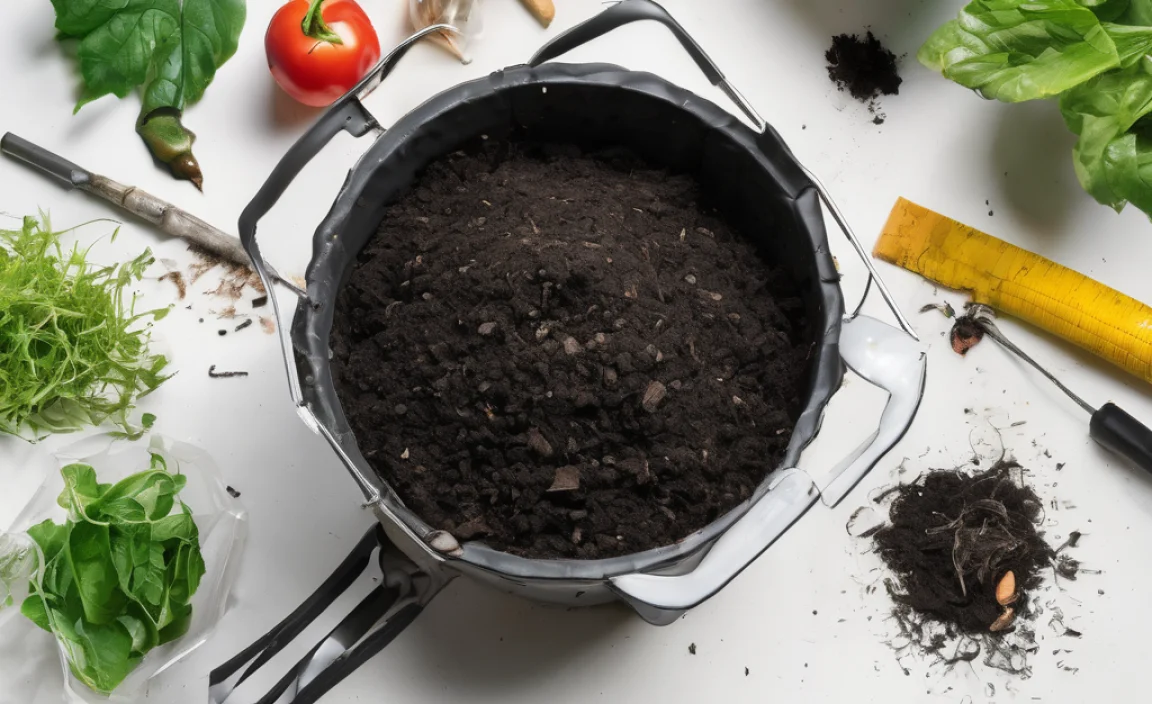
- Know When It’s Ready: You’ll know your compost is ready when it looks dark, crumbly, and earthy, and you can no longer recognize the original materials. It should also have a pleasant, earthy smell. This can take anywhere from 4 weeks to 3 months, depending on how often you turn it, the mix of materials, and the weather.
- Harvest Your Compost: Empty the finished compost from the bin. You can use a screen to sift out any larger, uncomposted pieces, which can go back into the bin to continue decomposing with your new batch.
Troubleshooting Common Composting Puzzles
Even with the best intentions, sometimes your compost bin needs a little nudge. Here are a few common issues and easy fixes:
- It Smells Bad (Ammonia or Rotten Eggs): This usually means too many “greens” or not enough air.
- Fix: Add more “browns” like shredded paper or dry leaves. Spin the bin vigorously to introduce air. Ensure you’re not adding meat, dairy, or oily foods.
- It’s Not Heating Up / Breaking Down: This is often due to a lack of moisture or not enough “greens” to kickstart the microbial action.
- Fix: Check the moisture – it should be like a damp sponge. Add a bit of water if it’s too dry. Add more “green” materials like coffee grounds or fresh kitchen scraps. Ensure you’re spinning it regularly.
- There Are Fruit Flies or Gnats: These are attracted to exposed food scraps.
- Fix: Make sure all food scraps are fully covered by “brown” materials. Spin the bin more frequently. If it persists, try a thin layer of finished compost or soil on top.
- Stuff Looks Wet and Slimy: Too much moisture and not enough airflow.
- Fix: Add a generous amount of dry “browns” (cardboard ripped into small pieces works great). Spin the bin thoroughly to mix everything and introduce air.
Remember, composting is a natural process. These little hiccups are normal and part of the learning curve. A quick spin and a balanced addition of materials usually sorts things out quickly.
Tips for Genius, Effortless Composting
Want to take your rotating bin composting from good to genius? Here are a few extra tips to make it even more effective and easy:
- Chop It Up: Smaller pieces of food scraps and browns break down much faster. Keep a small compost caddy in your kitchen and a pair of shears or a small chopper nearby. You don’t have to go crazy, but cutting big items into halves or quarters helps a lot.
- Store Browns Handy: Keep a good supply of dry leaves or shredded paper near your compost bin station. This makes it super easy to grab browns whenever you add greens.
- Use a Kitchen Caddy with a Lid: This keeps your kitchen scraps contained, prevents odors, and makes it easy to transport them to the bin. Look for ones with carbon filters for extra odor control.
- Don’t Overfill: Give your compost bin room to tumble and aerate. If it’s packed too tightly, the materials won’t mix properly. A good rule of thumb is to fill it about two-thirds to three-quarters full.
- Check Out Local Resources: Many cities and counties offer free workshops or resources on composting. Sometimes they even have their own compost bin sales! A quick search for “[Your City/County] composting” can be very helpful.
- Patience is a Virtue (But Not Too Much!): While rotating bins are faster, they still need time. Don’t get discouraged if it’s not ready in a month. Keep it balanced and keep spinning!
For more detailed advice on what to compost, the Composting Manual offers a comprehensive list of compostable materials.
How to Use Your Finished Compost
The best part! Once your compost is dark, crumbly, and smells earthy, it’s ready to be used. This “black gold” is a fantastic soil amendment.
- Improve Garden Soil: Mix compost into your vegetable beds and flower gardens. It adds nutrients, improves soil structure, helps retain moisture, and encourages beneficial microbial activity. Your plants will thank you!
- Potting Mix: Blend compost with other potting soil ingredients to create a nutrient-rich mix for container plants and houseplants.
- Top Dressing: Sprinkle a layer of compost around trees, shrubs, and established plants. This provides a slow release of nutrients and helps suppress weeds.
- Lawn Care: Rake a thin layer of compost over your lawn in the spring or fall to improve soil health and grass vitality.
Using your own compost is incredibly satisfying. You’re not just gardening; you’re closing the loop on waste and creating a healthier environment, right in your own backyard.
Conclusion: Your Effortless Path to “Black Gold”
See? Rotating bin composting really is a genius and effortless way to turn your household waste into something incredibly valuable for your garden. You’ve learned about the perfect green and brown recipe, how to set up your bin, and even how to tackle common issues before they become problems. By following these simple tips, you’re not just reducing waste; you’re actively enriching your soil and contributing to a healthier environment. So grab your scraps, give that bin a spin, and enjoy the magic of creating your very own “black gold.” Happy composting!
Frequently Asked Questions About Rotating Bin Composting
How often should I spin my rotating compost bin?
For the fastest results, aim to spin your bin 2-3 times a week. If you’re less busy, spinning it once a week will still work, but it might take a little longer for the compost to mature.
What if I don’t have enough “browns” or “greens”?
If you have too many kitchen scraps (greens), cover them with more household paper products like shredded newspaper, paper towels, or torn cardboard. If you have a surplus of dry leaves or yard waste (browns), just use them more liberally to cover your greens and add structure.
Can I compost in the winter?
Yes, you can! Composting slows down in cold weather, but it doesn’t stop entirely. Your bin might take longer to break down materials, but continue adding scraps and spinning as usual. Some people move their bins to a more sheltered location if it gets extremely cold.
How big should the pieces I add be?
Smaller pieces break down much faster than larger ones. Aim to chop up kitchen scraps and tear or shred larger brown materials like cardboard. You don’t need to pulverize everything, but a reasonable size helps speed things up considerably.
Will my rotating compost bin attract pests?
Rotating bins are much better at deterring pests than open piles because they are enclosed. If you’re experiencing pest issues, it usually means some food is exposed. Always ensure your food scraps are well-covered with brown materials and that your lid is secure.
How do I know if my compost is “cooked”?
Finished compost will be dark brown, crumbly, and have an earthy smell, similar to forest soil. You won’t be able to recognize the original food scraps or yard waste. If it still looks like recognizable scraps and smells off, it needs more time and a good spin.

I am passionate about home engineering. I specialize in designing, installing, and maintaining heating, ventilation, and air conditioning systems. My goal is to help people stay comfortable in their homes all year long.