Want to turn your kitchen scraps into gardening gold right at home? Vermicomposting, or worm composting, might sound a little wiggly, but it’s actually a super simple process. It’s a fantastic way to handle food waste while creating nutrient-rich fertilizer for your plants. Even if you’re new to this, don’t worry! We’ll guide you through it, step-by-step. Let’s get your worms working for you!
Vermicomposting in India: Your Proven Essential Guide
Hey everyone, Troy D Harn here from TopChooser, ready to uncomplicate another home project for you! Today, we’re diving into the wonderful world of vermicomposting, specifically for us here in India. You know, the idea of composting with worms might sound a bit… messy. Or maybe even a little intimidating? Lots of folks think it’s only for master gardeners or requires fancy equipment. But I’m here to tell you, it’s totally achievable for anyone, anywhere, even in your apartment or small backyard. We’re talking about transforming your daily kitchen waste into black gold – amazing fertilizer for your plants – using the power of earthworms. It’s eco-friendly, budget-friendly, and surprisingly easy once you know how. So, let’s get those little wrigglers working their magic!
Why Vermicompost in India? Benefits You Can’t Ignore
Composting with worms isn’t just a trendy thing to do; it’s incredibly beneficial, especially in the Indian context. Think about it – we generate a lot of organic waste from our kitchens daily. Instead of sending it to landfills where it harms the environment, vermicomposting turns it into something valuable. Plus, the end product, called vermicast or worm castings, is one of the best natural fertilizers you can get your hands on.
Boost Your Garden’s Health
Worm castings are packed with essential nutrients that plants absolutely love. They improve soil structure, making it easier for plant roots to grow and access water and air. This means healthier, more vibrant plants, whether you have a sprawling garden or a few pots on your balcony.
Reduce Waste and Help the Environment
Every bit of food waste you compost is waste that doesn’t end up in landfills. This significantly reduces greenhouse gas emissions and helps conserve natural resources. It’s a small step each of us can take that makes a big difference.
Save Money on Fertilizers
Buying chemical fertilizers can add up. Vermicast is essentially free fertilizer once you have your worm system set up. You’ll be producing your own high-quality plant food right at home, saving you money and keeping your gardening purely organic.
Simple and Accessible
You don’t need a huge amount of space to start vermicomposting. A small bin can do the job, making it perfect for urban dwellers, apartment residents, and even those with limited outdoor space in India.
Getting Started: Your Wormy Shopping List
Okay, ready to get your hands dirty (in a good way!)? Here’s what you’ll need to set up your very own vermicomposting system. We want to keep this simple, reliable, and budget-friendly.
The Worm Bin: Your Worms’ New Home
This is where your composting happens. You have a few good options:
- Ready-made Bins: You can buy specialized vermicomposting bins. These are usually made of durable plastic and come with multiple trays for easy harvesting and good aeration. Brands often have specific designs that work well.
- DIY Bins: Get crafty! A simple plastic storage container with a lid works wonders. Look for one around 15-20 gallons (60-75 liters). You’ll just need to drill some holes for air and drainage.
- Wooden Bins: If you prefer natural materials, a wooden bin can also work. Just ensure it’s untreated wood so it doesn’t leach chemicals.
Pro Tip: Whichever bin you choose, make sure it has a lid to keep out pests and moisture in. Good aeration is key, so drill or ensure there are holes near the top and bottom.
The Bedding: A Cozy Home for Worms
Before your worms can start munching on food scraps, they need a comfortable place to live. This is their bedding. Good bedding holds moisture, allows air to circulate, and provides food for the worms.
- Shredded Newspaper: Black and white print is best. Avoid glossy inserts.
- Cardboard: Corrugated cardboard, torn into small pieces, works well.
- Coconut Coir (Coco Peat): This is a fantastic, sustainable option that holds moisture beautifully. You can find it at garden stores.
- Dried Leaves: Crumpled dry leaves are also a good addition.
How to prepare bedding: Mix your chosen materials with water until they are damp, like a wrung-out sponge. Not too wet, not too dry! It should feel moist but not drip when squeezed.
The Stars of the Show: The Worms!
This is crucial: you can’t use just any earthworm. You need specific types that are excellent composters. The most common and recommended for vermicomposting are:
- Red Wigglers (Eisenia fetida): These are the superstars of vermicomposting. They reproduce quickly and love to eat decaying organic matter.
- European Nightcrawlers (Eisenia hortensis or Dendrobaena veneta): Similar to red wigglers, they are also efficient composters.
Where to get them in India: You can often find these worms from specialized vermicomposting suppliers online or through local gardening clubs and agricultural supply stores. Make sure you buy from a reputable source to get the right kind of worms.
Food for Your Friends
Your worms are not fussy eaters, but there are some things they love and some they’d prefer you kept out of their home. Start small and gradually add more as the worm population grows.
- Worm Delights (What they love!):
- Fruit and vegetable scraps (peels, rinds, cores, etc.)
- Coffee grounds and tea bags (without staples or synthetic bags)
- Crushed eggshells (helps with grit and balances pH)
- Cooked pasta and rice (plain, no sauces or spices)
- Plain bread and dough
- Shredded newspaper and cardboard (as bedding and food!)
- Worm No-Nos (What to avoid):
- Meat, dairy products, and oily foods (can attract pests and cause odors)
- Spicy foods and citrus peels in large quantities (can make the bin too acidic)
- Onions and garlic in large quantities (worms don’t like the strong smell)
- Diseased plant matter
- Feces from pets (dogs, cats)
Setting Up Your Vermicompost System: Step-by-Step
Ready to build it? It’s easier than you think. Let’s get your worm bin ready for its new inhabitants.
Step 1: Prepare Your Bin
If you’re using a DIY bin, now’s the time to drill those holes. You’ll want several 1/4-inch to 1/2-inch holes in the bottom for drainage and several more around the top sides for airflow. If you have a multi-tier system, ensure the trays fit together snugly but allow for drainage between them.
Step 2: Add the Bedding
Moisten your bedding materials (shredded newspaper, coco coir, etc.) until they are about as damp as a wrung-out sponge. Fluff them up and fill your bin about 1/3 to 1/2 full. You want a nice, airy layer for your worms to burrow into.
Step 3: Introduce Your Worms
Gently place your purchased worms onto the surface of the bedding. They are nocturnal and sensitive to light, so they will likely burrow down into the bedding quite quickly. This is a good sign they are settling in!
Step 4: Add a Little Food
For the first few days, don’t overload them with food. You can bury a small amount of food scraps (about a handful) in one corner of the bin, perhaps under a bit more bedding. This encourages them to start foraging.
Important Note on Water: Keep the bedding consistently moist. If it seems dry, gently spray it with water. If it’s too wet, add more dry bedding material to absorb the excess moisture. The lid helps retain moisture, but check it regularly.
Feeding Your Worms: The Dos and Don’ts
Worms are not only great composters but also pretty low-maintenance eaters once you get the hang of it. The key is to feed them appropriately and not too much at once.
How Much to Feed?
A good rule of thumb is that a healthy worm bin can process about half its weight in food scraps per day. If you start with 1 pound (approx. 500 grams) of worms, they can eat about 1/2 pound (approx. 250 grams) of food scraps daily. However, it’s always better to start with less and observe.
- Observe: Before adding new food, check if the previous feeding has been mostly eaten. If there’s a lot of uneaten food, wait a bit longer and add less next time.
- Bury the Food: To prevent odors and pests, bury food scraps under the bedding material. You can rotate where you bury the food each time to encourage even composting throughout the bin.
- Chop it Up: Smaller food pieces break down faster. So, chopping or blending your kitchen scraps before adding them can speed up the process.
What’s on the Menu? (Recap)
Remember, stick to fruits, vegetables, coffee grounds, tea bags, and crushed eggshells. Avoid meat, dairy, oily foods, and anything too spicy or acidic.
Caring for Your Worms and Bin
Your worms are going to do most of the hard work, but a little care from you goes a long way in ensuring a healthy composting system.
Moisture Levels
This is critical. The bedding should always feel like a damp sponge – moist but not waterlogged. If it’s too dry, your worms will suffer. If it’s too wet, it can lead to anaerobic conditions (lack of air), which causes foul odors and can harm the worms. You can adjust moisture by adding more damp bedding (to dry it out) or more water (to moisten it).
Temperature
Red wigglers prefer temperatures between 15°C and 25°C (59°F and 77°F). In India, this means you might need to keep your bin in a shaded, cool spot during the hottest months. Avoid direct sunlight or extreme heat. During cooler periods, a warmer spot might be beneficial.
Aeration
Worms need oxygen! Ensure the air holes in your bin are not blocked. You can gently fluff the top layers of the bedding occasionally, being careful not to disturb the worms too much. This also helps prevent compaction.
Troubleshooting Common Issues
Even with the best intentions, you might run into minor issues. Here’s how to handle them:
- Smelly Bin: Usually means it’s too wet, overfed, or not enough air. Try adding dry bedding, reducing food, and gently fluffing the contents.
- Fruit Flies: A few flies are normal, but an infestation can be annoying. Bury food scraps properly, avoid sweet, fermenting items, and consider covering the bin with a mesh screen or a layer of bedding or newspaper.
- Worms Trying to Escape: This usually signals a problem with the bin: too wet, too dry, too acidic, or lack of air. Check your conditions and make adjustments.
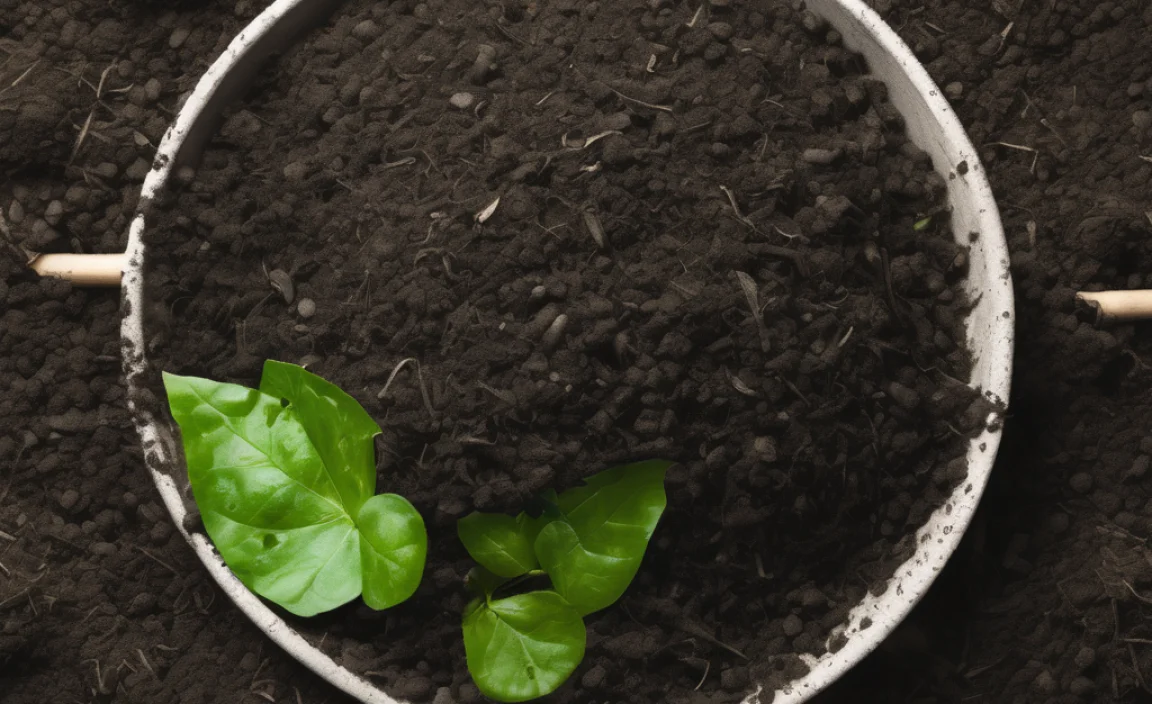
Harvesting Your Worm Castings: The “Black Gold”
After 2-3 months, your worms will have transformed a good portion of your scraps into nutrient-rich vermicast. It looks like dark, crumbly soil and smells earthy. Here’s how to get it out:
Popular Harvesting Methods
-
The Light Method:
Spread a thin layer of your bin contents onto a tarp outdoors in bright light. Worms hate light and will burrow downwards. Scrape off the top layer of castings, and the worms will move further down. Repeat this process until you’re left with mostly worms and a small amount of castings. Collect the worms and return them to your bin.
-
The Migratory Method (for multi-tray bins):
As the worm bin fills up, you add a new tray on top. Add fresh bedding and food scraps to this new tray. The worms will naturally migrate upwards towards the fresh food and bedding. Once most worms have moved to the top tray, you can harvest the castings from the lower tray.
-
Manual Sorting:
Dump the contents onto a clean surface (like a plastic sheet) and manually separate the worms from the castings. This is more labor-intensive but straightforward.
How to Use Your Worm Castings
- Soil Amendment: Mix into your garden soil or potting mix at a ratio of about 1 part castings to 10 parts soil. This improves soil structure and fertility.
- Top Dressing: Sprinkle a thin layer around existing plants, especially vegetables and flowers.
- Liquid Fertilizer (Worm Tea): You can steep worm castings in water for 24 hours to create a nutrient-rich liquid fertilizer. Remember to aerate it if possible, and use it within a day or two. Dilute it with water before use for best results.
What About Worm Leachate?
You might see a dark liquid forming at the bottom of your bin, especially if you have drainage holes. This is called leachate, or “worm tea” (though not the aerated steeped kind). It’s a byproduct of the composting process and full of nutrients.
- Collection: If your bin has a collection tray, drain this liquid regularly.
- Usage: It’s potent! Dilute it significantly with water, usually at a ratio of 1 part leachate to 10 parts water, before using it to water your plants. Do NOT use it undiluted, as it can be too strong and harm plants.
- Troubleshooting: If you have a lot of leachate, your bin might be too wet. Add more carbon-rich bedding (like shredded paper or cardboard) to absorb the excess moisture.
Factors Affecting Vermicomposting Success in India
While vermicomposting is adaptable, certain factors are particularly relevant for success in India.
Climate Considerations
India’s diverse climate means you’ll need to be mindful of temperature and humidity. During the monsoon season, ensure your bin has good drainage and isn’t sitting in standing water. In scorching summers, finding a cool, shaded spot is essential. Some people even bring their bins indoors during extreme weather. A reliable weather source like the India Meteorological Department can help you plan.
Worm Lifespan and Reproduction
Under optimal conditions, red wigglers can live for 1-2 years and reproduce significantly. Factors like temperature, food availability, and moisture directly impact their reproduction rate. If your bin seems sluggish, revisit those core conditions.
Space and Scale
Whether you live in a bustling city like Mumbai or a quieter town, vermicomposting is scalable. A small kitchen bin handles typical household waste. For larger gardens or businesses, you might consider multiple bins or larger custom-built systems. The principles remain the same.
Types of Waste Available
Your local diet influences the type of scraps you’ll have. Indian cuisine often involves a lot of vegetables, fruits, and grains. These are perfect for worms! Be mindful of spicy ingredients or excessive oil, which are best avoided.
Frequently Asked Questions (FAQs)
Q1: How many worms do I need to start?
For a standard 15-20 gallon bin, starting with 1/2 kg to 1 kg (about 500-1000 worms) is a good amount. They will reproduce, and the population will grow with the amount of food you feed them.
Q2: Can I put all my kitchen waste into the worm bin?
No, not everything. You should avoid meat, dairy, oily foods, spicy items, citrus in large quantities, and diseased plants. Stick to fruits, vegetables, coffee grounds, tea bags, and crushed eggshells.
Q3: How often should I feed my worms?
Start by feeding them 2-3 times a week. Always check if the previous food is mostly gone before adding more.

I am passionate about home engineering. I specialize in designing, installing, and maintaining heating, ventilation, and air conditioning systems. My goal is to help people stay comfortable in their homes all year long.