Hey there, fellow home improvers and garden enthusiasts! Ever look at your kitchen scraps and yard waste and think, “There’s gotta be a simpler way to turn this into garden gold?” I hear you! Traditional composting can sometimes feel like a big, messy project. But what if I told you there’s a super neat and tidy way to get fantastic compost, right in your backyard, without all the fuss? Introducing “in-vessel composting,” and trust me, it’s going to make your life a whole lot easier and your garden a whole lot happier. We’re going to break it down, step-by-step, so you can start making your own amazing compost today. Stick around, because we’ve got a game-changer coming your way!
In-Vessel Composting: The Easy Way to Awesome Compost
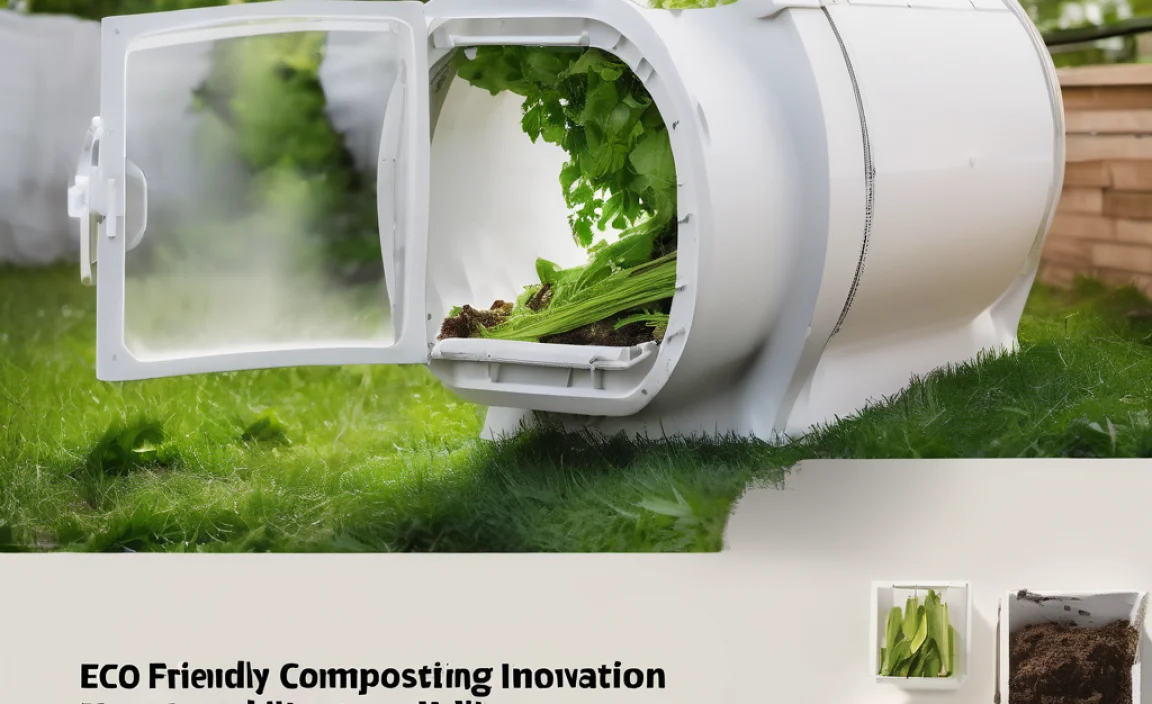
So, you want to compost, but the thought of a big outdoor pile feels a bit… much? Maybe you’re worried about smells, pests, or just the sheer space it takes up. That’s where in-vessel composting shines! Think of it as a contained kitchen for your organic waste. Instead of an open pile, you use a special bin, often called a composter or a tumbler. This keeps everything neatly tucked away, speeds up the composting process, and makes harvesting your finished compost a breeze.
Why is it called “in-vessel”? Simple! You’re doing the composting inside a container, or “vessel.” This control over the environment is key to getting great results quickly and without a lot of the common composting headaches.
Why Choose In-Vessel Composting? Let’s Talk Benefits!
There’s a reason in-vessel composting has become so popular, especially for folks who want effective results without the typical composting drama. Here are some of the big wins:
- Speed: Because the composting ingredients are contained and often aerated (thanks to tumblers!), the microorganisms that break down the waste work faster. You can often get finished compost in a matter of weeks or a few months, rather than many months to a year with traditional methods.
- Odor Control: A well-managed in-vessel system is designed to keep smells contained. Proper balancing of “greens” and “browns” (more on that later!) and good airflow are crucial here. Unlike an open pile that might attract unwanted attention, a sealed vessel keeps things tidy and discreet.
- Pest Prevention: The enclosed nature of these composters is a huge deterrent for pests like rodents and flies. No more worrying about critters raiding your compost!
- Neat and Tidy: If you’ve only got a small yard or even a balcony, an in-vessel composter is a fantastic choice. It looks much tidier than a sprawling compost pile and fits easily into most outdoor spaces.
- Easier Turning/Aeration: Many in-vessel composters, especially tumblers, make mixing and aerating your compost incredibly simple. A few turns of a dial or a good shake can provide all the oxygen your compost microbes need.
- Reduced Leaching: The contained system helps prevent nutrient-rich liquids from washing away, meaning more goodness stays in your compost – ready to feed your plants!
Types of In-Vessel Composters: Finding Your Perfect Match
When we talk about in-vessel composters, there are a few main types you’ll encounter. Each has its own way of working and might appeal to different people.
1. Stationary Bins
These are typically plastic bins with lids and often a door at the bottom for harvesting. They’re a step up from an open pile because they’re enclosed, which helps with heat retention and keeps pests out. You usually add materials from the top. To aerate them, you might use a pitchfork or a specialized aerator tool.
Pros:
- Relatively inexpensive
- Durable and long-lasting
- Good for continuous composting (adding new material as you go)
Cons:
- Aeration can be manual and a bit more work
- Composting can be slower than with tumblers
- Harvesting from the bottom can sometimes be a bit tricky
2. Tumbling Composters
These are often barrel-like containers mounted on a stand, allowing you to easily rotate them. You load them with materials, seal them up, and then give them a spin every few days. The tumbling action mixes everything, introduces oxygen, and breaks up clumps, which significantly speeds up the composting process.
Pros:
- Fast composting times
- Very easy to aerate and mix
- Keeps pests out effectively
- Harvesting is often straightforward
Cons:
- Can be more expensive than stationary bins
- Sometimes have smaller capacities
- Can get heavy when full, though most are designed to be manageable
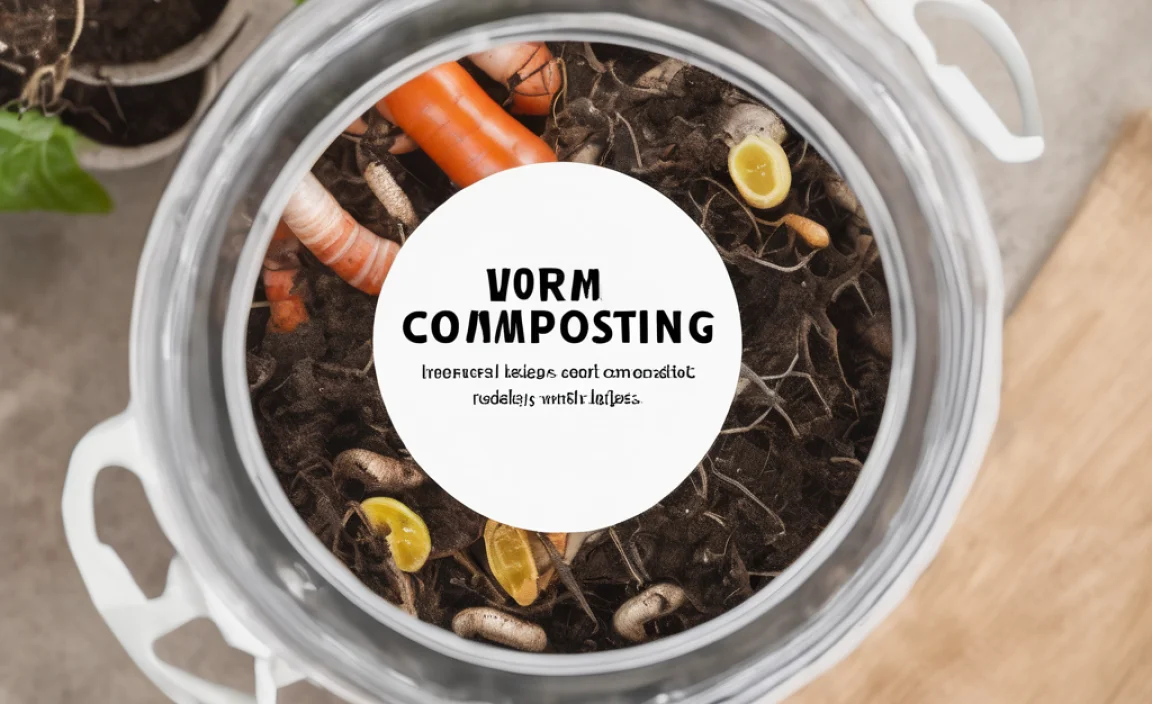
3. Worm Composting Bins (Vermicomposting)
While technically a form of in-vessel composting, vermicomposting uses special worms (like red wigglers) to break down food scraps. These systems are usually multi-tiered trays where worms eat the waste and produce nutrient-rich castings. They are incredibly efficient but require a different approach (and no meat, dairy, or oily foods!).
Choosing the Right One:
For most beginners looking for the “effortless results” promised by “in-vessel composting best,” a tumbling composter is often the top pick. They balance ease of use, speed, and effectiveness perfectly. Stationary bins are great if you’re on a tighter budget or have more patience. Worm bins are a whole different, fascinating world for those who want to dive deep!
What Can You Compost? The “Greens” and “Browns” Game
To get the best compost, you need to feed your composter the right stuff. Think of it like baking a cake – you need the right ingredients in the right proportions! Garden composters thrive on a mix of “greens” and “browns.”
Greens (Nitrogen-Rich Materials)
These are the nitrogen-rich materials that provide the “fuel” for the microorganisms doing the composting work. They tend to be moist and break down quickly.
- Fruit and vegetable scraps (peels, cores, etc.)
- Coffee grounds and tea bags
- Grass clippings (in moderation!)
- Plant trimmings (non-diseased)
- Eggshells (crushed)
Browns (Carbon-Rich Materials)
These are the carbon-rich materials that provide the “bulk” and help with aeration. They break down slower and prevent the compost from getting too wet or smelly.
- Dry leaves
- Shredded newspaper and cardboard (avoid glossy paper)
- Straw and hay
- Twigs and small branches (chopped)
- Sawdust (from untreated wood, in moderation)
What NOT to Compost (Especially in Beginner Systems)
Some items can cause problems like attracting pests, creating strong odors, or spreading diseases. It’s best to steer clear of these, particularly when you’re starting out:
- Meat, fish, and bones
- Dairy products (milk, cheese, yogurt)
- Oily or greasy foods
- Diseased plants
- Weeds that have gone to seed
- Pet waste (dog or cat feces)
- Coal or charcoal ash
- Treated wood products
- Synthetic materials
The Ideal Ratio: The Secret to Effortless Results
The magic number for great compost is roughly a 2:1 or 3:1 ratio of browns to greens by volume. So, for every two or three scoops of “browns” you add, toss in one scoop of “greens.” This balance is crucial for maintaining the right moisture level, airflow, and temperature for effective decomposition.
If your compost starts smelling like ammonia, you likely have too many greens. Add more browns! If it’s dry and not breaking down, you might need more greens or a bit of water.
Getting Started: Your Step-by-Step Guide to In-Vessel Composting
Ready to jump in? It’s easier than you think! Here’s how to set up and start your in-vessel composter for those effortless results.
Step 1: Choose Your Composter
As we discussed, decide if a stationary bin or a tumbler is best for your space, budget, and how much effort you want to put into turning. For maximum ease, a good quality tumbler is hard to beat.
Step 2: Find the Perfect Spot
Place your composter in a convenient location. Ideally, it should be:
- On level ground.
- In a spot that gets some sun (this helps heat up the compost) but not scorching all-day sun, which can dry it out too quickly. Partial shade is often perfect.
- Accessible for adding materials and for turning or harvesting.
- If using a tumbler, ensure you have enough space around it to turn it freely.
Step 3: The First Layer
When you first set up your composter, it’s a good idea to start with a base layer of coarse “brown” materials like small twigs or wood chips. This helps with drainage and aeration from the bottom.
Step 4: Start Adding Your Materials
Begin adding your kitchen scraps (“greens”) and yard waste (“browns”). Remember the ratio! The easiest way to manage this is to have a small bin in your kitchen for scraps and a separate pile or area for your brown materials. When you empty your kitchen bin, grab some browns to add along with it.
Pro Tip: Chop larger items into smaller pieces. Smaller pieces have more surface area for the microbes to work on, speeding up decomposition.
Step 5: Aerate Regularly (The Key to Speed!)
This is where the “vessel” really pays off.
For tumblers: Give it a good spin every 2-3 days. This mixes everything and introduces oxygen.
For stationary bins: Use a compost aerator tool or a pitchfork to poke holes and stir the contents every week or so. Don’t skip this – oxygen is vital for the aerobic bacteria that compost effectively and without odor.
Step 6: Maintain Moisture
Your compost pile should feel like a damp, wrung-out sponge. Not soaking wet, not bone dry.
If it’s too dry, add some water. Tumblers are easy to add water to; for stationary bins, you might need to add it from the top.
If it’s too wet (and potentially smelly), add more “browns” to absorb excess moisture and improve airflow.
Step 7: Be Patient and Observe
Composting is a natural process. Keep adding materials, keep aerating, and keep the moisture right. You’ll notice the temperature of the pile might rise initially, then cool down as it composts. You’ll also see the materials breaking down.
Step 8: Harvest Your Compost!
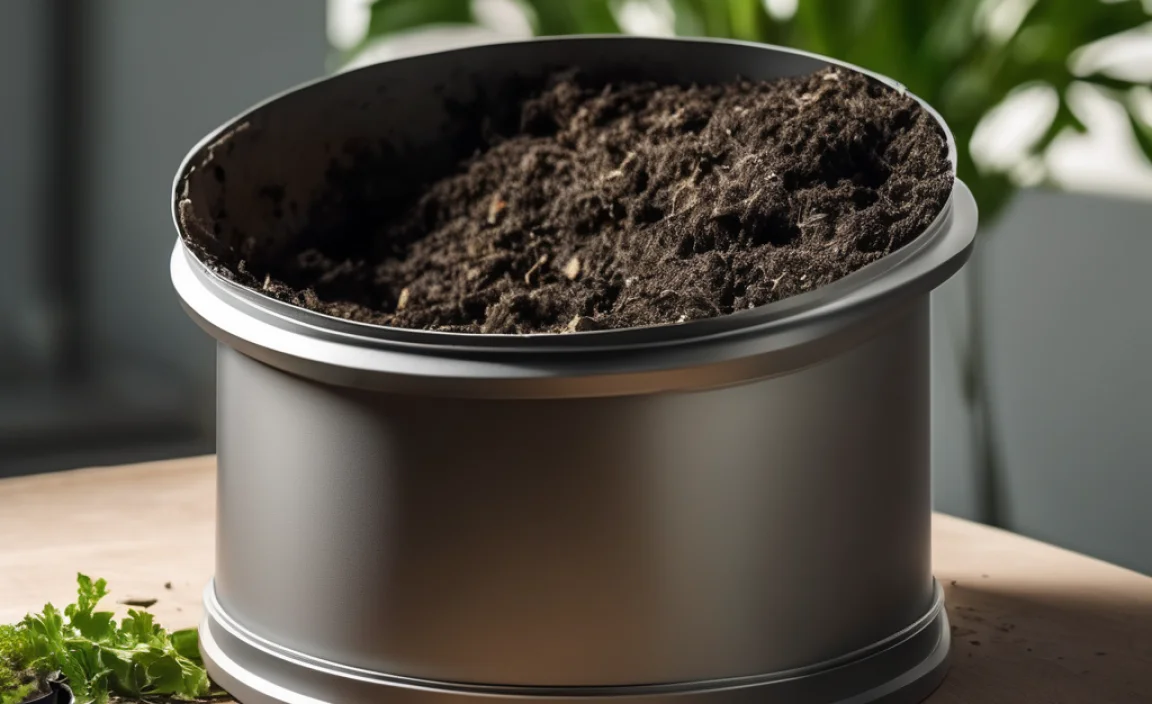
When the materials are dark, crumbly, and smell earthy (like a forest floor), they’re ready to use!
For tumblers: You’ll typically empty the whole bin or have a separate door.
For stationary bins: Use the bottom door to scoop out the finished compost. Sometimes, the material at the bottom finishes first, allowing for continuous composting.
You might find some larger, uncomposted bits. You can either put these back into the composter with your next batch or sift them out.
Troubleshooting Common In-Vessel Composting Hiccups
Even with user-friendly systems, you might run into a common issue or two. Don’t worry, they’re usually easy fixes!
Problem: My compost smells bad (like rotten eggs or ammonia).
Cause: Too much nitrogen (too many greens) or not enough air. This means the composting process is going anaerobic (without oxygen), which creates bad smells.
Solution:
- Add a generous amount of carbon-rich “browns” (like shredded paper, dry leaves, or sawdust).
- For tumblers, give it a good, thorough spin.
- For stationary bins, use a compost aerator to mix and introduce air deep into the pile.
- Ensure you’re not adding meat, dairy, or oily foods.
Problem: My compost is very dry and not breaking down.
Cause: Not enough moisture or too many “browns.” Without moisture, the microbes can’t thrive.
Solution:
- Add water! Aim for the “damp sponge” consistency.
- If you’ve been adding a lot of browns, try adding a few more greens from your kitchen scraps.
- Mix everything thoroughly to distribute the moisture.
Problem: I see pests (flies, small bugs).
Cause: Often caused by exposed food scraps or a compost that’s too wet, attracting flies.
Solution:
- Always bury fresh kitchen scraps under a layer of “brown” material.
- Ensure your composter lid is securely closed.
- If it’s too wet, add more browns.
- Good news: Most beneficial composting critters (like beneficial mites and springtails) are a sign of a healthy compost! It’s the larger pests you want to avoid.
Problem: It’s taking too long to compost.
Cause: Often a combination of issues like poor aeration, incorrect moisture levels, or an unbalanced green-to-brown ratio.
Solution:
- Focus on the basics: consistent turning/aeration, proper moisture, and a balanced mix of greens and browns.
- Chop materials into smaller pieces.
- Ensure your composter is in a location that gets some warmth.
Using Your Finished Compost: The Sweet Reward
Once your compost is ready, you’ve got black gold! This nutrient-rich material is fantastic for your garden. Here’s how to use it:
- Soil Amendment: Mix 1-3 inches of compost into your garden beds before planting. It improves soil structure, drainage, and water retention. Your plants will thank you!
- Top Dressing: Spread a layer of compost around existing plants, shrubs, and trees. This acts as a natural mulch, suppresses weeds, and slowly releases nutrients.
- Potting Mix: Mix compost with a good potting soil to create a nutrient-rich blend for your container plants and indoor pots.
- Compost Tea: You can even make a liquid fertilizer by steeping compost in water.
To learn more about the benefits of compost for soil health, check out resources from university extensions.
In-Vessel Composting vs. Traditional Composting: A Quick Look
To really highlight why in-vessel is so great for beginners, let’s compare it to the more traditional pile method.
| Feature | In-Vessel Composting | Traditional Open Pile Composting |
|---|---|---|
| Speed of Composting | Faster (weeks to a few months) | Slower (months to a year+) |
| Odor Control | Excellent (contained) | Fair to Poor (can be smelly if not managed well) |
| Pest Attraction | Minimal to None (enclosed) | Can attract rodents, flies, etc. |
| Space Required | Compact, often suitable for small yards/balconies | Requires more space for a pile |
| Aesthetics | Neat, tidy, looks like outdoor furniture | Can look messy if not maintained |
| Manual Labor (Turning) | Easy (tumblers spin, bins may need occasional poking) | Requires more physical effort with a pitchfork |
| Cost | Initial purchase cost for the vessel | Can be free to build, but may need materials |
Frequently Asked Questions About In-Vessel Composting
Q1: How often do I need to turn my in-vessel composter?
A1: For tumblers, aim to give them a good spin every 2-3 days. For stationary bins, aerating with a tool