“`html
Anaerobic Composting USA: Your Essential Beginner’s Guide
Ever feel like your kitchen scraps are just… piling up? You want to compost, but the thought of turning piles and dealing with smells seems a bit much. Especially when you’re starting out in the USA, figuring out what works can feel overwhelming. But what if I told you there’s a way to turn that waste into something useful, even with less turning and fuss? Yep, we’re talking about anaerobic composting. It sounds technical, but it’s actually quite straightforward once you get the hang of it. Stick with me, and I’ll walk you through exactly how to get started, step-by-step.
In this guide, we’ll break down anaerobic composting for folks here in the USA. We’ll cover what it is, how it differs from the usual methods, what you’ll need, and most importantly, how to do it yourself without all the complicated stuff. Ready to turn that kitchen waste into black gold? Let’s get started!
What is Anaerobic Composting, Anyway?
So, what’s the big deal with “anaerobic” composting? Think “an” as in “without,” and “aerobic” as in “air.” Easy, right? Anaerobic composting is a process where organic materials break down without oxygen. This is different from the more common method, aerobic composting, which relies on oxygen-loving microbes to do the work.
In aerobic composting, you usually see piles or bins where air circulation is key. You turn it, you watch it, and the microbes gobble up the waste. Anaerobic composting, on the other hand, happens in sealed or mostly sealed systems. This creates an environment where different types of microbes take over. These microbes don’t need oxygen. They’re super efficient at breaking down stuff, and they do it a bit differently, often producing methane as a byproduct (which can even be captured for energy, but that’s a more advanced topic!).
For beginners in the USA, the most common and manageable form of anaerobic composting is often related to specialized containers or bins designed to keep air out. This can be a simpler approach for some, especially if space is limited or you want a more hands-off method once set up. We’ll focus on these simpler systems.
Anaerobic vs. Aerobic Composting: What’s the Difference for You?
It’s good to know how these two methods stack up. This helps you pick what’s best for your situation here in the USA. Here’s a quick look:
| Feature | Aerobic Composting | Anaerobic Composting |
|---|---|---|
| Oxygen Needs | Requires plenty of oxygen. Needs frequent turning and aeration. | Happens without oxygen. Systems are typically sealed or have limited air. |
| Microbes Involved | Aerobic bacteria (need oxygen). | Anaerobic bacteria (don’t need oxygen). |
| Speed | Generally faster decomposition if managed well (weeks to months). | Can be faster or slower depending on the system and materials. Often very quick in specialized systems. |
| Smell | Should have an earthy, pleasant smell if managed correctly. Bad smells indicate issues (too wet, not enough air). | Can produce methane and ammonia, which can smell. Proper management is key to minimize odors. Some systems are designed to be odorless. |
| End Product | Rich, dark compost that looks like soil. | Can produce a compost-like material, but the process is different. In some systems, it’s an initial breakdown stage before further aerobic composting or direct use. |
| Effort Level | Requires regular turning and monitoring. | Can be more “set it and forget it” once materials are added, depending on the system. Less physical turning. |
| Common Systems | Open piles, tumblers, bins with vents. | Sealed bins, some types of digesters, Bokashi systems (though Bokashi is a fermentation process that’s a precursor to composting). |
For many beginners in the USA looking for a simpler, less labor-intensive option, anaerobic methods (especially those that are contained and odor-controlled) can be appealing. It’s a different path, but still leads to reducing waste and creating valuable soil amendments.
Why Choose Anaerobic Composting? The Pros for USA Homeowners & Renters
Okay, so why might you consider going anaerobic right here in the United States? It’s not for everyone, but it has some neat advantages:
- Less Work, Less Turning: This is a big one! If you’re not keen on the physical effort of turning compost piles regularly, anaerobic systems often require significantly less manual intervention. Ideal for those with busy schedules or physical limitations.
- Space-Saving Solutions: Many anaerobic composting systems are compact and enclosed, making them perfect for smaller yards, balconies, or even indoor use (with some models, like Bokashi buckets).
- Odor Control: While anaerobic processes can smell, many modern systems are designed to minimize or eliminate unpleasant odors. This is a huge win for suburban living or apartment dwellers.
- Faster Initial Breakdown: Some anaerobic methods, like fermentation-based systems, can rapidly break down food scraps in a matter of weeks, making the materials ready for further composting or soil amendment.
- Handles More Types of Waste (with specific systems): Certain anaerobic methods, like Bokashi, can process things like meat scraps, dairy, and oily foods that are often discouraged in traditional aerobic composting.
- Potential for Energy Production (Advanced): For those who get really into it, anaerobic digestion can be scaled up to capture methane gas for biogas and fertilizer from the leftover digestate. This is more for larger-scale or farm applications but is a cool, albeit complex, possibility.
Given these benefits, anaerobic composting can definitely be a practical choice for many people across the USA who want to compost but find traditional methods a bit challenging.
What You’ll Need: Getting Started with Anaerobic Composting
The equipment you need really depends on the type of anaerobic composting you decide to do. For beginners in the USA, we’ll focus on the most accessible methods, which often involve specialized bins or buckets. The most popular beginner-friendly anaerobic method that’s easy to manage in a home setting is often Bokashi, which is technically a fermentation process but works in a similar, oxygen-excluding way and is often grouped with anaerobic composting for home use.
Here’s a breakdown of what you might need for a Bokashi-style system, which is a great entry point:
Essential Gear: The Bokashi Bucket System
A Bokashi system typically involves two airtight buckets with spigots and a special inoculant.
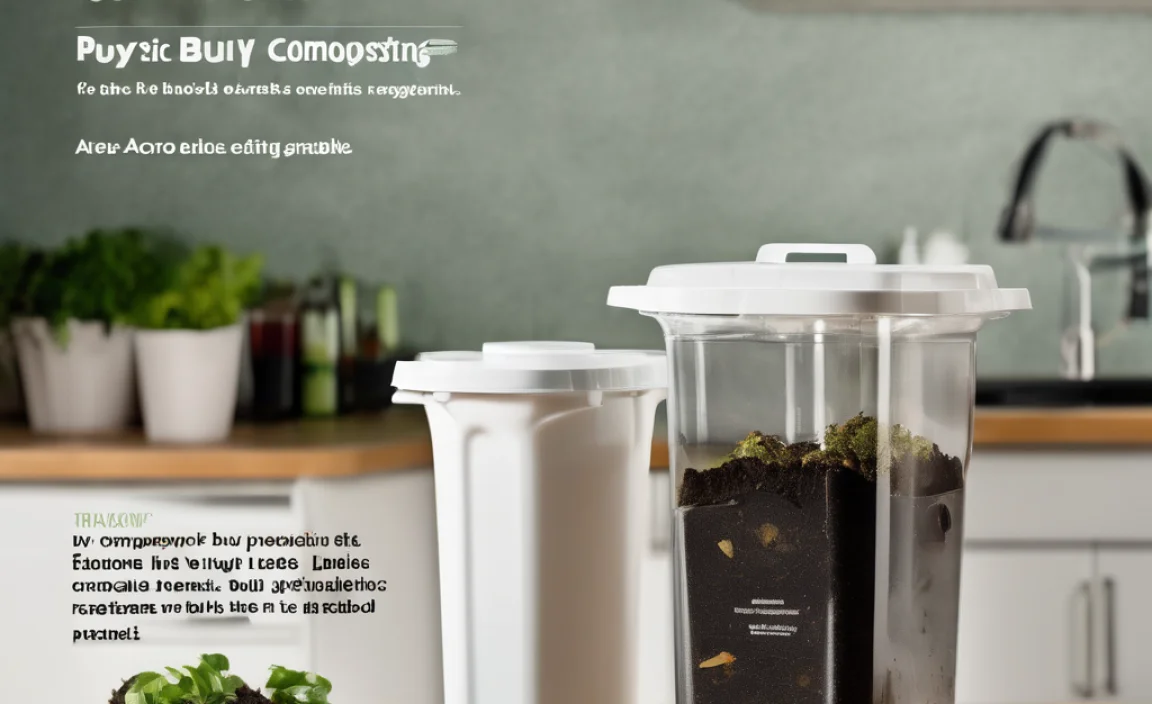
- Bokashi Buckets: You’ll need at least two of these special buckets. They are designed to be airtight and usually come with a lid that seals tightly. A crucial feature is a spigot near the bottom. This spigot is used to drain off the liquid that the fermentation process produces. This liquid, called “Bokashi tea,” is a nutrient-rich fertilizer. A common setup is to have one bucket you’re filling while the other is fermenting. You can buy pre-made Bokashi bucket systems online or from garden supply stores in the USA.
- Airtight Lids: The buckets must have lids that seal very tightly. This is what keeps the oxygen out and allows the anaerobic fermentation to happen.
- Bokashi Bran (Inoculant): This is the magic ingredient! It’s typically a carrier (like wheat bran or rice bran) that has been inoculated with Effective Microorganisms (EM). These are a mix of beneficial bacteria, yeasts, and fungi. You sprinkle a little bit of this bran on top of your food scraps each time you add them to the bucket. You can find Bokashi bran online or at many garden centers.
- Tools for Chopping: While not strictly mandatory, chopping your food scraps into smaller pieces (about 1-2 inches) helps the microbes work more efficiently. A kitchen knife or a small manual chopper can be useful.
- A Place to Store: Keep your Bokashi bucket in a convenient kitchen spot, away from extreme temperatures. Once fermented, you’ll need a place to bury the contents or add them to a traditional compost pile.
Optional but Handy Items
- A Second Bucket (or Composter): While you can manage with one bucket, having two allows you to continue adding scraps to one while the other is fermenting. This is more efficient.
- Gloves: For handling the bokashi bran and the fermented material.
- Small Shovel or Trowel: For burying the fermented material in your garden or adding it to a compost pile.
You can find Bokashi starter kits and additional bran from numerous suppliers in the USA, often available through online retailers or specialty garden shops. Always check reviews to ensure you’re getting a quality product.
DIY Anaerobic Composting: Your Step-by-Step Guide
Let’s get down to business! This guide will walk you through using a Bokashi system, which is a fantastic, beginner-friendly way to do anaerobic composting at home in the USA.
Step 1: Prepare Your Bucket
If you bought a pre-made Bokashi bucket system, it’s likely ready to go. Just make sure the lid seals tightly and the spigot is attached securely. If you’re handy, you can create your own by modifying a food-grade bucket with a tight-fitting lid and a spigot. Ensure it’s clean before you start.
Step 2: Add Your Food Scraps
Start by adding your kitchen scraps to the bucket. Remember: Bokashi can handle things traditional composting often avoids, like meat, dairy, and cooked foods. However, avoid adding large bones, excessive oils, or liquids that aren’t from food.
Tip: Chop larger scraps into smaller pieces (about 1-2 inches). This increases the surface area for the microbes to work on, speeding up the fermentation.
Step 3: Sprinkle the Bokashi Bran
Once you’ve added a layer of scraps (about 1-2 inches deep), lightly sprinkle a tablespoon or two of Bokashi bran over them. You want to ensure all the scraps are lightly covered. This bran contains the “Effective Microbes” (EM) that will start the fermentation process.
Step 4: Press Down the Scraps
Use a plate, a small towel, or your hands to press down the scraps firmly. The goal here is to remove as much air from the bucket as possible, encouraging the anaerobic conditions needed for fermentation.
Step 5: Seal the Bucket Tightly
Place the airtight lid securely onto the bucket. This is the most critical step to keep oxygen out and let the anaerobic fermentation begin. If your lid doesn’t seal perfectly, you might want to add a weight on top of the lid or use a towel to help create a better seal.
Step 6: Repeat the Process
Continue adding food scraps, sprinkling with Bokashi bran, pressing down, and sealing the lid each time. You’re essentially building layers of fermented material. Don’t overfill your bucket; leave a few inches of space at the top for the fermentation process.
Step 7: Drain the “Bokashi Tea”
As the food scraps ferment, they release liquid. You’ll need to drain this liquid from the spigot at the bottom of the bucket regularly. Do this at least every 1-2 days. This “Bokashi tea” is a potent liquid fertilizer! Dilute it with water (about 1:100 ratio – a splash in a gallon of water) before using it on your plants. Never let the liquid pool at the bottom of the bucket, as this can cause the scraps to become too wet and anaerobic digestion can go wrong, leading to bad odors.
Step 8: The Fermentation Period
Once your bucket is full, don’t add any more scraps. Continue to drain the liquid as needed. Now, let the bucket sit sealed for about two weeks. This is the main fermentation period where the microbes work their magic, pickling your food waste. You might notice a sweet, sour, or yeasty smell – this is normal!
Step 9: Finishing the Process (The “Composting” Part)
After the two-week fermentation, you’ll have a bucket full of pickled food waste. This is not finished compost yet! It’s been fermented, but the organic matter is still largely intact. You have a couple of options for what to do next:
- Bury it: Dig a trench in your garden (at least 8-10 inches deep) and bury the fermented material. Cover it with soil. The microbes in the soil will continue the decomposition process. Wait at least two weeks after burying before planting anything in that spot.
- Add to a traditional compost pile: Mix the fermented contents into your existing aerobic compost pile or bin. The pre-fermented material will break down much faster in the aerobic environment.
- Use a second stage composter: Some specialized Bokashi composters are designed to continue the process.
If you bury it or add it to a compost pile, it will take a few more weeks to fully break down into usable compost. The beauty is that the initial anaerobic fermentation has already pre-digested much of the material, making the subsequent decomposition much quicker and more complete.
What Can You Compost Anaerobically (Bokashi)?
One of the great things about the Bokashi method of anaerobic composting is its versatility. You can essentially put most of your kitchen waste into it!
Great for Bokashi:
- Fruit and vegetable scraps
- Meat and fish scraps (bones included, but avoid very large ones)
- Dairy products (cheese, yogurt, butter)
- Cooked leftovers
- Coffee grounds and tea bags
- Eggshells
- Bread and grains
- Small amounts of paper or cardboard (shredded)
What to Avoid or Use Minimally:
- Excessive amounts of oil or grease
- Large, hard bones (like those from whole chickens or large roasts)
- Non-organic materials (plastic, metal, glass)
- Large amounts of liquid from other sources (like soup broth without solids)
- Diseased plant material (though less of a concern with Bokashi than traditional composting)
It’s important to remember that the fermented material still needs a second stage (burying or adding to an aerobic compost pile) to fully become finished compost. But the ability to process a wider range of food waste, including meat and dairy, is a huge advantage for many households in the USA.
Common Challenges and Troubleshooting Your Anaerobic System
Even with a simple system like Bokashi, you might run into a few bumps in the road. Here’s how to tackle them:
Challenge: Bad Smells (Rotten Egg or Ammonia Smell)
Why it happens: This usually means the system isn’t truly anaerobic, or the liquid isn’t being drained properly. The microbes are getting confused, or something else is going wrong.
Solution:
- Drain the liquid! This is the most common fix. Ensure you’re draining the Bokashi tea daily or every other day. Never let it pool at the bottom.
- Check the seal. Make sure the lid is truly airtight. If not, try pressing it down harder, or even adding a towel or weight to help it seal.
- Add more bran. If it feels too wet or is smelling off, sprinkle an extra layer of Bokashi bran.
- Chop scraps smaller. Smaller pieces ferment better.
Challenge: Mold Growth
Why it happens: Some mold is normal, especially the white, fuzzy kind that looks like yeast. However, fuzzy, colored molds (blue, green, black) can sometimes indicate an issue.
Solution:
- Ensure enough bran. The bran helps create the right environment.
- Press down scraps well. This removes air pockets where unwanted molds might thrive.
- Usually not a deal-breaker. As long as there’s no foul odor, a little bit of interesting mold growth is often okay, especially if it’s white and yeasty.
Challenge: The Bokashi Tea is Too Strong or Smelly
Why it happens: You might have added too many “wet” scraps or not enough bran. Or, it’s just very concentrated.
Solution:

I am passionate about home engineering. I specialize in designing, installing, and maintaining heating, ventilation, and air conditioning systems. My goal is to help people stay comfortable in their homes all year long.