Ever feel like you’re throwing away perfectly good stuff? Food scraps, yard trimmings – it all piles up. And then, it just sits in a landfill, not doing any good. It’s a common frustration, feeling like there must be a better way. The good news? There absolutely is!
We’re going to dive into circular economy composting. Think of it as a supercharged way to recycle your organic waste, turning trash into treasure for your garden. This guide is all about making it simple, step-by-step, so you can start composting with confidence. Let’s get your garden the best food it’s ever had!
What is Circular Economy Composting, Anyway?
You’ve probably heard of composting. It’s been around forever! But “circular economy composting” takes it a step further. Imagine a world where nothing is wasted. Everything goes back to where it came from, in a continuous loop. That’s the heart of a circular economy.
In the traditional “linear economy,” we take resources, make products, use them, and then throw them away. Think of a single-use plastic bottle that ends its life in a landfill. It’s a one-way street, and it creates a lot of waste.
Circular economy composting is part of a bigger picture. It’s all about closing that loop. Instead of throwing food scraps and yard waste into the garbage to rot in a landfill (and produce harmful methane gas!), we actively turn them into nutrient-rich compost. This compost then nourishes our soil, helping plants grow better. These plants might eventually become food, and their scraps come back to the compost pile. See? A beautiful, continuous cycle!
Why is this so important, especially now, heading towards 2025? Because our planet needs it. Landfills are overflowing. We’re using up natural resources faster than we can replenish them. Composting, as a cornerstone of the circular economy, is a tangible, hands-on way each of us can make a real difference right at home.
Why Composting is Your Garden’s Best Friend (and a Planet Saver!)
Let’s talk benefits. Composting isn’t just about being eco-friendly (though it’s a huge plus!). It’s also incredibly practical, especially for your garden.
- Super Soil: Compost is like a multivitamin for your soil. It adds essential nutrients that help your plants grow bigger, stronger, and healthier. Think vibrant flowers and delicious veggies!
- Better Soil Structure: Compost acts like a sponge. It helps sandy soil hold more water and nutrients, and it loosens up heavy clay soil, making it easier for plant roots to breathe and grow.
- Less Waste, More Savings: You’ll throw away less trash, meaning fewer trash bags and potentially lower waste disposal fees. Plus, you’ll be buying less fertilizer for your garden.
- Reduces Landfill Burden: Food scraps and yard waste make up a significant portion of household trash. Composting diverts this material, reducing the strain on our landfills.
- Cuts Down on Greenhouse Gases: When organic matter decomposes in a landfill (anaerobically, meaning without oxygen), it produces methane, a potent greenhouse gas. Composting (aerobically, with oxygen) dramatically reduces these emissions.
- Water Conservation: Healthy soil enriched with compost holds moisture better, meaning you’ll need to water your plants less often.
Getting Started: What You Need for Circular Economy Composting
The beauty of composting is that you don’t need fancy equipment to start. You can get going with very little, but a few key things will make the process smoother and more efficient.
Choosing Your Composting Method
There are a few main ways to compost, depending on your space and how much effort you want to put in. For beginners, we’ll focus on the most common and easy-to-manage methods.
- Compost Bin (Enclosed System): These are great for keeping things tidy and deterring pests. They can be made of plastic, wood, or metal. Many have lids and doors for easy access.
- Open Pile: The simplest method! Just pile your organic materials in a designated spot in your yard. It’s best if it’s out of direct, scorching sun and has good air circulation.
- Tumbler Composter: These are rotating bins that make it super easy to mix your compost. Just give it a turn every few days, and you’ll speed up decomposition significantly.
Essential Tools (The Bare Minimum)
You can absolutely start with just what you have, but these items will make things much easier:
- A Pitchfork or Garden Fork: For turning and aerating your compost pile.
- A Shovel: To move compost around and add materials.
- A Kitchen Compost Caddy: A small bin with a lid to collect food scraps in your kitchen before taking them out to the main compost bin.
- Water Source: A hose or watering can to keep your compost pile moist.
Optional (But Helpful!) Gadgets
These aren’t necessary to start, but they can improve your composting experience:
- Compost Thermometer: To monitor the temperature of your pile, ensuring it’s hot enough to kill weed seeds and pathogens.
- Shredder: For breaking down larger yard waste into smaller pieces, which composts faster.
- Compost Aerator Tool: A specialized tool designed to easily aerate your compost pile without a lot of heavy lifting.
The Magic Mix: What to Compost and What to Avoid
This is where most beginners get a little confused. The key to successful composting is getting the right balance of “greens” and “browns.
Greens: These are your nitrogen-rich materials. They provide moisture and essential heat for decomposition.
- Fruit and vegetable scraps
- Coffee grounds and tea bags (no staples!)
- Grass clippings (in thin layers to avoid matting)
- Plant trimmings (non-diseased)
- Eggshells (crushed)
Browns: These are your carbon-rich materials. They provide bulk and allow air to circulate.
- Dry leaves
- Shredded newspaper or cardboard (avoid glossy or colored inks)
- Straw or hay
- Small twigs and branches (chopped up)
- Sawdust (from untreated wood only)
What to AVOID: You want to keep these out of your compost bin to prevent attracting pests, spreading disease, or creating foul odors.
- Meat, fish, and bones
- Dairy products (cheese, milk, yogurt)
- Oily or greasy foods
- Diseased plants
- Weeds that have gone to seed
- Pet waste (dog and cat feces)
- Inorganic materials (plastic, metal, glass)
- Treated wood or sawdust
- Coal ash or charcoal briquettes
The Golden Ratio: Aim for a mix of about 2 parts Browns to 1 part Greens. This isn’t an exact science, but having more browns than greens usually prevents a slimy, stinky mess.
Step-by-Step: Building Your Compost Pile Like a Pro
Ready to get your hands dirty? Here’s how to build a composting system that works wonders.
Step 1: Choose Your Location
Pick a spot for your compost bin or pile that is:
- Convenient: Easy to access from your kitchen and garden.
- Well-drained: You don’t want your compost sitting in a puddle.
- Partially Shaded: Too much direct sun can dry out the pile, while too much shade might keep it too wet.
- Away from Structures: Give it a little breathing room from your house or shed.
Step 2: Start with a Base Layer of Browns
Begin by putting a layer of coarse brown materials (like small twigs or straw) at the bottom of your bin or chosen spot. This helps with drainage and airflow from underneath. About 4-6 inches is a good start.
Step 3: Add Your Greens and Browns
Now, start layering your kitchen scraps (greens) and yard waste (browns). Try to alternate layers, like making a lasagna. A layer of greens followed by a layer of browns, then more greens, and so on. Chop up larger items into smaller pieces to speed up decomposition.
Pro Tip: Chop up or shred your materials as much as possible. Smaller pieces break down much faster!
Step 4: Keep it Moist
Your compost pile should be as damp as a wrung-out sponge. Not dripping wet, and not bone dry. If it seems too dry, add some water with your hose or watering can. If it’s too wet (and starts to smell bad), add more brown materials to absorb the excess moisture.
Step 5: Aerate (Turn) Your Pile
This is crucial for fast, healthy composting. Oxygen is needed for the microorganisms that break down the organic matter. Use your pitchfork or garden fork to turn the pile. Aim to mix the outer layers into the center and vice versa. How often? Every 1-2 weeks is great. If you have a tumbler, just give it a spin every few days.
If you don’t turn it often, it will still compost, but it will take much longer and might get smelly because it starts to decompose anaerobically (without oxygen).
Step 6: Monitor and Wait!
Keep adding your kitchen scraps and yard waste, always trying to maintain that green-to-brown balance and moisture level. You’ll start to notice the pile shrinking and the material at the bottom becoming dark, crumbly, and earthy-smelling. This is your finished compost!
The time it takes varies greatly depending on the materials, how often you turn it, its size, and the weather. It can take anywhere from a few months to a year. A hot compost pile (around 130-160°F or 55-70°C) will decompose much faster, often within a few months, but this requires more careful management.
Troubleshooting Common Composting Problems
Even experienced composters have the occasional hiccup. Don’t get discouraged if something seems off. Here are a few common issues and how to fix them:
| Problem | Possible Cause | Solution |
|---|---|---|
| Bad Smell (Rotten Eggs, Ammonia) | Too many “greens” (nitrogen-rich materials), pile is too wet, not enough air. | Add more “browns” (carbon-rich materials like dry leaves or shredded cardboard). Turn the pile to aerate it. If too wet, add dry browns. |
| Pile Isn’t Heating Up / Decomposing Slowly | Not enough “greens,” pile is too dry, pile is too small, not enough aeration. | Add more greens. Check moisture and add water if dry. Ensure your pile is at least 3x3x3 feet. Turn the pile more regularly. |
| Attracting Pests (Flies, Rodents) | Exposed food scraps, adding meat/dairy/oils. | Bury kitchen scraps deep within the pile, under a layer of browns. Avoid adding prohibited items (meat, dairy, etc.). Ensure your bin has a secure lid if pests are a major concern. |
| Pile is Too Wet and Slimy | Too much “greens,” not enough “browns,” excessive rain. | Add plenty of dry “brown” materials (sawdust, shredded paper, leaves) and turn the pile thoroughly. Cover the pile if heavy rain is expected. |
| Weeds or Seeds Not Dying | Pile not hot enough, composting too quickly before pasteurization. | Ensure your pile reaches adequate temperatures (around 130-160°F or 55-70°C) for a sustained period. This may require a larger pile or more active management. Always add questionable weed seeds to the hottest part of the pile during active decomposition. |
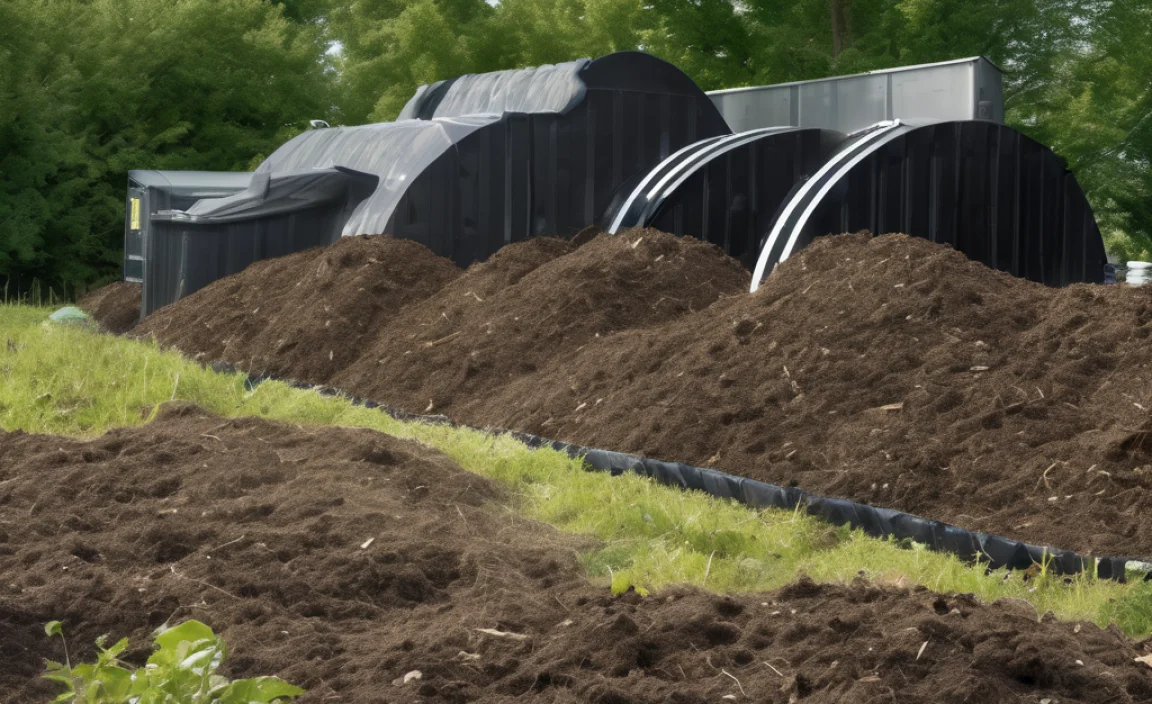
Circular Economy Composting in Urban Settings
Think you need a big backyard to compost? Think again! Circular economy composting is perfectly achievable in smaller spaces, even apartments.
- Worm Composting (Vermicomposting): This is a superstar for small spaces. Special composting worms (like red wigglers) do the work for you in a compact bin. You feed them kitchen scraps, and they produce amazing worm castings (worm poop!), which are like super-fertilizer. You can buy worm bins or easily make your own. Check out resources from your local EPA (Environmental Protection Agency) for basic composting principles that apply here too.
- Bokashi Composting: This is a bit different. It’s an anaerobic fermentation process that uses a special microbial inoculant (Bokashi bran). You can compost all food scraps, including meat and dairy, in a sealed bucket. The fermented material then needs to be buried in soil or added to a traditional compost pile to finish decomposing without any smell. It’s a great pre-composting step for urban dwellers.
- Community Gardens and Drop-off Sites: Many cities have community gardens with composting programs where residents can drop off their scraps. Some municipalities also offer curbside composting programs.
The goal remains the same: divert organic waste and create valuable soil amendment while contributing to a more sustainable, circular system.
When is My Compost Ready?
You’ll know your compost is ready when it:
- Looks dark brown and crumbly.
- Smells earthy and pleasant, like forest soil.
- You can no longer recognize the original materials (no banana peels or coffee grounds!).
- The temperature of the pile has cooled down to ambient temperature.
Once it’s ready, you can sift it through a screen to remove any larger, uncomposted pieces (which can go back into a new compost pile). Then, it’s ready to use!
How to Use Your Compost
You’ve done it! You’ve turned waste into black gold. Here’s how to put your amazing compost to work:
- Soil Amendment: Mix about 2-3 inches of compost into your garden beds before planting. This improves soil structure and fertility for the entire growing season.
- Top Dressing: Spread a thin layer (about 1 inch) of compost around existing plants, shrubs, and trees. This feeds the soil and helps retain moisture.
- Potting Mix: For container plants, mix compost with other potting materials like peat moss or coir. A common ratio is one-third compost, one-third peat moss/coir, and one-third perlite or vermiculite for drainage.
- Lawn Care: Top-dress your lawn with a thin layer of compost in the spring or fall. It helps establish new grass and revitalizes existing lawns.
Using compost regularly will build healthier, more resilient soil year after year, contributing to that beautiful circular economy we’re aiming for.
Conclusion: Join the Circular Movement!
Composting is more than just a gardening hack; it’s a powerful tool for living more sustainably. By turning your kitchen scraps and yard waste into nutrient-rich compost, you’re actively participating in the circular economy. You’re closing the loop, reducing waste, enriching your soil, and helping the planet.
Don’t be intimidated! Start small, learn as you go, and remember that every little bit you compost makes a difference. Your plants will thank you, your garden will thrive, and you’ll feel great knowing you’re contributing to a healthier, greener future. So, grab that kitchen caddy, start collecting those scraps, and welcome the magic of circular economy composting into your life. Happy composting!
FAQ: Your Composting Questions Answered
Q1: How long does composting actually take?
A1: It varies a lot! A fast, hot compost pile managed actively can be ready in 2-3 months. A slower, less-managed pile might take 6-12 months or longer. Using a tumbler can significantly speed things up.
Q2: My compost is smelly. What did I do wrong?
A2: Foul odors usually mean your pile is too wet and/or has too many “greens.” Add plenty of “browns” like dry leaves or shredded cardboard and turn it to get air into it. Avoid adding meat, dairy, or greasy foods.
Q3: Can I compost everything from my kitchen?
A3: Not quite. Stick to fruit and vegetable scraps, coffee grounds, and tea bags. Avoid meat, fish, dairy, and oily foods, as these can attract pests and cause odors. For those items, consider Bokashi composting first!
Q4: Do I need a special bin for composting?
A4: No, you don’t have to have a fancy bin! An open pile works, and you can even build your own bin from scrap lumber. However, a bin can help keep things tidy, conserve moisture, and deter pests.
Q5: How much compost can I expect to make?
A5: It heavily depends on how much organic material you put in and how well you manage it. A general rule of thumb is that you can reduce the volume of your organic waste by 30-50% through composting.
Q6: Is it safe to use compost that might have weed seeds or pathogens?
A6: Properly managed hot composting (reaching temperatures of 130-160°F for several days) will kill most weed seeds and pathogens. If your pile doesn’t get hot, it’s best to use the finished compost in areas where it won’t spread weed seeds, like around established trees or bushes, rather than directly in a vegetable garden where you are starting from seed.

I am passionate about home engineering. I specialize in designing, installing, and maintaining heating, ventilation, and air conditioning systems. My goal is to help people stay comfortable in their homes all year long.