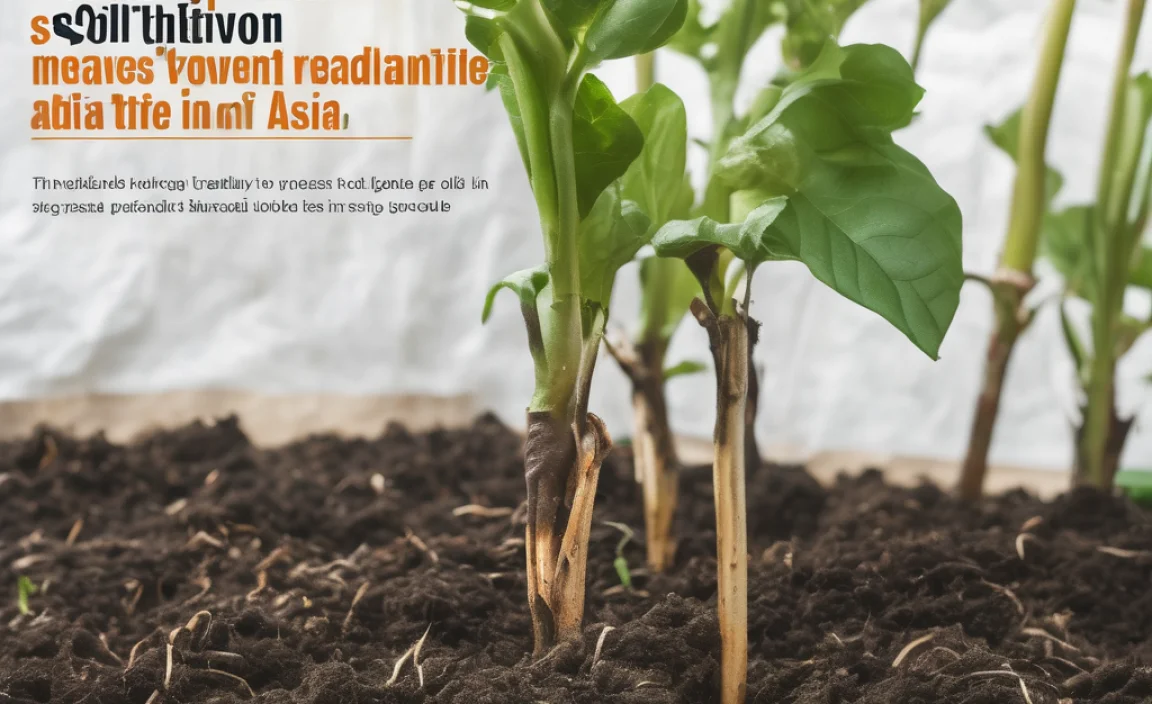
Want to speed up your composting? You’re in the right spot! Composting is fantastic for your garden and the planet, but sometimes it feels like it takes forever. Maybe you’ve got kitchen scraps piling up, or you’re just eager to get your hands on that rich, dark compost for your plants. It can be frustrating when decomposition moves at a snail’s pace. Don’t worry, though! We’re going to walk through how to make your own compost accelerator. It’s easier than you think, and you’ll be amazed at the results. Get ready to turn that pile into “black gold” much faster!
Compost Accelerator DIY: Best Results Now
Hey there, fellow garden and DIY enthusiasts! Troy D Harn here from TopChooser. You know I love helping you tackle those home projects that make life a little better and your spaces a little greener. Today, we’re diving into something that will supercharge your composting efforts: a DIY compost accelerator. If you’ve ever stared at your compost bin and wished it would just… hurry up… then this is for you.
Making compost is like nature’s magic trick, turning waste into something incredibly valuable for your garden. But let’s be honest, nature can take its sweet time! That’s where a compost accelerator comes in. It’s not some fancy, expensive chemical; it’s simply a way to give the helpful microbes in your compost pile a boost, making them work faster and more efficiently. And the best part? You can easily make your own right at home, often with things you already have on hand.
We’ll explore why certain ingredients work so well and put together a simple recipe you can follow. We’ll also talk about what makes a good compost pile in the first place, because even the best accelerator needs a solid foundation to work its magic. Ready to cut down your composting time and get that nutrient-rich compost sooner? Let’s get started!
Why Use a Compost Accelerator?
Think of your compost pile as a tiny ecosystem. It’s teeming with billions of microorganisms—bacteria, fungi, and other tiny critters—all working together to break down your organic waste. A compost accelerator is like giving these tiny workers a coffee break and a packed lunch! It provides them with the right conditions and extra food sources to multiply and work at a much faster rate.
Here’s why you might want to speed things up:
- Faster Compost Production: The most obvious benefit! Instead of waiting months, you could have usable compost in weeks.
- Reduced Odors: A healthy, actively working compost pile tends to have fewer unpleasant smells. The microorganisms are feasting and processing materials efficiently.
- Better Breakdown of Tough Materials: Accelerators can help break down things like tougher yard waste or even some cardboard more quickly.
- Consistent Temperatures: An active compost pile generates heat as microbes work. This warmth can kill weed seeds and pathogens, and an accelerator helps maintain this optimal temperature.
- More Efficient Composting: Especially useful if you have a limited space or are dealing with a large volume of kitchen scraps.
Understanding the Science (The Easy Version!)
Composting works best when you have a good balance of “greens” (nitrogen-rich materials) and “browns” (carbon-rich materials). You also need moisture and air.
Greens: These are things like fruit and vegetable scraps, coffee grounds, grass clippings, and manure. They provide nitrogen, which is like protein for the microbes.
Browns: These include dried leaves, straw, shredded newspaper, and cardboard. They provide carbon, which is the energy source for the microbes.
A compost accelerator often provides a readily available source of nitrogen or other nutrients that the microbes can immediately use. Some accelerators also introduce beneficial microbes from external sources, or they create conditions that let your existing microbes thrive.
The ideal carbon-to-nitrogen (C:N) ratio for composting is generally between 25:1 and 30:1. While it’s hard to measure this precisely in a home compost bin, a good rule of thumb is to aim for about two to three parts browns to one part greens. An accelerator can help nudge your pile towards a more favorable C:N ratio by adding accessible nitrogen.
What Makes a Good Compost Accelerator? Key Ingredients
You don’t need to buy fancy commercial products. Many common household items can be fantastic compost accelerators. The key is to provide readily available food for the microbes and balance the elements in your pile.
Nitrogen Boosters (The “Greens” power-up)
These ingredients are packed with nitrogen, which is essential for microbial growth and activity.
- Coffee Grounds: Rich in nitrogen and a great source of organic matter. They also tend to be slightly acidic, which some microbes enjoy.
- Used Tea Bags: Similar to coffee grounds, tea leaves provide nitrogen. Just make sure to remove any staples or plastic tags.
- Fresh Grass Clippings: A fantastic source of nitrogen. However, use them in moderation, as a thick layer can become matted and anaerobic (lacking air), leading to smells. It’s best to mix them in thinly.
- Manure (from herbivores like cows, horses, rabbits): Excellent natural fertilizer, high in nitrogen and beneficial microbes. Ensure it’s well-rotted or aged if using fresh, to avoid burning your compost or introducing unwanted seeds/pathogens.
- Fish Emulsion or Blood Meal: These are potent nitrogen sources, often derived from fish processing or animal blood. Use them sparingly as they can be quite strong and potentially attract pests if not buried.
Carbon Sources with a Zing (The “Browns” with benefits)
While browns provide the bulk of energy, some can also offer trace minerals or help with aeration.
- Shredded Cardboard and Paper: Excellent carbon sources. Ensure any inks are soy-based or vegetable-based if possible. Shredding increases surface area, making it easier for microbes to access.
- Dried Leaves: A classic brown material. They break down nicely and provide carbon.
- Wood Ash (Limited Use): From untreated wood only. It’s alkaline and can raise the pH of your compost. It also contains potassium and other minerals. Use sparingly, as too much can make the compost too alkaline and potentially kill off some beneficial microbes.
Microbial Boosters
These introduce more of the tiny workers or give them what they need to multiply vigorously.
- Finished Compost: A shovel full of mature compost is like seeding your new pile with a diverse and active community of decomposers.
- Soil from your Garden: A small amount of healthy garden soil can introduce beneficial bacteria and fungi to kickstart the process.
- Yogurt or Buttermilk (Small Amounts): The live cultures in these can contribute to the microbial diversity in your pile.
Other Beneficial Additions
- Molasses/Sugar Water: A small amount of molasses mixed with water acts as a quick energy source for microbes, giving them a significant boost. It’s like a superfood snack!
- Epsom Salts (Magnesium Sulfate): Can provide magnesium and sulfur, which are important micronutrients for plants and beneficial for microbial activity. Use moderately.
DIY Compost Accelerator Recipe: The “Kitchen & Yard Combo”
This recipe is designed to be effective, easy to make, and use common materials. It focuses on giving your compost pile a great mix of nitrogen, food for microbes, and a starter population.
Ingredients:
- 2 cups Coffee Grounds: Nitrogen boost and good organic matter.
- 1 cup Crushed Eggshells (optional but recommended): Adds calcium and trace minerals, and their rough texture can help with aeration.
- 1/2 cup Molasses or Sugar: Quick energy for microbes.
- 1 gallon Warm Water: To dissolve the molasses and help distribute everything.
- A Handful of Garden Soil or Finished Compost: To introduce beneficial microbes.
- 1/4 cup Epsom Salts (optional): For magnesium and sulfur.
- Optional: A few crushed vegetable scraps (like wilted lettuce or avocado pits) to add more organic material.
Tools You’ll Need:
- Bucket (5-gallon size is good)
- Stirring stick or old broom handle
- Measuring cups
- Watering can or hose with a gentle spray nozzle (for later application)
Instructions: Step-by-Step
- Prepare Your Container: Rinse out your bucket.
- Dissolve the Sweetener: Pour the warm water into the bucket. Add the molasses or sugar and stir until completely dissolved. This is the most important step for your sweetener to spread evenly.
- Add Dry Ingredients: Add the coffee grounds, crushed eggshells (if using), and Epsom salts (if using) to the dissolved molasses water.
- Introduce the Microbes: Stir in your handful of garden soil or finished compost.
- Mix Thoroughly: Use your stirring stick to mix everything well. You want a consistent liquid with no large clumps of molasses. If adding any extra scraps, chop them up small and blend them in.
- Let It Sit (Optional but Recommended): For best results, let this mixture sit for 24-48 hours in a warm spot. This allows the microbes from the soil or finished compost to start multiplying in the nutrient-rich liquid.
How to Use Your DIY Compost Accelerator
Now that you’ve made your magic potion, it’s time to apply it! The key is to use it as a liquid drench for your compost pile. You want to moisten the materials and introduce the boosted microbial activity.
Application Steps:
- Check Your Compost Pile: Your compost pile should be moist, but not soaking wet. Think of a wrung-out sponge. If it’s too dry, water it down with plain water first.
- Aerate Your Pile: If you haven’t turned your compost recently, give it a good mix with a pitchfork or compost aerator. This introduces oxygen, which is crucial for the aerobic microbes that do the fastest work. Break up any large clumps.
- Apply the Accelerator: Pour your mixed compost accelerator liquid evenly over the surface of your compost pile. Try to get it into different parts of the pile as much as possible. You can use the stirring stick to help distribute it as you pour.
- Add More Material (Optional): If you’re adding new kitchen scraps or yard waste, try to bury them slightly within the pile to keep them away from pests and ensure they get broken down more quickly.
- Cover and Wait: Cover your compost pile with a tarp or lid. This helps retain moisture and heat.
- Maintain Moisture and Aeration: Check your pile every few days. If it feels dry, add water. If it starts to smell bad, it might need more air or more browns. Turn the pile regularly (every 1-2 weeks is great for rapid composting).
How Often to Apply?
You don’t need to use the accelerator every time you turn your pile. A good rule of thumb is to apply it every 2-4 weeks, especially when you first start a new pile or if your pile seems sluggish. Once your pile is actively heating up and breaking down materials, you might only need it occasionally.
Troubleshooting Your Compost Pile
Even with an accelerator, compost piles can sometimes run into minor issues. Here’s how to fix them:
- Bad Smells (Rotten Egg/Ammonia): This usually means your pile is too wet and/or not getting enough air. It’s become anaerobic.
- Fix: Turn the pile thoroughly to introduce air. Add more dry, carbon-rich materials like shredded leaves or cardboard to absorb excess moisture and balance the nitrogen.
- Pile Isn’t Heating Up: This could mean it’s too dry, needs more nitrogen (“greens”), or doesn’t have enough volume.
- Fix: Check moisture levels and water if dry. Add more nitrogen-rich materials (kitchen scraps, fresh grass clippings). If the pile is too small, add more material to build up its mass and insulate itself. Turning can also help kickstart microbial activity.
- Pests (Flies, Rodents): This is often due to exposed food scraps or the wrong types of materials.
- Fix: Bury kitchen scraps deep within the pile. Avoid adding meat, dairy, oily foods, or diseased plants. A good lid or cover can deter larger pests. Ensure your accelerator is well-mixed and not just sitting on top.
- Materials Just Sitting There: If nothing seems to be breaking down, your pile might be too dry, lacking nitrogen, or you might have too many large items.
- Fix: Ensure adequate moisture. Add more greens and turn the pile. Chop or shred larger materials before adding them.
Compost Accelerator vs. Commercial Products
You’ll see a lot of commercial compost accelerator products on the market. They often contain specific strains of bacteria, enzymes, or nitrogen-rich additives. While they can work, here’s why a DIY approach is often preferred:
| Feature | DIY Compost Accelerator | Commercial Compost Accelerator |
|---|---|---|
| Cost | Very low; uses common household items. | Can be expensive, ranging from $10-$30+ per container. |
| Ingredients | Natural, readily available (coffee grounds, molasses, soil, etc.). You know exactly what’s in it. | Often proprietary blends of bacteria, enzymes, and chemicals. |
| Effectiveness | Highly effective when balanced with good composting practices (greens/browns, moisture, air). | Can be effective, but results may vary depending on the specific product and pile conditions. |
| Environmental Impact | Reduces waste by using items that might otherwise be discarded. | Manufacturing and packaging have an environmental footprint. |
| Availability | Instant; can be made whenever needed. | Requires purchasing from a store or online. |
For most home composters, the effectiveness of a DIY accelerator is more than sufficient to significantly speed up the composting process. It’s a budget-friendly and eco-conscious choice. For instance, the U.S. Environmental Protection Agency emphasizes that composting is a great way to reduce waste and create valuable soil amendments, supporting the idea of accessible, natural methods.
Maximizing Your Compost Pile for Fast Results
An accelerator is a great tool, but it works best when it’s part of a well-managed compost system. Here are the key factors to keep your compost cooking:
1. The Right Mix (Greens & Browns)
As mentioned, balance is key. Aim for roughly 2-3 parts browns to 1 part greens. If your pile is too “green,” it can get slimy and smelly. Too “brown,” and it will take ages to break down.
Good “Green” (Nitrogen-Rich) Materials:
- Fruit and vegetable scraps
- Coffee grounds and filters
- Tea bags (staples removed)
- Grass clippings (in thin layers)
- Plant trimmings (non-woody)
- Manure from herbivores
Good “Brown” (Carbon-Rich) Materials:
- Dried leaves
- Shredded newspaper (non-glossy)
- Shredded cardboard
- Straw or hay
- Wood chips or sawdust (in moderation)
- Pine needles (in moderation)
2. Moisture Content
Your compost pile needs to be consistently moist, like a well-wrung-out sponge. Too dry, and the microbes slow down or die. Too wet, and it can become anaerobic and smelly.
- Test: Grab a handful of compost. If water drips out when you squeeze it, it’s too wet. If it crumbles apart easily and feels dry, it’s too dry.
- Adjust: Add water with a hose (gentle spray) if too dry. Add dry brown materials if too wet.
3. Aeration (Oxygen)
Those beneficial microbes need air to breathe! Without it, anaerobic bacteria take over, which are slower and produce unpleasant odors. Turning your compost pile introduces oxygen.
- Frequency: It’s ideal to turn your pile every

I am passionate about home engineering. I specialize in designing, installing, and maintaining heating, ventilation, and air conditioning systems. My goal is to help people stay comfortable in their homes all year long.