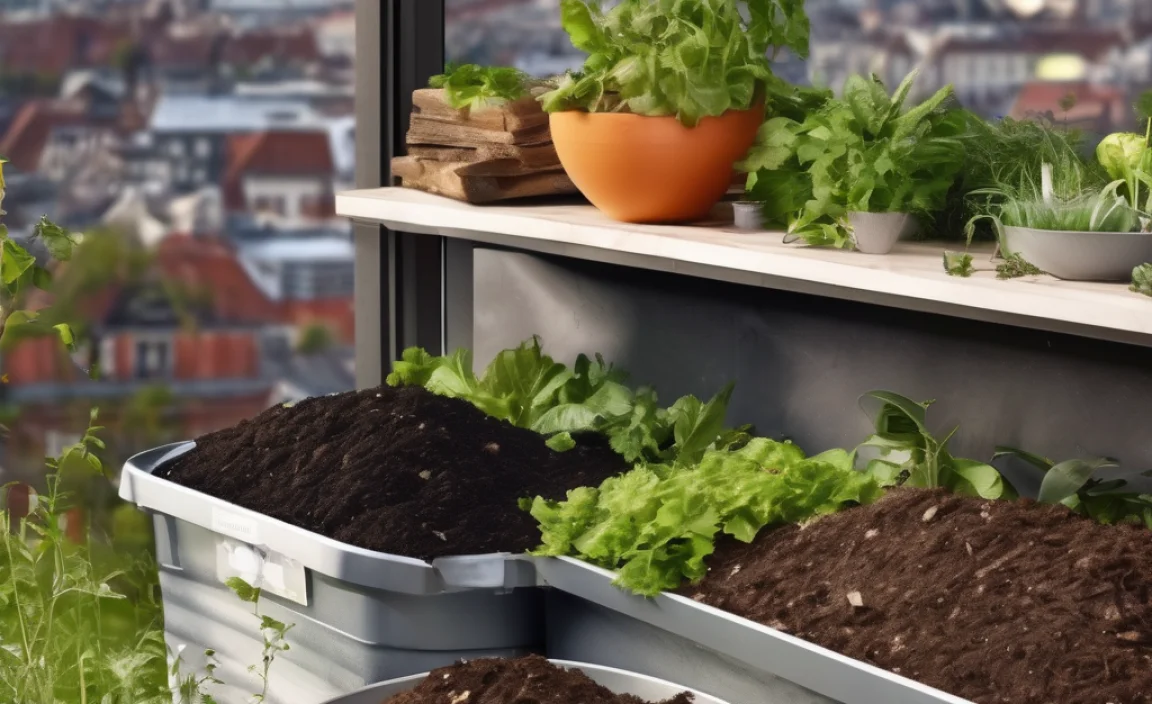
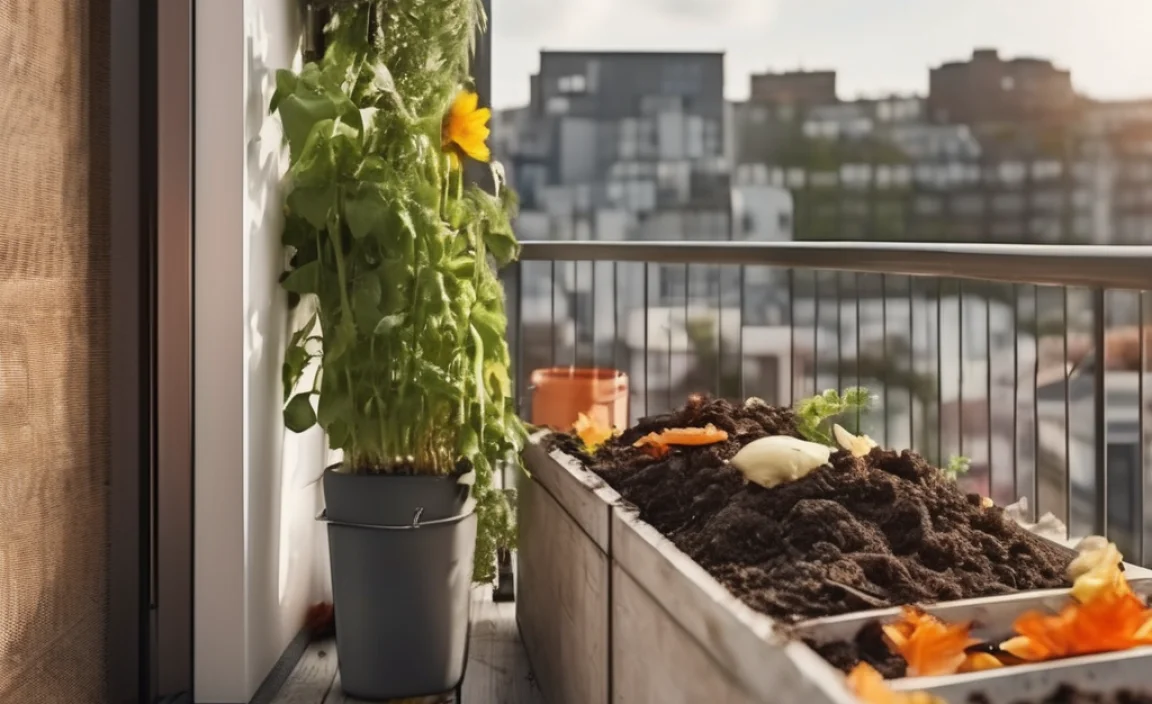
Got food scraps piling up? Wish you could turn them into garden gold right on your balcony? It’s totally doable! Many people think composting is only for big backyards, leaving them frustrated with smelly bins or frequent trips to the compost drop-off. But what if I told you there’s a super simple way to compost right where you live, even in a small apartment? Get ready, because we’re about to unlock the secret to a genius and effortless balcony compost heap!
Why a Balcony Compost Heap is a Game-Changer
Let’s face it, throwing away food scraps feels like a waste, right? Especially when you see those perfectly good bits ending up in the landfill. Composting is nature’s way of recycling, turning your kitchen leftovers and yard trimmings into nutrient-rich soil. This “black gold” is amazing for your plants, whether you have a few potted herbs or a small balcony garden. Doing it on your
balcony means you can have fresh compost ready for your plants without a big yard, saving money and reducing your environmental footprint. It’s a win-win-win!
Think about it: no more smelly trash cans, no more guilt about tossing banana peels, and soon, you’ll have the best soil to make your balcony plants thrive. It sounds complicated, I know, but it’s really not. We’re going to break it down into easy steps.
Getting Started: What You’ll Need for Your Balcony Compost Heap
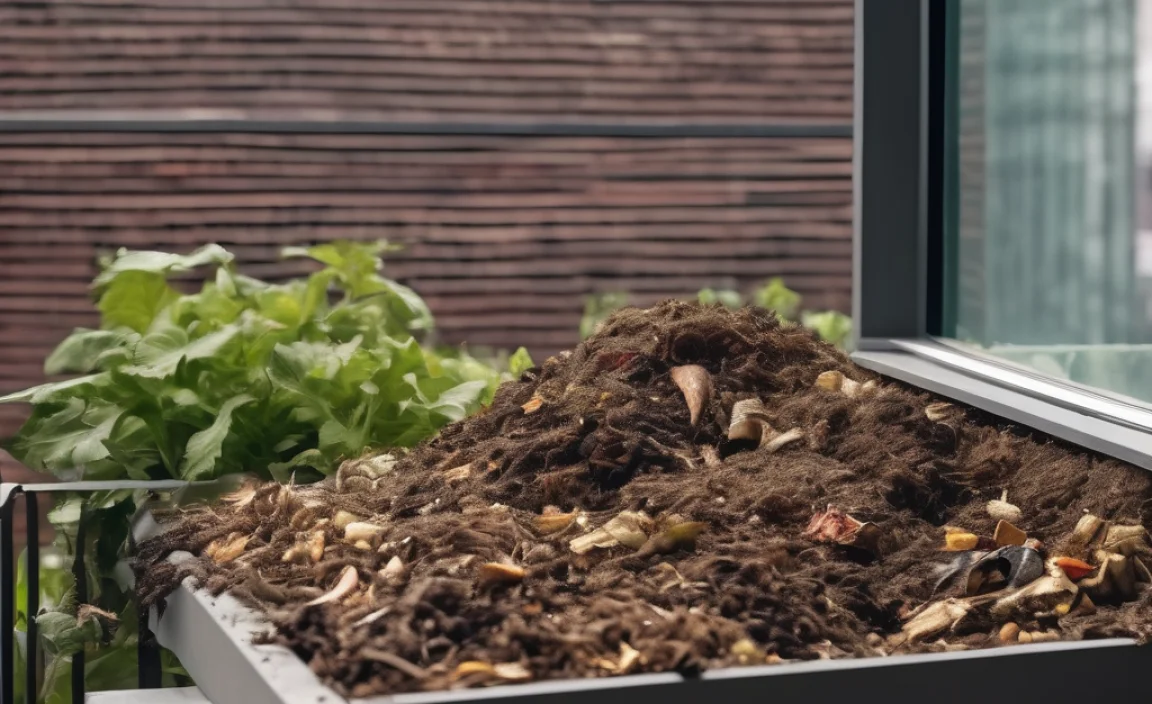
The beauty of a balcony compost heap is its simplicity. You don’t need a huge pile of material, and the equipment is minimal. Here’s what you’ll want to gather:
The Compost Bin: Your Balcony’s Best Friend
This is the heart of your balcony composting setup. For smaller spaces like balconies, you have a few excellent options:
- Worm Bin (Vermicomposting): This is a popular choice for apartments and balconies. It uses special composting worms (Red Wigglers, not earthworms you dig up!) to break down food scraps quickly. They’re quiet, don’t smell if managed well, and a good-sized worm bin fits easily on most balconies. You can buy pre-made worm bins or even DIY one with plastic storage containers!
- Tumbler Composter: These are sealed, rotating bins. You add your materials, give it a spin every few days, and it speeds up the composting process. Tumblers are great because they keep pests out and can churn the compost for you, making aeration easy. They come in various sizes, so find one that fits your balcony space.
- A Simple Stackable Bin System: Some systems use several stacked trays. As one is filled, you move it up, and the compost “ages” and finishes in the lower trays. This is a neat way to manage different stages of compost.
When choosing a bin, think about:
- Size: Measure your balcony space first! A bin that’s too big will be a hassle.
- Ventilation: Your compost needs air to breathe. Look for bins with natural ventilation or drill some holes if needed (but be careful with DIY for tumblers or sealed bins).
- Pest Control: Especially important in urban settings. Sealed bins or tumblers are best for keeping critters out.
- Ease of Use: Can you easily add materials? Can you harvest the finished compost?
Composting Materials: Greens and Browns
Composting is all about balance. You need two main types of materials:
- “Greens” (Nitrogen-rich): These are your wet, nitrogen-rich items. They provide the moisture and nitrogen that microorganisms need to get to work. Examples include:
- Fruit and vegetable scraps (peels, cores, rinds)
- Coffee grounds and tea bags (remove staples from tea bags)
- Eggshells (crushed)
- Grass clippings (use in moderation if you have them)
- “Browns” (Carbon-rich): These are your dry, carbon-rich materials. They provide the air pockets and carbon. Examples include:
- Shredded newspaper and junk mail (avoid glossy paper)
- Cardboard (torn into small pieces)
- Dry leaves
- Sawdust (from untreated wood only)
- Straw or hay
A good rule of thumb for traditional composting is about a 2:1 or 3:1 ratio of browns to greens by volume. For worm bins, you’ll use mostly greens from your kitchen scraps, and the bedding (like shredded paper or coir) acts as your browns.
Essential Tools (And Things You Can Skip!)
You don’t need a shed full of fancy tools:
- A Kitchen Countertop Collection Bin: A small lidded container to collect scraps as you cook.
- Gardening Gloves: To keep your hands clean when handling compost.
- A Small Shovel or Trowel: For mixing and harvesting.
- A Watering Can or Spray Bottle: Compost should be moist, like a wrung-out sponge.
- Shredded Paper/Cardboard/Coconut Coir: For bedding in worm bins.
What you generally DON’T need for a balcony setup: A huge pitchfork, a wheelbarrow, or large outdoor compost piles. Keep it compact and manageable!
The “How-To”: Setting Up Your Genius Balcony Compost Heap
Let’s get your system up and running. We’ll cover a common method, like setting up a worm bin, as an example, since it’s so popular for balconies.
Step 1: Prepare Your Worm Bin
- If you bought a worm bin, follow the manufacturer’s instructions.
- If you’re making a DIY bin from plastic totes, you’ll need two or three identical ones. In two of them, drill ¼-inch holes every 2-3 inches across the bottom and sides for ventilation and drainage.
- Place the drilled bins inside one of the undrilled bins (this one will catch any leachate, or liquid). Or, if using three bins, one will be for drainage.
Step 2: Add the Bedding
Worms need a comfy home! Shredded newspaper, cardboard, or coconut coir (often sold for pet bedding or in garden centers) works great. Moisten the bedding until it’s damp but not soaking wet. Fluff it up and fill your bin about halfway to two-thirds full.
Step 3: Introduce Your Worms
This is the fun part! You’ll need “Red Wiggler” composting worms. You can order these online from reputable worm farms. Gently place the worms on top of the bedding and let them burrow down. They’ll usually do this within a few minutes.
Step 4: Start Feeding Your Worms
Begin by adding just a small amount of food scraps. Bury them under the bedding to avoid attracting pests and to keep the moisture levels right. You can chop larger scraps into smaller pieces to help them break down faster.
What to feed your worms:
- Fruit scraps (apple cores, banana peels, melon rinds)
- Vegetable scraps (lettuce, carrot tops, potato peels)
- Coffee grounds and filters
- Tea bags (staples removed)
- Crushed eggshells
What NOT to feed your worms:
- Meat, dairy, or oily foods (attract pests, smell bad, can kill worms)
- Citrus peels or tomatoes in large quantities (too acidic)
- Onions and garlic (worms don’t like them)
- Spicy foods
- Anything processed or heavily seasoned
- Pet waste
Step 5: Maintain Your Worm Bin
- Feeding: Once the worms have eaten their first feeding, you can start adding scraps more regularly. Don’t overfeed! A good rule is that worms can eat about half their weight in food per day, but it’s better to feed them what they can process in a few days.
- Moisture: The bedding should always feel like a damp sponge. If it’s too dry, spray with water. If it’s too wet, add more dry shredded paper or cardboard.
- Aeration: Gently fluff the bedding every week or two with a small trowel to ensure air circulation.
- Temperature: Worms are happiest between 55-77°F (13-25°C). Avoid extreme heat or cold on your balcony. If it gets too hot, move the bin to a shadier spot or insulate it. If it gets too cold, bring it inside or insulate it well.
Step 6: Harvesting Your Compost
After a few months, you’ll start seeing dark, crumbly material forming at the bottom – that’s your worm castings (worm compost!). There are a few ways to harvest:
- “Migration Method”: Add fresh bedding and food to one side of the bin. The worms will migrate to the fresh food, leaving the finished compost behind. You can then scoop out the finished compost from the other side.
- “Push and Scrape”: Gently push the finished compost to one side of the bin and add new bedding and food to the other side.
- Empty and Separate: You can also dump the entire bin onto a tarp in the sun (worms will burrow down to avoid light, making separation easier) or simply pick out the worms.
The “worm tea” (leachate) collected in the bottom bin can be diluted (1 part tea to 10 parts water) and used as a fantastic liquid fertilizer for your plants. Be sure to empty this collection bin regularly!
Compost Tumbler: An Alternative for Effortless Composting

If worms aren’t your thing, a tumbler is a fantastic balcony option. They work on a different principle:
Step 1: Choose Your Tumbler
Select a size that fits your balcony and your waste output. Many are designed to be easily turned by hand.
Step 2: Load Your “Greens” and “Browns”
Add your kitchen scraps (greens) and yard waste/paper (browns) to the tumbler. Aim for that 2:1 or 3:1 brown-to-green ratio. Chop larger items into smaller pieces for faster decomposition.
Step 3: Rotate and Aerate
This is the key! Once a day, or every few days, give the tumbler a good spin. This mixes the contents, introduces air, and speeds up the breakdown process.
Step 4: Monitor Moisture
Tumblers are enclosed, so moisture can be a bit tricky. The compost should be damp, like a wrung-out sponge. If it’s too dry, add a little water. If it’s too wet, add more browns and ensure the vents are open. Some tumblers have drainage options.
Why Tumblers are Great for Balconies:
They are generally pest-proof, can compost faster, and the rotating action does the hard work of mixing for you. This makes them very “effortless” once you get the hang of the green/brown balance.
What Goes In (And What Stays Out!)
Getting the mix right is crucial for a stink-free, efficient compost heap. Here’s a quick cheat sheet:
| Add to Your Compost Heap | Avoid in Your Compost Heap |
|---|---|
| Fruit and vegetable scraps | Meat, fish, and bones |
| Coffee grounds and filters | Dairy products (milk, cheese, yogurt) |
| Tea bags (staples removed) | Oily foods and grease |
| Crushed eggshells | Diseased plants or weeds that have gone to seed |
| Shredded newspaper and non-glossy junk mail | Pet waste (cat litter, dog feces) |
| Cardboard (torn into small pieces) | Treated wood or sawdust from treated wood |
| Dry leaves | Coal ash or charcoal briquettes |
| Grass clippings (in moderation) | Synthetic materials |
| Sawdust (from untreated wood) | Glossy paper or colored inks |
| Plant trimmings (non-woody) | Anything chemically treated |
Remember, for worm bins, the “Avoid” list is even more critical due to the sensitive nature of the worms.
Common Composting Hiccups and How to Fix Them
Even the most “effortless” systems can have a minor wobble. Here are common issues and their simple fixes:
- It Smells Bad (Ammonia/Rotten Eggs):
- Problem: Too much “greens” (nitrogen) or not enough air.
- Fix: Add more “browns” (carbon like shredded paper or dried leaves). Turn or aerate the compost more frequently. For worm bins, ensure you aren’t overfeeding, and that there’s enough bedding.
- It’s Too Wet and Slimy:
- Problem: Too much moisture, not enough air.
- Fix: Add more browns to absorb excess moisture. Turn the compost more to aerate. For worm bins, check drainage and add dry bedding, and make sure leachate is being collected and emptied.
- It’s Too Dry:
- Problem: Not enough moisture for the microorganisms to work.
- Fix: Add water gradually until it’s like a wrung-out sponge. If using a worm bin, ensure food scraps are moist when added.
- Pests (Fruit Flies, Gnats):
- Problem: Exposed food scraps or overly wet conditions.
- Fix: Always bury food scraps under the browns. Ensure your bin is sealed properly. For fruit flies, a layer of dry leaves or shredded paper on top can help. You can also try a simple fruit fly trap near (but not in) your compost bin. Tumblers are excellent at preventing pests.
- Nothing Seems to Be Happening:
- Problem: Too many browns, too cold, or not enough active microbes.
- Fix: Ensure you have enough greens. Check the temperature – warmer conditions speed things up. For worm bins, ensure your worms are alive and active. The EPA offers great resources on composting basics, which apply universally.
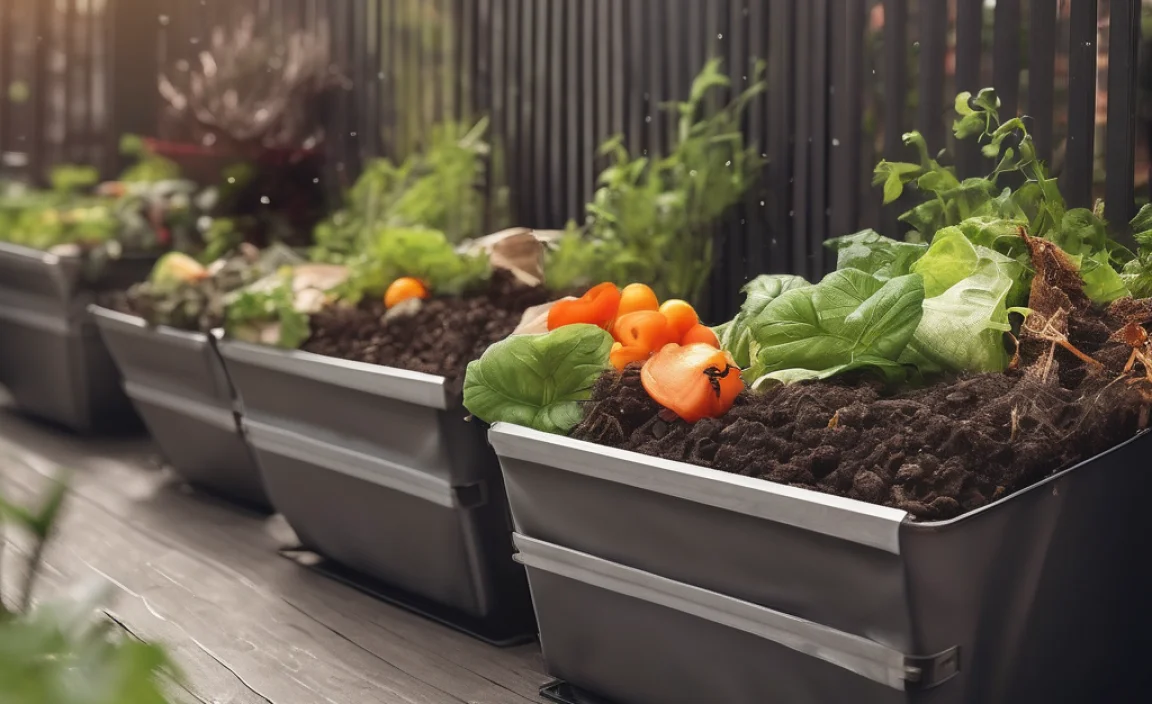
The Benefits of Your Balcony Compost Heap
Okay, so we’ve covered the “how,” but let’s just quickly re-cap why this is such a brilliant idea for your balcony:
- Reduces Waste: You’ll be amazed at how much kitchen waste you divert from the landfill.
- Creates Nutrient-Rich Soil: Your balcony plants will thank you with lusher growth and more blooms.
- Saves Money: No need to buy expensive potting soil or fertilizers.
- Environmentally Friendly: Composting helps reduce greenhouse gas emissions and supports a circular economy.
- Educational and Rewarding: It’s a fantastic way to connect with nature and see your efforts literally bear fruit (or flowers!).
- Small Space Friendly: Designed specifically for apartments and balconies, these systems are compact and efficient.
Frequently Asked Questions About Balcony Composting
Q1: Will my balcony compost bin smell bad?
A: No, not if managed correctly! A good compost system should smell earthy, like a forest floor. Bad odors usually mean there’s too much moisture, not enough air, or you’re adding the wrong materials like meat or dairy.
Q2: What kind of worms do I need for a worm bin?
A: You need specific composting worms, typically Red Wigglers (Eisenia fetida). Regular earthworms from your garden won’t survive well in a compost bin.
Q3: How much compost can I realistically make on a balcony?
A: It depends on the size of your bin and how much food waste you generate. A typical worm bin can produce a few pounds of finished compost every 3-6 months, which is plenty for several potted

I am passionate about home engineering. I specialize in designing, installing, and maintaining heating, ventilation, and air conditioning systems. My goal is to help people stay comfortable in their homes all year long.