Feeling a bit stumped about getting your plants the best nutrition without breaking the bank? It’s a common gardening puzzle. You want lush, healthy plants, but those fancy fertilizers can add up. There’s a super-simple, natural way to boost your garden’s vitality. It’s called compost tea, and it’s easier than you think to get started, especially with all the helpful resources online. We’ll walk through everything you need to know, from what it is to how to make it, so your garden can thrive naturally. Ready to give your plants a nutrient-rich drink brewed just for them?
Compost Tea Online: Your Genius Essential Guide
Hey green thumbs! Troy D Harn here from TopChooser, ready to make gardening a whole lot simpler and your plants a whole lot happier. Today, we’re diving into something pretty amazing: compost tea. If you’ve ever looked at your plants and wished they had a bit more sparkle, or if you’re tired of sifting through confusing fertilizer labels, you’re in the right place. Compost tea is like a super-powered smoothie for your plants, made from the magic of compost. And guess what? You can learn all about it and even gather your supplies online. We’re going to break it down step-by-step, so even if you’re new to gardening, you’ll feel confident brewing up this natural goodness for your blooms and veggies.
What Exactly is Compost Tea?
Think of compost tea as a liquid extract of your best compost. When you brew compost in water, you’re not just making a brown-colored liquid; you’re giving all the beneficial microbes and soluble nutrients from the compost a cozy place to multiply. These tiny helpers, like bacteria and fungi, are crucial for plant health. They help plants access nutrients, fight off diseases, and build stronger defenses. So, instead of just adding compost to the soil, compost tea delivers these benefits directly to the plant’s leaves and roots, giving them a quick, powerful boost.
Why is this so great for your garden?
- Natural Nutrients: It provides a wide range of essential nutrients that plants can easily absorb.
- Beneficial Microbes: It introduces a diverse population of good bacteria and fungi to your soil and plant surfaces.
- Disease Suppression: These microbes can outcompete harmful pathogens, helping to prevent plant diseases.
- Improved Soil Structure: Regular application can contribute to healthier, more crumbly soil over time.
- Environmental Friendliness: It’s a fantastic way to use your compost scraps and reduce the need for synthetic fertilizers.
Why Should You Care About Compost Tea?
Most of us want our gardens to look their best. We want those vibrant flowers, crisp vegetables, and strong, healthy trees. But sometimes, achieving that can feel like a chore, or it gets expensive with all the fancy garden products out there. Compost tea offers a natural, affordable, and incredibly effective way to give your plants that extra something they need to truly flourish.
It’s like the difference between a quick energy drink and a balanced, homemade meal for your plants. The synthetic fertilizers can give a quick fix, but compost tea works with nature to build long-term plant health and resilience. And the best part? You can learn everything you need, from recipes to equipment, right from your computer or phone. It’s about working smarter, not harder, for a beautiful, thriving garden.
Getting Started: What You’ll Need
Don’t worry, you don’t need a chemistry lab or a huge budget to make compost tea. Most of the equipment is pretty standard, and you can often find it locally or order it online with ease. Here’s a breakdown of the essentials:
The Brewing Container
You need something to brew your tea in. A clean bucket is the most common and easiest choice for beginners. Anything from a 5-gallon bucket to a larger trash can will work, depending on how much tea you want to make.
Water Source
The quality of your water matters. Tap water can contain chlorine and chloramines, which are harmful to the beneficial microbes you’re trying to brew. It’s best to use:
- Dechlorinated water: Let tap water sit out for 24 hours in an open container. This allows chlorine to dissipate.
- Rainwater: The cleanest option if you can collect it.
- Well water: Usually safe, but check if it has high mineral content.
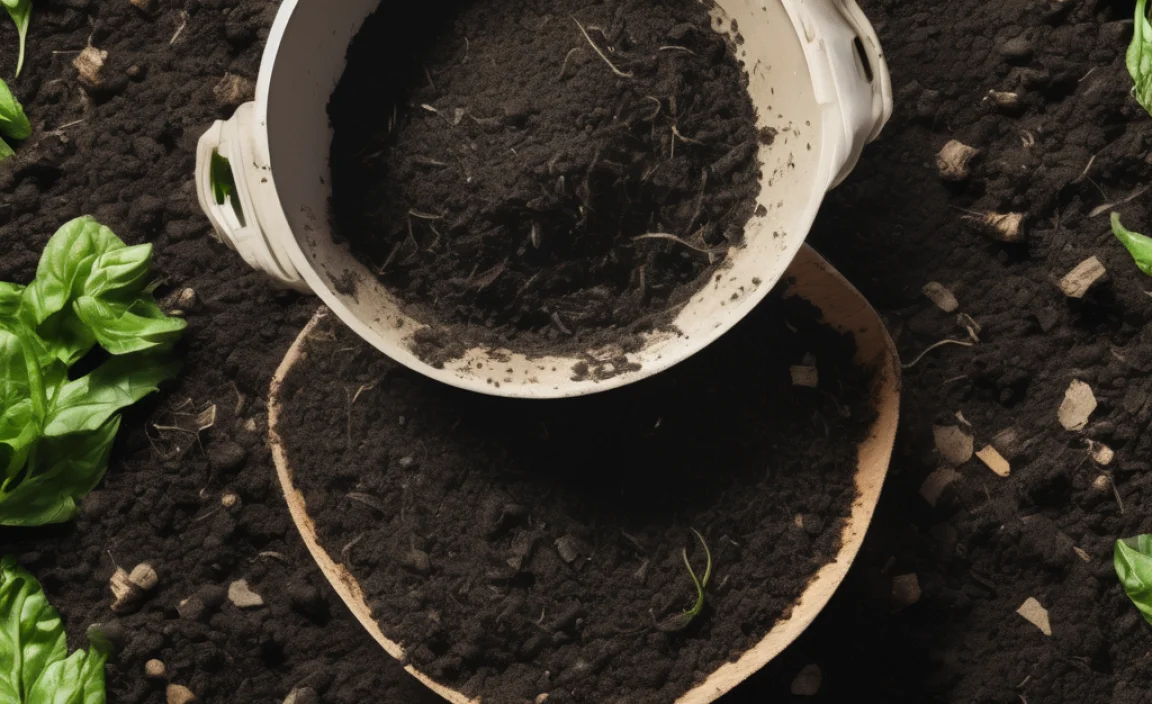
Compost
This is the heart of your tea! You need high-quality, finished compost. This means compost that is dark, crumbly, and smells earthy, not sour or rotten. You can use:
- Worm castings (vermicompost): These are packed with microbes and nutrients.
- Mature garden compost: From your own compost bin or a purchased bag.
- Aged manure: Well-rotted animal manure.
A good starting point is about 1-2 cups of compost for a 5-gallon batch.
Aeration – The Bubbles of Life!
This is super important for aerobic compost tea (the kind that’s most beneficial). Aerobic means “with oxygen.” You need to keep the water bubbly to provide oxygen for the microbes to thrive. For this, you’ll need:
- Aquarium pump: A small, inexpensive one is perfect for a 5-gallon bucket.
- Air stone: This attaches to the pump and disperses the air into fine bubbles.
- Tubing: To connect the pump to the air stone.
You can find these at pet stores or online. Look for a pump rated for a 10-20 gallon aquarium; it’ll be more than enough air for your tea.
Where to find these online: A quick search for “aquarium air pump kit” or “compost tea brewing supplies” will bring up plenty of options. Amazon, gardening supply websites, and even some larger home improvement stores offer these. Just compare prices and read reviews to find what suits you best.
A Bag for Your Compost
To keep the brewed compost from making your tea murky and clogging sprayers, you’ll want to put your compost in a bag. A nylon mesh bag, a paint strainer bag, or even an old pillowcase or cheesecloth will work. This allows the water to flow through and extract the goodness.
Optional Additives
Some people like to add a bit of readily available food for the microbes to help them multiply faster. These are optional but can give your tea an extra kick. Common choices include:
- Unsulphured molasses: Provides sugars for bacteria.
- Fish hydrolysate or kelp meal: Adds nutrients and food for fungi.
Use these sparingly, often just a tablespoon or two for a 5-gallon batch.
How to Brew Your First Batch (Step-by-Step Guide)
Alright, let’s get brewing! This process is straightforward and takes just a few minutes of hands-on time, with the brewing doing most of the work.
Step 1: Prepare Your Water
Fill your clean bucket with water. Remember to use dechlorinated, rainwater, or well water. If you’re starting with tap water, fill your bucket and let it sit for at least 24 hours before you begin brewing. This allows the chlorine to evaporate, making the water safe for your microbial friends.
Step 2: Set Up Aeration
Place your aquarium air pump near the bucket. Connect the tubing to the pump and run it into the bucket. Attach the air stone to the other end of the tubing. Make sure the air stone is submerged in the water but not so deep that it’s resting on the bottom (leaving a few inches of water above it is fine). You want the bubbles to spread throughout the water.
Safety Tip: Always keep your air pump above the water level to prevent water from siphoning back into the pump if the power goes out. You can use a small piece of tape to secure the tubing to the side of the bucket.
Step 3: Add Your Compost and Additives
Put your high-quality compost into the mesh bag or strainer bag. Tie it off securely. If you’re using optional additives like molasses, dissolve them in a little bit of water first and then add them to the bucket now. Once everything is prepared, place the compost bag into the water. You can let it hang from the side or just let it sink to the bottom. Make sure it’s submerged and has room to expand a bit.
Step 4: Start Brewing!
Turn on your aquarium air pump. You should see steady bubbles rising from the air stone, churning the water and keeping it oxygenated. This is crucial! The bubbling action helps to extract beneficial compounds from the compost and provides the oxygen needed for aerobic microbial life. Let the tea brew for at least 24 hours, and up to 48 hours. A longer brew time (up to 36 hours) is often recommended, especially if you’re using molasses.
Step 5: Stir and Monitor
Give the brew a gentle stir a couple of times during the brewing process if you can. You’ll notice the water turning a nice, rich brown color. The bubbling should be vigorous throughout the brewing period. If the bubbles slow down, check your air stone for clogs or ensure your pump is working correctly.
Step 6: Strain and Use
After 24-48 hours, turn off the pump. The tea is ready when it smells pleasant and earthy, not cheesy or rotten. Carefully remove the compost bag. You can squeeze out any excess liquid, but don’t wring it out too hard, as you want to keep the microbes. If you didn’t use a bag, you’ll need to strain the liquid through cheesecloth or a fine-mesh sieve to remove solid particles, especially if you plan to use a sprayer.
What to do with the spent compost: Don’t throw it away! You can add the used compost back to your garden beds or your compost pile. It’s already given up its most potent liquids, but it still has valuable organic matter.
How to Use Your Compost Tea
Now for the fun part – feeding your plants! There are two main ways to apply compost tea:
1. Soil Drench
This is where you pour the compost tea directly onto the soil around your plants. It’s a fantastic way to introduce beneficial microbes and nutrients right to the root zone. Dilute the tea with more dechlorinated water. A common ratio is 1:1 (one part tea to one part water), but you can also use it straight, especially for very healthy plants or soil lacking organic matter. Apply it to the base of your plants, soaking the soil thoroughly.
2. Foliar Spray
This means spraying the tea directly onto the leaves of your plants. It’s like giving them a healthy mist. This method is great for a quick nutrient boost and can help protect leaves from fungal diseases. If you plan to spray, make sure your tea is well-strained to avoid clogging your spray bottle or sprayer. Dilute the tea, typically 1:4 or 1:10 (tea to water), and spray the tops and undersides of leaves. It’s best to do this in the early morning or late evening when the sun is not directly overhead to prevent leaf scorch.
Application Frequency: For both soil drenching and foliar spraying, you can apply compost tea every 2-4 weeks during the growing season. Observe your plants; they’ll often tell you when they appreciate the boost!
Compost Tea Recipes: Beyond the Basics
While the basic recipe is fantastic, you can tailor your compost tea to the specific needs of your plants or season. Here are a couple of ideas:
Beneficial Bacteria-Boosting Brew
This recipe focuses on increasing bacteria populations, great for leafy greens and general soil health.
- Compost: Use primarily worm castings.
- Water: Dechlorinated water.
- Additive: 1-2 tablespoons of unsulphured molasses per 5 gallons.
- Brew Time: 24-36 hours.
Beneficial Fungi-Boosting Brew
This is excellent for plants that grow fruits, roots, or flowers, and for improving soil structure.
- Compost: Use a mix of mature compost and a small amount of worm castings.
- Water: Dechlorinated water.
- Additive: 1-2 tablespoons of fish hydrolysate or kelp meal per 5 gallons. Avoid molasses, as it favors bacteria.
- Brew Time: 36-48 hours.
Tip: Always start with the basic recipe until you get comfortable. Once you understand how it works, you can experiment with additives and different compost sources.
Troubleshooting Common Compost Tea Issues
Even with simple processes, things can sometimes go a little sideways. Here are a few common bumps and how to smooth them out:
Problem: My compost tea smells bad (rotten, sewage-like).
Cause: Lack of oxygen (anaerobic conditions) or using poor-quality compost.
Solution: Ensure your air pump is working well and producing plenty of bubbles. Check that the air stone isn’t clogged. If the problem persists, you might need a stronger pump or a larger air stone for your bucket size. Also, make sure your compost is good quality and fully finished. Try a different batch of compost.
Problem: My spray bottle or sprayer is getting clogged.
Cause: Not straining the tea enough, or using compost that is too fine or has lots of small particles.
Solution: Strain your tea more thoroughly. Use a finer mesh strainer or multiple layers of cheesecloth after brewing. Make sure your compost isn’t too dusty or contains tiny twigs that can clog. If you’re using a paint strainer bag during brewing, consider a tighter weave.
Problem: My plants aren’t showing improvement.
Cause: Several possibilities: the tea might not contain enough beneficial microbes or nutrients, it could be applied incorrectly, or the plants might have a different underlying issue.
Solution: Ensure you’re brewing for at least 24 hours with good aeration. Use high-quality compost. Try using a small amount of molasses or fish hydrolysate (as discussed in recipes). Make sure you’re applying it consistently via soil drench or foliar spray as needed. Also, consider what else your plants might need – sometimes it’s a simple matter of sunlight, water, or pest control.
Problem: The brew seems weak, not bubbling much.
Cause: Weak air pump, clogged airline, or air stone.
Solution: Check all connections. Clean or replace the air stone. Make sure the tubing isn’t kinked. If your pump is old, it might be time for a new one. For larger batches, you might need a more powerful pump or multiple air stones.
Compost Tea vs. Synthetic Fertilizers: A Comparison
When deciding how to feed your plants, it’s helpful to see how compost tea stacks up against the more conventional options, like synthetic fertilizers.
| Feature | Compost Tea | Synthetic Fertilizers |
|---|---|---|
| Nutrient Source | Natural, soluble nutrients and beneficial living microbes from compost. | Chemically manufactured nutrients (often N-P-K). |
| Effect on Soil Life | Enhances and feeds beneficial microbial populations, building soil health. | Can harm or kill beneficial soil microbes, leading to nutrient-locked soil over time. |
| Nutrient Availability | Readily available to plants, supplemented by microbial activity that unlocks more over time. | Fast-acting, but can leach out of the soil quickly, leading to runoff pollution. |
| Ease of Use | Requires brewing and application; can be a bit messy if not strained. | Easy to measure and apply, often readily available in granular or liquid forms. |
| Cost | Low cost if you have your own compost; minimal equipment cost. | Can be expensive, especially for high-quality formulations, and requires regular purchase. |
| Environmental Impact | Positive; recycles organic waste, builds soil, reduces need for synthetic inputs. | Can contribute to water pollution (eutrophication) from runoff; energy-intensive production. |
For a gardener looking for sustainable, long-term plant health and soil improvement, compost tea is a clear winner. It’s not just about feeding the plant; it’s about fostering a healthy ecosystem in your garden. For more in-depth information on soil health and the
.lwrp.link-whisper-related-posts{
margin-top: 40px;
margin-bottom: 30px;
}
.lwrp .lwrp-title{
}.lwrp .lwrp-description{
}
.lwrp .lwrp-list-container{
}
.lwrp .lwrp-list-multi-container{
display: flex;
}
.lwrp .lwrp-list-double{
width: 48%;
}
.lwrp .lwrp-list-triple{
width: 32%;
}
.lwrp .lwrp-list-row-container{
display: flex;
justify-content: space-between;
}
.lwrp .lwrp-list-row-container .lwrp-list-item{
width: calc(25% – 20px);
}
.lwrp .lwrp-list-item:not(.lwrp-no-posts-message-item){
max-width: 150px;
}
.lwrp .lwrp-list-item img{
max-width: 100%;
height: auto;
object-fit: cover;
aspect-ratio: 1 / 1;
}
.lwrp .lwrp-list-item.lwrp-empty-list-item{
background: initial !important;
}
.lwrp .lwrp-list-item .lwrp-list-link .lwrp-list-link-title-text,
.lwrp .lwrp-list-item .lwrp-list-no-posts-message{
}@media screen and (max-width: 480px) {
.lwrp.link-whisper-related-posts{
}
.lwrp .lwrp-title{
}.lwrp .lwrp-description{
}
.lwrp .lwrp-list-multi-container{
flex-direction: column;
}
.lwrp .lwrp-list-multi-container ul.lwrp-list{
margin-top: 0px;
margin-bottom: 0px;
padding-top: 0px;
padding-bottom: 0px;
}
.lwrp .lwrp-list-double,
.lwrp .lwrp-list-triple{
width: 100%;
}
.lwrp .lwrp-list-row-container{
justify-content: initial;
flex-direction: column;
}
.lwrp .lwrp-list-row-container .lwrp-list-item{
width: 100%;
}
.lwrp .lwrp-list-item:not(.lwrp-no-posts-message-item){
max-width: initial;
}
.lwrp .lwrp-list-item .lwrp-list-link .lwrp-list-link-title-text,
.lwrp .lwrp-list-item .lwrp-list-no-posts-message{
};
}

I am passionate about home engineering. I specialize in designing, installing, and maintaining heating, ventilation, and air conditioning systems. My goal is to help people stay comfortable in their homes all year long.