Have you ever looked at your bathroom vanity and wondered how to make it perfect? A beautiful vanity can transform your space. One of the key steps is knowing how to attach a sink to a vanity. It’s easier than it sounds!
Many DIY enthusiasts feel proud when they complete a simple home project. Imagine the satisfaction of installing your sink. Plus, you can save money by doing it yourself. How cool is that?
Attaching a sink to a vanity might sound tricky, but it doesn’t have to be. With the right tools and guidance, you can do it. We’ll walk you through the steps. Before you know it, you’ll have a stunning vanity with a perfectly attached sink!
How To Attach A Sink To A Vanity: A Step-By-Step Guide
How to Attach a Sink to a Vanity
Attaching a sink to a vanity can seem tricky, but it’s simple with the right steps. First, gather your tools and materials. You’ll need a level, silicone caulk, and brackets. Start by placing the sink upside down on the vanity. Secure it using brackets or plumber’s putty. Did you know that using silicone helps create a waterproof seal? This prevents leaks and keeps your vanity looking new. Follow these steps, and you’ll have a sturdy sink in no time!
Choosing the Right Sink and Vanity

Factors to consider when selecting a sink for your vanity.. Different styles and materials available for sinks and vanities..
Choosing the right sink and vanity can be exciting! Start by considering size. Measure your space carefully. Look at styles too. Do you like modern or classic designs? Materials matter as well. Sinks come in ceramic, stainless steel, and glass. Each has a different look and feel. Think about how easy it is to clean. A great sink and vanity can bring your bathroom to life!
What factors should I consider when selecting a sink for my vanity?
Think about size, style, and material. Make sure the sink fits well with your vanity’s measurements. Style should match your bathroom look. For materials, choose what you can easily maintain.
Different styles and materials available for sinks and vanities:
- Ceramic: Durable and easy to clean.
- Stainless Steel: Modern look, resists stains.
- Glass: Unique and stylish but can be fragile.
- Wood: Warm feel but needs more care.
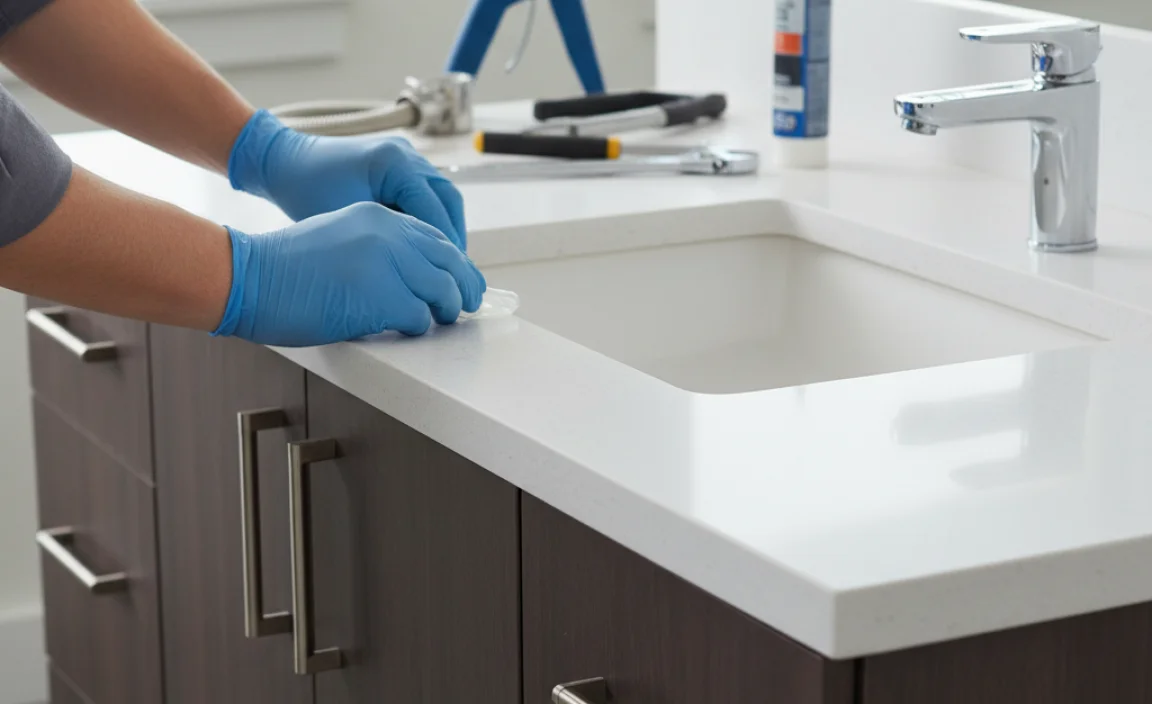
Preparing the Vanity for Sink Installation
Steps to measure and mark the sink
placement accurately.. Tips for reinforcing the vanity if necessary..
Start by measuring the spot where the sink will sit. Use a tape measure for accuracy. Mark the center of the sink on the vanity with a pencil. This will help you know where to cut. If the vanity feels weak, add extra wood inside to make it stronger. Use screws to keep everything in place. Always double-check your marks before cutting.
How do I measure for the sink placement?
To measure for your sink, use a tape measure to find the center and mark it clearly on the vanity. This ensures your sink sits perfectly without moving later.
Tips for Reinforcing the Vanity:
- Use screws to secure the vanity.
- Add wooden blocks for support if needed.
- Check if it feels sturdy before installation.
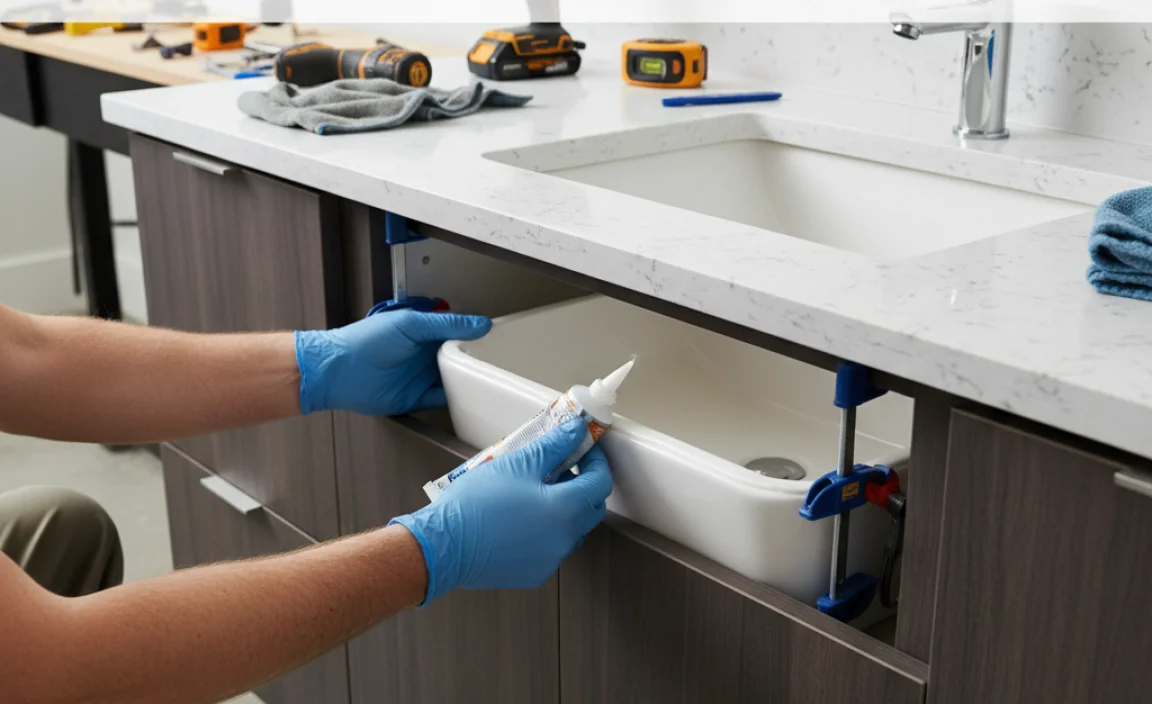
Installing the Sink onto the Vanity

Detailed stepbystep instructions for securing the sink.. Common pitfalls to avoid during the installation process..
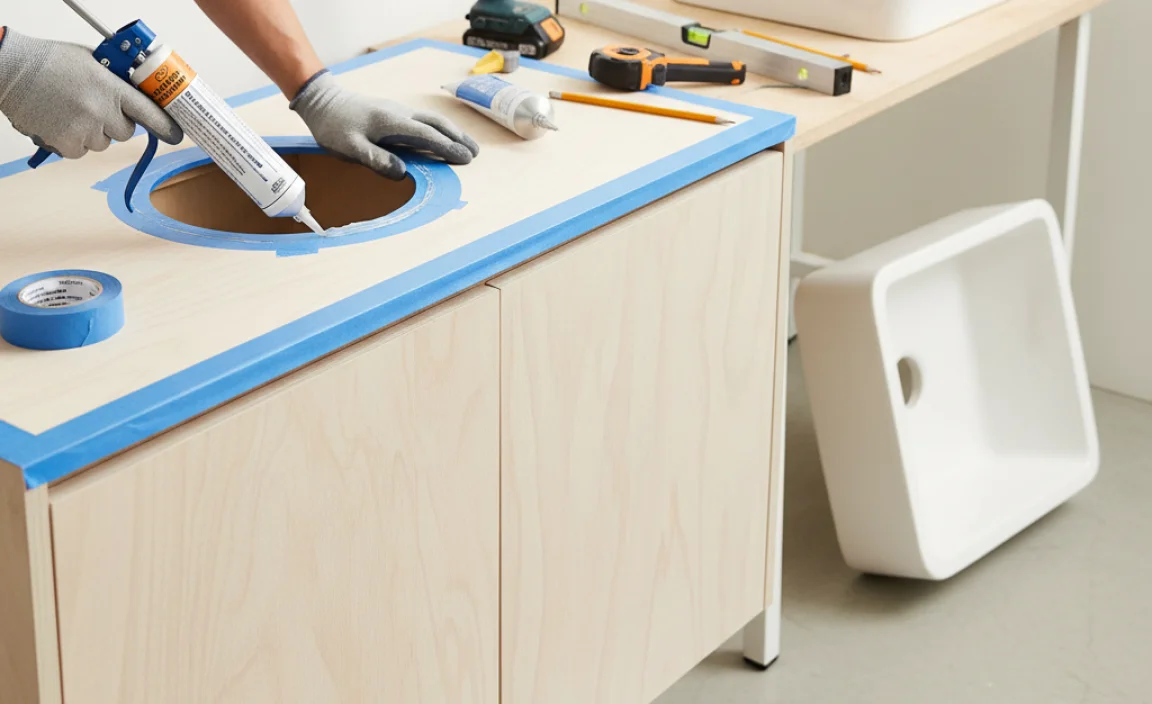
First, place the sink carefully on the vanity. Make sure it’s centered and straight. Then, apply a bead of silicone caulk around the top edge of the vanity. This helps seal and gives a nice grip. Next, carefully lower the sink onto the caulk, giving it a little twist to spread the sealant.
Now, let’s avoid some classic blunders! Don’t forget to check for any leaks before sealing everything up. And remember, using too much caulk is like putting on too much cake frosting—nobody likes a messy finish!
| Common Pitfalls | Tips to Avoid |
|---|---|
| Not leveling the sink | Use a level tool before securing. |
| Insufficient caulk | Use enough for a good seal. |
| Ignoring leaks | Always test before finalizing. |
Lastly, let it sit for at least 24 hours before using it. This waiting game isn’t fun, but it’s worth it for a safe sink!
Connecting the Plumbing
Guidelines for attaching water supply lines to the sink.. Instructions for properly connecting the drain to prevent leaks..
First, let’s talk about those sneaky water supply lines. You need to attach them to your sink. Remember, righty-tighty, lefty-loosey! Making sure they’re snug helps avoid any unexpected indoor waterworks. Next up, the drain. Connect it properly to keep things flowing smoothly. A leak-free drain keeps your bathroom dry and happy. You don’t want your bathroom to double as a wading pool!
| Step | Action |
|---|---|
| 1 | Attach water supply lines. |
| 2 | Check for snug fit. |
| 3 | Connect the drain. |
| 4 | Test for leaks. |
Sealing and Finishing Touches
Importance of applying silicone sealant around the sink.. Final adjustments and checks to ensure everything is securely in place..
Applying silicone sealant around the sink is important. It keeps water from leaking and protects the vanity. Follow these steps to finish strong:
- Use a caulk gun to apply sealant smoothly.
- Make sure the sealant is even around the edge of the sink.
- Wipe away any extra sealant for a clean look.
Once the sealant dries, check that the sink is steady. Give it a gentle shake to make sure it is secure. Everything should feel tight and reliable. Taking these final steps helps your sink last longer.
Why is silicone sealant important?
Silicone sealant prevents leaks and protects the vanity from water damage.
Final Adjustments:
- Ensure the sink is level.
- Check all fittings are tight.
Maintenance Tips for Your Sink and Vanity
Regular cleaning and care recommendations.. Troubleshooting common issues with sink installation..
Keeping your sink and vanity clean is simple and fun! Wipe them down regularly with a gentle cleaner. This helps avoid stains and keeps everything shiny. Sometimes, you might notice a drip or a weird noise. Don’t panic! Check the seals and pipes. Often, a little tightening does the trick. Below is a quick troubleshooting guide:
| Issue | Solution |
|---|---|
| Leaking tap | Tighten the faucet or replace washers. |
| Slow drain | Clear out any clogs with a plunger! |
| Strange noises | Check pipes for loose fittings. |
Staying on top of these tips can help your sink and vanity last longer. Remember, a happy sink means a happy home!
Conclusion
In conclusion, attaching a sink to a vanity involves gathering tools, aligning the sink correctly, and securing it firmly. Remember to use silicone sealant to prevent leaks. Follow these steps carefully and read more online for helpful videos and tips. You can successfully complete this project with patience and practice, making your bathroom look great!
FAQs
Sure! Here Are Five Related Questions On How To Attach A Sink To A Vanity:
To attach a sink to a vanity, first, place the sink on top of the vanity. Make sure it fits well. Next, use special glue or silicone to hold it in place. Then, connect the plumbing so water can flow in and out. Finally, check if everything is working properly.
Sure! Please go ahead and ask your question, and I’ll be happy to help!
What Types Of Sinks Are Compatible With Different Styles Of Vanities?
You can use different sinks with various vanities. For a modern vanity, a sleek under-mount sink works well. For a classic look, a top-mount sink is great. If you have a rustic vanity, a vessel sink adds charm. Choose a sink that matches your style!
What Tools And Materials Will I Need To Securely Attach A Sink To A Vanity?
To attach a sink to a vanity, you will need a few tools and materials. First, get a drill and some screws. You’ll also need a wrench to tighten everything. Don’t forget silicone caulk to seal the edges and keep water from leaking. Finally, use a level to make sure the sink is straight.
How Do I Properly Align And Level The Sink When Attaching It To The Vanity?
To align and level the sink with the vanity, first place the sink on the vanity. Use a level tool to check if it is straight. If one side is higher, lift that side and add small shims, which are thin pieces of wood. Keep adjusting until the sink is even. Then, secure it in place.
What Steps Should I Follow To Ensure A Watertight Seal Between The Sink And The Vanity?
To make sure your sink doesn’t leak, start by cleaning the edge of the sink and the top of the vanity. Then, put a line of silicone sealant all around the edge of the sink. Next, carefully press the sink down onto the vanity. Wipe away any extra sealant that comes out. Finally, let it dry for the time shown on the sealant tube before using the sink.
Are There Any Common Mistakes To Avoid When Installing A Sink To A Vanity?
Yes, there are some common mistakes to avoid. First, make sure you measure everything correctly. If you don’t, the sink might not fit. Next, remember to seal around the edges with caulk. This keeps water from leaking. Finally, check all the connections to make sure they are tight. This helps prevent any leaks later on.
Related Posts

Top Marine Spotlights For Boats: Illuminate Your Adventures!
Should Light Fixtures Match Throughout House? Find Out!
How To Install Led Bulbs: A Simple Step-By-Step Guide
Pressure Switch Wiring Diagram Air Compressor – Ensuring Safe Wiring