Do you have a leaky sink? Water can damage your home. It can also waste water. You can stop leaks. You can learn how to caulk a sink. Caulking seals gaps. It keeps water where it should be. Let’s find out how to do it right!
Caulking is not hard. With some practice, anyone can do it. You will need a few tools. You will also need some caulk. There are different types of caulk. We will talk about those too. Let’s get started and learn how to caulk a sink!
Key Takeaways
- Knowing how to caulk a sink prevents water damage and saves money.
- Gather tools like a caulk gun, scraper, and cleaning supplies before starting.
- Clean the area well and remove old caulk for a strong new seal.
- Apply a smooth, even bead of caulk and smooth it with your finger.
- Let the caulk dry fully before using the sink to ensure a waterproof seal.
How to Prepare to Caulk a Sink
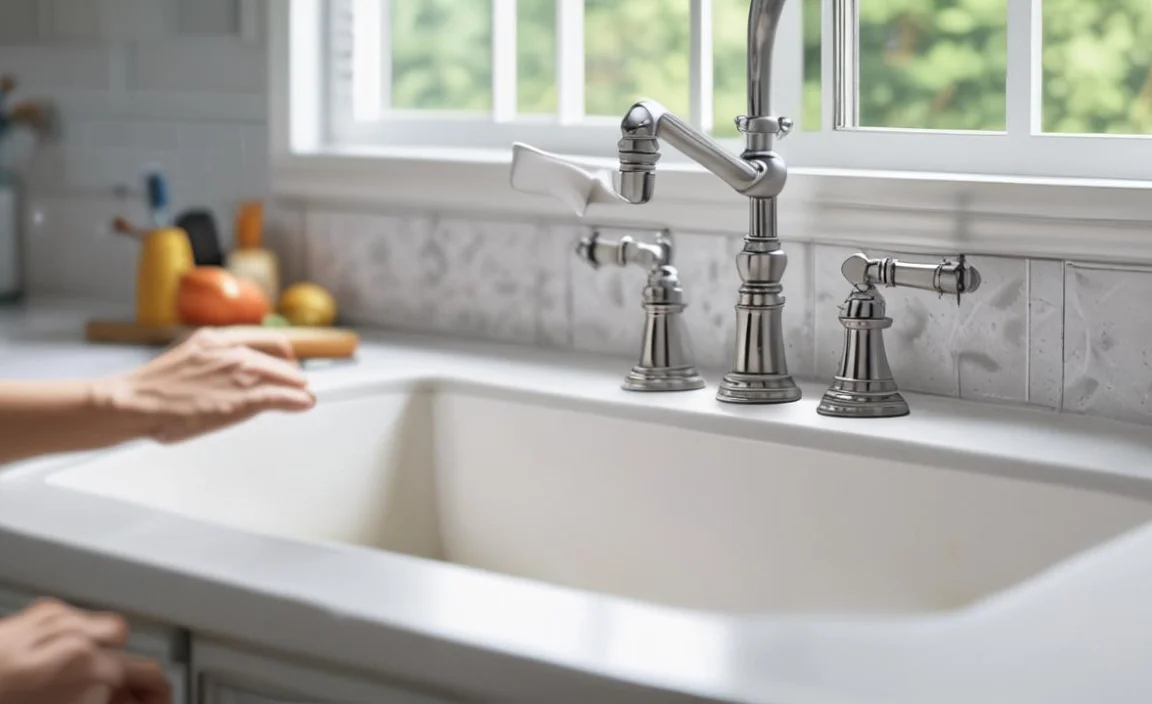
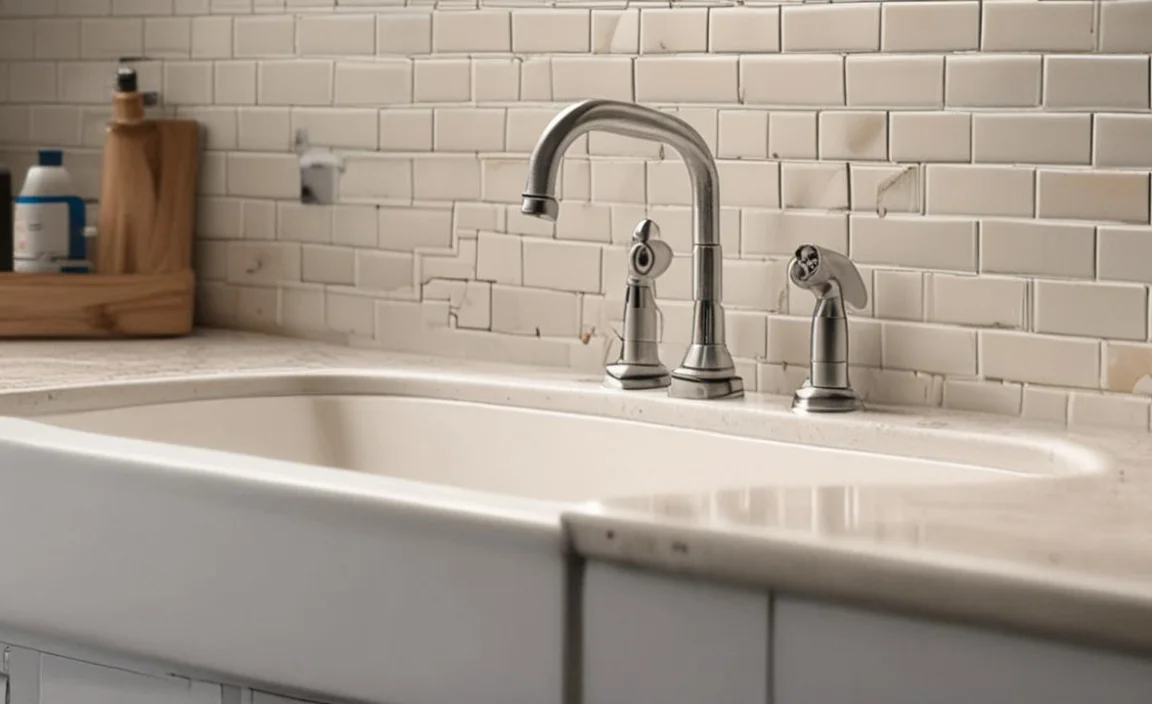
Before you start caulking, you must get ready. Good prep work makes the job easier. It also makes the seal last longer. First, gather your tools. You’ll need a caulk gun. You will also need a scraper. A utility knife is useful too. Get some cleaning supplies. A cleaner and some paper towels are needed. You might want some painter’s tape. This helps make clean lines. Make sure you have the right type of caulk. Silicone caulk is usually best for sinks. It is waterproof and flexible. Acrylic caulk is another choice. It is easier to paint. But it might not be as waterproof. Make sure the area around the sink is clean and dry. Remove any old caulk. This is important for a good seal. Now you are ready to begin!
- Gather your tools and supplies.
- Choose the right type of caulk.
- Clean the sink area well.
- Remove all old caulk.
- Make sure the area is dry.
Once the area is prepped, you are almost ready to caulk. Check the sink and countertop for any cracks. If you see any, fill them before caulking. Use a filler that is made for the material. Let the filler dry completely. This will make a stronger seal. Painter’s tape can help. Put it around the area you will caulk. This will make a neat line. It will also protect the countertop. Now, load the caulk into the caulk gun. Cut the tip of the caulk tube at an angle. This will help you apply the caulk smoothly. Practice on a piece of cardboard first. This will help you get the feel of the caulk gun. You are now ready to caulk your sink.
Why is Cleaning So Important?
Imagine you are building a house. You would not build it on a dirty, uneven surface. The same is true for caulking. Cleaning removes dirt and grime. It also removes mold and mildew. These things can stop the caulk from sticking. A clean surface helps the caulk bond better. This makes a stronger, longer-lasting seal. Use a good cleaner to scrub the area. Rinse it well with water. Make sure it is completely dry before you start. Use a clean cloth to wipe away any water. You can even use a hair dryer to dry it faster. A clean, dry surface is key to successful caulking. It will help you get a professional-looking result.
What if I Don’t Have a Scraper?
A scraper is a useful tool for removing old caulk. But what if you don’t have one? Don’t worry, there are other options. A utility knife can work well. Be careful not to scratch the sink or countertop. You can also use a plastic putty knife. These are less likely to cause damage. You can soften the old caulk first. Use a heat gun or hair dryer. This will make it easier to remove. There are also caulk removal solvents. These can help dissolve the old caulk. Follow the instructions on the solvent carefully. Always wear gloves and eye protection. Even without a scraper, you can still remove old caulk.
How Do I Choose the Right Caulk?
Choosing the right caulk is important for a good seal. Silicone caulk is best for wet areas. It is waterproof and flexible. It can handle changes in temperature. Acrylic caulk is easier to paint. It is good for areas that need to be painted. But it is not as waterproof as silicone. Read the label on the caulk tube. Make sure it is made for sinks and countertops. Look for caulk that is mildew-resistant. This will help prevent mold growth. Consider the color of your sink and countertop. Choose a caulk color that matches. White and clear caulk are common choices. With the right caulk, your sink will look great and stay sealed.
Fun Fact or Stat: Did you know that caulking your sink can save you up to 10% on your water bill? Leaky sinks waste water, and that costs money!
Best Way to Apply Caulk to a Sink
Now that you have prepped the area, it’s time to apply the caulk. Hold the caulk gun at a 45-degree angle. Start at one corner of the sink. Squeeze the trigger gently. Move the gun slowly and steadily. Apply a smooth, even bead of caulk. Don’t apply too much caulk at once. It is better to apply a thin bead. You can always add more if needed. Overlapping the old caulk line a little is okay. This will help create a good seal. Once you have applied the caulk, smooth it out. Use your finger or a caulk smoothing tool. Dip your finger in water with a little dish soap. This will prevent the caulk from sticking to your finger. Smooth the caulk in one continuous motion. Remove any excess caulk with a damp cloth.
- Hold the caulk gun at a 45-degree angle.
- Apply a smooth, even bead of caulk.
- Don’t apply too much caulk at once.
- Smooth the caulk with your finger or a tool.
- Remove any excess caulk with a damp cloth.
If you used painter’s tape, remove it now. Pull the tape away slowly and carefully. This will leave a clean, straight line. Let the caulk dry completely. This usually takes 24 to 48 hours. Check the caulk tube for drying time. Don’t use the sink during this time. This will allow the caulk to cure properly. Once the caulk is dry, inspect it. Look for any gaps or cracks. If you see any, apply more caulk. Repeat the smoothing process. With a little patience, you can get a perfect seal. Your sink will look great and be protected from leaks.
What If I Mess Up?
Everyone makes mistakes. If you mess up while caulking, don’t worry. You can fix it. If the caulk is still wet, wipe it away with a damp cloth. Start over. If the caulk has started to dry, use a scraper to remove it. Be careful not to damage the sink or countertop. You can also use a caulk removal solvent. This will soften the caulk and make it easier to remove. Once you have removed the bad caulk, clean the area. Dry it well. Then, apply new caulk. Remember to smooth it out. Don’t be afraid to try again. Practice makes perfect. Soon, you will be caulking like a pro.
How Can I Make a Straight Line?
A straight line of caulk looks professional. It also helps create a good seal. Painter’s tape is your best friend for straight lines. Apply the tape to both sides of the area you will caulk. Make sure the tape is straight and even. Apply the caulk between the tape lines. Smooth it out with your finger or a tool. Then, remove the tape slowly and carefully. The tape will leave a clean, straight line of caulk. If you don’t have painter’s tape, you can still make a straight line. Use a steady hand. Move the caulk gun slowly and evenly. Practice on a piece of cardboard first. This will help you get the feel of it. With a little practice, you can make straight lines without tape.
How Long Does Caulk Last?
Caulk doesn’t last forever. Over time, it can dry out and crack. This can let water leak through. How long caulk lasts depends on a few things. The type of caulk matters. Silicone caulk usually lasts longer than acrylic caulk. The quality of the caulk also matters. Better quality caulk will last longer. The amount of use the sink gets matters too. A sink that is used a lot will need to be caulked more often. In general, you should check your caulk every year. Look for cracks or gaps. If you see any, it’s time to re-caulk. Re-caulking your sink will prevent water damage. It will also keep your sink looking its best.
Fun Fact or Stat: Professional caulking can cost between $50 and $200 per project. Doing it yourself can save you a lot of money!
Tools Needed When You Caulk a Sink

To caulk a sink, you need a few key tools. The most important tool is a caulk gun. This holds the tube of caulk. It lets you apply the caulk smoothly. You also need a scraper. This helps remove old caulk. A utility knife is useful too. It can help cut the tip of the caulk tube. You will also need cleaning supplies. A cleaner and some paper towels are needed. Painter’s tape can help make clean lines. A caulk smoothing tool can help create a smooth finish. Some people use their finger. But a tool can be more precise. A bucket of water and some dish soap are also helpful. These help you smooth the caulk without it sticking to your finger.
- Caulk gun for applying caulk.
- Scraper for removing old caulk.
- Utility knife for cutting the caulk tube.
- Cleaning supplies for preparing the surface.
- Painter’s tape for creating clean lines.
- Caulk smoothing tool for a professional finish.
Having the right tools makes the job easier. It also makes it more likely that you will get a good result. Before you start, gather all your tools. Lay them out where you can reach them easily. This will save you time and frustration. Make sure your tools are clean and in good condition. A dull scraper won’t remove old caulk well. A dirty caulk gun can clog. Taking care of your tools will help them last longer. It will also help you caulk a sink like a pro.
What Kind of Caulk Gun Should I Get?
There are different types of caulk guns. Some are basic and inexpensive. Others are more advanced and cost more. A basic caulk gun is fine for small jobs. It is easy to use. But it can be harder to control the flow of caulk. A dripless caulk gun is a good choice. It stops the caulk from oozing out when you release the trigger. This can save you caulk and reduce mess. A ratcheting caulk gun is another option. It has a mechanism that makes it easier to squeeze the trigger. This is helpful if you have weak hands. Choose a caulk gun that feels comfortable in your hand. Make sure it is easy to load and unload the caulk tube. The right caulk gun will make caulking easier and more enjoyable.
Are There Alternatives to a Scraper?
A scraper is a great tool for removing old caulk. But there are alternatives. A utility knife can work well. Be careful not to scratch the sink or countertop. A plastic putty knife is another option. It is less likely to cause damage. You can also use a heat gun or hair dryer to soften the old caulk. This will make it easier to remove. There are also caulk removal solvents. These can help dissolve the old caulk. Follow the instructions on the solvent carefully. Always wear gloves and eye protection. Even without a scraper, you can still remove old caulk.
Do I Really Need Painter’s Tape?
Painter’s tape is not essential. But it can make caulking easier. It helps create clean, straight lines. This makes the job look more professional. If you are confident in your ability to caulk a sink straight line, you don’t need tape. But if you are a beginner, tape is a good idea. It can help you avoid mistakes. It can also protect your sink and countertop from caulk smears. Apply the tape carefully. Make sure it is straight and even. Remove it slowly after you have smoothed the caulk. Painter’s tape is a simple tool that can make a big difference.
Fun Fact or Stat: The first caulk was made from natural materials like clay and plant fibers. Today, most caulk is made from synthetic materials like silicone and acrylic!
Understanding Different Types of Caulk
There are different types of caulk. Each type has its own uses. Silicone caulk is very common. It is waterproof and flexible. It is great for sinks and bathrooms. Acrylic caulk is another option. It is easier to paint than silicone. But it is not as waterproof. Latex caulk is similar to acrylic caulk. It is also paintable. Polyurethane caulk is very strong. It is good for outdoor projects. But it can be harder to work with. Hybrid caulk combines the benefits of different types of caulk. It is waterproof, flexible, and paintable. When choosing caulk, read the label. Make sure it is made for your project.
- Silicone caulk is waterproof and flexible.
- Acrylic caulk is easy to paint.
- Latex caulk is similar to acrylic caulk.
- Polyurethane caulk is very strong.
- Hybrid caulk combines different benefits.
The best type of caulk for a sink is usually silicone. It can handle water and changes in temperature. It also resists mold and mildew. This is important in a wet environment like a sink. When buying caulk, choose a color that matches your sink and countertop. White and clear are common choices. You can also find caulk in other colors. Read the instructions on the caulk tube. Follow them carefully. This will help you get the best results. With the right caulk, your sink will be protected from leaks. It will also look great for years to come.
When Should I Use Acrylic Caulk?
Acrylic caulk is a good choice for areas that need to be painted. It is easy to paint over. This makes it ideal for trim and molding. It is also good for filling small gaps and cracks. But acrylic caulk is not as waterproof as silicone. So, it is not the best choice for sinks and bathrooms. If you use acrylic caulk in a wet area, it may crack or peel. This can lead to leaks and water damage. If you are not sure which type of caulk to use, ask a professional. They can help you choose the right caulk for your project. Using the right caulk will ensure a long-lasting seal.
What is Mildew-Resistant Caulk?
Mildew is a type of mold that grows in damp places. It can be a problem in sinks and bathrooms. Mildew-resistant caulk contains chemicals that prevent mildew from growing. This helps keep your caulk clean and healthy. When buying caulk for a sink, look for mildew-resistant caulk. This will help prevent mold growth. Clean your caulk regularly. Use a cleaner that is made for removing mildew. This will help keep your caulk looking its best. Mildew-resistant caulk is a smart choice for any wet area.
Can I Mix Different Types of Caulk?
It is not a good idea to mix different types of caulk. Each type of caulk has its own properties. Mixing them can create a caulk that does not work well. It may not be waterproof or flexible. It may also crack or peel. If you need to use different types of caulk, apply them separately. Let each type dry completely before applying the next. This will help ensure a good seal. It is always best to use the right type of caulk for the job. This will give you the best results.
| Caulk Type | Water Resistance | Paintable | Best Use |
|---|---|---|---|
| Silicone | Excellent | No | Sinks, bathrooms |
| Acrylic | Fair | Yes | Trim, molding |
| Latex | Fair | Yes | Similar to acrylic |
| Polyurethane | Excellent | Yes | Outdoor projects |
| Hybrid | Excellent | Yes | Versatile, many uses |
Fun Fact or Stat: Some caulk is made with special additives that change color when it gets wet. This can help you detect leaks early!
Safety Tips for Caulking a Sink
Caulking can be safe if you follow some simple tips. Always wear gloves. Caulk can irritate your skin. Wear safety glasses too. This will protect your eyes from splashes. Work in a well-ventilated area. Caulk can release fumes that are not good to breathe. Open a window or turn on a fan. Keep caulk away from children and pets. It is not safe to eat or drink. If you get caulk on your skin, wash it off with soap and water. If you get caulk in your eyes, rinse them with water for 15 minutes. If you feel sick after caulking, see a doctor.
- Wear gloves to protect your skin.
- Wear safety glasses to protect your eyes.
- Work in a well-ventilated area.
- Keep caulk away from children and pets.
- Wash off any caulk that gets on your skin.
When cutting the tip of the caulk tube, be careful. Use a sharp utility knife. Cut away from your body. Don’t cut yourself. When removing old caulk, be gentle. Don’t scratch the sink or countertop. Use a scraper or a plastic putty knife. If you are using a caulk removal solvent, follow the instructions carefully. Wear gloves and eye protection. Never mix different types of solvents. This can create dangerous fumes. By following these safety tips, you can caulk a sink safely.
What Should I Do If I Get Caulk in My Eye?
If you get caulk in your eye, rinse it immediately with water. Use clean, cool water. Rinse for at least 15 minutes. Hold your eyelid open. Make sure the water gets behind your eyelid. Don’t rub your eye. This can make it worse. After rinsing, see a doctor. They can check your eye for damage. They can also give you treatment if needed. It is important to act quickly if you get caulk in your eye. This can help prevent serious injury.
How Can I Avoid Fumes?
Caulk can release fumes that are not good to breathe. To avoid fumes, work in a well-ventilated area. Open a window or turn on a fan. This will help circulate the air. You can also wear a respirator. This will filter out the fumes. Choose a caulk that is low in VOCs. VOCs are volatile organic compounds. These are chemicals that can cause fumes. Read the label on the caulk tube. Look for caulk that is labeled as low-VOC. Take breaks from caulking. Get some fresh air. This will help you avoid breathing in too many fumes.
How Should I Store Caulk?
Store caulk in a cool, dry place. Keep it away from direct sunlight. Sunlight can cause the caulk to dry out. Store the caulk tube upright. This will help prevent it from leaking. If you have opened a tube of caulk, seal it tightly. You can use a caulk saver cap. This will keep the caulk from drying out. You can also wrap the tip of the tube with tape. Check the expiration date on the caulk tube. If the caulk is expired, it may not work well. Dispose of old caulk properly. Don’t throw it in the trash. Take it to a hazardous waste disposal site.
Fun Fact or Stat: Some caulk is made with a bitter taste to discourage children and pets from eating it!
How to Clean Up After Caulking a Sink
After you have finished caulking, it is important to clean up. Remove any excess caulk from the sink and countertop. Use a damp cloth. Wipe up any spills or drips. Clean your tools. Use a scraper to remove caulk from the caulk gun. Wash your hands with soap and water. Dispose of the empty caulk tube properly. Don’t throw it in the trash. Take it to a hazardous waste disposal site. Let the caulk dry completely before using the sink. This usually takes 24 to 48 hours. Check the caulk tube for drying time.
- Remove excess caulk with a damp cloth.
- Clean your tools after use.
- Wash your hands with soap and water.
- Dispose of the empty caulk tube properly.
- Let the caulk dry completely before using the sink.
A clean workspace is a safe workspace. It also shows that you take pride in your work. Take a few minutes to clean up after caulking. It will make a big difference. Your sink will look great. It will also be protected from leaks. Cleaning up is an important part of how to caulk a sink. It is the final step in the process.
What is the Best Way to Remove Wet Caulk?
Wet caulk is easy to remove. Use a damp cloth or paper towel. Wipe up the caulk before it dries. You can also use a caulk smoothing tool. This will help you remove excess caulk. If the caulk is on your skin, wash it off with soap and water. Don’t let the caulk dry on your skin. It can be harder to remove. Clean up wet caulk as soon as possible. This will make the job easier. It will also prevent the caulk from staining your sink or countertop.
How Do I Remove Dried Caulk?
Dried caulk can be harder to remove. Use a scraper or a utility knife. Be careful not to scratch the sink or countertop. You can also use a caulk removal solvent. This will soften the caulk and make it easier to remove. Follow the instructions on the solvent carefully. Always wear gloves and eye protection. You can also try using a heat gun or hair dryer. This will soften the caulk and make it easier to scrape off. Be patient when removing dried caulk. It may take some time and effort. But with the right tools and techniques, you can remove it successfully.
How Should I Dispose of Leftover Caulk?
Leftover caulk should be disposed of properly. Don’t throw it in the trash. Take it to a hazardous waste disposal site. These sites are designed to handle hazardous materials safely. They will dispose of the caulk in an environmentally responsible way. You can also check with your local waste management company. They may have special instructions for disposing of caulk. Some companies offer curbside pickup of hazardous waste. Properly disposing of leftover caulk protects the environment. It also keeps hazardous materials out of landfills.
Fun Fact or Stat: Some recycling centers now accept empty caulk tubes for recycling, reducing waste and helping the environment!
Summary
Learning how to caulk a sink involves several steps. First, you need to gather your tools and materials. This includes a caulk gun, scraper, caulk, and cleaning supplies. Then, you must prepare the area. This means removing old caulk and cleaning the surface. Next, you apply the caulk. Hold the caulk gun at a 45-degree angle and apply a smooth bead. Smooth the caulk with your finger or a tool. Finally, clean up any excess caulk and let it dry.
Caulking a sink is a simple project. But it can have a big impact. It can prevent water damage and save you money. By following these steps, you can caulk a sink like a pro. Remember to choose the right type of caulk. Silicone caulk is usually best for sinks. Also, be sure to follow safety precautions. Wear gloves and eye protection. Work in a well-ventilated area. With a little practice, you can become a caulking expert.
Conclusion
Caulking your sink is a simple way to protect your home. It prevents water damage. It also saves you money on repairs. You can learn how to caulk a sink with a few tools and some practice. Remember to prepare the surface well. Apply the caulk smoothly. Clean up afterwards. With these tips, you can keep your sink sealed and looking great.
Frequently Asked Questions
Question No 1: What is caulk and why is it used around sinks?
Answer: Caulk is a flexible material. People use it to seal gaps. It stops water and air from getting through. Around sinks, caulk prevents water from leaking. Leaks can damage cabinets and floors. Caulk also keeps mold and mildew from growing. Mold can be harmful to your health. Caulking a sink is an easy way to protect your home. It also helps keep your sink clean and sanitary. It’s a simple step with big benefits.
Question No 2: How often should I re-caulk my sink?
Answer: How often you re-caulk depends on a few things. The type of caulk matters. Silicone caulk lasts longer than acrylic caulk. The amount of use the sink gets matters too. A busy sink needs re-caulking more often. In general, check your caulk every year. Look for cracks or gaps. If you see any, it’s time to re-caulk. Re-caulking prevents leaks and damage. It also keeps your sink looking its best. Don’t wait until the caulk is falling apart. Re-caulk at the first sign of wear.
Question No 3: Can I paint over caulk?
Answer: Yes, you can paint over some types of caulk. Acrylic and latex caulk are paintable. Silicone caulk is not. Paint will not stick to silicone caulk. If you plan to paint the caulk, choose acrylic or latex. Make sure the caulk is fully dry before painting. Use a good quality primer. This will help the paint stick better. Apply two coats of paint. This will give you a smooth, even finish. Painting caulk can help it match your decor. It can also protect the caulk from damage.
Question No 4: What happens if I don’t caulk my sink?
Answer: If you don’t caulk your sink, water can leak. Leaks can cause damage to your cabinets and floors. Water can also get behind the sink. This can lead to mold and mildew growth. Mold can cause health problems. It can also damage your home. Not caulking your sink can lead to expensive repairs. It is better to caulk a sink regularly. This will prevent these problems from happening. Caulking is a simple way to protect your home and your health.
Question No 5: Is it difficult to learn how to caulk a sink myself, or should I hire someone?
Answer: Learning how to caulk a sink is not difficult. It is a simple project that most people can do themselves. You can save money by doing it yourself. Hiring someone can be expensive. But if you are not comfortable doing it yourself, you can hire a professional. They will have the tools and experience to do the job right. If you decide to do it yourself, watch some videos. Read some articles. Practice on a piece of cardboard first. With a little practice, you can caulk a sink like a pro.
Question No 6: Can I use any type of cleaner on the caulk around my sink?
Answer: No, you should not use any type of cleaner on the caulk around your sink. Some cleaners can damage the caulk. Avoid using harsh chemicals like bleach. These can cause the caulk to dry out and crack. Use a mild soap and water to clean the caulk. You can also use a cleaner that is made for removing mildew. Clean the caulk regularly. This will help prevent mold growth. It will also keep the caulk looking its best. Proper cleaning will help your caulk last longer.
