Imagine swimming in your pool at night, enjoying the glowing lights that dance on the water’s surface. But what happens when that beautiful light fixture stops working? Don’t worry! Changing a pool light fixture might seem tricky, but it’s easier than you think. Have you ever wished you could tackle simple repairs at home? This project is not only fun but also rewarding.
Did you know that a bright light can make your pool more inviting and safe? When you know how to change a pool light fixture, you can brighten up your evenings and impress your friends. Plus, it’s a great way to learn new skills! Ready to dive in? With the right tools and steps, you’ll transform your pool lighting in no time.
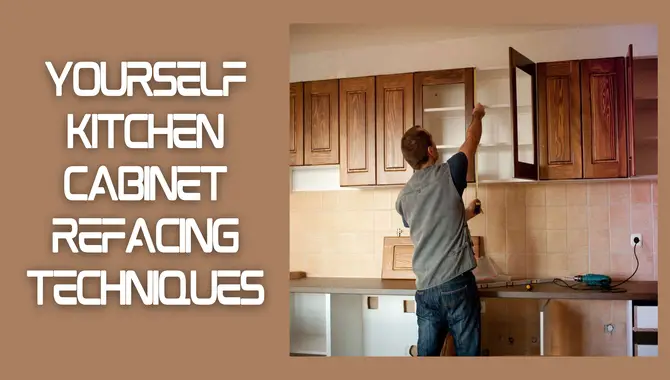
How To Change A Pool Light Fixture: A Step-By-Step Guide

How to Change a Pool Light Fixture
Changing a pool light fixture is simpler than you might think! First, turn off the power to ensure safety. Then, remove the old fixture by unscrewing it from the wall. Did you know that pool lights can last for years? Installing a new light just requires connecting wires and securing it in place. Always double-check for leaks afterward. This easy task can brighten up your night swims and enhance your backyard’s vibe!Understanding Pool Light Fixtures
Different types of pool light fixtures available. Importance of choosing the right fixture for your pool.There are several types of pool light fixtures to choose from. Each type has unique benefits. You can find:
- LED lights – Energy-efficient and long-lasting.
- Halogen lights – Bright but use more energy.
- Fiber optic lights – Colorful and safe for kids.
- Incandescent lights – Traditional but less efficient.
Choosing the right fixture is important for your pool’s safety and atmosphere. A good light can set the mood. It can also help everyone see clearly when swimming at night.
Why is it important to choose the right pool light fixture?
Picking the right pool light makes a big difference. It affects visibility and safety during night swims.
Tools and Materials Needed
Essential tools for replacing a pool light fixture. Recommended materials for installation.To replace a pool light fixture, you’ll need some specific tools and materials. First, make sure you have:
- A screwdriver
- Wire cutters
- Electrical tape
- A voltage tester
- Safety goggles
For materials, gather:
- A new pool light fixture
- Pool light bulb
- Waterproof connectors
What tools do I need to change a pool light fixture?
You’ll need a screwdriver, wire cutters, and a voltage tester to get the job done right. Safety goggles will keep you protected while you work.
Safety Precautions
Electrical safety measures to follow. Importance of working with water and electricity.First, remember that water and electricity don’t mix well—it’s like putting a cat and a dog in a small room! Always turn off the power at the breaker before starting any work. Use tools with rubber grips, and wear dry gloves to keep zaps away. If you see any water near the fixture, that’s a big red flag! Team up with a buddy for extra safety, because two heads are better than one, especially in tricky situations.
| Safety Tip | Description |
|---|---|
| Turn Off Power | Make sure the power is off at the main breaker box. |
| Dry Tools | Use dry, insulated tools with rubber handles. |
| Buddy System | Always work with a friend for extra safety. |
These steps will help keep you safe and sound, making pool light changes less shocking and a touch more fun!
Steps to Remove the Old Pool Light Fixture
Detailed stepbystep process for safely removing the fixture. Tips for handling existing electrical connections.Before you start, make sure to turn off the power to your pool light. Safety first, right? Now, grab a screwdriver and look for screws around the fixture. Unscrew them carefully, like you’re opening a treasure chest. Gently lift the fixture from the wall, but be cautious of any wires. If you see wires, use a voltage tester to check for electricity. Then, loosen the wire connectors. If it’s giving you trouble, don’t hesitate to ask a friend for help. You want to avoid shocking surprises!
| Step | Action |
|---|---|
| 1 | Turn off the power. |
| 2 | Remove screws carefully. |
| 3 | Lift the fixture gently. |
| 4 | Check wires with a tester. |
| 5 | Loosen wire connectors. |
Preparing for Installation of the New Fixture
Cleaning the fixture area before installation. Checking electrical connections and wiring conditions.Before diving into the world of your new pool light fixture, it’s important to roll up those sleeves! Start by giving the area around the fixture a good scrub. Dust and grime don’t stand a chance against your cleaning spree!
Next, check those electrical connections. Loose wires are like the unexpected party crashers that can ruin your pool vibe. Make sure everything looks safe and sound, just like a cozy family gathering—but with fewer pool floats.
| Preparation Steps | Notes |
|---|---|
| Clean the Fixture Area | Remove dust and debris |
| Check Electrical Connections | Ensure all wires are secure |
This simple prep work can save you from shocking surprises—literally! Remember, safety first, fun later!
Installing the New Pool Light Fixture
Stepbystep guide to installing the new fixture. How to ensure proper alignment and sealing.Swapping out an old pool light? It’s simpler than finding a clean sock! First, turn off the power at the breaker. Safety first, folks! Next, gently pull the old fixture from the wall. You want it out like a cat from a bathtub. Align the new fixture with the existing hole, ensuring it fits snugly. Secure it using screws. Now, seal the edges with silicone to keep water out. Trust me, you don’t want a swim with lights on! Finally, turn the power back on and enjoy your sparkling new light.
| Step | Action |
|---|---|
| 1 | Turn off the power. |
| 2 | Remove the old fixture. |
| 3 | Align the new fixture. |
| 4 | Secure with screws. |
| 5 | Seal edges with silicone. |
| 6 | Turn on the power. |
Testing the New Pool Light
Methods to test your new installation for functionality. Checklist to ensure everything is working correctly.After installing your new pool light fixture, it’s time to check if it works properly. You can use these simple methods:
- **Check the Power**: Make sure the light is plugged in or connected to power.
- **Turn It On**: Flip the switch to see if the light turns on.
- **Inspect for Leaks**: Ensure there are no water leaks around the fixture.
- **Look for Flickering**: Check if the light flickers or shines steadily.
- **Test the Color**: Make sure the color of the light is what you wanted.
Follow this checklist to ensure your new light shines brightly and safely in your pool.
How do I know if my pool light is working?
To see if your pool light is working, check the power supply and look for any flickering. Make sure the light is securely in place and free of water leaks.
Maintenance Tips for Pool Light Fixtures
Regular maintenance procedures to extend fixture life. Signs that indicate a need for repair or replacement.To keep your pool lights shining bright, regular care is a must. Check the fixtures at least once a month for dirt or rust. Clean them gently to avoid damage. Look out for signs that they may need help:
- Flickering lights: This could mean there’s an issue.
- Dark spots: If a part is not lighting up, it may need repair.
- Corrosion: Rusty fixtures might need replacing.
Taking good care of your pool light fixtures can help them last longer, keeping your pool safe and fun!
How do I know if my pool light is broken?
You can look for flickering bulbs or dark spots in the light. If the light does not turn on, it may be a sign that it needs repair or replacement.
Conclusion
In conclusion, changing a pool light fixture is simple. First, you should turn off the power for safety. Next, remove the old fixture carefully. Then, install the new one and restore power. Always follow safety guidelines. If you’re unsure, ask an adult for help. Ready to brighten your pool? Check more resources for detailed guides!FAQs
What Tools Do I Need To Safely Remove And Replace A Pool Light Fixture?To safely remove and replace a pool light fixture, you need a few simple tools. First, get a screwdriver to take off the fixture cover. You’ll also need a replacement light bulb or fixture. For safety, use a pair of gloves to protect your hands. Finally, use a voltage tester to make sure the electricity is off before you start.
How Do I Safely Turn Off The Power To My Pool Light Before Changing The Fixture?To safely turn off the power to your pool light, first, find the circuit breaker for your pool. This is usually in your house’s electrical panel. Next, flip the switch to the “off” position. You can also use a tester to make sure the power is really off. Then, you can change the light fixture safely!
What Steps Should I Follow To Correctly Install A New Pool Light Fixture?First, turn off the electricity to the pool light at the circuit breaker. Next, remove the old light fixture carefully. Then, connect the wires of the new light to the same spots as the old one. After that, fit the new light into the opening. Finally, turn the power back on and test your new light to make sure it works!
Are There Specific Types Of Pool Light Fixtures Compatible With My Existing Wiring And Housing?Yes, there are specific pool light fixtures that can work with your existing wiring and housing. You need to check the brand and type of your current lights. Some lights fit into the same space and use the same electrical setup. Always ask a professional for help if you’re not sure about it. They can give you the best advice!
How Can I Troubleshoot Issues With My Pool Light Fixture Before Deciding To Replace It?To troubleshoot your pool light fixture, first, check if the light is plugged in or connected to power. Next, inspect the bulb to see if it’s burned out or broken. You should also look for any loose wires or connections. If everything seems fine but the light still doesn’t work, try replacing the bulb with a new one. If it still doesn’t light up, you might need to get help from a professional.