Imagine stepping into your bathroom, only to find water pooling under the bathtub. What a nightmare! How did that happen? Often, a leaking pipe under the bathtub causes this problem. It can start small and soon turn into a big issue.
Did you know that a tiny leak can waste hundreds of gallons of water each year? That’s water you pay for but never use! Fixing a leaking pipe under your bathtub might seem tough, but it doesn’t have to be.
In this article, we’ll show you how to fix a leaking pipe under your bathtub. With some simple steps, you can save water and avoid costly repairs. Are you ready to learn? Let’s get started!
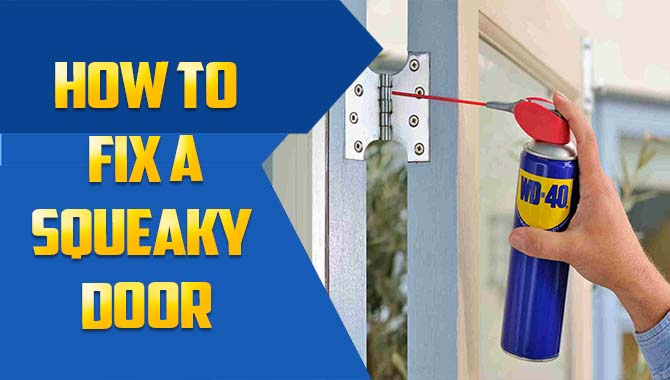
How To Fix Leaking Pipe Under Bathtub: A Step-By-Step Guide

How to Fix a Leaking Pipe Under the Bathtub
Dealing with a leaking pipe under the bathtub can be frustrating. First, turn off the water supply to prevent further damage. Next, check for the leak’s source by looking for wet spots. Use a pipe wrench to tighten any loose joints. If that doesn’t work, consider replacing the damaged section. Did you know a small leak can waste over 10,000 gallons of water a year? Act quickly to save money and keep your home dry!Identifying the Source of the Leak
Common signs of a leaking pipe under the bathtub. Methods to locate the leak accurately.Water pooling where it shouldn’t be? Uh-oh! Common signs of a leaking pipe include damp spots, peeling paint, or even a mysterious puddle that suddenly appears. To track down the leak, start by checking around the bathtub carefully. Use a flashlight and look for wet areas, especially behind walls or under the tub. Sometimes, the quickest way to find a sneaky leak is by using some paper towels and checking for wetness. Don’t forget, if it looks like a water park in your bathroom, it’s time to play detective!
| Signs of a Leak | Methods to Find It |
|---|---|
| Damp Spots | Use a flashlight |
| Peeled Paint | Check around edges |
| Puddles | Use paper towels |
Finding the source of a leak can be tough, but your inner Sherlock can help! Remember to stay patient. After all, you wouldn’t want to solve this mystery without your trusty magnifying glass… or a roll of duct tape!
Tools and Materials Required
Essential tools for DIY leak repair. Recommended materials to use for fixing pipes.Ready to tackle that sneaky leak? First, gather your tools. You’ll need a wrench, a screwdriver, and some handy plumbing tape. Don’t forget a bucket; it’ll be your best friend for water collection!
As for materials, grab some pipe fittings and a patch kit. You can even use a little caulk for good measure. Remember, fixing pipes is like putting together a puzzle. The right pieces make it easier!
| Tool/Material | Purpose |
|---|---|
| Wrench | To tighten or loosen pipe connections |
| Screwdriver | To remove screws that hold parts together |
| Plumbing Tape | To seal connections and prevent leaks |
| Pipe Fittings | To connect different sections of pipe |
| Patch Kit | To cover small holes in pipes |
| Caulk | To seal spaces and gaps |
Safety Precautions
Importance of turning off the water supply. Protective gear to wear during the repair process.Fixing a leaking pipe can be tricky. First, always turn off the water supply. This helps prevent flooding and keeps you dry. It’s a smart step before starting the repair.
Next, wear protective gear. Here are some important items:
- Gloves: Protect your hands from sharp edges and water.
- Goggles: Save your eyes from splashes and debris.
- Old clothes: Wear something you don’t mind getting wet or dirty.
By following these safety tips, you can work confidently and avoid accidents.
How can I prepare for repairing a leaking pipe?
Start by shutting off the water supply. Put on gloves and goggles. Have old clothes ready to protect yourself. This way, you are safe and ready for the job.
Step-by-Step Guide to Fixing the Leaking Pipe
Detailed instructions for accessing the pipes under the bathtub. Stepbystep procedure for repairing or replacing the damaged pipe.To tackle that sneaky leak under your bathtub, start by removing the access panel. If you’re the DIY type, maybe grab a tool or two, or just channel your inner handyman! Next, check the pipes closely. Look for any cracks or holes. If you spot the culprit, you can either patch it up with some tape or replace the section entirely. Pro tip: Turn off the water first or you might end up creating a fountain show in your bathroom!
| Steps | Actions |
|---|---|
| 1. Access Panel | Remove carefully using a screwdriver |
| 2. Inspect Pipes | Look for visible damages |
| 3. Fix or Replace | Patch with tape or swap out damaged parts |
Remember, a little humor can ease the stress of home repairs. If it gets too messy, just blame it on the “pipes doing the cha-cha!”
Testing for Success
Methods to check if the leak has been fixed. Tips for ongoing maintenance to prevent future leaks.After fixing a leak under your bathtub, checking your work is key. Use these simple steps to test for success:
- Run the water and check for drips.
- Look for damp spots around the pipe.
- Inspect the surrounding area for water stains.
To prevent future leaks, perform regular checks. Here are some tips:
- Keep an eye on water pressure.
- Inspect hoses and connections often.
- Consider using pipe insulation in colder months.
This will help your plumbing stay in good shape.
How can I tell if my bathtub leak is fixed?
Check your plumbing by running water. Look for any new damp spots or leaks. If everything stays dry, your repair worked well!
When to Call a Professional
Signs that indicate professional help is needed. Benefits of hiring a licensed plumber for complex issues.It’s time to ask for help if you see signs like leaking water, strange noises from pipes, or mold. These problems can get worse if ignored. Hiring a skilled plumber brings many benefits:
- Quick solutions
- Proper tools
- Safe repairs
With their experience, professionals can handle tricky situations easily. So, don’t hesitate to call someone who knows what they’re doing!
What are signs that indicate I need a professional?
If you notice a persistent leak, water stains, or a spike in water bills, it’s time to call for help. These signs can mean serious hidden problems.
Conclusion
To fix a leaking pipe under your bathtub, start by turning off the water. Check for visible cracks or loose connections. Use plumbing tape or a sealant to patch any leaks. If the problem persists, consider calling a plumber. Remember, taking action quickly can prevent more damage. For more detailed tips, check out our other guides on home repairs!FAQs
Sure! Here Are Five Related Questions On The Topic Of Fixing A Leaking Pipe Under A Bathtub:To fix a leaking pipe under the bathtub, start by turning off the water. Next, find the leak by looking for wet spots. If you see a crack or a hole, you may need to use tape to cover it. Sometimes, you might need to replace the pipe part. After fixing everything, turn the water back on and check for leaks again.
Sure! Please share the question you’d like me to answer, and I’ll be happy to help!
What Are The Common Causes Of A Pipe Leak Under A Bathtub?A common cause of a pipe leak under your bathtub is loose connections. These can happen if pipes move over time. Another cause is cracks in the pipes, which can happen from age or pushing too hard. Old pipes might also rust and break. If you see water under your tub, it’s important to check these things right away!
How Can I Identify The Source Of The Leak In My Bathtub Plumbing?To find the leak in your bathtub plumbing, you can start by looking for water stains. Check around the tub and under it. Turn off the water and watch for drips. You might try running the water and see if it gets worse. If you still can’t find it, ask an adult for help.
What Tools And Materials Do I Need To Fix A Leaking Pipe Under A Bathtub?To fix a leaking pipe under your bathtub, you’ll need a few tools. Grab a pipe wrench to unscrew the pipes. Use some plumber’s tape to help stop the leak. You might also need a bucket to catch any water. Finally, have a towel ready to clean up any mess!
Should I Call A Plumber Or Can I Fix A Leaking Pipe Under My Bathtub Myself?If you’re not sure how to fix it, it’s best to call a plumber. They are trained to handle these problems. Trying to fix it yourself might make it worse. If you feel confident and have tools, you can try. Just be careful and watch out for water damage!
What Steps Should I Follow To Properly Repair A Leaking Pipe Beneath My Bathtub?First, turn off the water supply to stop the leak. Next, you will want to empty the area under the bathtub so you can see the pipe. Then, check the pipe for cracks or loose parts. Use plumber’s tape or a special glue to fix the leak. Finally, turn the water back on and check if the leak is gone.