Have you ever tripped over a crack in your sidewalk? Sinking concrete slabs can be annoying and unsafe. Many homeowners face this problem. It makes your home look bad, and it can damage your property. But what if I told you that you can fix it yourself? That’s right! Learning how to fix sinking concrete slab DIY is easier than you think.
Imagine walking outside and seeing your driveway rise to its former glory. No more trips or falls! Now, picture yourself saving money by solving the problem without hiring help. Sounds great, right? You’re in luck because with the right tools and steps, you can tackle this project at home.
In this article, you’ll discover how to fix sinking concrete slab DIY style. Whether you want to fix a patio, driveway, or walkways, these tips will help. Ready to bring your concrete back to life? Let’s dive in!
How To Fix Sinking Concrete Slab Diy: Step-By-Step Guide

How to Fix Sinking Concrete Slab DIY
Sinking concrete slabs can be a hassle, but fixing them doesn’t have to be. Simple methods like mudjacking or foam leveling can lift your slab back to its original position. Have you noticed cracks or uneven surfaces? These are signs your slab needs attention. By using materials from your local hardware store, you can tackle this project yourself. It’s easier than many might think, and you’ll save money, too! Uncover how a little DIY work can restore your concrete.
Understanding Concrete Slab Sinking

concrete slabs. Importance of timely repairs.
Concrete slabs sink for several reasons. Mainly, it’s due to soil erosion or poor drainage. Heavy rain can wash soil away, leaving voids under the slab. It’s like your concrete dance floor suddenly loses its beat! Other culprits include tree roots, or even underground animal tunnels! Timely repairs are crucial. Ignoring a sinking slab can lead to bigger issues and costs. Like waiting too long for dessert, the longer you wait, the worse it gets!
| Cause | Explanation |
|---|---|
| Soil Erosion | Rain washes away soil, leaving gaps. |
| Poor Drainage | Water gathers and weakens the ground. |
| Heavy Loads | Too much weight can sink the slab. |
| Tree Roots | Growing roots can lift or undermine the slab. |
Assessing the Damage
Signs of a sinking slab. Methods for checking the level of the slab.
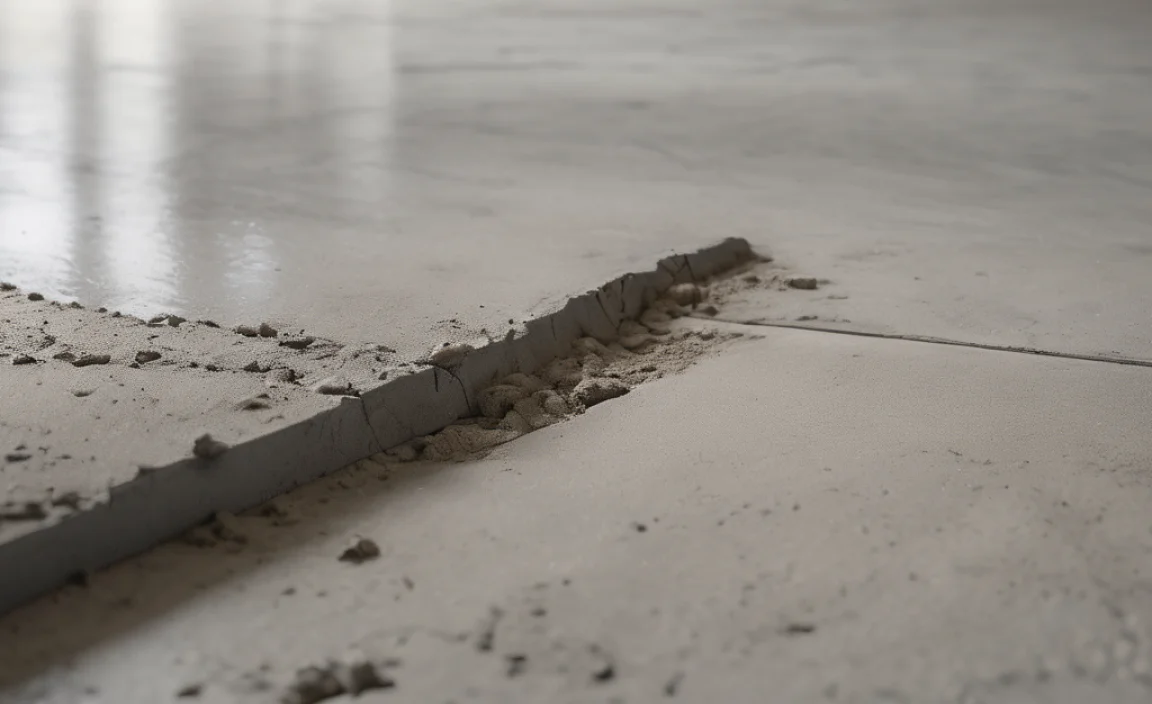
To find out if a concrete slab is sinking, look for key signs. You might see cracks, especially if they are different widths or lengths. Uneven floors are also a result of a sinking slab. Another clue is doors and windows that stick or don’t close properly. Measuring the level can help too. Here are some quick checks:
- Use a level tool to check flatness.
- Measure corners and the center of the slab.
- Look for gaps between the slab and walls.
These signs can help you assess the damage. Fixing your concrete slab will be easier once you understand the problem!
What are the signs of a sinking slab?
The signs include cracks, uneven floors, and sticking doors. These clues can help identify sinking quickly.
DIY Repair Tools and Materials
Essential tools needed for repairs. Recommended materials for a lasting fix.
To fix a sinking concrete slab, you need the right tools and materials. Think of them as your superhero gear for this DIY mission! First, grab a jackhammer or sledgehammer—perfect for breaking up stubborn concrete. Next, a shovel and level will help you dig deep and ensure everything is flat, like a pancake on Sunday morning!
| Tools | Materials |
|---|---|
| Jackhammer | Concrete Mix |
| Sledgehammer | Gravel |
| Shovel | Expansion Joints |
| Level | Sealant |
Gathering these items will set you up for a fix that lasts. With the right stuff in hand, you can turn that sad and sinking slab into a proud, level surface!
Preparation Steps Before Repairing
Clearing the area and removing obstacles. Analyzing drainage and soil conditions.
Before jumping into the repairs, get your superhero cape on! First, you’ll want to clear the area of any plants, furniture, or other obstacles. You need a clear space for the mission ahead. Next, take a good look at the drainage. Is water pooling like a worried puppy? Check the soil conditions, too. Is it as hard as a rock or soft like pudding? Understanding these details will set you up for success.
| Step | Description |
|---|---|
| Clear Area | Remove all items from the slab. |
| Check Drainage | Look for water pooling around. |
| Analyze Soil | Check if it’s hard or soft. |
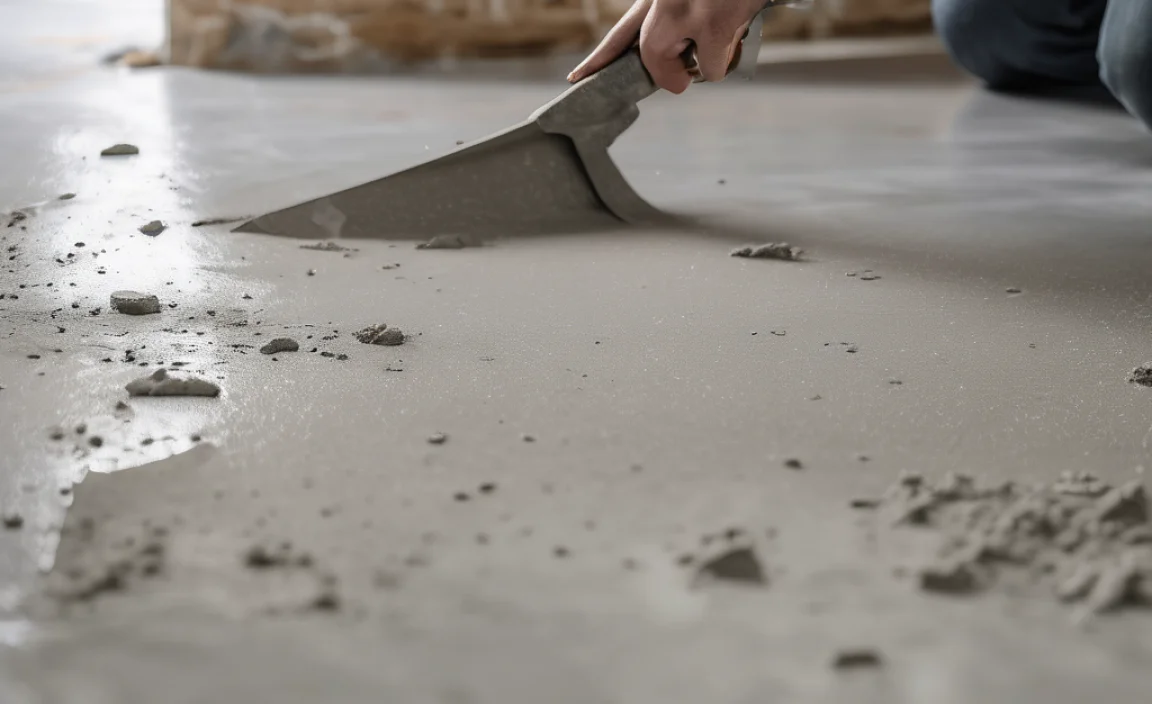
Step-by-Step Repair Process
Filling voids under the slab. Raising the slab using polyurethane foam.
Sinking concrete slabs can be a real headache. But fear not! First, fill any voids beneath the slab with a special filler. It’s kind of like giving your concrete a cozy blanket! Next, use polyurethane foam to raise the slab back to its rightful spot. Imagine it getting a lift like a tiny superhero! With the right steps, you can save your slab and impress your friends. Check out the easy table below for a quick guide:
| Step | Description |
|---|---|
| 1 | Identify and fill voids under the slab. |
| 2 | Inject polyurethane foam to lift the slab. |
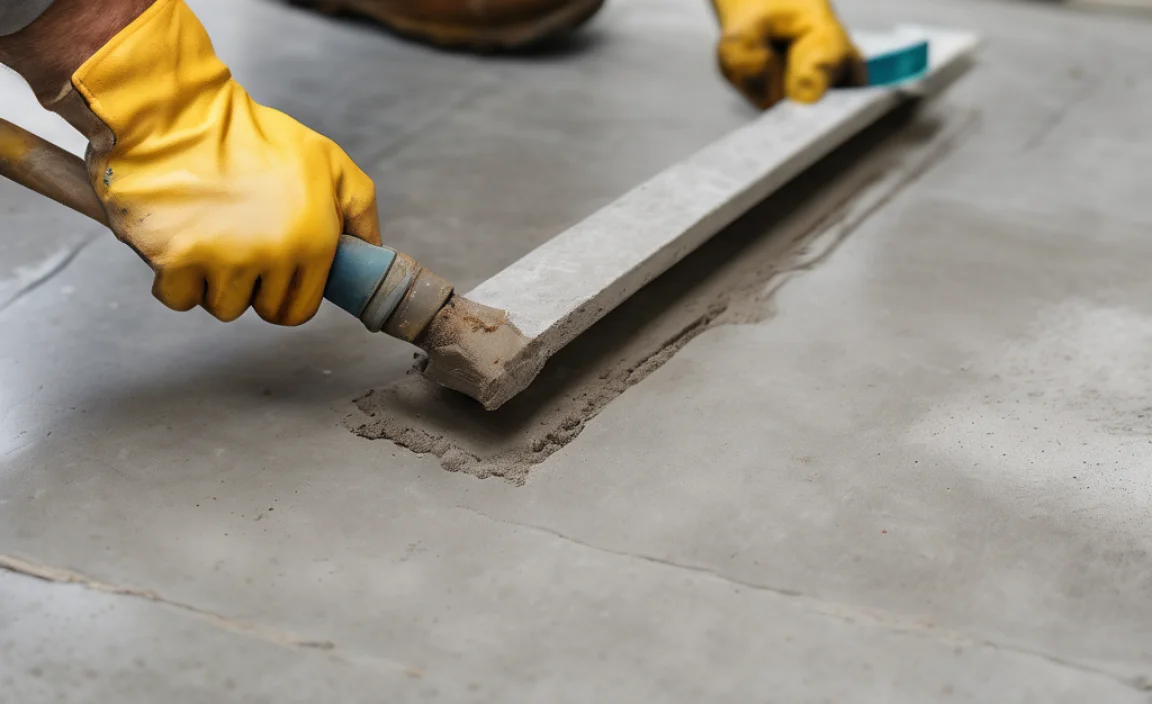
Alternative Repair Methods
Mudjacking explained. Using concrete overlays as an option.
Sinking concrete doesn’t have to be a big problem. There are different ways to fix it. One method is called mudjacking. In this process, workers pump a mix of mud and cement under the slab. This pushes the concrete back up. It’s quick and can often be done in a day.
Another option is using concrete overlays. This means putting a new layer of concrete over your old slab. It can hide cracks and make the surface look new. Plus, it is a great way to add design or texture!
What is mudjacking?
Mudjacking is a way to lift sinking concrete by injecting a mixture of mud and cement beneath it.
What are concrete overlays?
Concrete overlays are new layers applied on top of old concrete to improve appearance and hide flaws.
Preventative Measures to Avoid Future Sinking
Landscape adjustments that help. Importance of proper drainage systems.
Making simple changes to your yard can help keep concrete slabs in good shape. Start by adjusting the landscape so water flows away from your foundation. Think of it as giving your slab a comfy umbrella! Proper drainage systems are crucial. Without them, water can build up and cause sinking. A good rule of thumb is to have a slope of at least 2% away from your home. Take a look at the table below for quick tips!
| Tip | Benefit |
|---|---|
| Adjust Landscaping | Prevents water pooling. |
| Install Drainage | Reduces soil erosion. |
| Maintain Gutters | Directs rain away. |
When to Call a Professional
Signs that indicate the need for expert help. Cost considerations for professional repairs.
If you notice large cracks, uneven floors, or sinking areas in your home, it might be time to call in a pro. These signs can mean trouble is brewing below the surface. While DIY fixes can be fun, serious damage can lead to hefty repair bills. Remember, fixing concrete isn’t a video game; you can’t just respawn! If the repairs seem too big or complex, it’s safer to let an expert handle it. Expert help might cost more upfront, but it saves you from possible disasters down the road.
| Signs You Need Help | Cost Considerations |
|---|---|
| Large cracks appearing | Professional repairs can range from $300 to $2,000+ |
| Uneven floors | Long-term savings outweigh upfront costs |
| Water pooling | Don’t skimp on safety! |
Conclusion
In conclusion, fixing a sinking concrete slab can be easy with the right tools. You can use methods like mudjacking or foam leveling. Always check for water issues first. Remember to follow safety tips while working. If you’re unsure, don’t hesitate to ask for help or research more online. You’ll be proud to restore your slab!
FAQs
Certainly! Here Are Five Related Questions On The Topic Of Fixing A Sinking Concrete Slab Diy:
To fix a sinking concrete slab, you can use a method called mudjacking. This means you pump a special mix under the slab to lift it back up. You can also try using foam instead of mud. First, you need to clean the area and make small holes in the concrete. Then, you fill those holes with the mix or foam. Finally, you wait for it to dry, and your slab should be level again!
Sure! Please go ahead and ask your question, and I’ll help you with a clear and simple answer.
What Are The Common Causes Of A Sinking Concrete Slab?
A sinking concrete slab usually happens because of water digging under it. Heavy rain can wash away soil. Sometimes, the ground dries out and shrinks, leaving gaps. Heavy things on the slab can push it down, too. It’s important to fix these problems to keep your concrete safe.
What Materials And Tools Are Needed For A Diy Concrete Slab Repair?
To repair a concrete slab, you need a few materials and tools. Get some concrete patch or mix, water, and a trowel. You’ll also need a hammer, chisel, and a broom to clean the area. Don’t forget safety gear like gloves and goggles to protect yourself. Now you’re ready to fix the slab!
How Can I Determine The Level Of Sinking In My Concrete Slab Before Attempting Repairs?
To check if your concrete slab is sinking, you can look for cracks or uneven spots. Use a long level tool, like a straight board, to see if the surface is flat. If one side is higher than the other, that’s a sign of sinking. You can also pour a little water on it; if the water pools in one area, it’s not level. Mark any low spots with tape so you know where to repair.
What Are The Step-By-Step Procedures For Using A Concrete Raising Foam To Lift A Sinking Slab?
To lift a sinking slab using concrete raising foam, follow these steps:
1. First, we find the low spots where the slab sinks.
2. Next, you drill small holes in the slab.
3. Then, we carefully mix the foam.
4. After that, you pour the foam into the holes.
5. Finally, we let the foam expand, lifting the slab back up.
Once it’s done, we seal the holes.
Are There Any Permanent Solutions For Preventing Future Sinking Of Concrete Slabs?
Yes, there are ways to help stop concrete slabs from sinking. We can fix the ground under the slab so it’s strong. We can also use special materials to fill gaps and keep it even. Keeping water away from the slab can help too. Each of these steps can make the slab safer and more stable.